
Read time: ~8 minutes
Applies to: Shop Floor Interface · All deployments
What you’ll learn
Every Shop Floor Interface screen is built the same way: a header of controls that never changes, and a work area that does. Learn what each header control and each menu tile does, and why your device may show fewer options than this page lists.
The Shop Floor Interface runs either as an application on a device at the storage cabinet, or in a web browser at an address your system administrator gives you. The layout and the menus are the same in both; a few controls exist only in the application, and this page says which.
Everything below assumes you are signed in. If you are not, start with How to log in to Shop Floor Interface.
The two halves of every screen
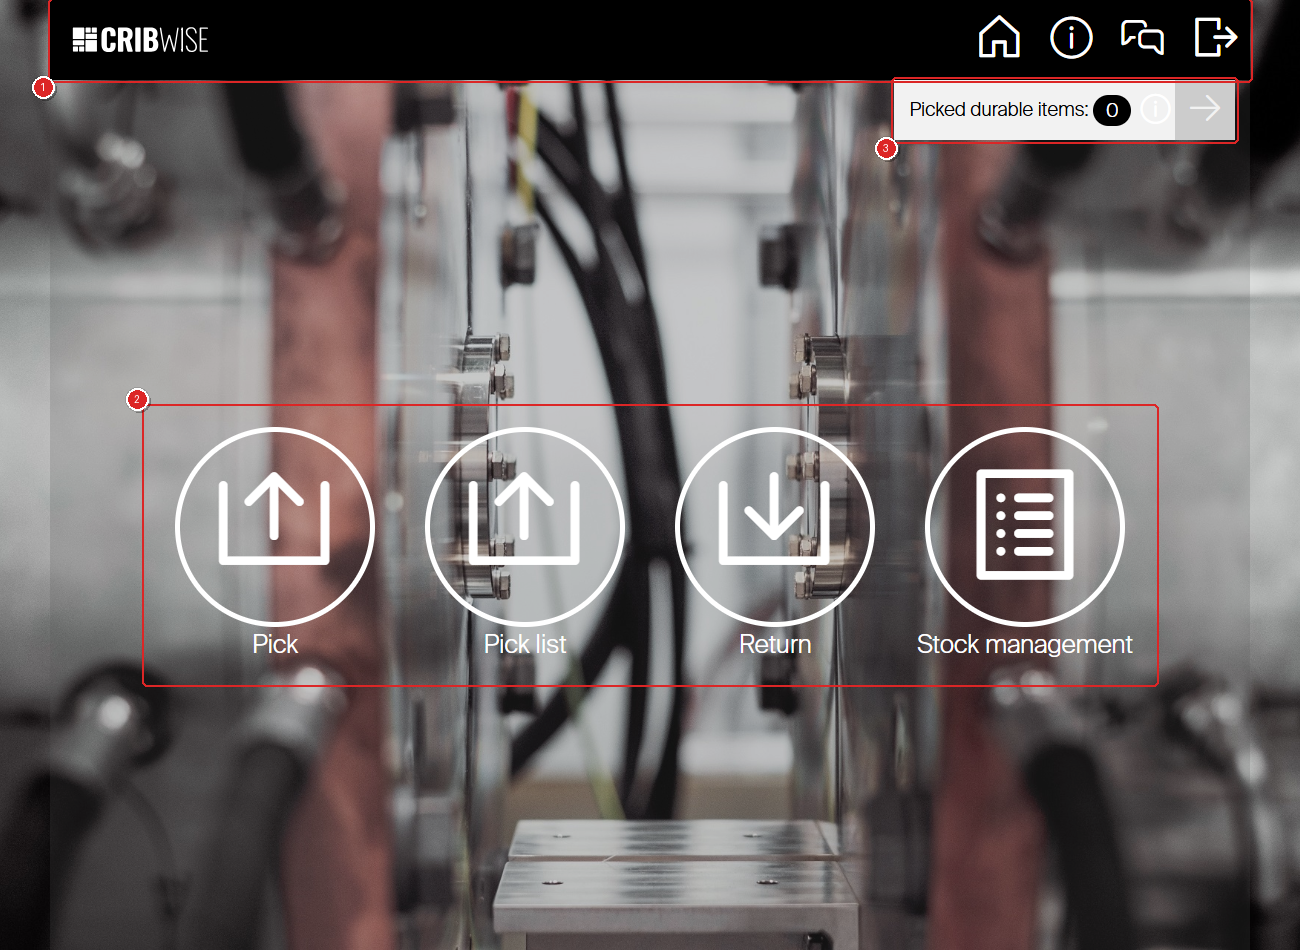
The main menu: the header (1) is on every screen, the work area (2) changes with what you are doing, and the Picked durable items counter (3) shows how many durables you still have out.
- The header. The same controls on every screen: go home, see which device you are on, message support, sign out.
- The work area. The main menu, a submenu, a list of items, or a form – whatever the current step needs.
- The Picked durable items counter. How many durable items you have picked and not yet returned. Select it to open a Picked durable items panel listing them, and Close to dismiss it.
Header controls
| Icon | Control | What it does | Where it appears |
|---|---|---|---|
| House | Home | Returns you to the main menu from anywhere, abandoning the current step. | Everywhere |
| Circled i | Device information | Opens the Information dialog: the signed-in user, the device, the remote-control state and the time of the last synchronization. It also holds Show use policy, and Switch device when more than one cloud device is available to you. | Everywhere |
| Two speech bubbles | Send E-mail to support | Sends your support team a message together with the current state of the application, including a screenshot. Use it when something behaves unexpectedly. | Everywhere |
| Arrow leaving a bracket | Logout | Signs you out and returns to the login screen. | Everywhere |
| Keyboard | Show or hide the keyboard | Toggles the on-screen keyboard. On most touch devices it opens by itself when you select a text field. | The application on a device, not a browser |
| Downward arrow into a tray | Update | Starts an update of the application. The Shop Floor Interface is unavailable while the update runs. | The application, only when an update is waiting and only for users with the update permission |
| Cross | Exit | Closes the Shop Floor Interface application. | The application, only for users with the permission |
Note: In a browser the header carries four controls – Home, Device information, Send E-mail to support and Logout. The keyboard, Update and Exit belong to the application running on a device.
The main menu
Each tile starts one kind of work. Your device may show fewer – see What decides which options you see.
| Tile | What it starts | Full guide |
|---|---|---|
| Pick | Take items out of the device for a job. | How to pick an item |
| Pick list | Work through a list of items someone prepared for you in the Admin Portal. | How to pick items from a pick list on the Shop Floor Interface |
| Return | Put a picked item back, in the condition you choose. | How to return, scrap, and recycle items in SFI |
| Move picked item | Move a pick you already made to a different cost allocation, without returning the item. | How to move a picked item to a different cost allocation |
| Stock management | The stock administrator’s work at the device: assigning, restocking, counting and service picks. | See the table below |
The Return menu
Return asks for the condition of the item before it asks which item you are returning.
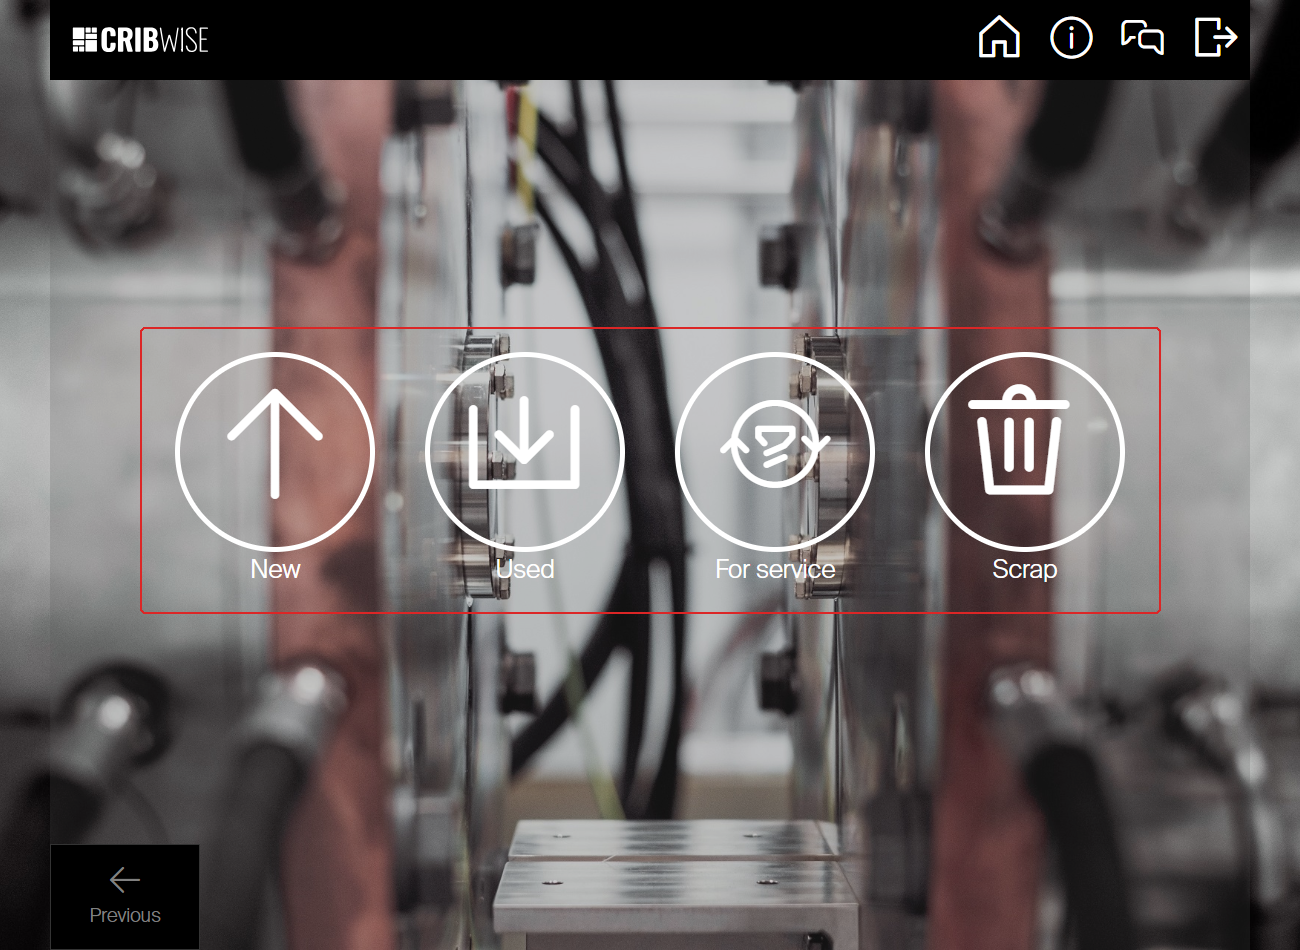
Four conditions on this device. A fifth, For recycle, appears when recycling is switched on.
- New – you picked too many, picked the wrong item, or never used it.
- Used – a durable item that has been used but is still usable.
- For service – a durable item that needs regrinding, calibration or repair first.
- Scrap – the item is beyond use and leaves the system.
- For recycle – the item goes to a recycling collection point. This tile appears only when Activate recycle is switched on under System settings > Stock daily use and the device has a location that receives recycled items.
The Stock management menu
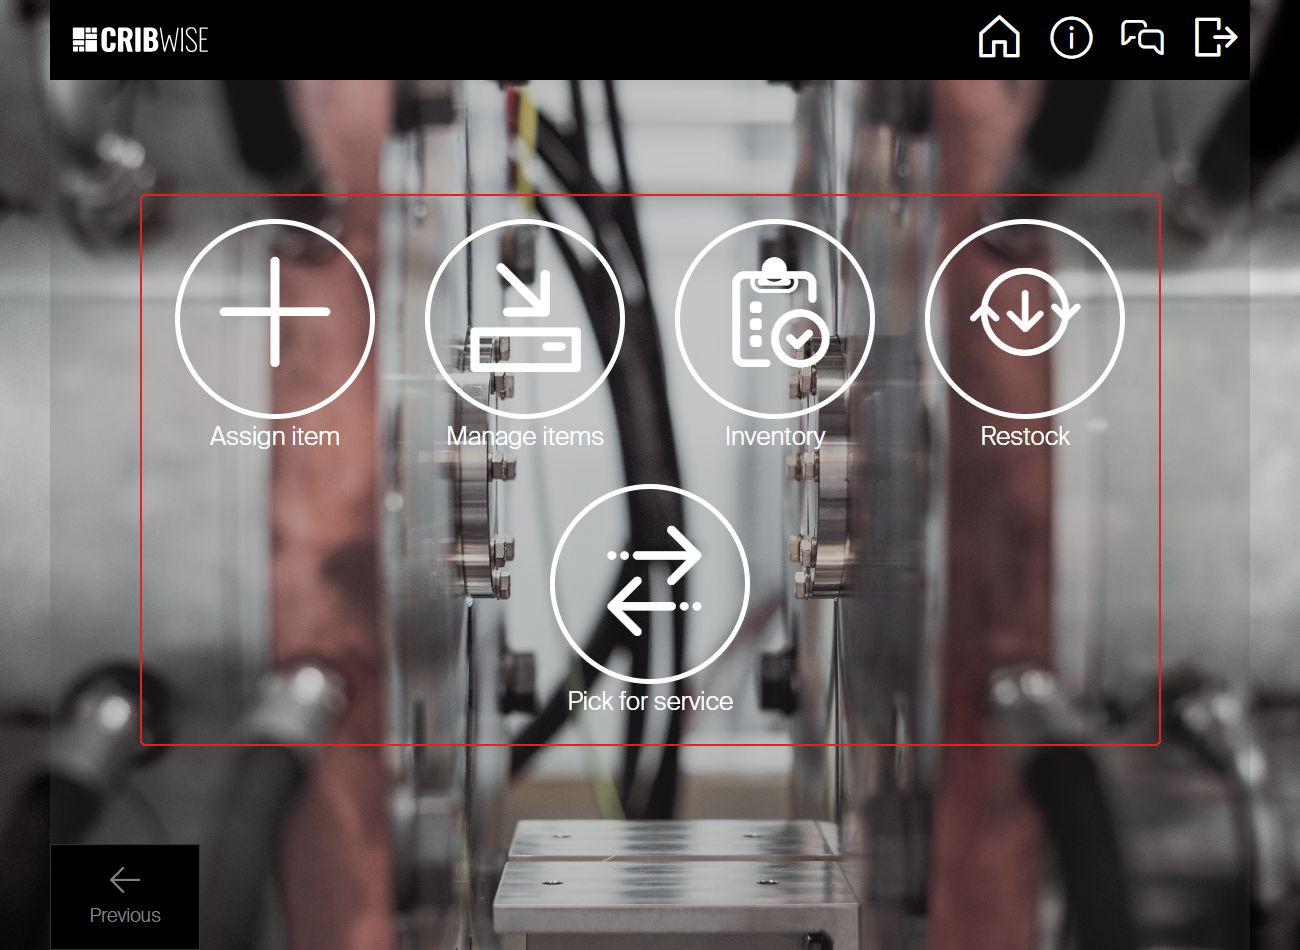
Five tiles on this device, and a Previous button in the bottom left corner that steps back one level.
| Tile | What it does | Full guide |
|---|---|---|
| Assign item | Give an item a location in this device. | How to assign an item to a location (Shop Floor Interface) |
| Manage items | Change an existing assignment, or place and withdraw quantity without a pick or a return. | How to edit item assignments (Shop Floor Interface) |
| Manage locations | See every location in the device, how much each holds, and filter by zone. | How to manage stock locations (Shop Floor Interface) |
| Restock | Receive goods against a purchase order, or restock without one. | How to restock items on the Shop Floor Interface |
| Inventory | Count what is physically in a location and correct the record. | How to do an inventory on the Shop Floor Interface |
| Pick for service | Pick items out against a service order or a service list. | — |
| Update <storage device> locations | Refresh the location list from the storage hardware. The label carries the name of the device type. | — |
Working through a task
Once you start a task, the work area gains a step progress bar along the top. Completed steps are filled in, the step you are on is highlighted, and steps still ahead are grey. Select a completed step to go back to it. A completed step also shows what you chose – once you pick item 5725119, the Item selection label is replaced by the item number.
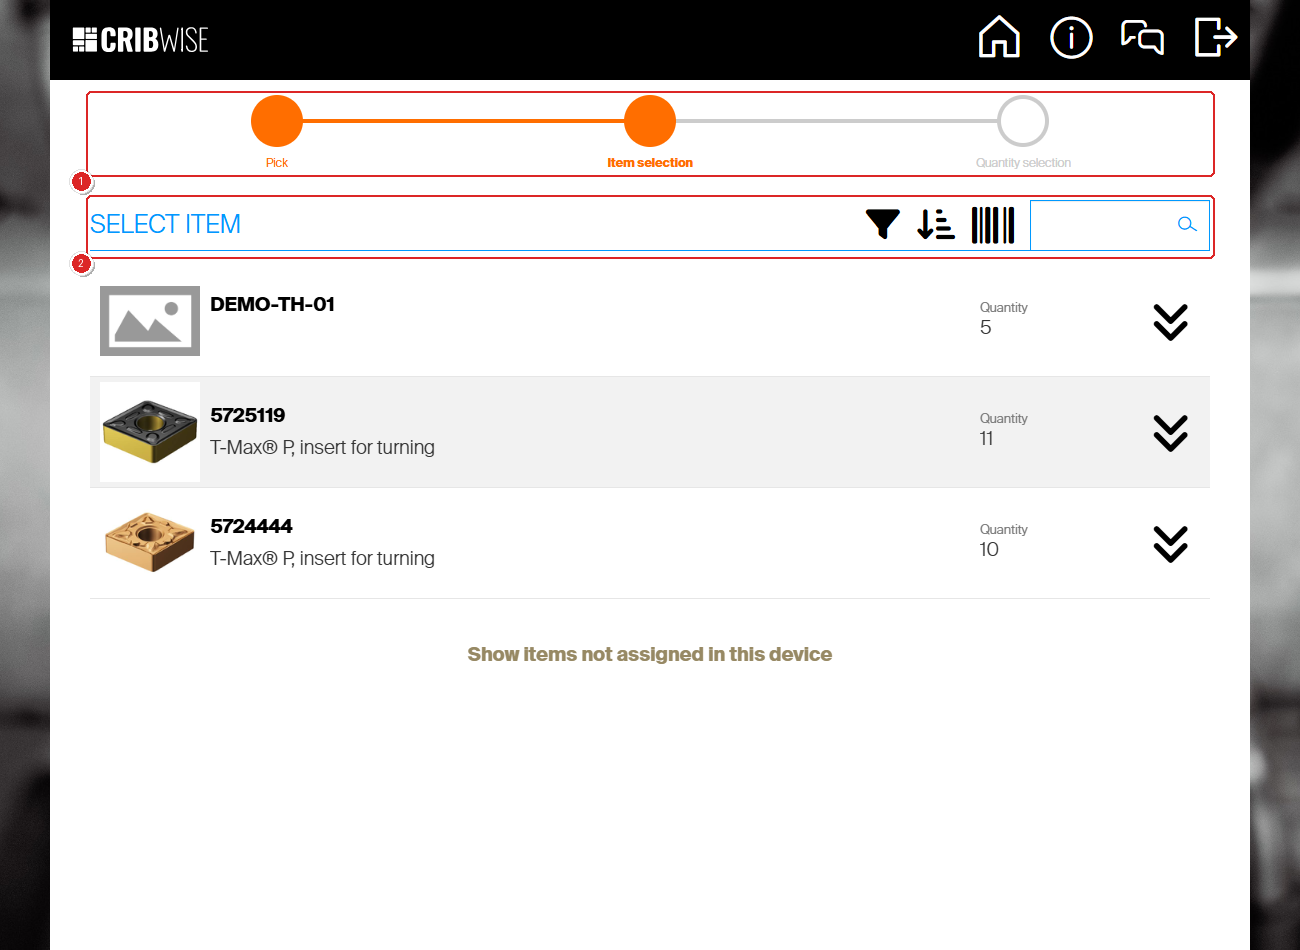
A pick in progress: the step bar (1) and the list toolbar (2). This device has no cost allocation configured, so the pick is three steps.
The bar is not a fixed set of steps. Each cost allocation level you have to choose during a pick becomes its own step, so a device configured with production, machine, operation and work order shows those between Item selection and Quantity selection.
Every list in the Shop Floor Interface carries the same toolbar (2):
- Filter categories – narrow the list to one item category.
- Sort by – change the order of the list.
- Scan – scan a barcode instead of finding the item in the list.
- The search field – type part of an item number or description.
A Previous button in the bottom left corner steps back one level in a menu.
What decides which options you see
The Shop Floor Interface hides what you cannot use rather than greying it out, so a menu with three tiles is normal. Four things decide what is on it.
| What | Effect | Who changes it |
|---|---|---|
| Your SFI privileges | An action you have no privilege for is not shown at all. | An administrator, on your user group |
| System settings | Switch a feature off for the whole tenant and its tile disappears everywhere – recycling is the usual example. | An administrator, under System settings |
| The device and its storage hardware | Options that need particular hardware, or a particular location setup, appear only on devices that have it. | A stock administrator, on the device |
| How the SFI is running | The keyboard, Update, Exit and card, key and fingerprint login exist in the application on a device, not in a browser. | Your deployment |
On the device used to check this article, Move picked item, Manage locations, Update <storage device> locations and For recycle were all hidden for these reasons, which is why they do not appear in the screenshots above.
Common confusion
| People often think… | But actually… |
|---|---|
| The browser version and the application are identical. | The layout and the menus are, but the application adds the on-screen keyboard, Update, Exit and card, key and fingerprint login. A browser header has four controls. |
| A missing menu option means the feature does not exist. | It means it is switched off for you. Check your privileges, the system settings and the device before concluding anything. |
| Every pick has the same steps. | The step bar grows with your cost allocation setup. With none configured a pick is three steps; with four levels it is seven. |
| Home saves what you were doing. | It abandons the current step and returns to the main menu. Finish the task first. |
| The support button just opens a mail window. | It sends the current state of the application, including a screenshot, so support sees what you saw. |
Take action
Ready to use it? Sign in with How to log in to Shop Floor Interface, then start with the most common task at the device, How to pick an item.
Related articles
- How to log in to Shop Floor Interface – user name and password, cards, keys and fingerprints.
- How to pick an item – the task most operators come to the device for.
- How to return, scrap, and recycle items in SFI – what each of the five return conditions does to the item.
- How to move a picked item to a different cost allocation – including the four conditions that hide the tile.
- How to create and manage devices – how a device is set up, assigned and locked.
- System requirements and supported browsers – what the browser version needs.
- How to update SFI application when auto update cannot be started? – what to do when the Update control cannot finish.