
How to restock items on the Shop Floor Interface
Read time: ~6 minutes
Applies to: Shop Floor Interface
What you can do
Use Restock when received goods arrive from a purchase order, when serviced items come back from a service list, or when you need to add stock without an order.
Before you start
- You need a user account with permission to restock items.
- You need access to the Shop Floor Interface on a device connected to your storage.
- If restocking from a purchase order, the order must already exist and have items ready for receiving.
- If restocking from a service list, the items must already have been picked for service — see How to pick items for a service order.
Note: Restock updates the quantity in the storage location immediately. Make sure you have the physical items in hand before confirming.
Quick start
Experienced users — restock items in 5 steps:
- Tap Stock management on the main menu.
- Tap Restock.
- Select a purchase order or service list, or tap Without order.
- Choose the item and verify the quantity.
- Tap Confirm to complete the restock.
Need more detail? Follow the full steps below.
Steps
Step 1 — Open stock management
On the SFI main menu, tap Stock management.
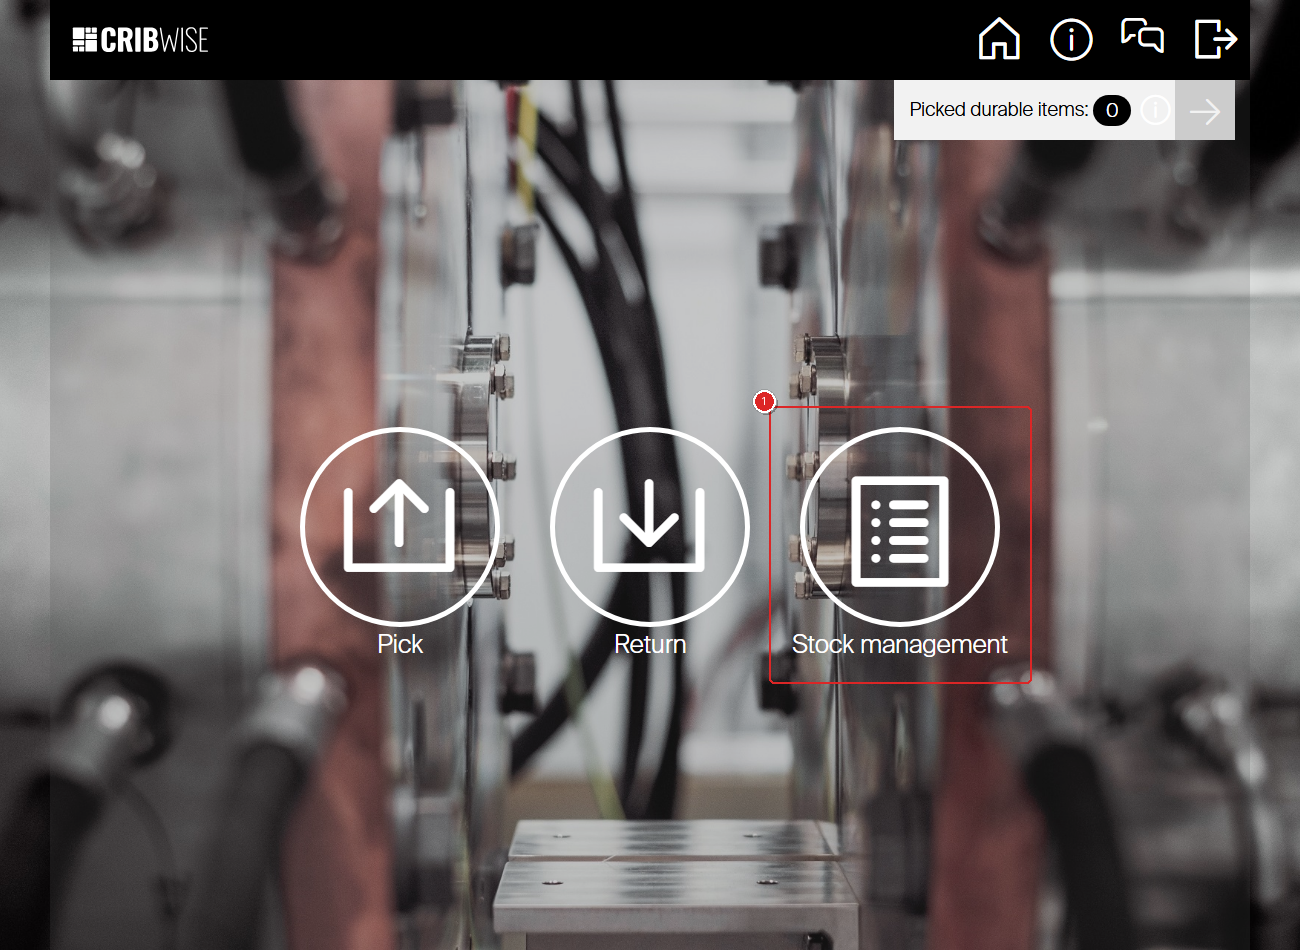
The SFI main menu. Tap Stock management to access restock options.
Step 2 — Tap Restock
The stock management submenu shows several options. Tap Restock.
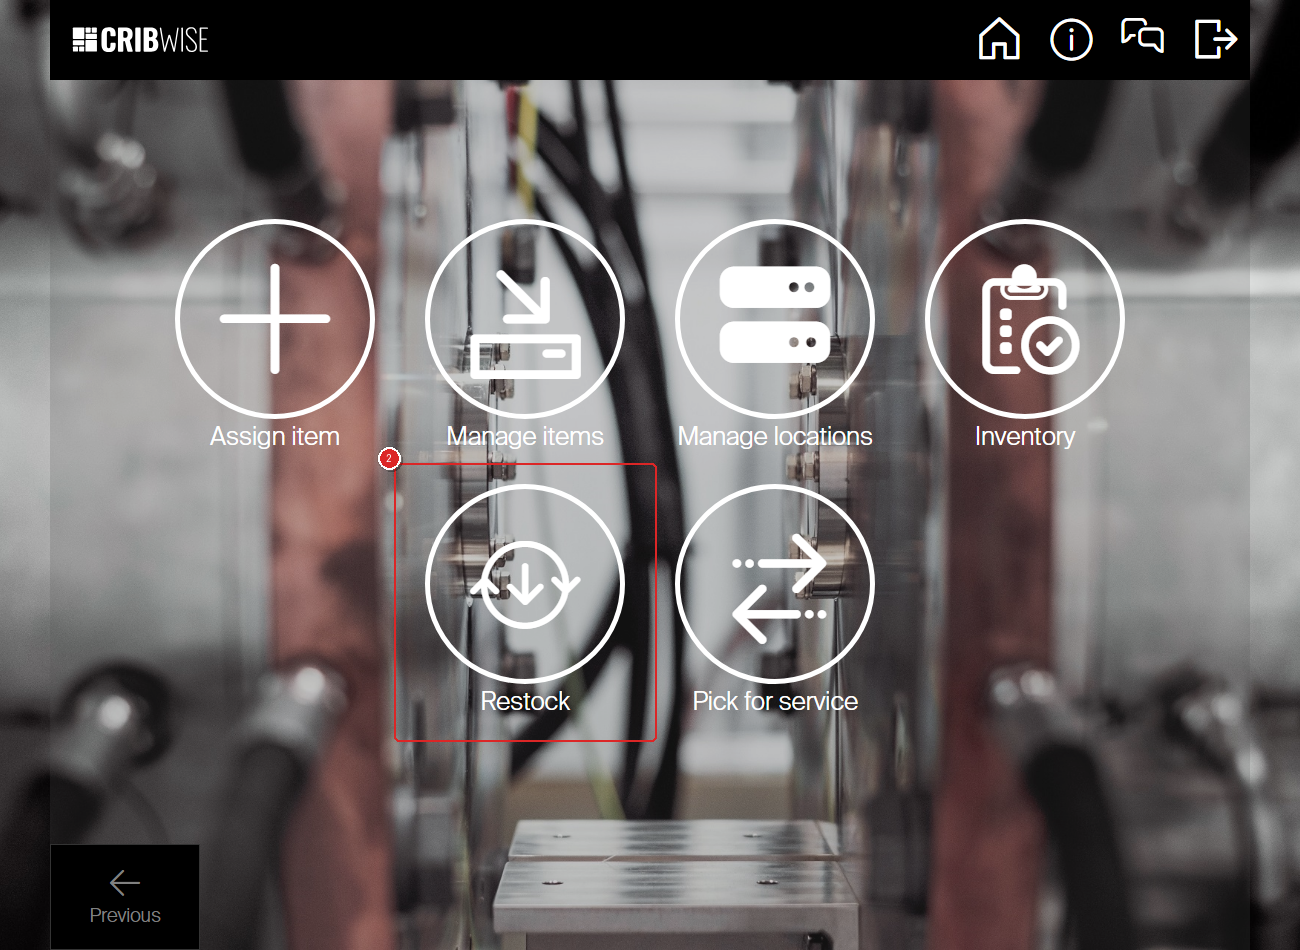
The stock management submenu. Tap Restock to start restocking items.
Step 3 — Select a purchase order or restock without order
The restock selection screen shows pending purchase orders and service lists on the left and their items on the right. You have three paths:
- From a purchase order:
- Option 1: Tap the order to view all items in that specific order.
- Option 2: Tap an item to see all orders it exists in.
- From a service list — see Step 4c below.
- Without order — tap Without order at the bottom of the screen to restock items that are not tied to a purchase order.
Tip: Use Restock all to restock every item on the selected purchase order at once
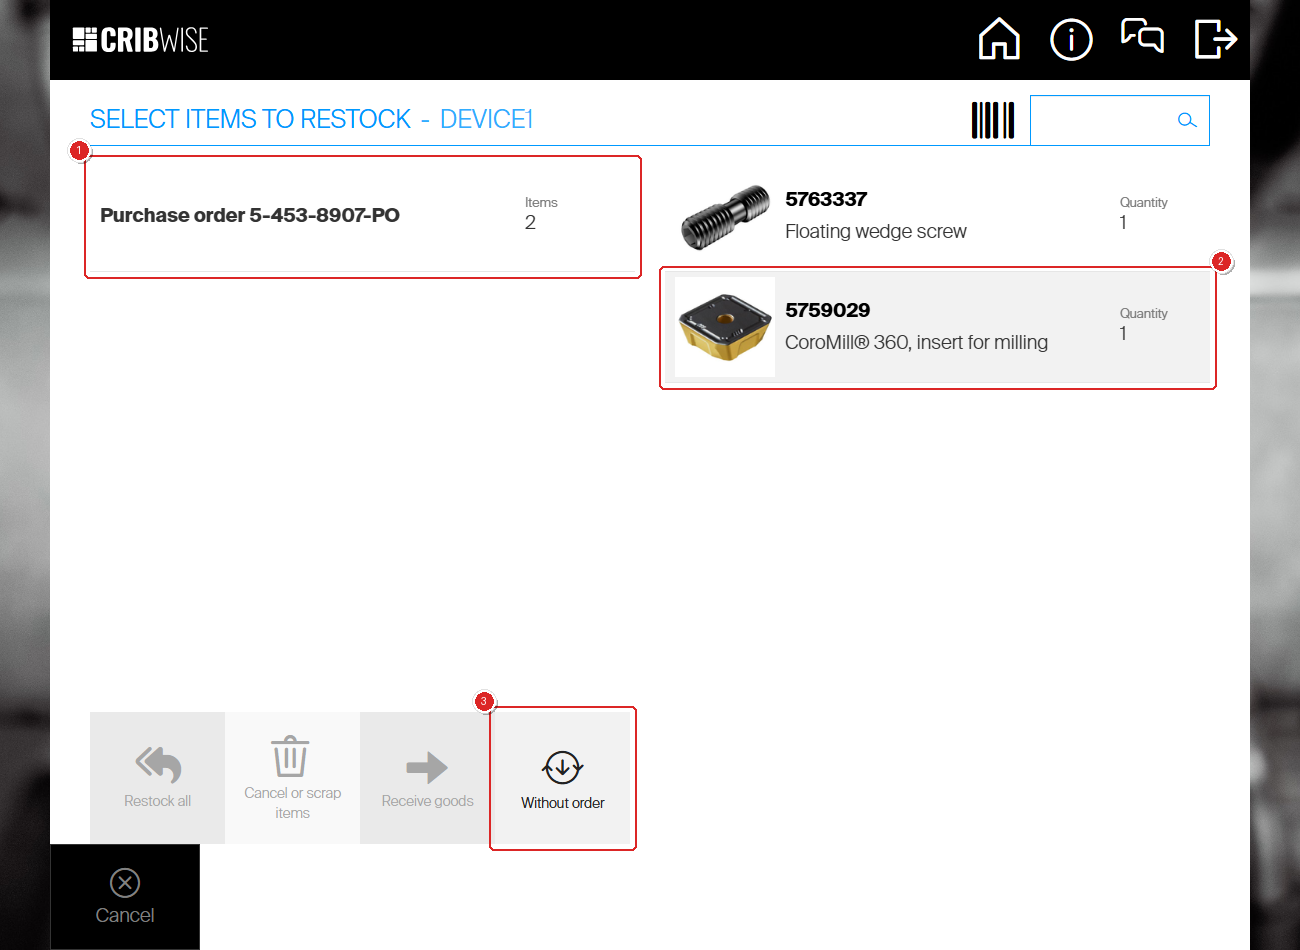
The restock selection screen. Tap a purchase order (left) and then an item (right), or tap Without order at the bottom.
Step 4 — Verify the quantity and confirm
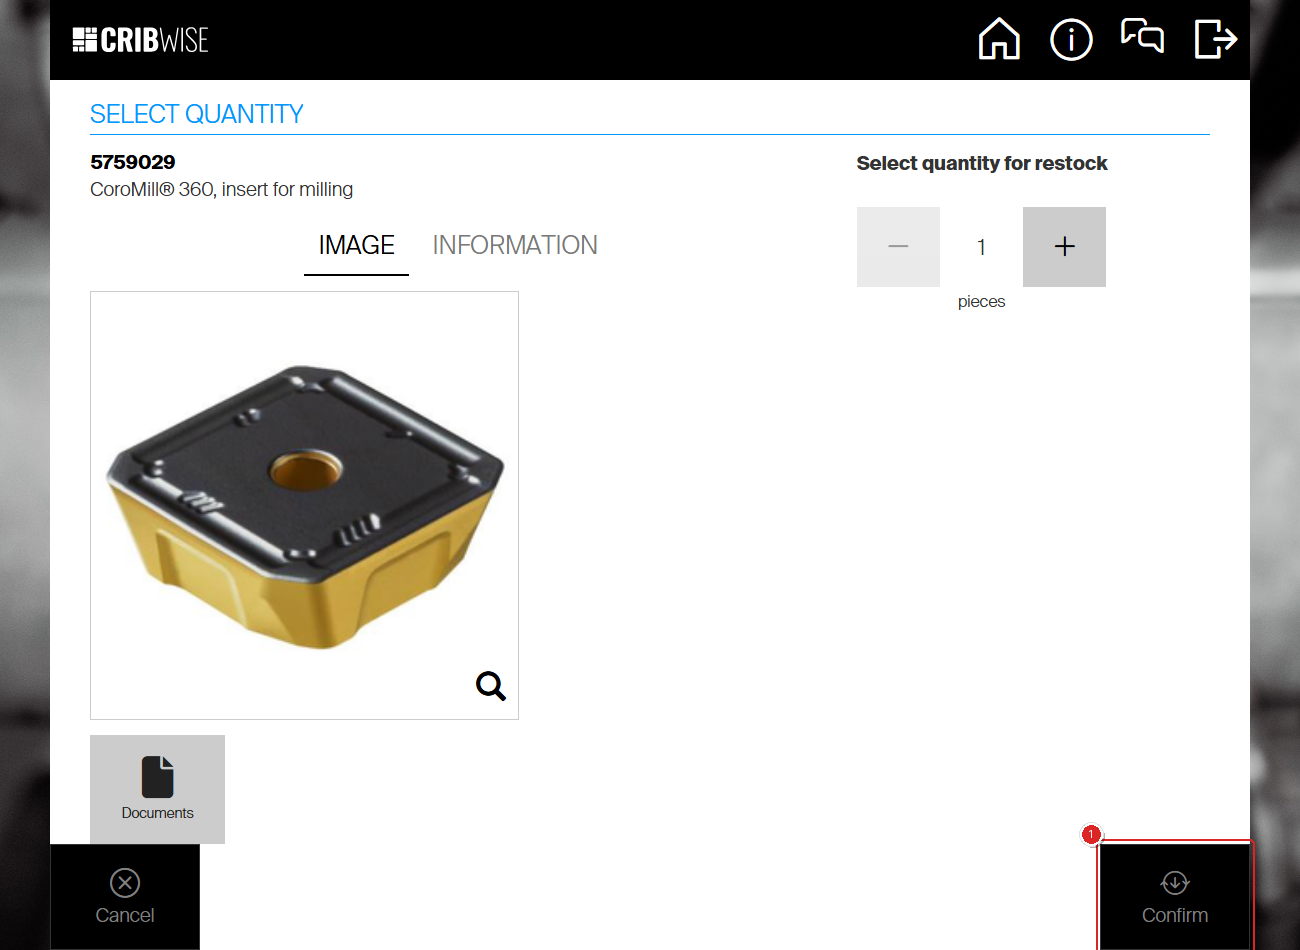
After selecting an item, the confirmation screen shows the item details and the quantity available for restock. Use the + and − buttons to adjust the quantity if needed.
Tap Confirm to complete the restock for this item.
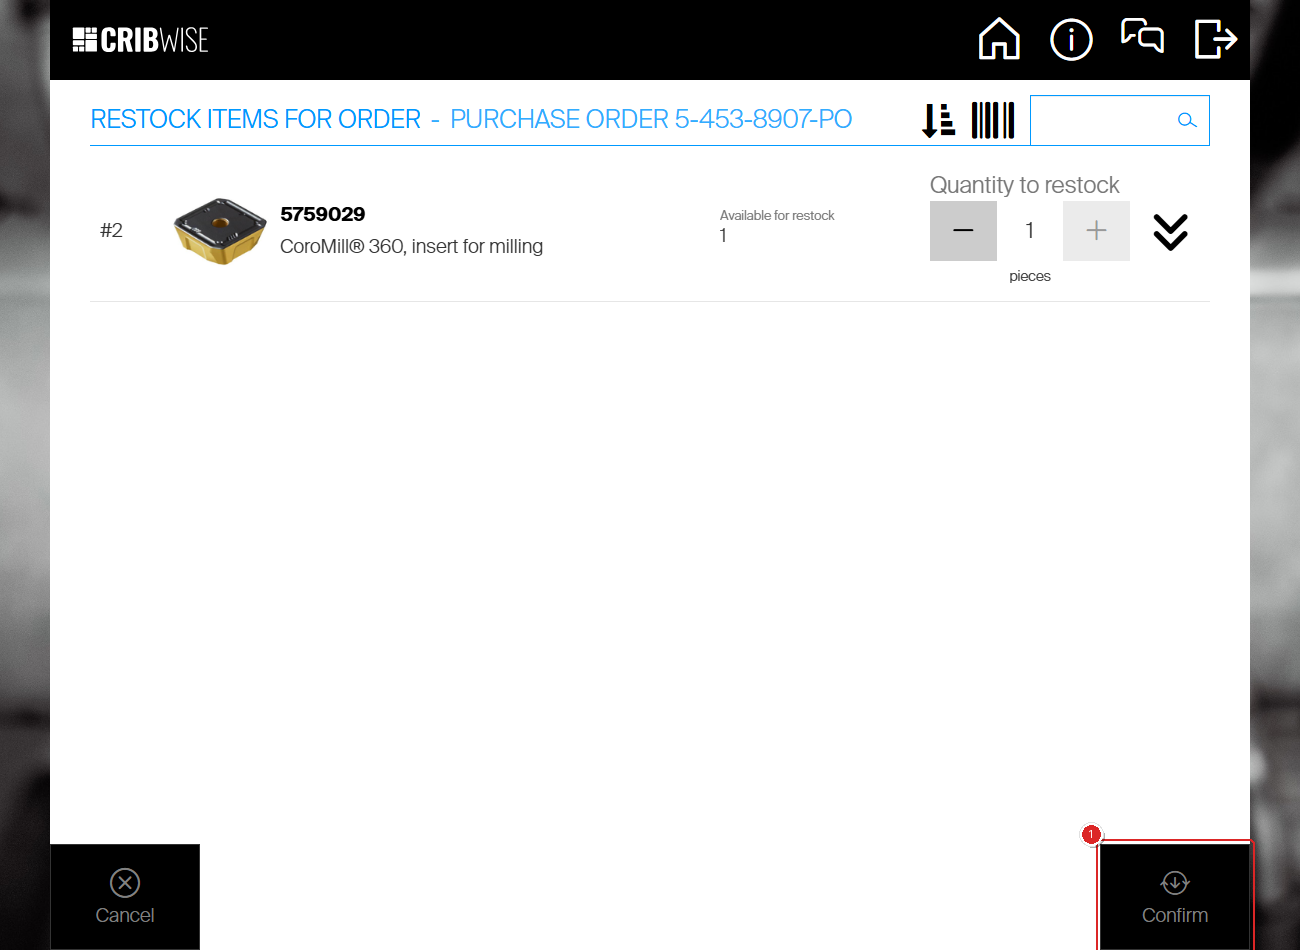
Verify the quantity and tap Confirm to restock the item.
Step 4b — Restock without order
If you chose Without order in Step 3, the screen shows items that can be restocked independently. Review the items, verify the quantities, and tap Restock finished to complete.
Restocking without a purchase order. Verify quantities and tap Restock finished.
Success: The item quantity in the storage location increases by the restocked amount. The SFI returns to the stock management menu.
Step 4c — Restock from a service list
When items come back from an internal service vendor, they are restocked against the service list they were picked from. The list only appears on the restock screen while it has items at service.
- Select one of the list’s items on the right, then select the service list on the left.
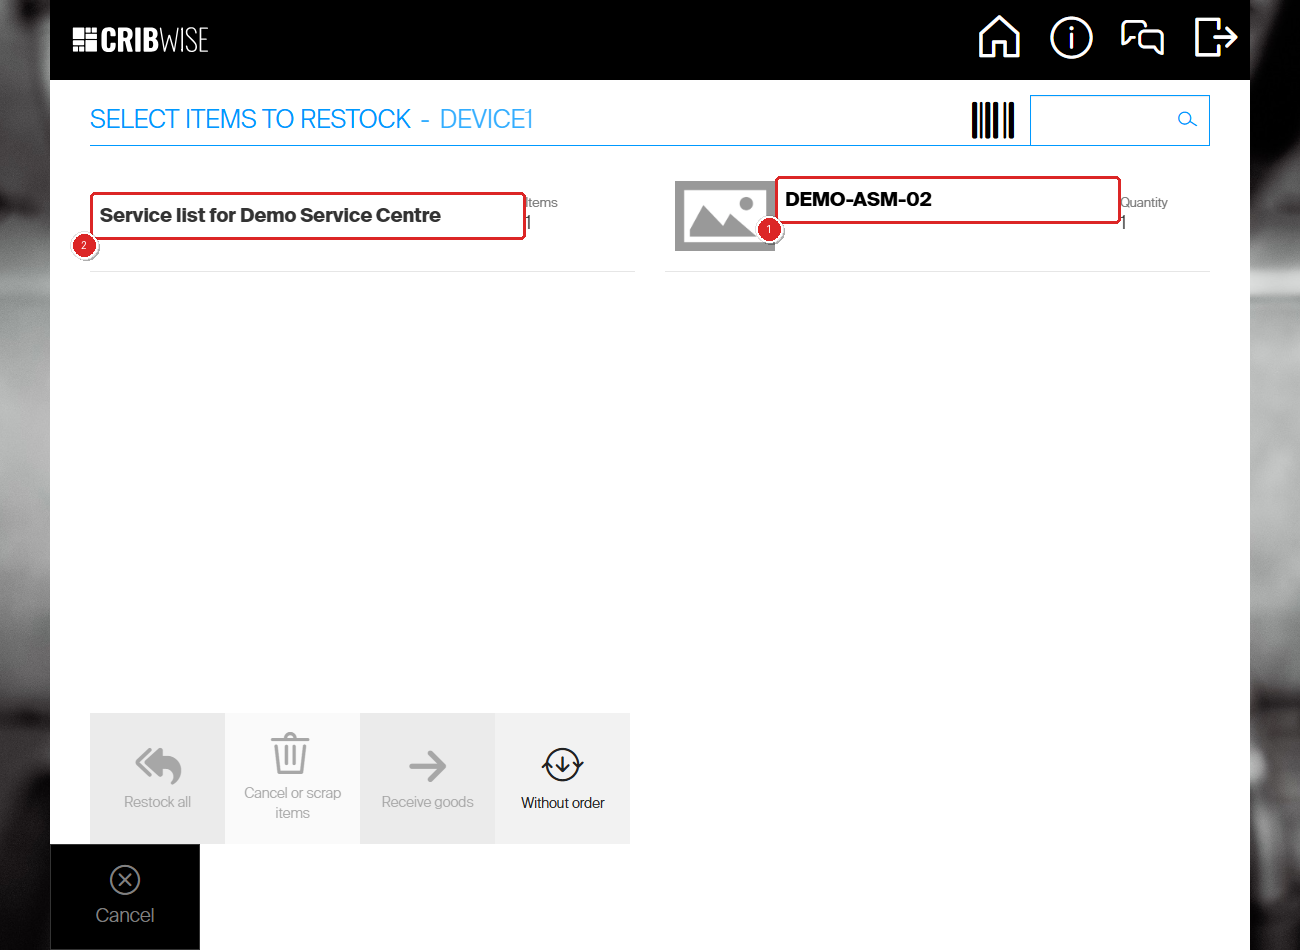
A service list waiting to be restocked. Select the item (1), then the list (2). If the list does not open on the first try, select it again.
- On Restock items for order, check Available for restock and the Rule — the condition the item comes back in.
- Set Quantity to restock with the − and + buttons.
- Select Confirm.
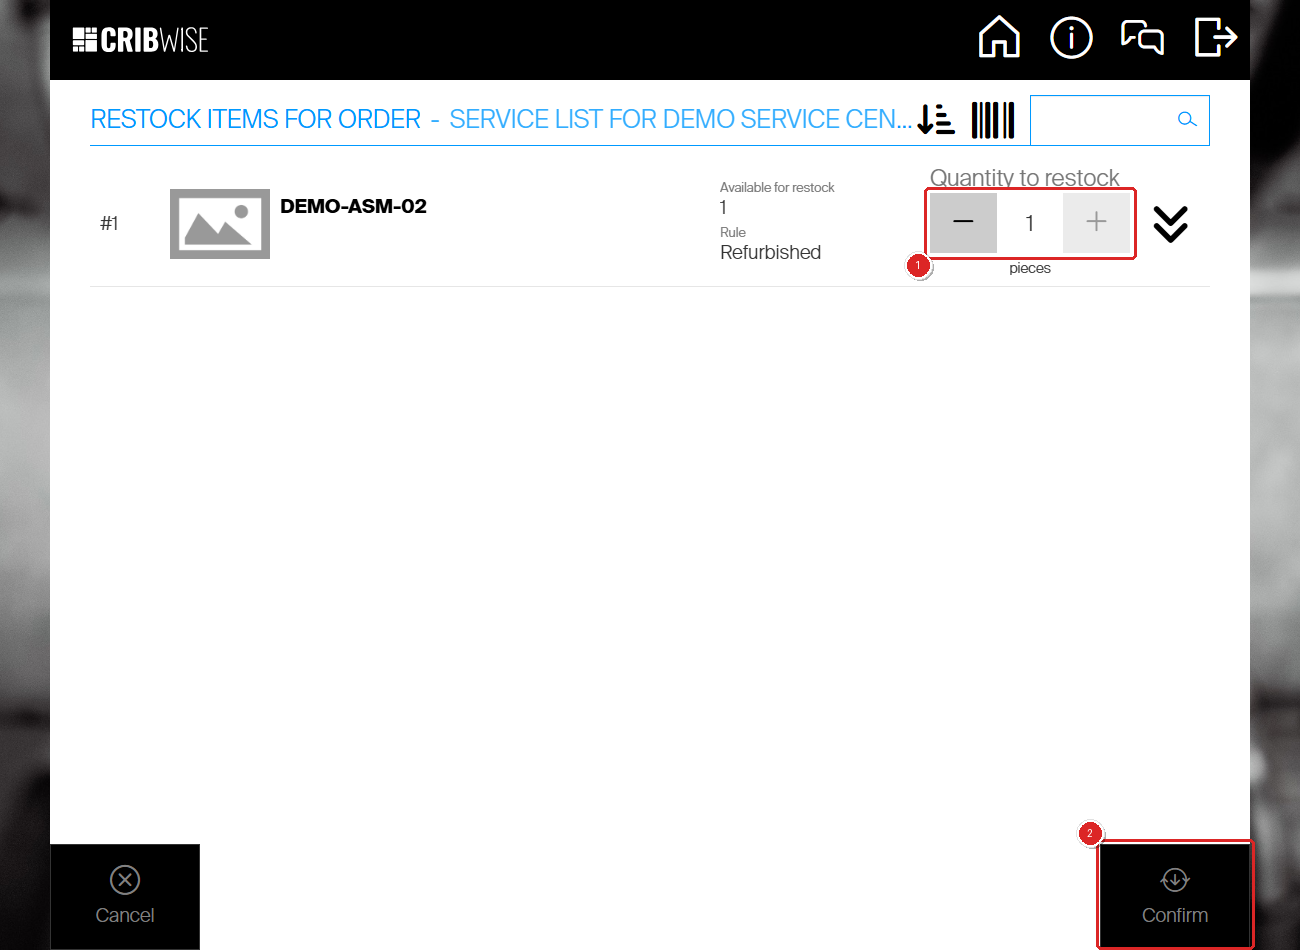
Set the quantity (1) and confirm (2). Rule shows the item’s Restock from service as setting — here Refurbished.
Important: A serviced item can only go into a location whose location rule matches its Rule. If there is none with room, Confirm available quantities opens with Available space 0 and Confirm greyed out. Select the item row, select Assign item, pick an empty location, set Location rule to the same condition, and save. Available space then goes up and you can confirm.
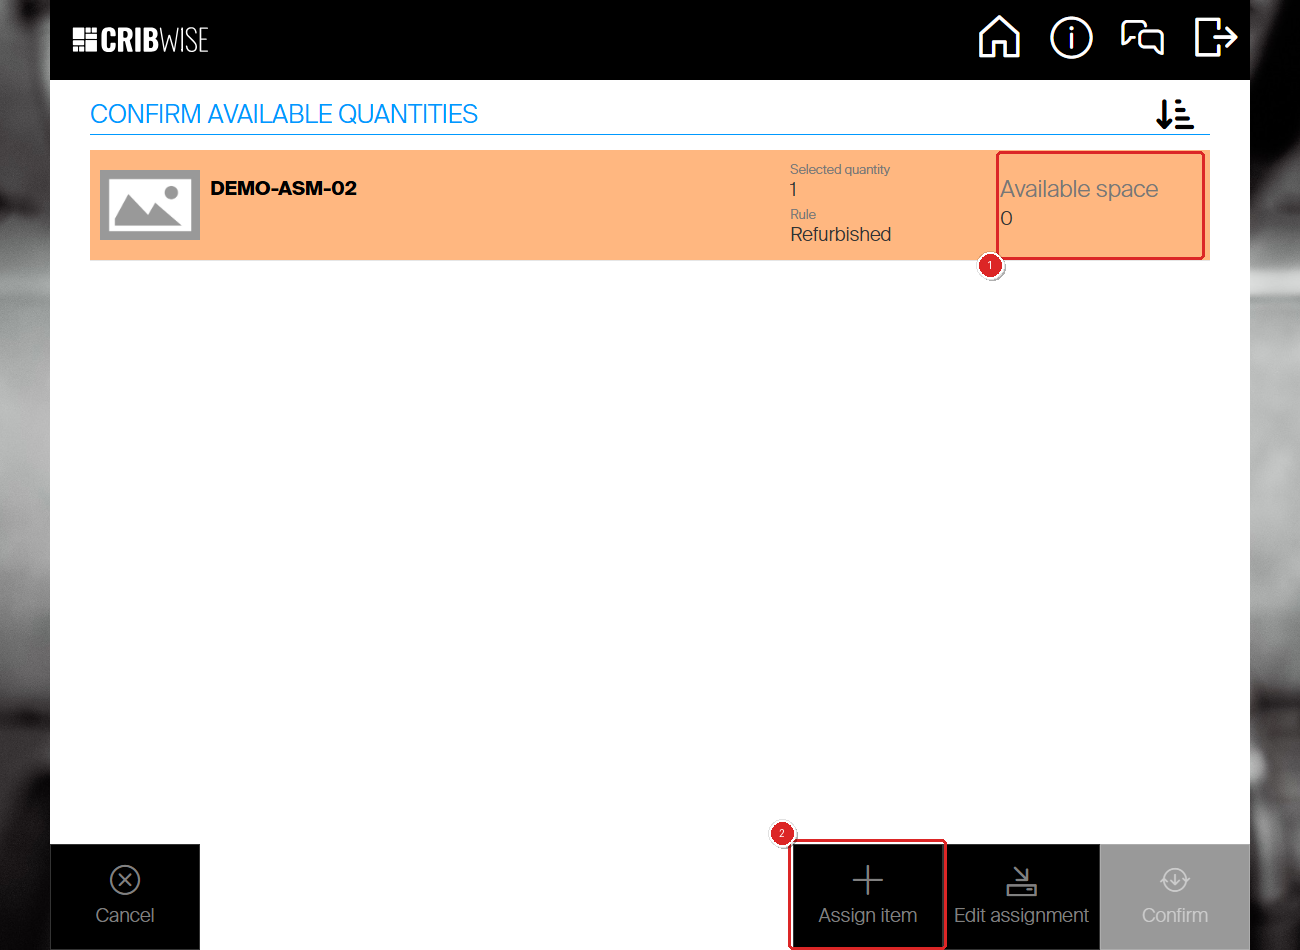
No Refurbished location has room (1). Assign one from here (2) without leaving the restock.
- On Check quantity in locations before restock, go to the Location shown and put the item there. Expected quantity before restock tells you how many should already be in that location.
- Make sure the item’s row is ticked. For a serialized item, ticking the row opens Select serial number(s) for item — tick the serial number and select Confirm.
- Select Restock finished. The restock is saved at this point.
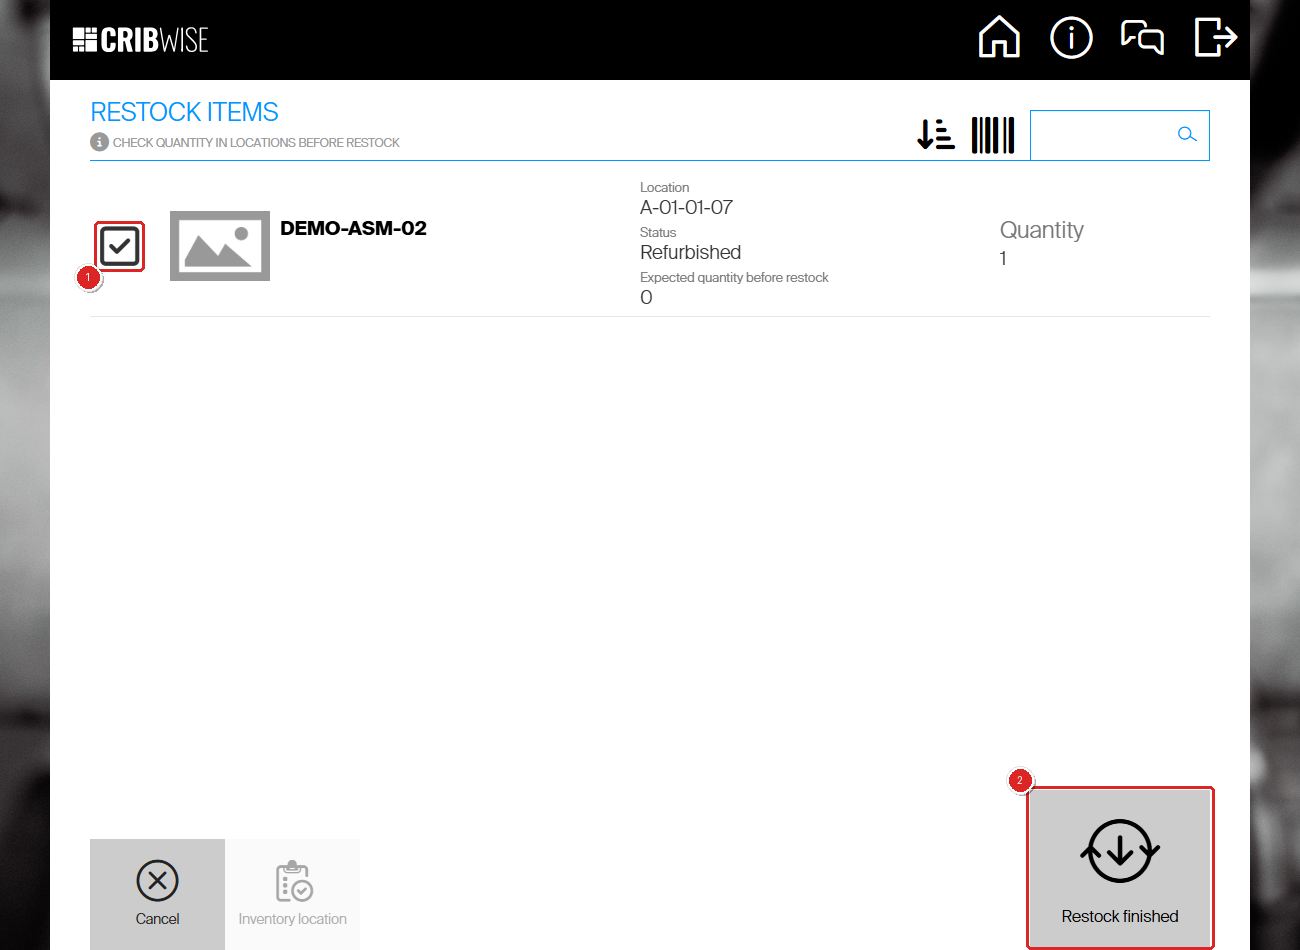
Tick the row once the item is in place (1), then finish (2). The status is the location rule of A-01-01-07.
- On the Restock summary, select Finish. If part of the quantity did not come back from service, select Scrap remaining quantity first.
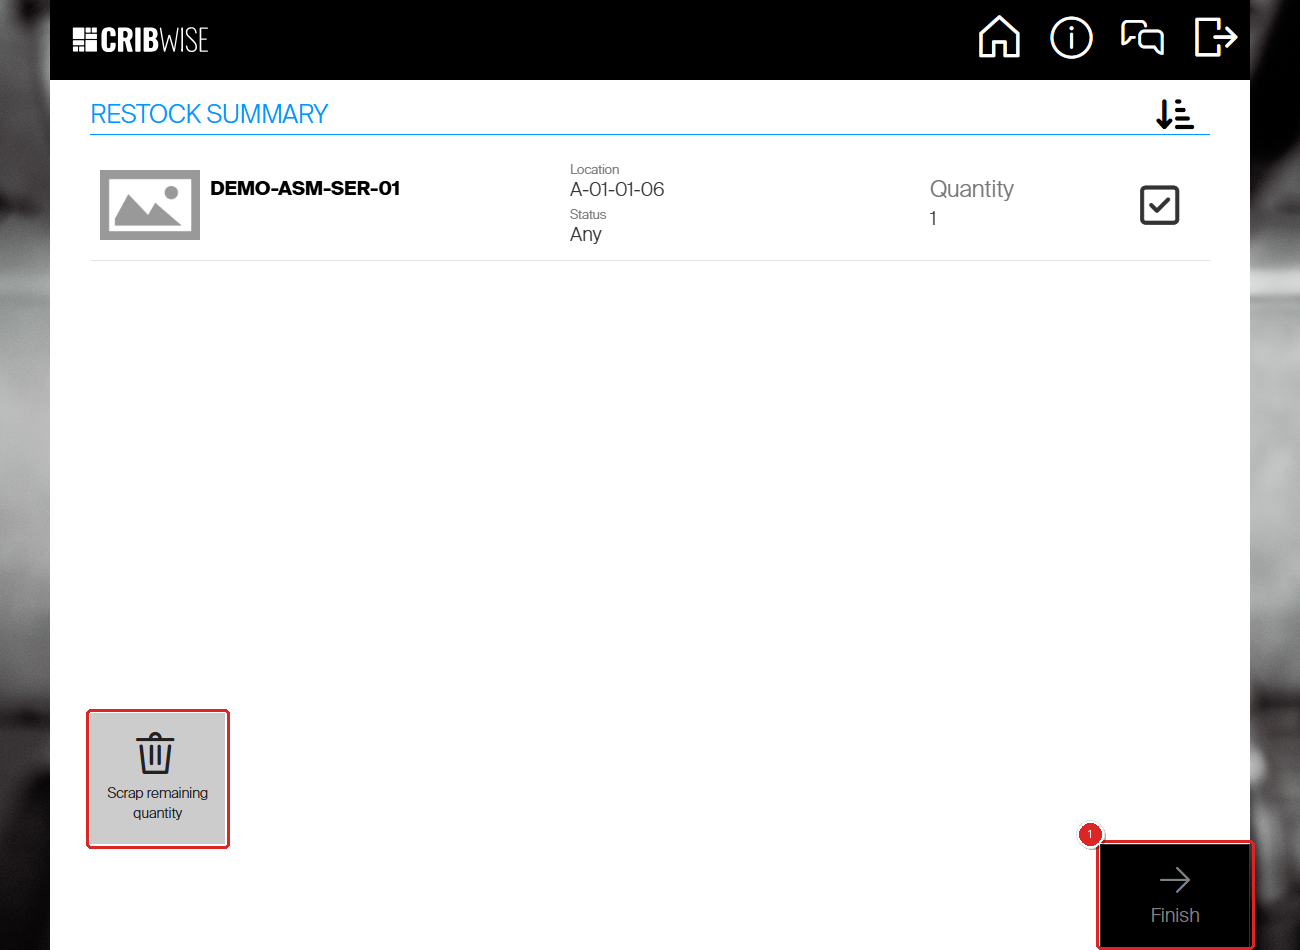
The restock summary. Scrap remaining quantity (outlined) writes off what did not come back; Finish (1) closes the flow.
Success: The item is back in the device in the condition set by Restock from service as, and it leaves the service list. On Pick for service, the list’s Quantity at service drops by what you restocked.
For the full journey of a service item — why it was returned, how the list was created, and where restocking fits — see Understanding the service flow: from pick to restock.
Next steps
After restocking:
- Verify stock levels — check the item’s stock in Admin Portal or via an inventory count to confirm accuracy.
- Complete remaining items — if the purchase order has more items, repeat the restock process for each one.
Troubleshooting
| Problem | Likely cause | Fix |
|---|---|---|
| No purchase orders appear on the restock screen | No orders have items in a “ready to receive” state | Check the purchase order status in Admin Portal. The order must be sent and have unreceived items. |
| Quantity to restock shows 0 | All ordered items have already been restocked | Verify the order in Admin Portal. If more stock is needed, create a new purchase order. |
| Item does not appear in the restock list | The item is not assigned to this device or has no pending restock | Check that the item is assigned to the correct device and that there is outstanding quantity on the order. |
| Restock finished button is greyed out | No items are selected for restock | Tap the checkbox next to at least one item before tapping Restock finished. |
| No service list appears on the restock screen | Nothing on the list is at service — items waiting for service have not been picked yet | Pick them first with Stock management > Pick for service, then restock. |
| Available space shows 0 and Confirm is greyed out | No location in the device has a location rule matching the item’s Restock from service as condition, or all of them are full | Select the item row, then Assign item. Pick an empty location and set its Location rule to that condition. |
| Assign item and Edit assignment are greyed out | No item row is selected | Select the item row on Confirm available quantities first. |
Related articles
- Understanding the service flow: from pick to restock – where restocking from a service list fits in the whole service journey.
- How to pick items for a service order – the step before a service list can be restocked.
- Understanding service lists – how items reach a service list and leave it again.
- Item supplier settings reference – the Restock from service as setting that decides the Rule.
- How to return, scrap, and recycle items in SFI – the other way items come back into the device.