
What you’ll learn
A service list tracks the items your own workshop services, and CRIBWISE fills it the moment an item is returned for service. Learn how a list is created, what its two quantities mean, and what you can change on it in the Admin Portal.
Service lists at a glance
A service list is one of two ways CRIBWISE handles items that need service. Which one an item uses depends on its Service vendor.
| Service list | Service order | |
| Used when the service vendor is | Internal – your own workshop | External – an outside company |
| How items get on it | Directly, when an item is returned for service | By a service order script, or by hand |
| Status | None – the list is stateless | Has a status, like a purchase order |
| Sent to the vendor | Never, so it needs no integration settings | Yes, over B2B or mail |
| How many there are | One per service vendor, stock and device | As many as scripts or users create |
| Where to find it | Order lists > Service lists | Order lists > Purchase orders, order type Service |
Tip: A vendor’s Internal box decides which one you get, and it can only be set when the vendor is created. To use service lists, create the workshop as a new internal vendor – see How to manage vendors.
How an item moves through a service list
An item joins a list the moment it is returned for service, is picked out of the device for service, and leaves the list when it is restocked or scrapped.
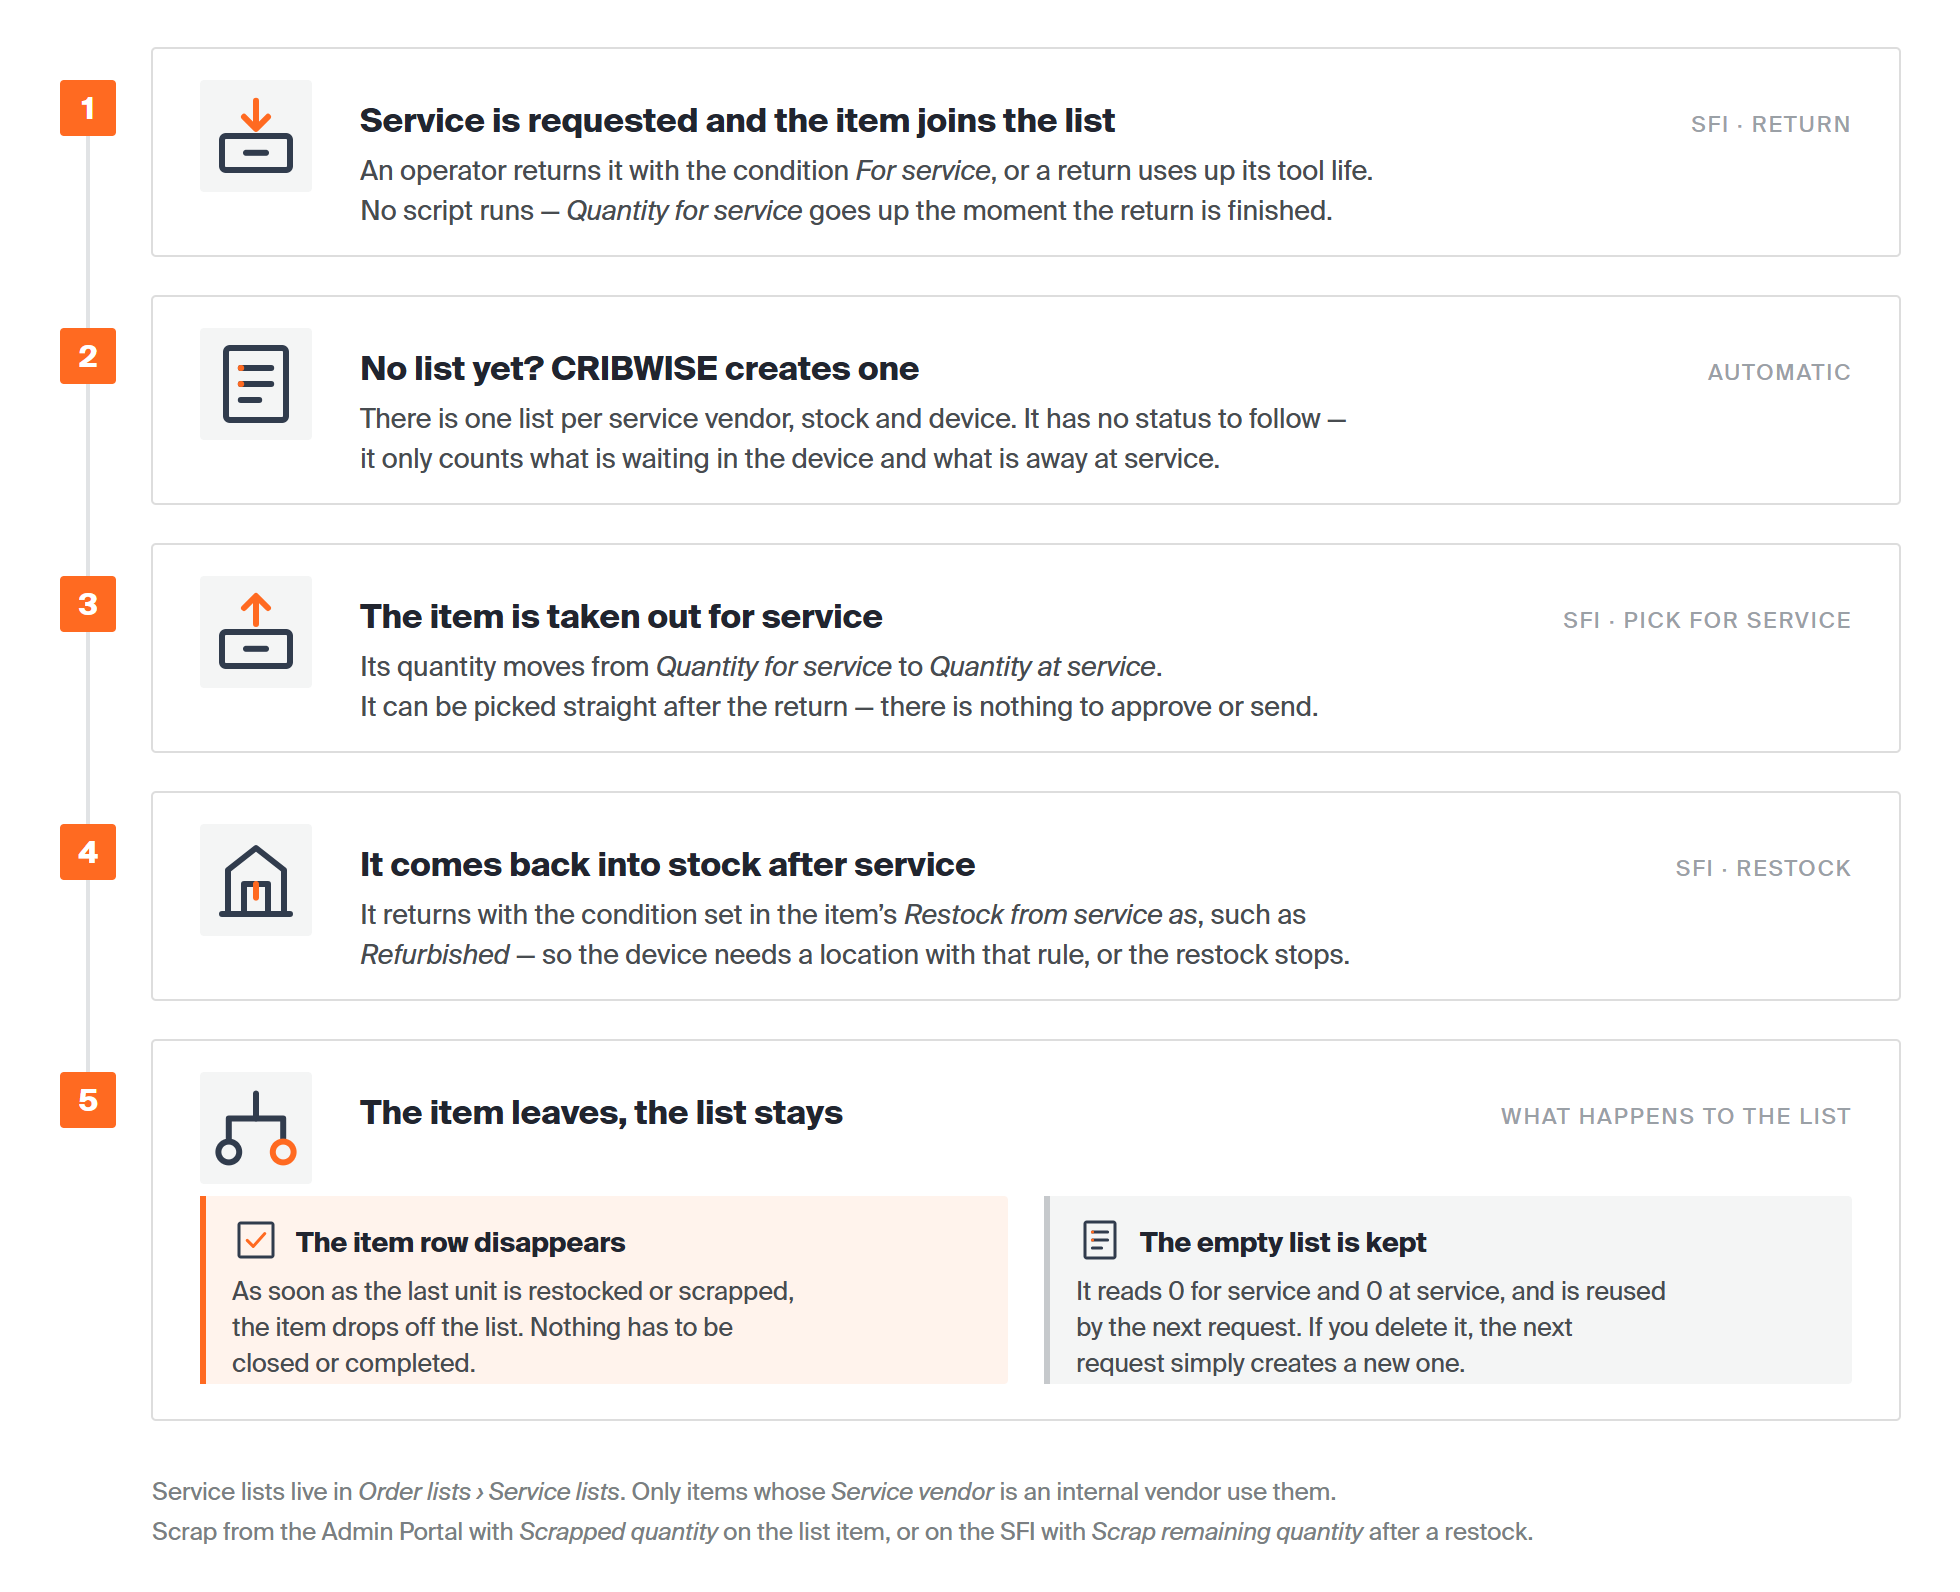
The list never moves through states. Only its two quantities change as items come and go.
Service is requested in one of two ways:
- An operator returns the item on the Shop Floor Interface (SFI) and chooses the condition For service.
- A tool life limit is reached. For a serialized item with tool life tracking, the return that uses up its tool life sets the condition to For service for you.
Either way, the item is added to the list as soon as the return is finished. If there is no list yet for that service vendor, stock and device, CRIBWISE creates one. That means an operator can go straight on to Pick for service – there is no script to wait for and no list to create first.
Note: Only items with Service ticked on their Supplier tab can be returned for service. The device also needs a location whose rule is For service. Without one, the return stops at Available space 0.
Where to find service lists
Service lists live in the Admin Portal under Order lists > Service lists. Each row is one list.
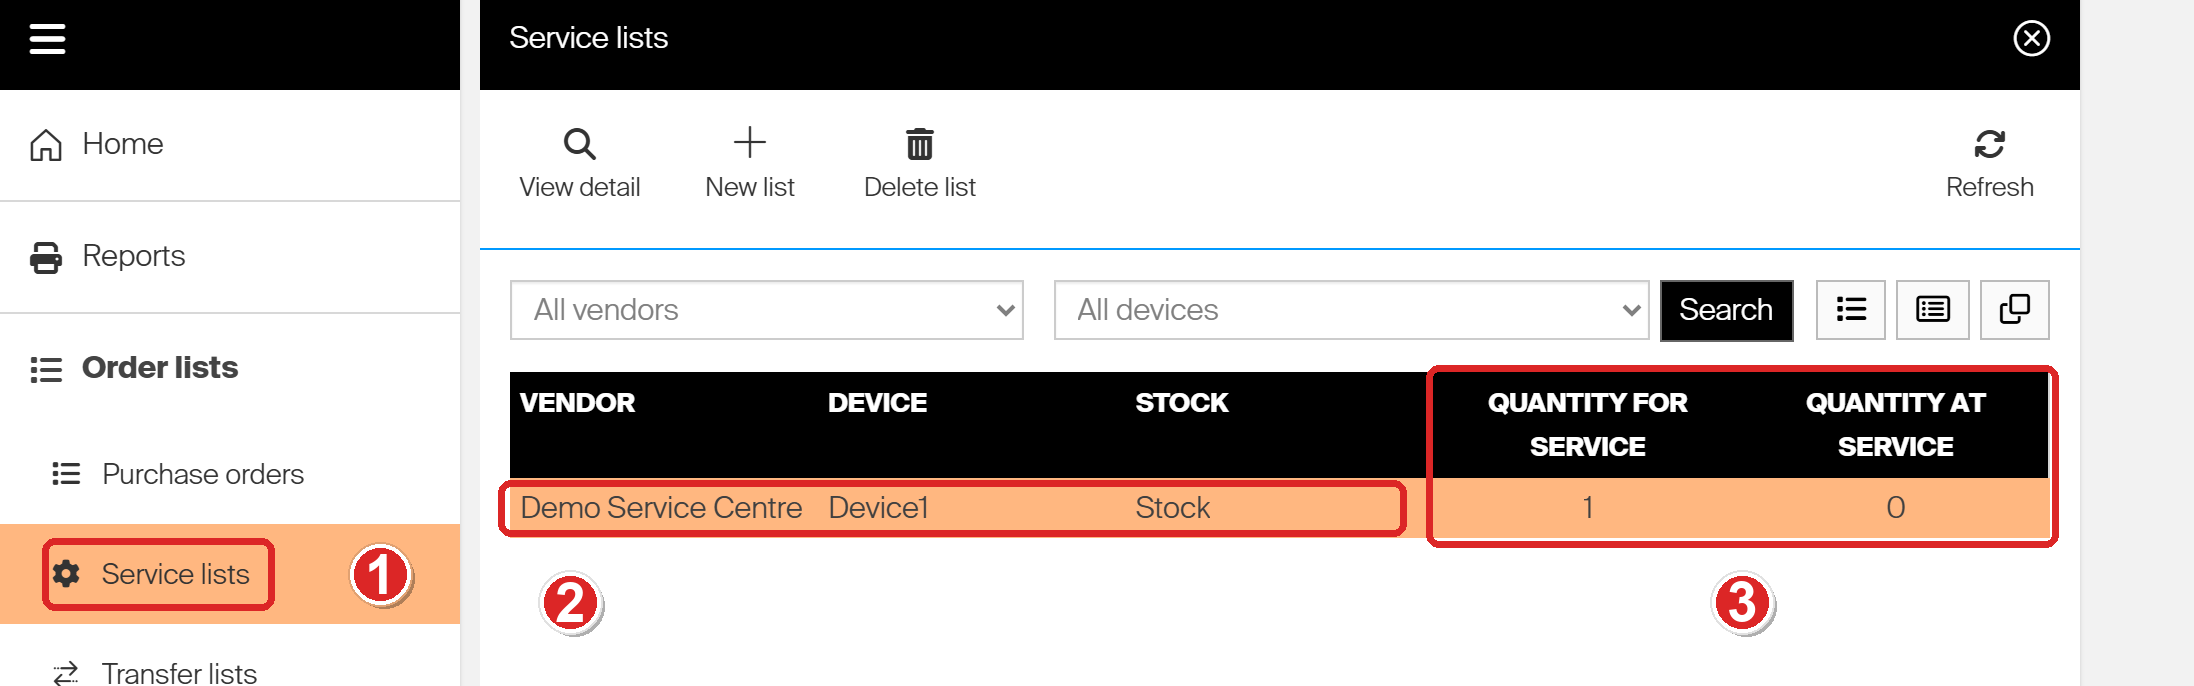
- Service lists sits under Order lists in the menu.
- Each row shows the list’s Vendor, Device and Stock. Use the vendor and device filters above the grid to narrow the list.
- Quantity for service is how many units are waiting in the device to be picked for service. Quantity at service is how many have been picked and are away being serviced.
Select a row and choose View detail to open the list. The toolbar also has New list, Delete list and Refresh. You rarely need New list, because the first return for service creates the list for you.
What is inside a list
An open list has two tabs. Items for service is where the work happens.
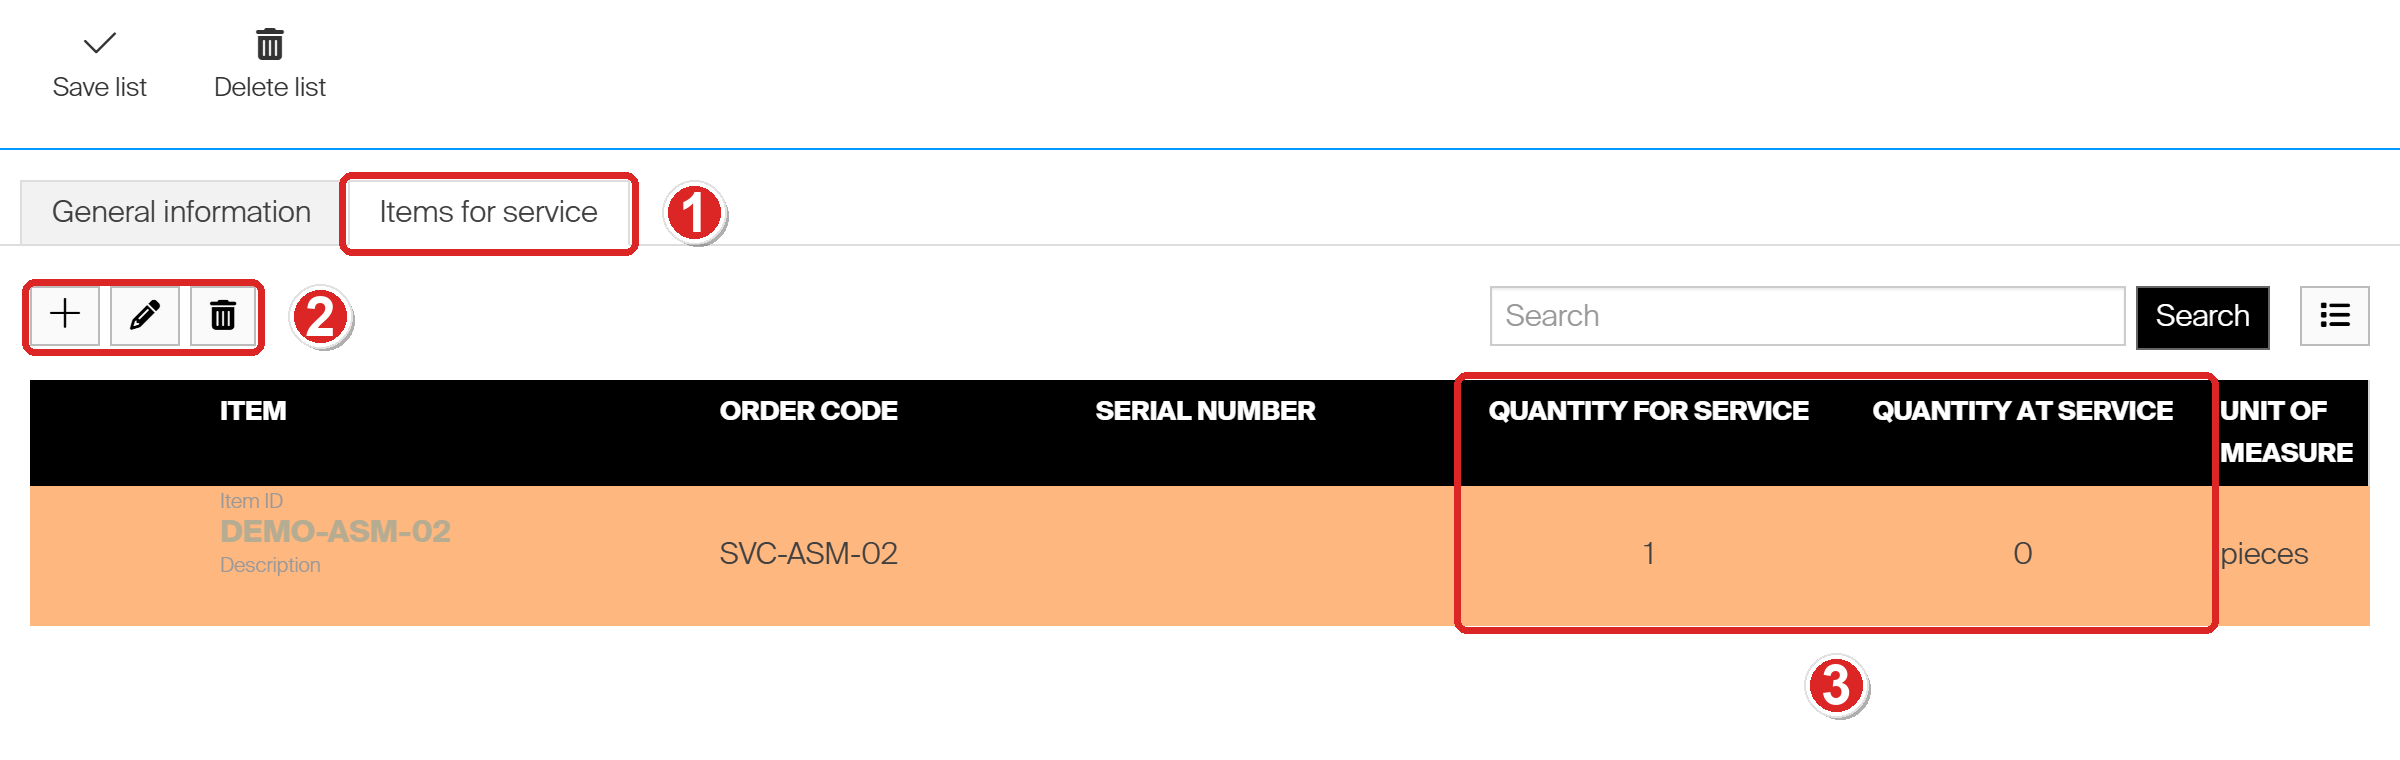
- Items for service shows every item on the list, with its order code, serial number and unit of measure.
- The buttons above the grid add an item, edit the selected item, and remove the selected item from the list.
- The two quantities per item. The grid totals them at the bottom.
Serialized items show their serial number in the Serial number column, so you can see exactly which instance is waiting or away.
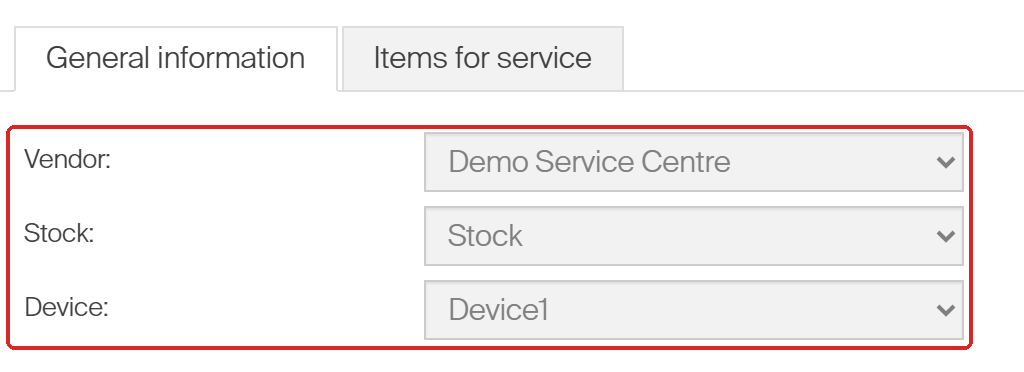
General information shows what the list belongs to. The fields are greyed out: a list cannot be moved to another vendor, stock or device.
Changing a list by hand
Most lists never need touching – the SFI keeps them up to date. The Admin Portal lets you correct a list when reality and the numbers disagree.
Change a quantity or scrap units
Select an item and choose Edit selected item (the pencil). The Service item panel opens.
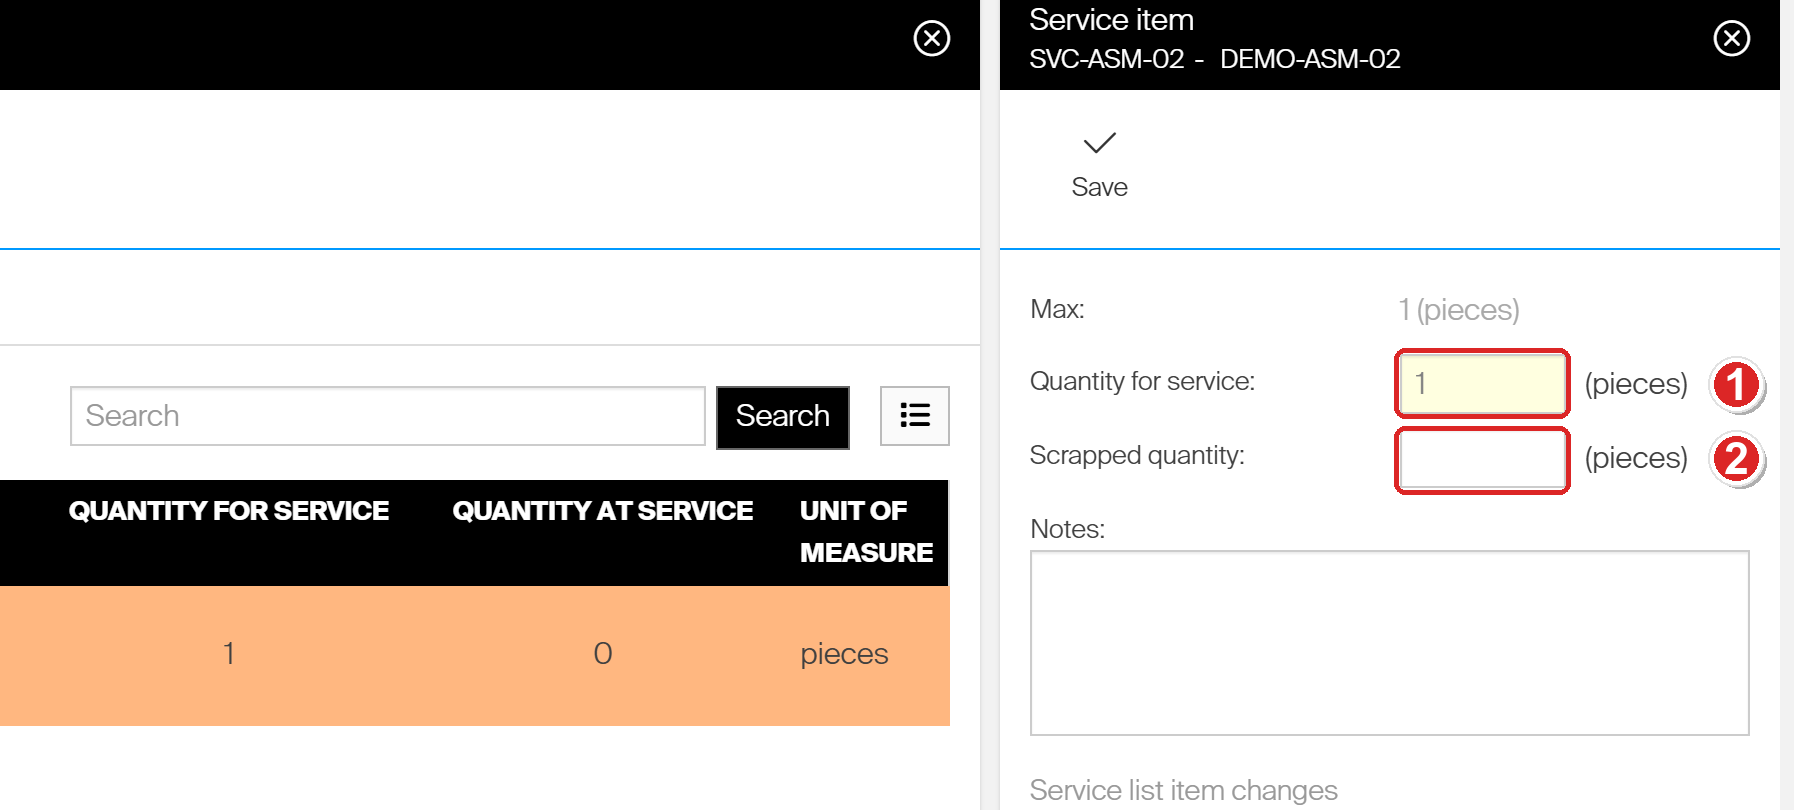
- Quantity for service is how many units are waiting in the device. Max above it shows the most you can enter for this device.
- Scrapped quantity is for units that are beyond repair. Enter the number and choose Save. The units are scrapped and leave the list. When nothing is left, the item row disappears.
Below Notes, Service list item changes keeps a history of the item on this list. Each change is listed with its type – for example Picked, Restocked or Scrapped – its quantity and its date.
Add an item by hand
Create new service item (the plus button) opens an item picker. It only offers items that meet all of these conditions:
- Service is ticked on the item, with this list’s vendor as its Service vendor.
- The item is on the list’s device, in a location whose rule is For service.
- The item’s status is Released, Phase in, Outgoing or Phase out.
- The item is not on the list already.
If the picker is empty, one of these is missing. An item still in Defined status never appears, even when everything else is set up.
Delete an item or the whole list
The trash button removes the selected item from the list. Delete list asks you to confirm before it deletes the list for that vendor and device.
Important: Delete a list only when both quantities are 0, so no unit that is waiting or away at service loses its record. Deleting an empty list is harmless – the next return for service creates a new one.
Service lists on the Shop Floor Interface
On the SFI, operators see service lists in two places under Stock management:
- Pick for service shows every list with units waiting, with its Quantity at service and Qty for service. The operator picks a list, then the items to take out.
- Restock shows the lists with units away at service. When the items come back, the operator restocks them into the device. At the end, the summary can offer Scrap remaining quantity for units that did not come back usable.
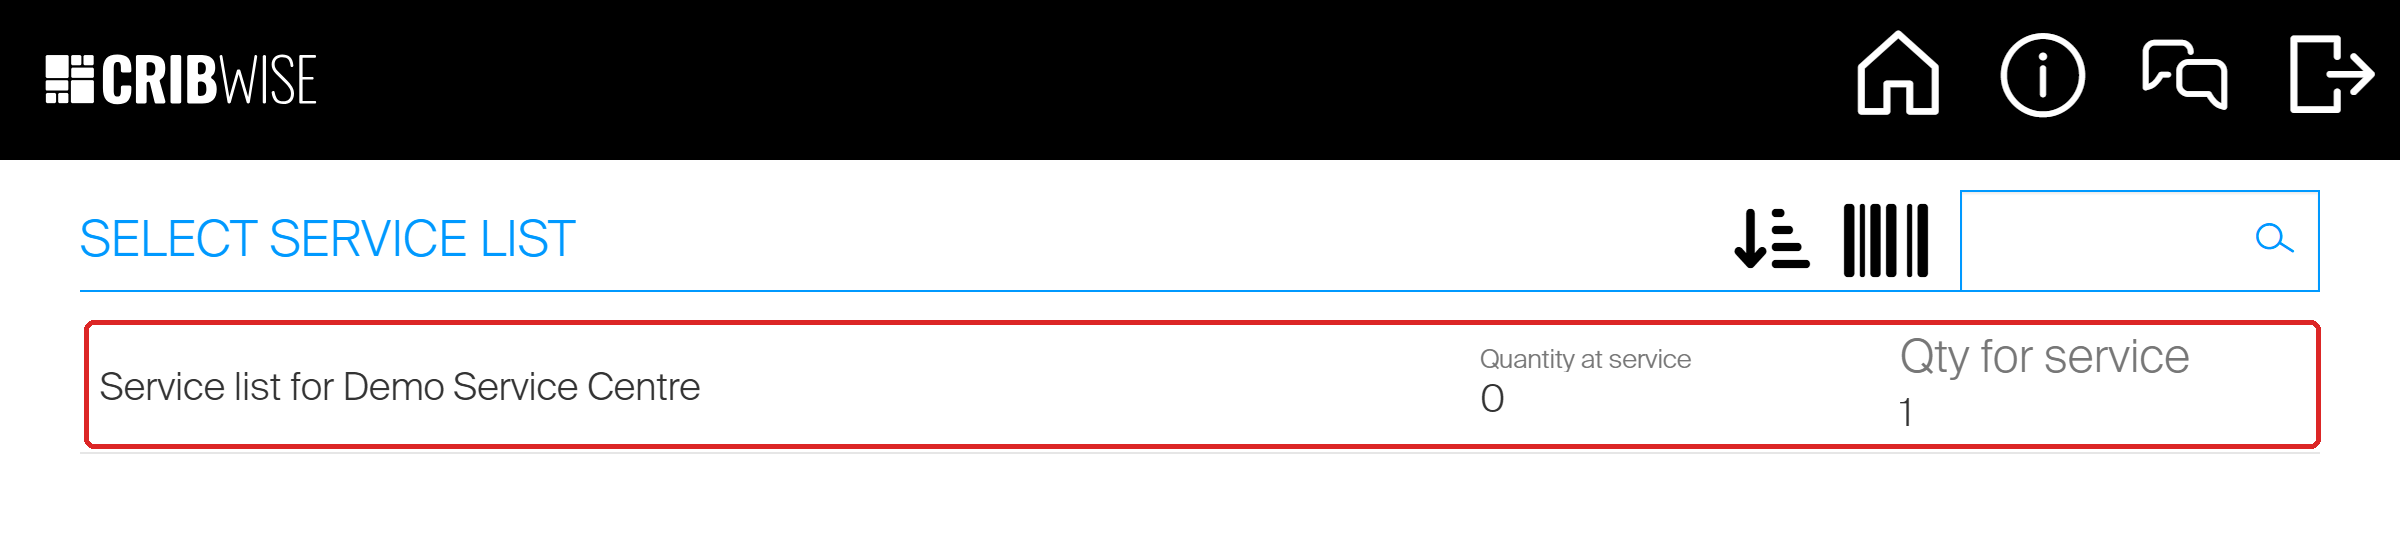
Pick for service lists each service list with units waiting. Here, one unit is waiting and none is away at service.
Restocked items come back with the condition set in the item’s Restock from service as setting, for example Refurbished. The device needs a location with that rule, or the restock stops at Available space 0.
Common confusion
| People often think… | But actually… |
| A service list has a status to follow. | It is stateless. The items on it move; the list does not. |
| A script has to run before an item appears on a list. | The item is added the moment its return is finished. Scripts are what create service orders; a service list does not need one. |
| You have to create a list before the first return. | CRIBWISE creates the list on the first request for that vendor, stock and device. New list is optional. |
| The list disappears when it is empty. | It stays at 0 for service and 0 at service, and is reused for the next request. |
| Every return for service lands on a list. | Only if the item has Service ticked and an internal Service vendor. With an external vendor it waits for a service order instead. |
| A service list can be sent to a vendor. | Only orders are sent. Lists are internal and need no integration settings. |
| You can switch an existing vendor to internal. | The Internal box can only be set when the vendor is created. |
Take action
Ready to work through a list? Take the items out of the device with How to pick items for a service order, then put them back after service with How to restock items on the Shop Floor Interface.
Related articles
- How to pick items for a service order – the next step once an item is on a list.
- How to restock items on the Shop Floor Interface – restocking from a service list, including the location rule it needs.
- Understanding the service flow: from pick to restock – the whole journey of a service item on one page.
- Understanding purchasing and service workflows – where service lists fit next to purchase and service orders.
- Understanding service order scripts: automated service and calibration rules – the external counterpart, driven by scripts.
- How to set up tool life tracking and automatic service triggers – sending serialized items for service automatically.
- How to manage vendors – creating the internal vendor that service lists need.