
Read time: ~8 minutes
Applies to: Customer Management Portal (app.cribwise.com) · Distributor account administrator role
What you can do
Change an existing customer’s subscription quantity, buy or remove add-ons, and check their invoice history from the Customer Management Portal.
Everything below happens on the customer overview, which you reach from the customer list. To create a brand-new customer instead, see How to create a customer account (distributors).
Before you start
- You have a distributor account administrator role and can log in at app.cribwise.com.
- The customer already exists in your customer list.
- To reduce a subscription quantity: the surplus devices have already been deleted in the customer’s Admin Portal.
End customer account administrators see a reduced view. The invoice history tab is hidden for them and they cannot change the subscription.
Quick start
Experienced users — change a subscription in 4 steps:
- Open Customers and select the customer line.
- Select Customer overview in the Details section.
- Open the Subscription tab.
- Select Update subscription, Add-ons, or Invoice history depending on what you need to change.
Need more detail? Follow the full steps below.
Open a customer’s account
Step 1 — Find the customer
- Log in at app.cribwise.com.
- Select Customers in the left menu.
- Select the customer line in the list.
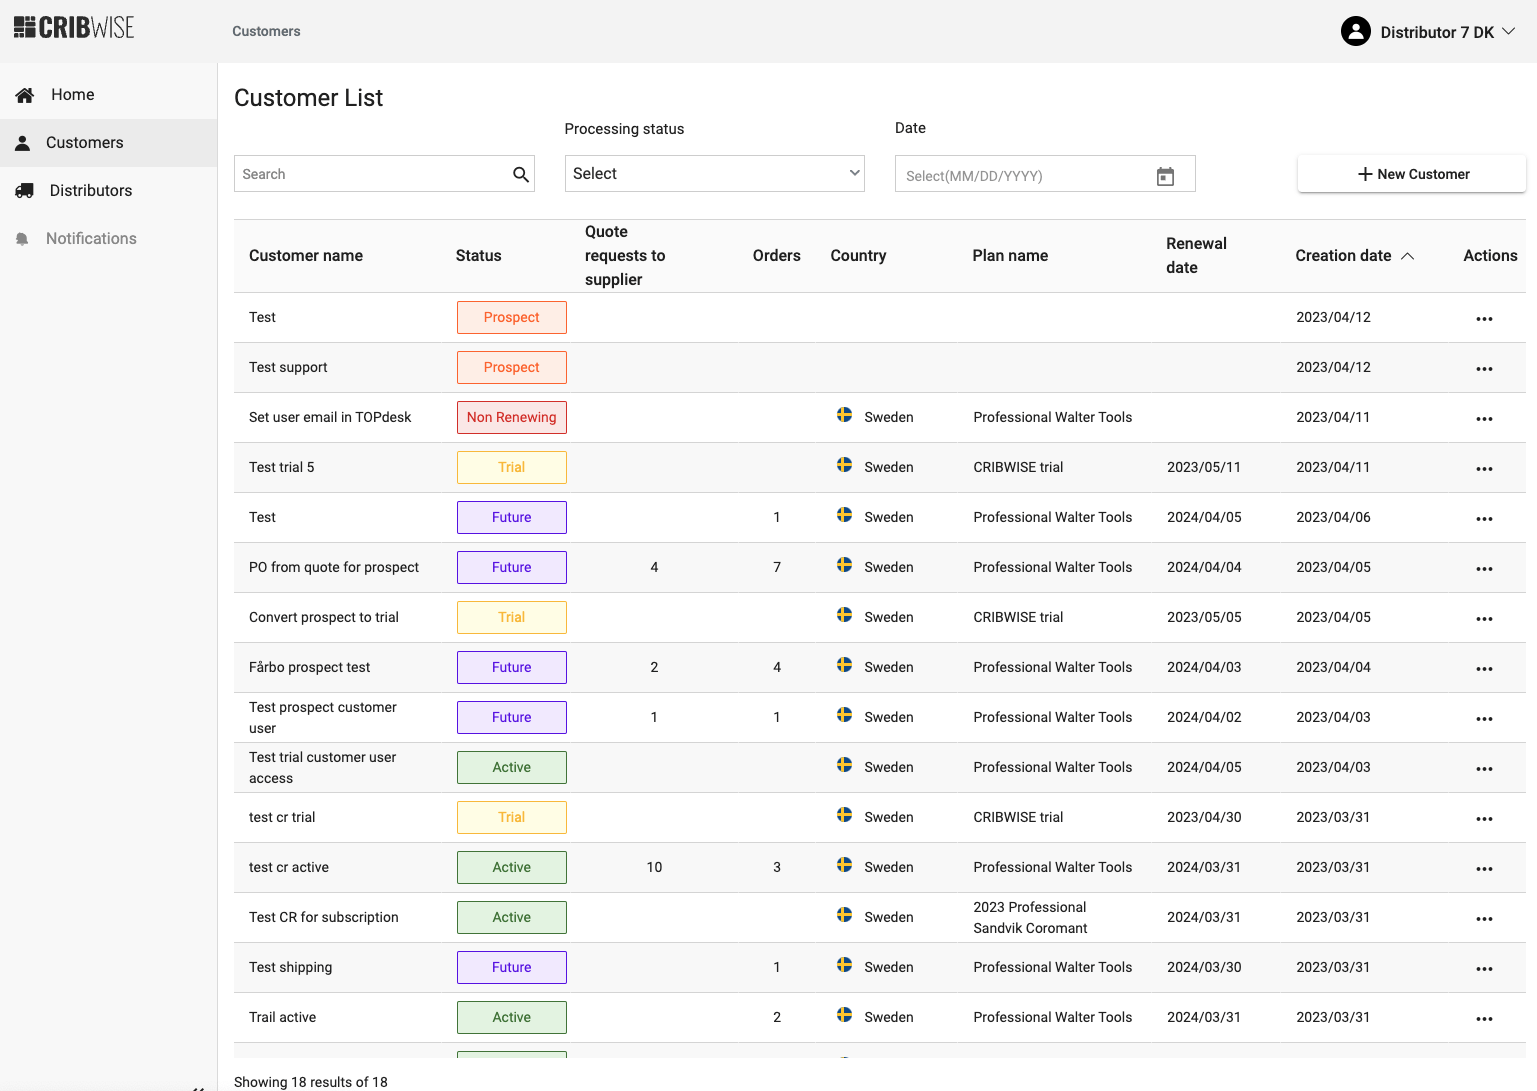
The customer list shows every customer you are allowed to manage.
Step 2 — Open the customer overview
- In the Details section on the right, select Customer overview.
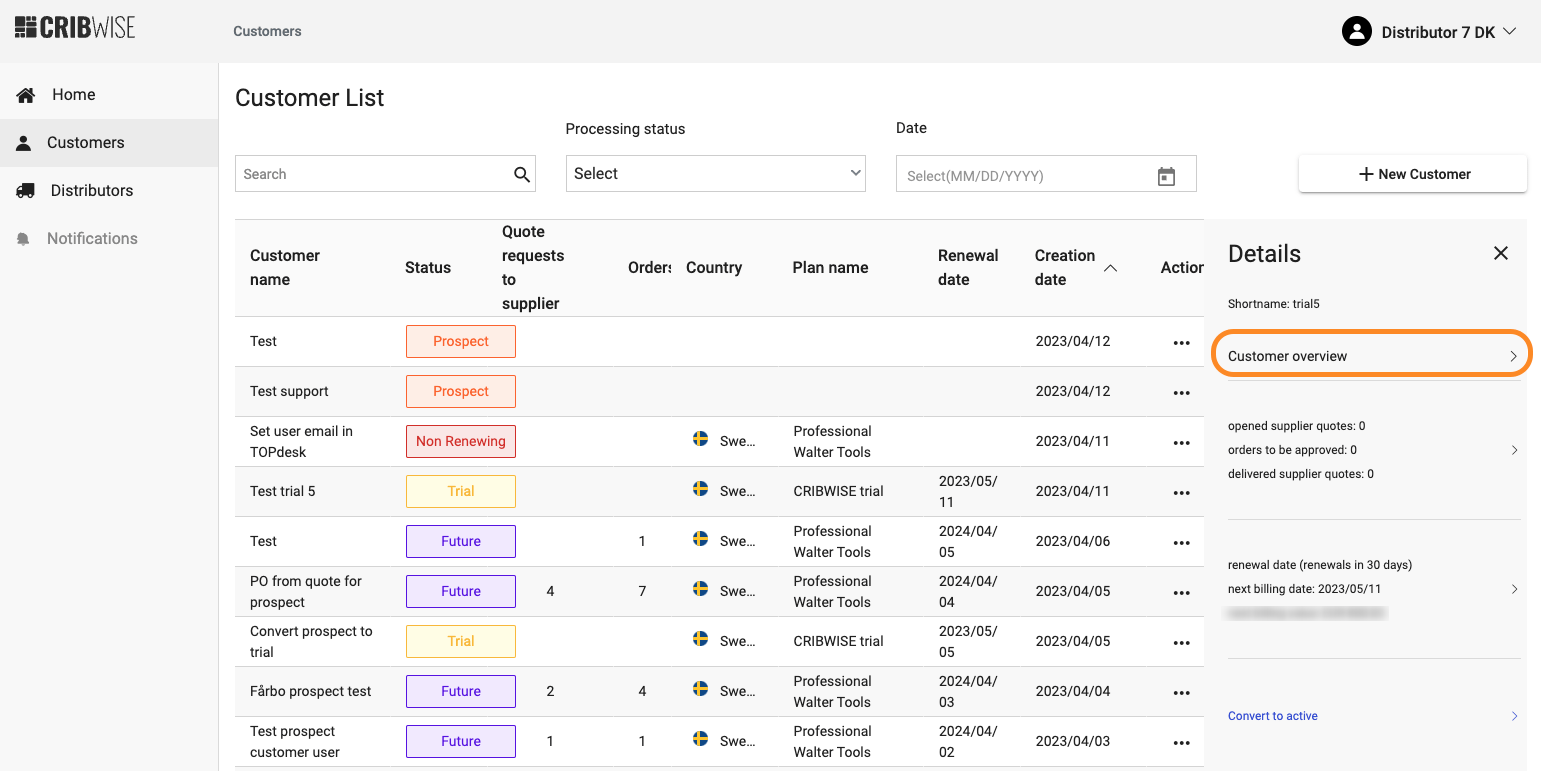
Customer overview is the entry point to everything else in this guide.
The overview opens first. It holds the account details (short name, ID), API keys, quote statistics, and useful links.
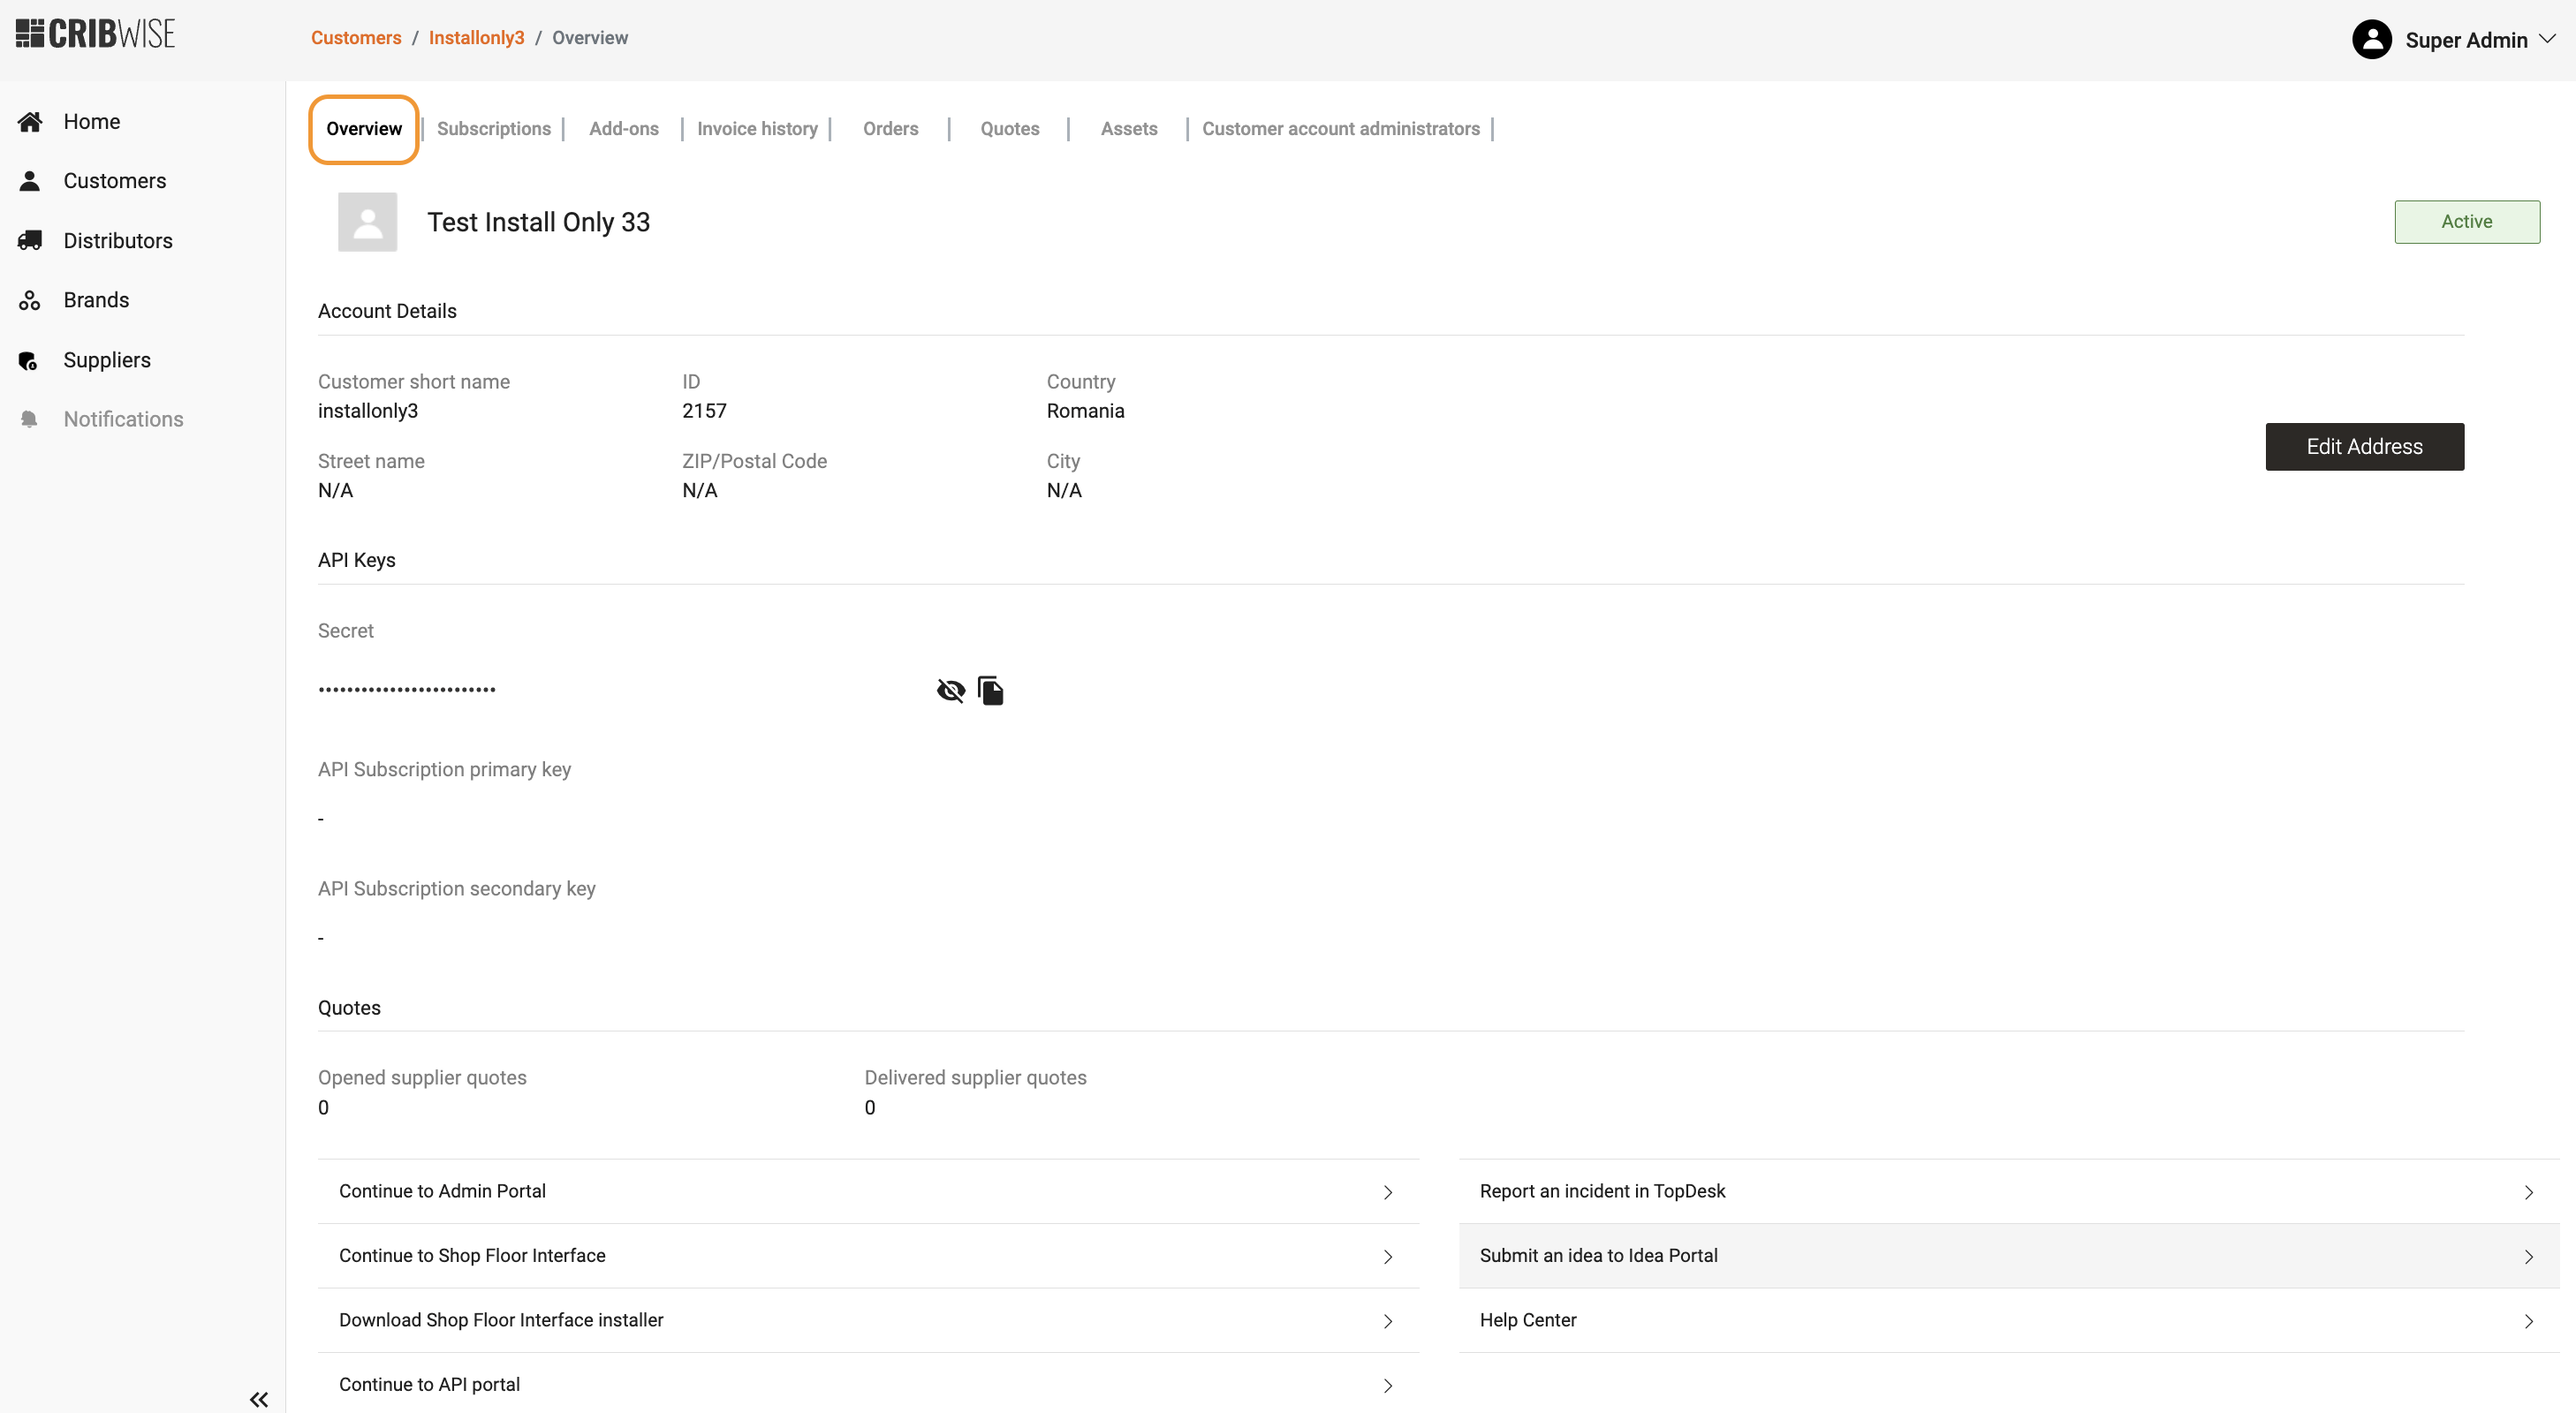
The customer overview: account details, API keys, statistics, and links.
Tip: To turn a trial or prospect into a paying customer, use Convert to active on the Subscription tab. See Convert a trial or prospect account to an active account.
Change the subscription quantity
The subscription detail shows how many main devices the customer has created and how many the current plan covers.
Step 1 — Open the subscription
- Open the Subscription tab on the customer overview.
- Select Update subscription.
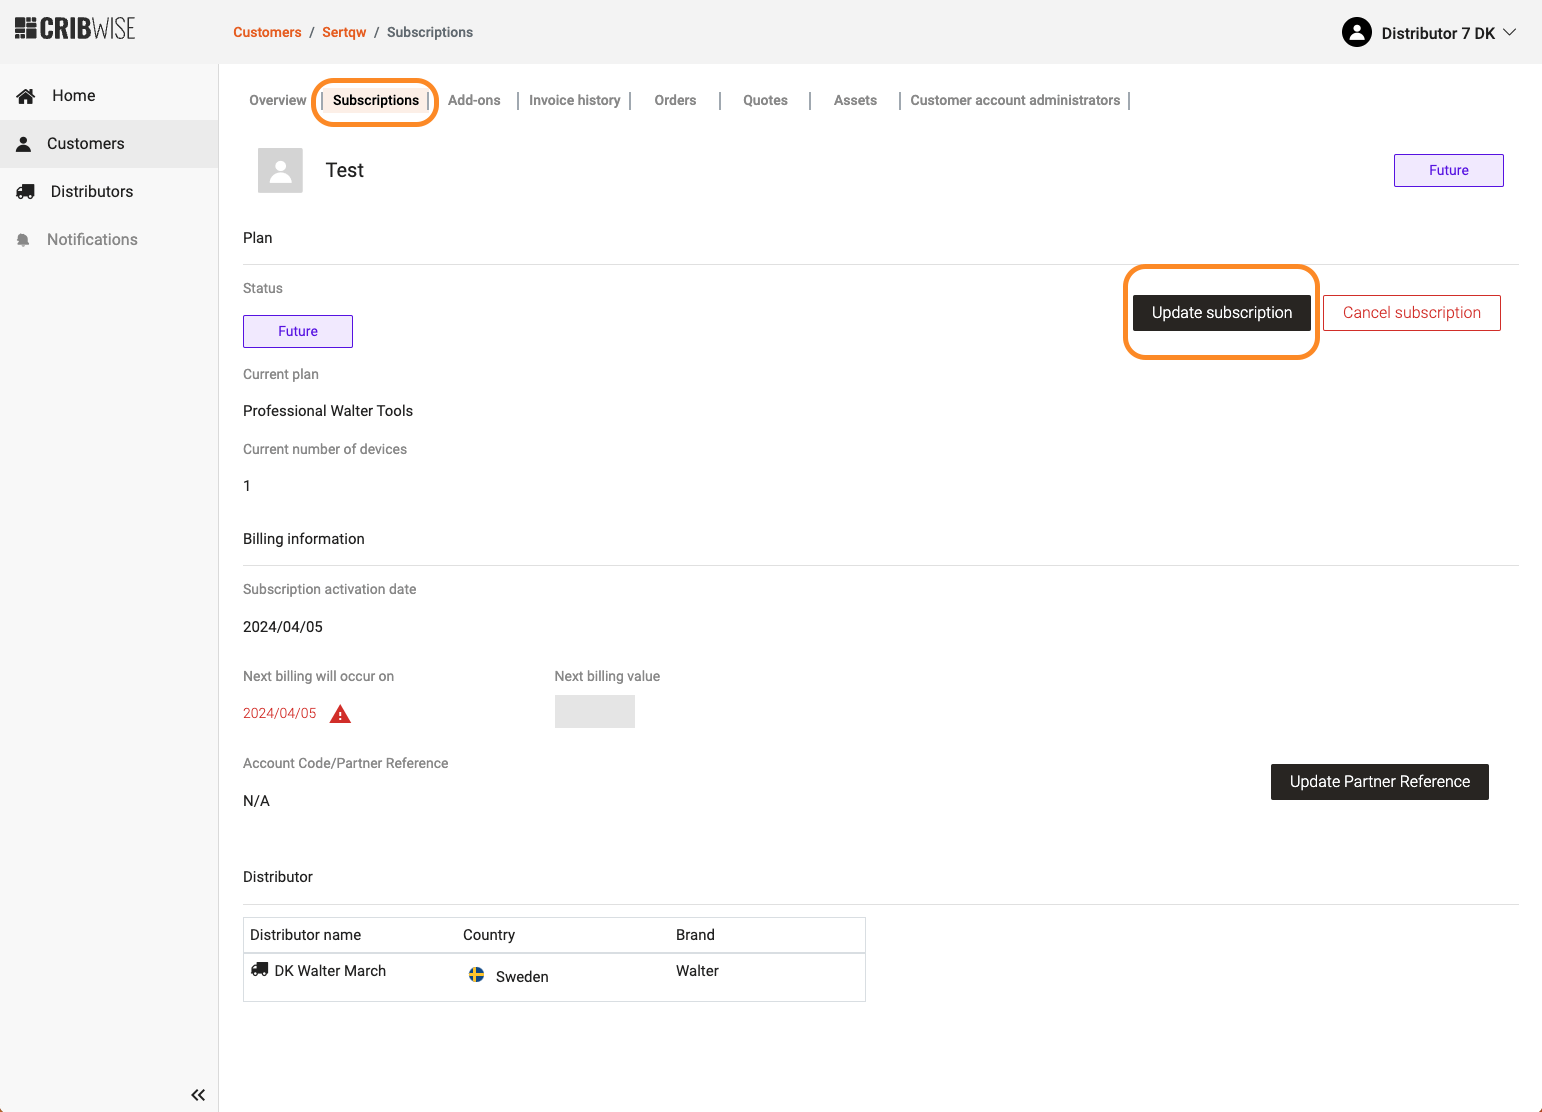
Compare devices created against devices on the plan before you change anything.
Step 2 — Set the new quantity
- Enter the new quantity in the pop-up.
- Confirm the change.
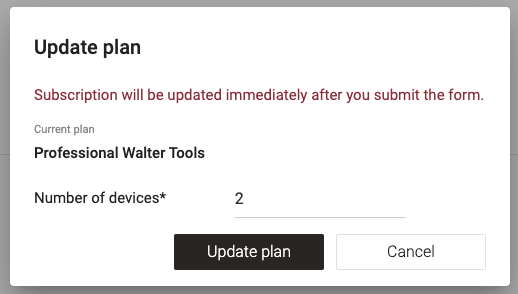
The quantity pop-up. This is the only place the plan quantity is changed.
Important: You cannot set the quantity below the number of devices already created in the Admin Portal — cloud or physical, it makes no difference. The customer has to delete a device in the Admin Portal before you can reduce the quantity.
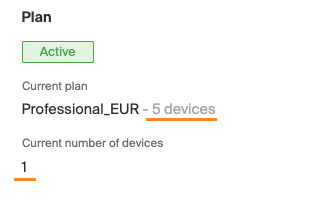
What you see when the new quantity is lower than the number of devices already created.
Success: The subscription shows the new quantity. An increase is invoiced immediately as the difference from today until the next billing date. From the next billing date onwards, a full year’s license is invoiced.
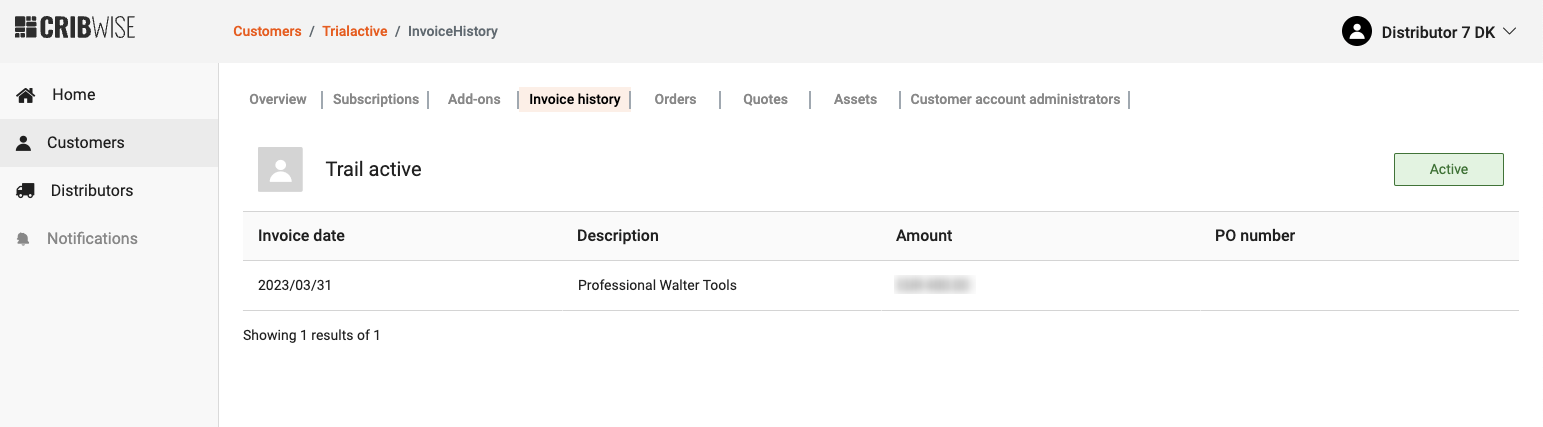
The resulting charge appears in the Invoice history tab.
Note: Quantity is the only thing you change here. To move a customer between plans — for example Starter to Professional — contact help@cribwise.com.
Subscription statuses
Every subscription has one of these statuses. You see it in the customer list and on the Subscription tab.
| Status | What it means | What you can do |
|---|---|---|
 |
A potential customer without an active plan. Prospects are created during the quote flow. | Select Convert to active on the Subscription tab. |
 |
A free trial with an end date. When the trial expires, the status becomes Disabled. | Select Convert to active at any time before the trial expires. |
 |
The Admin Portal works, but billing has not started yet. The billing start date targets the installation date, or the hardware delivery date when a device or an installation add-on was ordered with the subscription. | Nothing — the future start date cannot be changed from app.cribwise.com. |
 |
A running, billed subscription. | Change the plan quantity up or down. To cancel, select Cancel subscription on the Subscription tab — the status becomes Non Renewing. |
 |
Cancelled, but still running. The customer keeps using the system as normal until the subscription’s expiry date. On that date the status becomes Cancelled. | Activate the subscription again at any time before the expiry date. |
 |
The subscription has ended. A Non Renewing subscription becomes Cancelled on its expiry date. | Select Convert to active and fill in the form again, up to 270 days from the day Cancel subscription was selected. Time spent as Non Renewing counts towards the 270 days. |
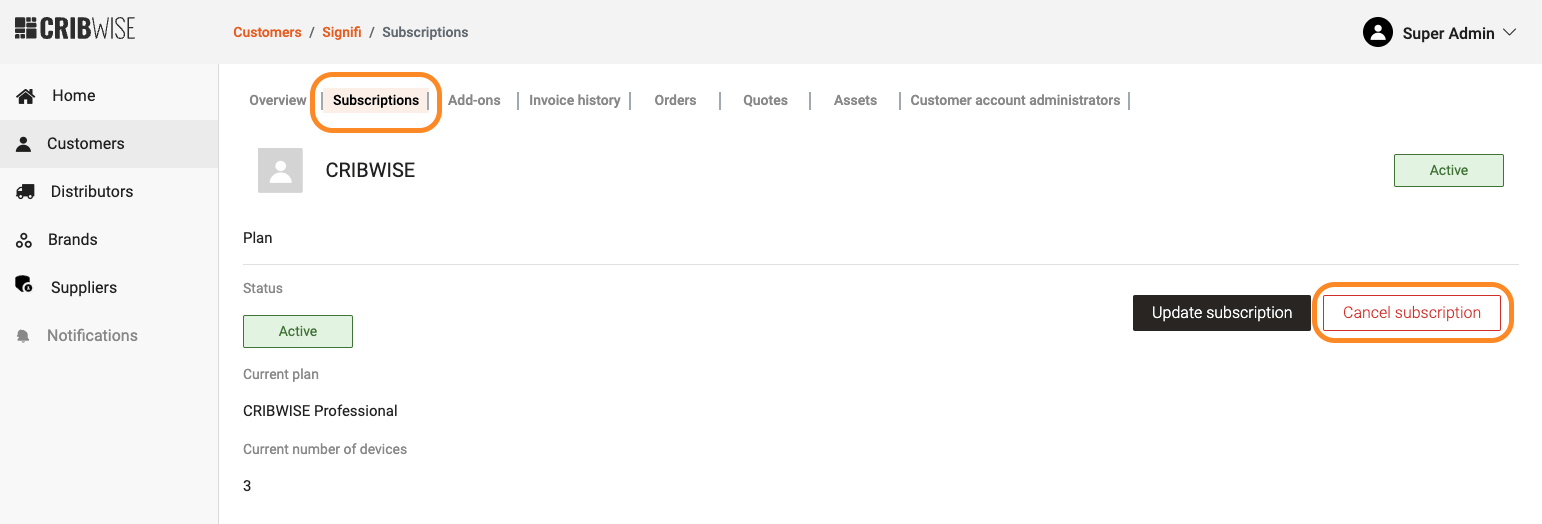
Cancel subscription sits on the Subscription tab of an active account.
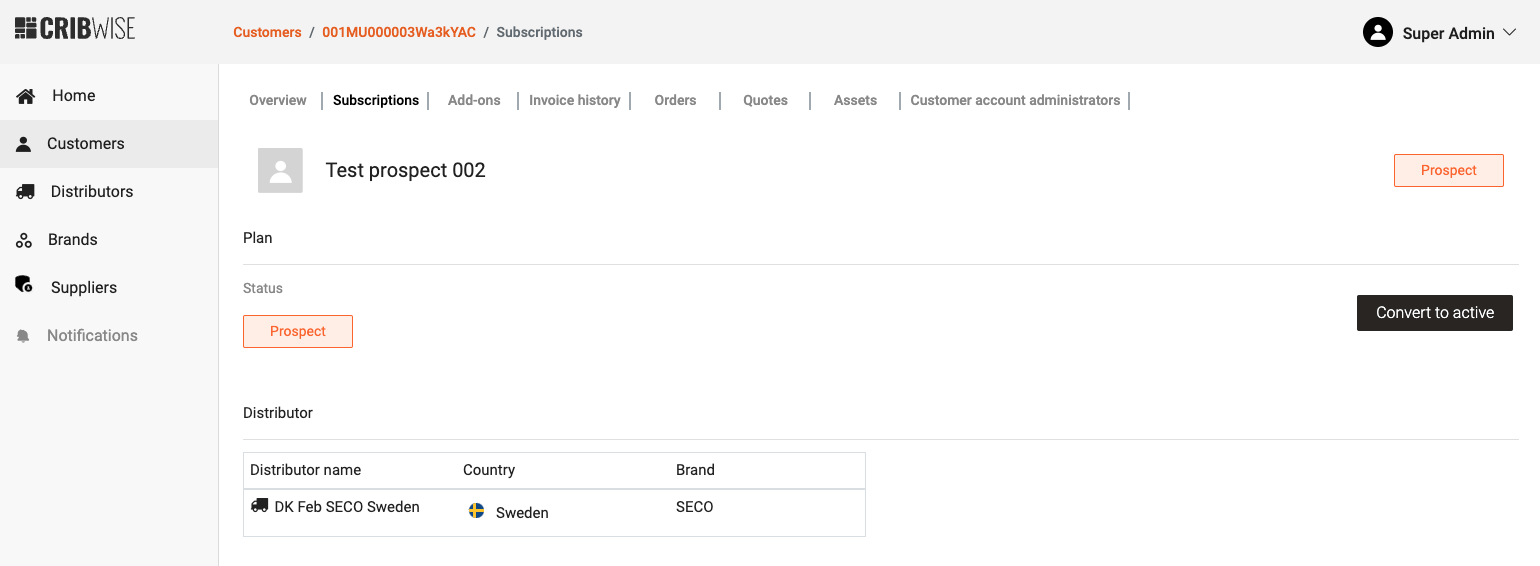
Convert to active on a prospect account. See How to place a purchase order in CMP (distributors) for the quote and purchase order flow.
Buy or remove add-ons
The Add-ons tab in the subscription menu holds the customer’s recurring and one-time add-ons.
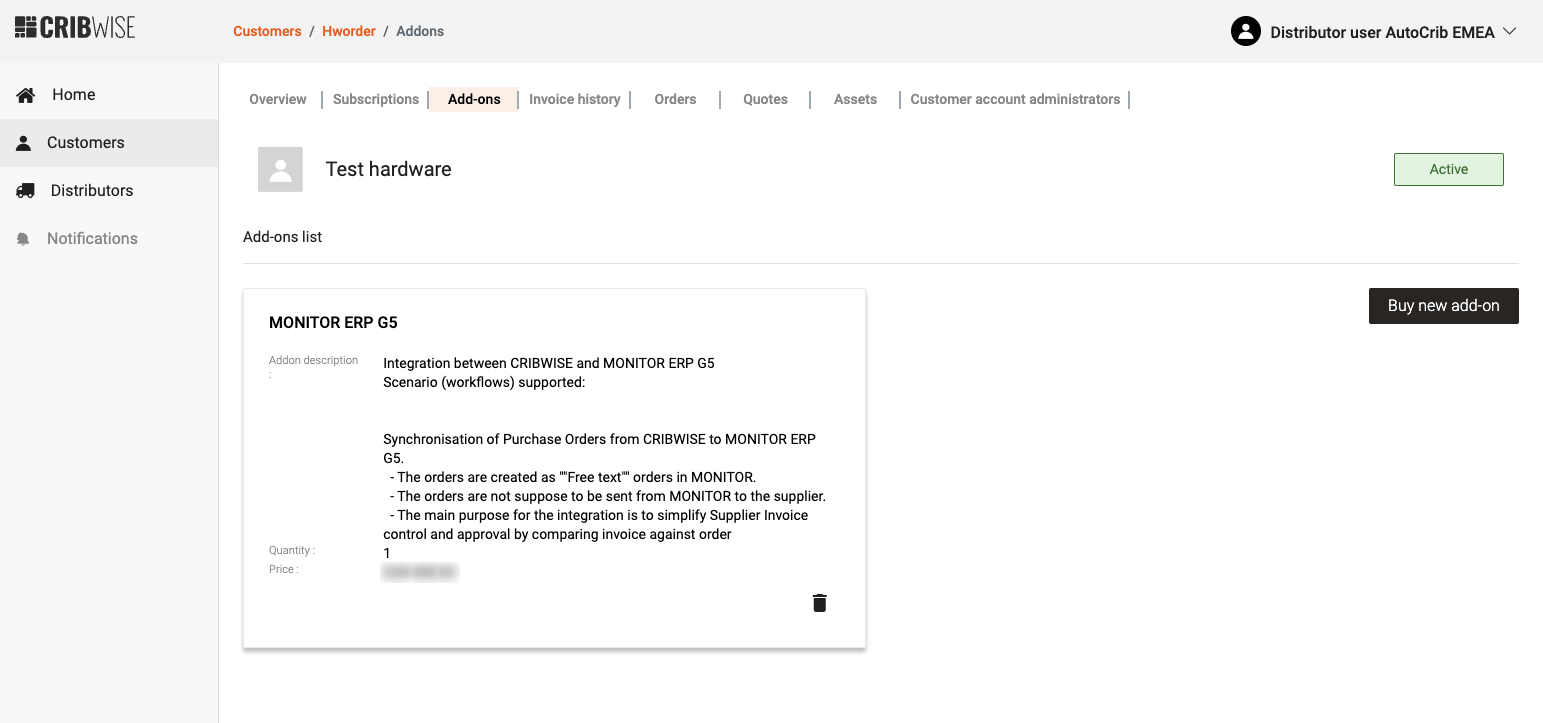
Recurring add-ons are always listed here. One-time add-ons appear only in the Invoice history tab.
Buy a new add-on
- On the Add-ons tab, choose to buy a new add-on. The order flow opens.
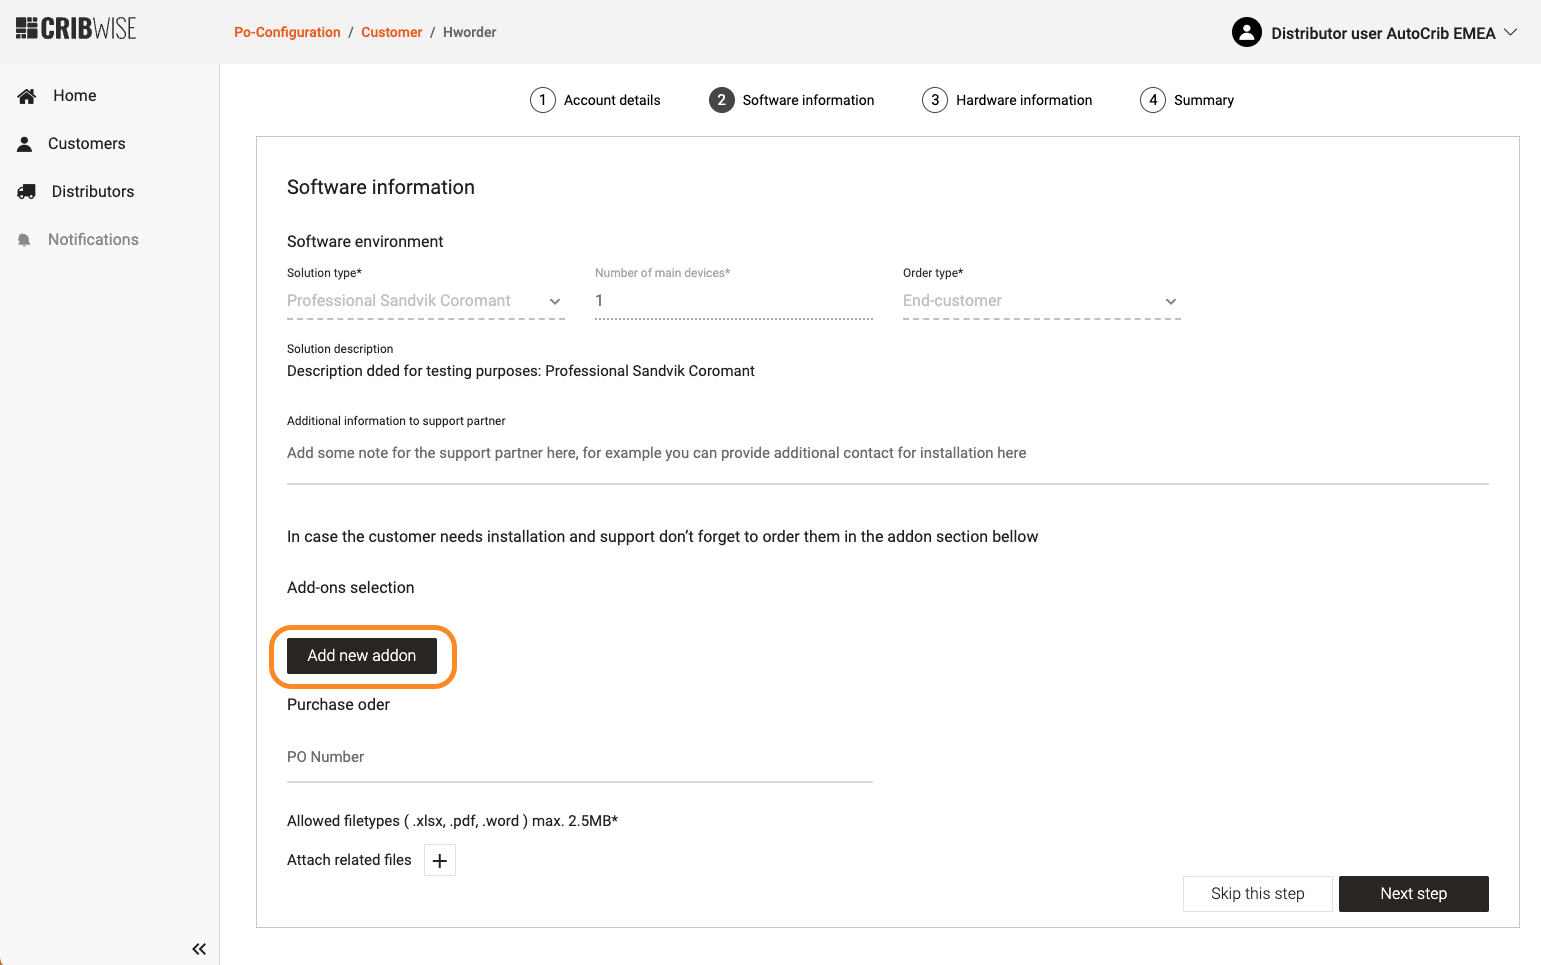
The same order flow also lets you add a hardware order, or skip that step.
- Select Add new add-on and pick an add-on from the drop-down.
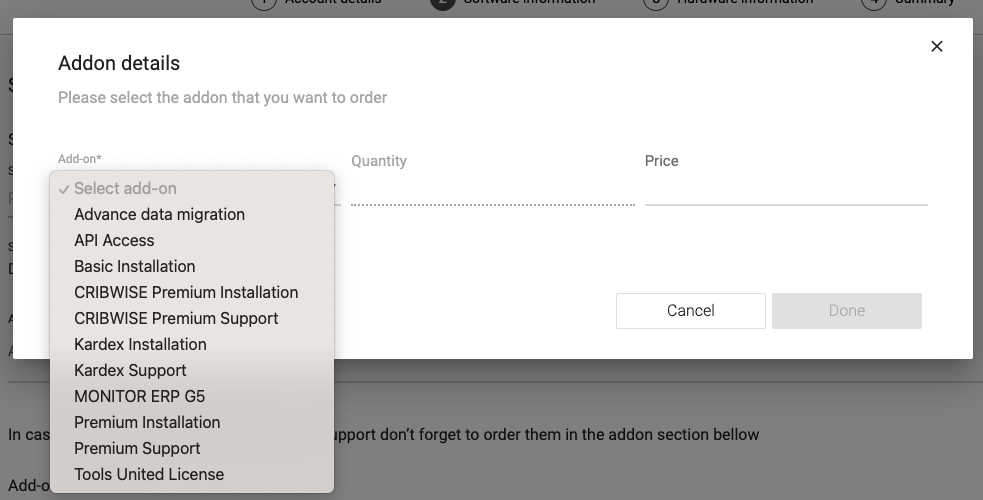
The available add-ons come from your distributor settings, set up in CMP by the CRIBWISE team.
| Add-on type | How it is charged |
|---|---|
| Recurring | A regular fee each period |
| One time fee | A single charge |
| One time set-up fee and recurring charge | A single set-up charge plus a regular fee |
An add-on can be quantity dependent. If it is not, the Quantity field is greyed out.
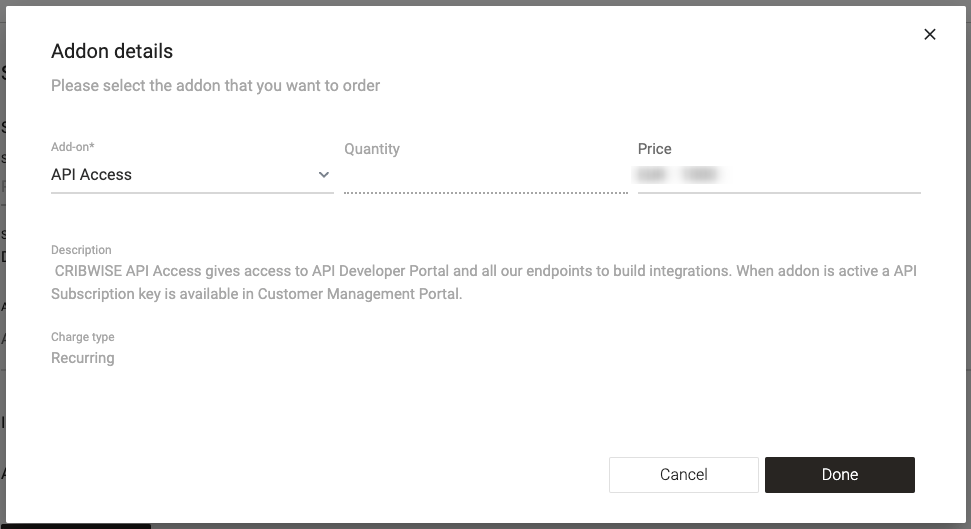
A greyed-out Quantity field means the add-on is not quantity dependent.
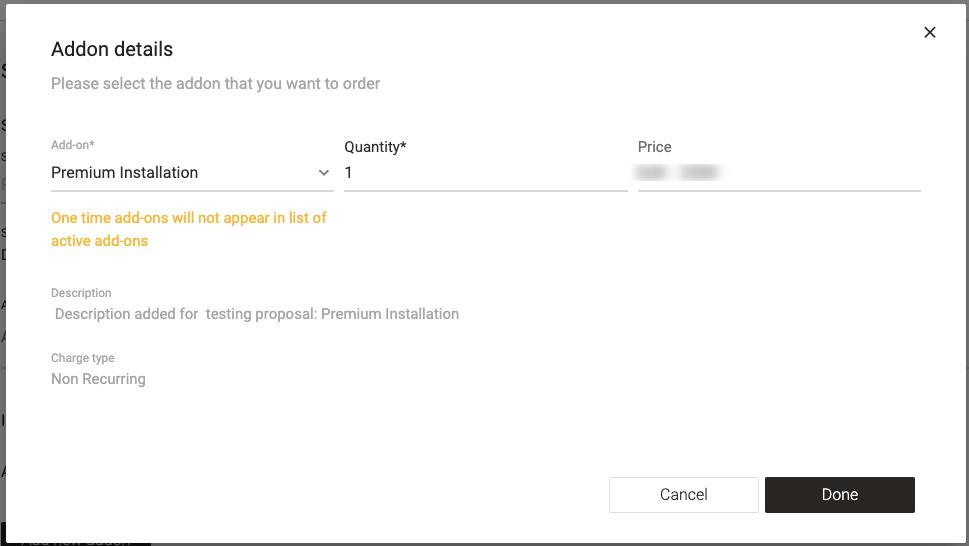
One-time add-ons are marked in the selection list. They will not appear in the add-ons list afterwards.
- Check the price and description, then confirm the selection.
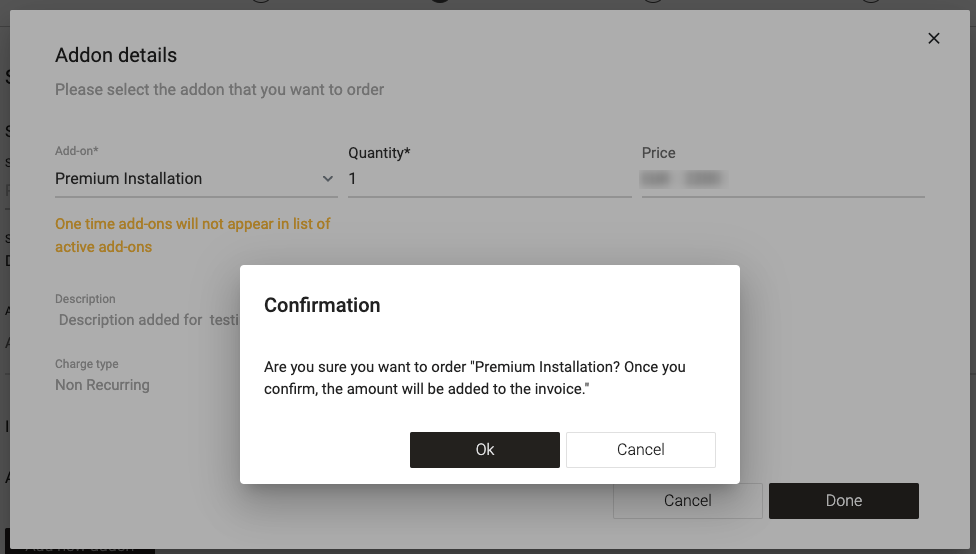
You must confirm the selection for the add-on to be ordered.
Success: The add-on is ordered. A recurring add-on creates a prorated charge from the day it was added until the next billing date, and is part of regular subscription invoicing from then on.
Remove an add-on
- On the Add-ons tab, select the trash can next to the recurring add-on.
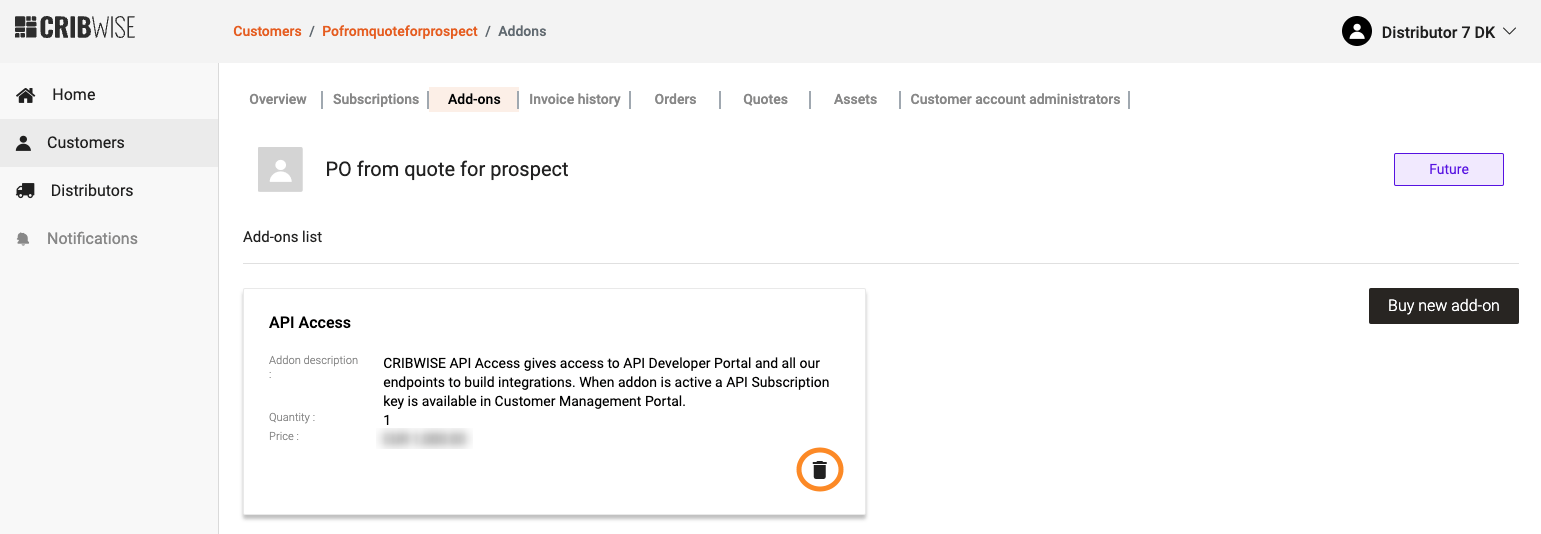
Only recurring add-ons can be removed. One-time add-ons are already charged.
- Confirm the removal.
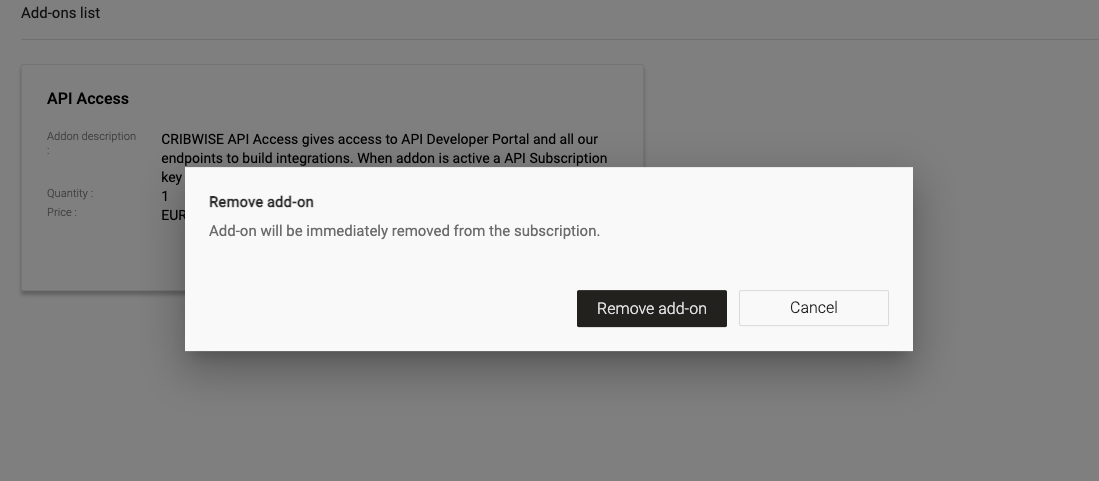
Confirm carefully — the service stops as soon as the removal is confirmed.
Warning: Any service or feature connected to the add-on stops working once the removal is confirmed.
Check the invoice history
The Invoice history tab lists all charges for the customer, both recurring and one-time.
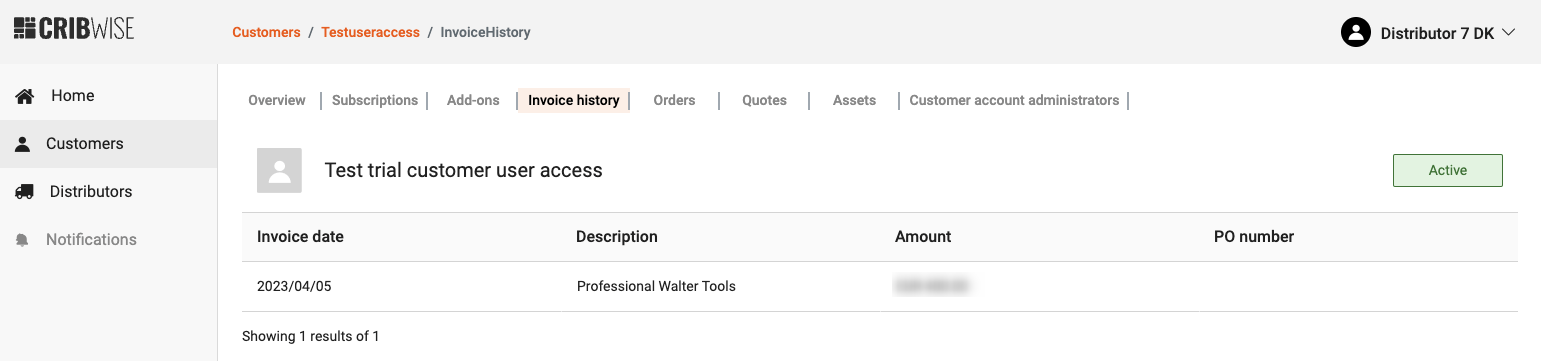
For customers managed through a distributor, the tab also shows the invoice partner for the account.
| Situation | What you see |
|---|---|
| Subscription in Future status | No invoices — there are none until the subscription is active |
| One-time charge not yet invoiced | Not visible in CMP until it has been invoiced |
| Customer managed through a distributor | The invoice partner for the account is shown |
| Signed in as an end customer account administrator | The tab is hidden, and subscription changes are not possible |
Next steps
- Activate a trial or prospect — see Convert a trial or prospect account to an active account.
- Update the customer’s administrators — see How to manage customer account administrators (distributors).
- Order hardware for the customer — see How to place a purchase order in CMP (distributors).
Troubleshooting
| Problem | Likely cause | Fix |
|---|---|---|
| You cannot lower the subscription quantity | The new quantity is below the number of devices already created in the Admin Portal | Have the customer delete the surplus devices in the Admin Portal first, then reduce the quantity |
| The Invoice history tab is empty | The subscription is in Future status, so no invoices exist yet | Wait until the subscription becomes active. One-time charges also stay hidden until invoiced |
| A one-time add-on is missing from the add-ons list | Only recurring add-ons stay in the list | Look for it in the Invoice history tab instead |
| The Quantity field is greyed out on an add-on | That add-on is not quantity dependent | Nothing to fix — order it as a single unit |
| You cannot change the plan from Starter to Professional | Plan changes are not self-service in CMP | Contact help@cribwise.com |
| The billing start date is wrong on a Future subscription | The date follows the installation or hardware delivery date set at order time | It cannot be changed from app.cribwise.com — contact the CRIBWISE team |
Related articles
- How to create a customer account (distributors) — the full signup flow for a new trial or active account.
- How to manage customer account administrators (distributors) — add and manage the customer’s administrators.
- How to place a purchase order in CMP (distributors) — the quote and purchase order flow.
- How to request a quote from a supplier (distributors) — where prospects are created.
- Understanding the hardware supplier flow (distributors) — what happens after a hardware order is placed.
- How to manage users in the Customer Management Portal (CMP) — CMP roles and permissions.