Read time: ~3 minutes
Applies to: Admin Portal
What you can do
Grant temporary access to support partners so they can investigate issues in your Admin Portal and Shop Floor Interface. Access is time-limited and revoked automatically when the period expires.
Before you start
- You need an administrator account with access to the Access control tab in System settings.
- Decide how long the support partner needs access (forever, 1 hour, or 24 hours).
Important: The support access login and password are only shown once. Copy them before closing the panel — the password is masked when you return to the page.
Quick start
Experienced users — grant support access in 5 steps:
- Go to Administration > System settings.
- Click the Access control tab.
- Click Set up support access under “Access for support partners”.
- Select a time period from the dropdown and click Save.
- Copy the login and password and share them with your support contact.
Need more detail? Follow the full steps below.
Steps
Step 1 — Open system settings
- In the left sidebar, click Administration (1) to expand the menu.
- Click System settings (2).
The System settings page opens with the General tab selected.
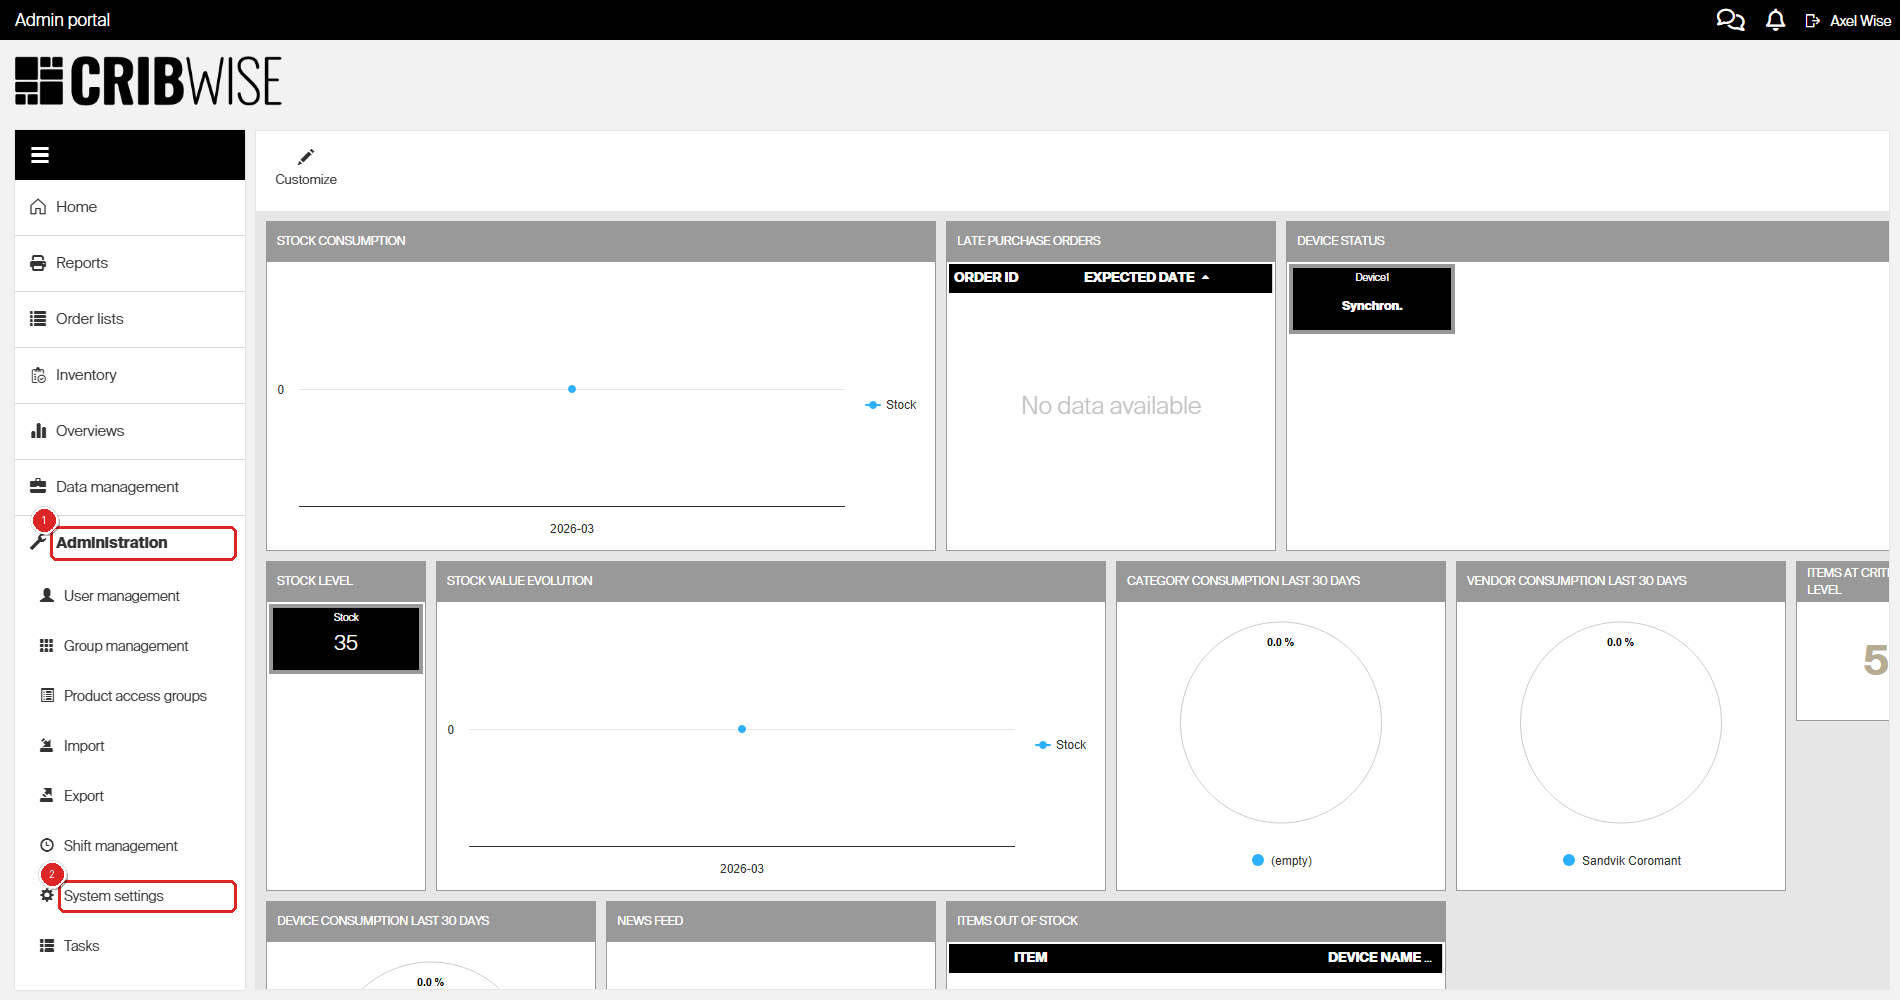
Click (1) Administration to expand the menu, then (2) System settings.
Step 2 — Go to the access control tab
- Click the Access control tab (1).
The page shows sections for password rules, user data retention, access for account administrators, access for support partners, and single sign-on.
Step 3 — Open the support access panel
- Under Access for support partners, click Set up support access (2).
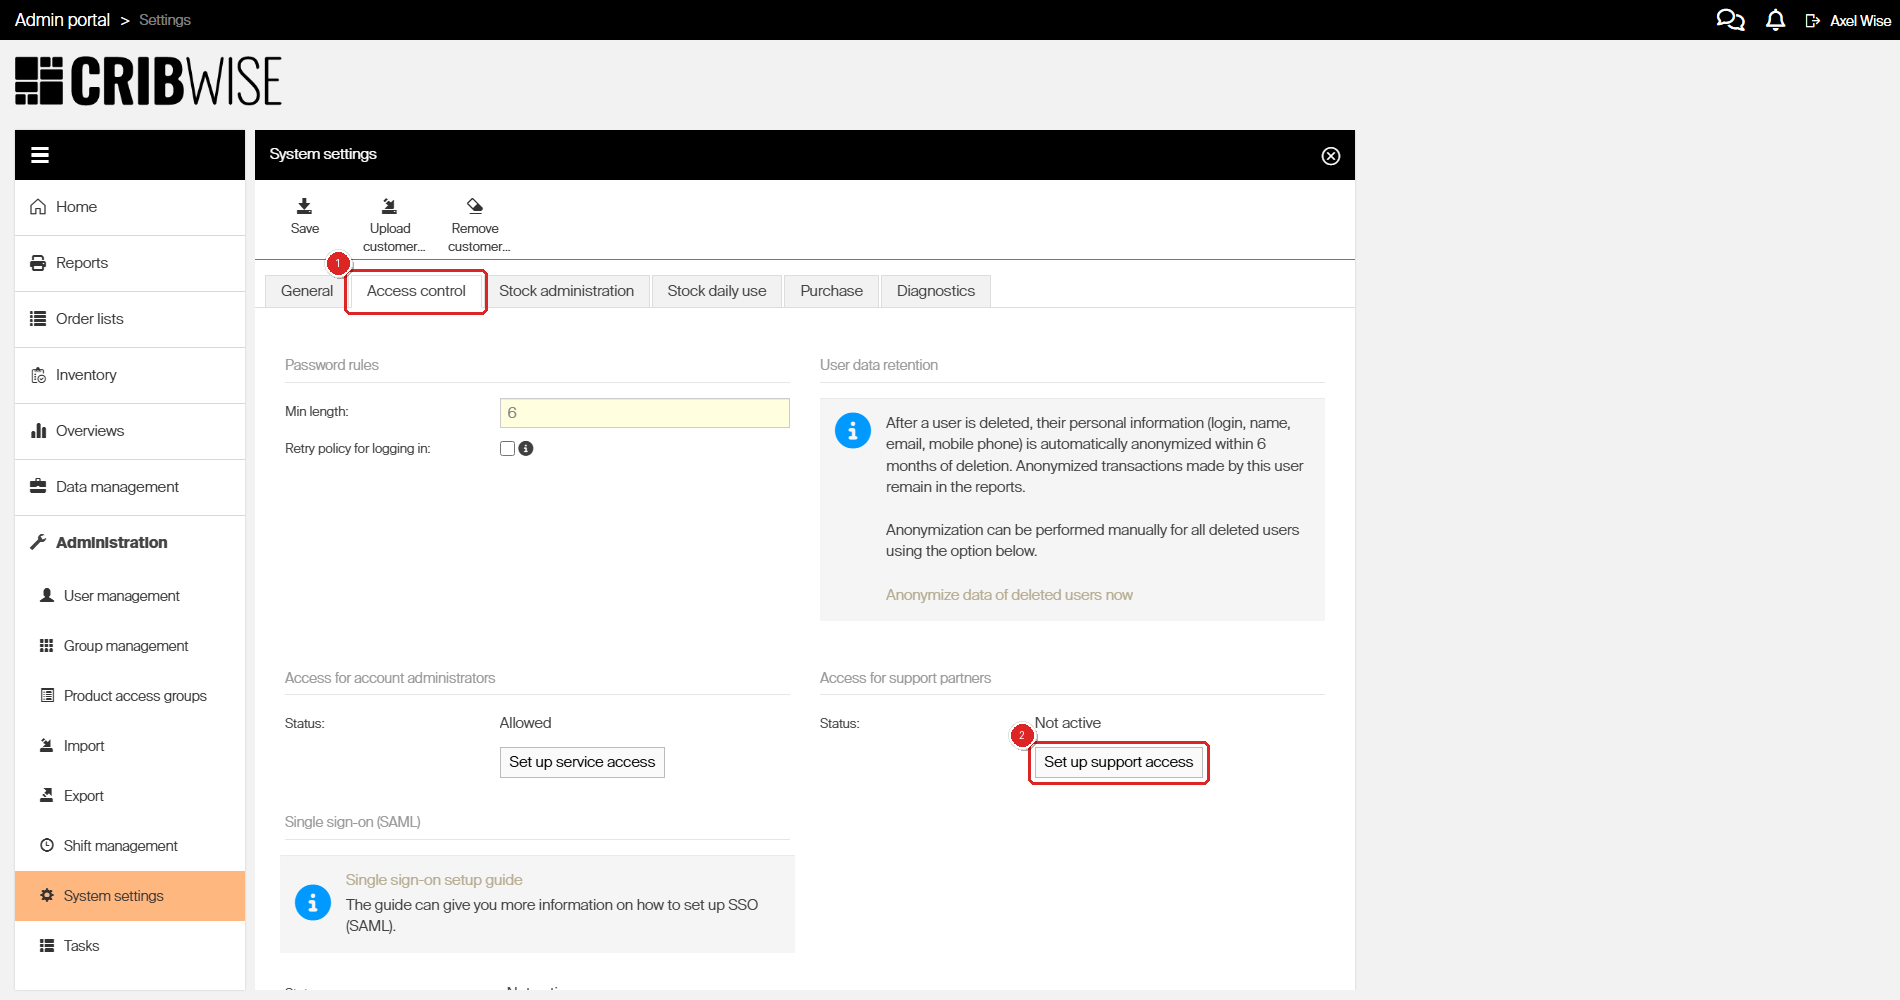
On the Access control tab, click (1) Access control, then (2) Set up support access under the support partners section.
Important: Support partners access provides full administrator access to AP and SFI for given time period. Access will be revoked automatically after that period.
Step 4 — Select a time period and save
- From the Set up support access dropdown (1), select a duration (for example, forever, for 1 hour, or for 24 hours).
- Click Save (2).
CRIBWISE generates temporary credentials and displays them in the panel.
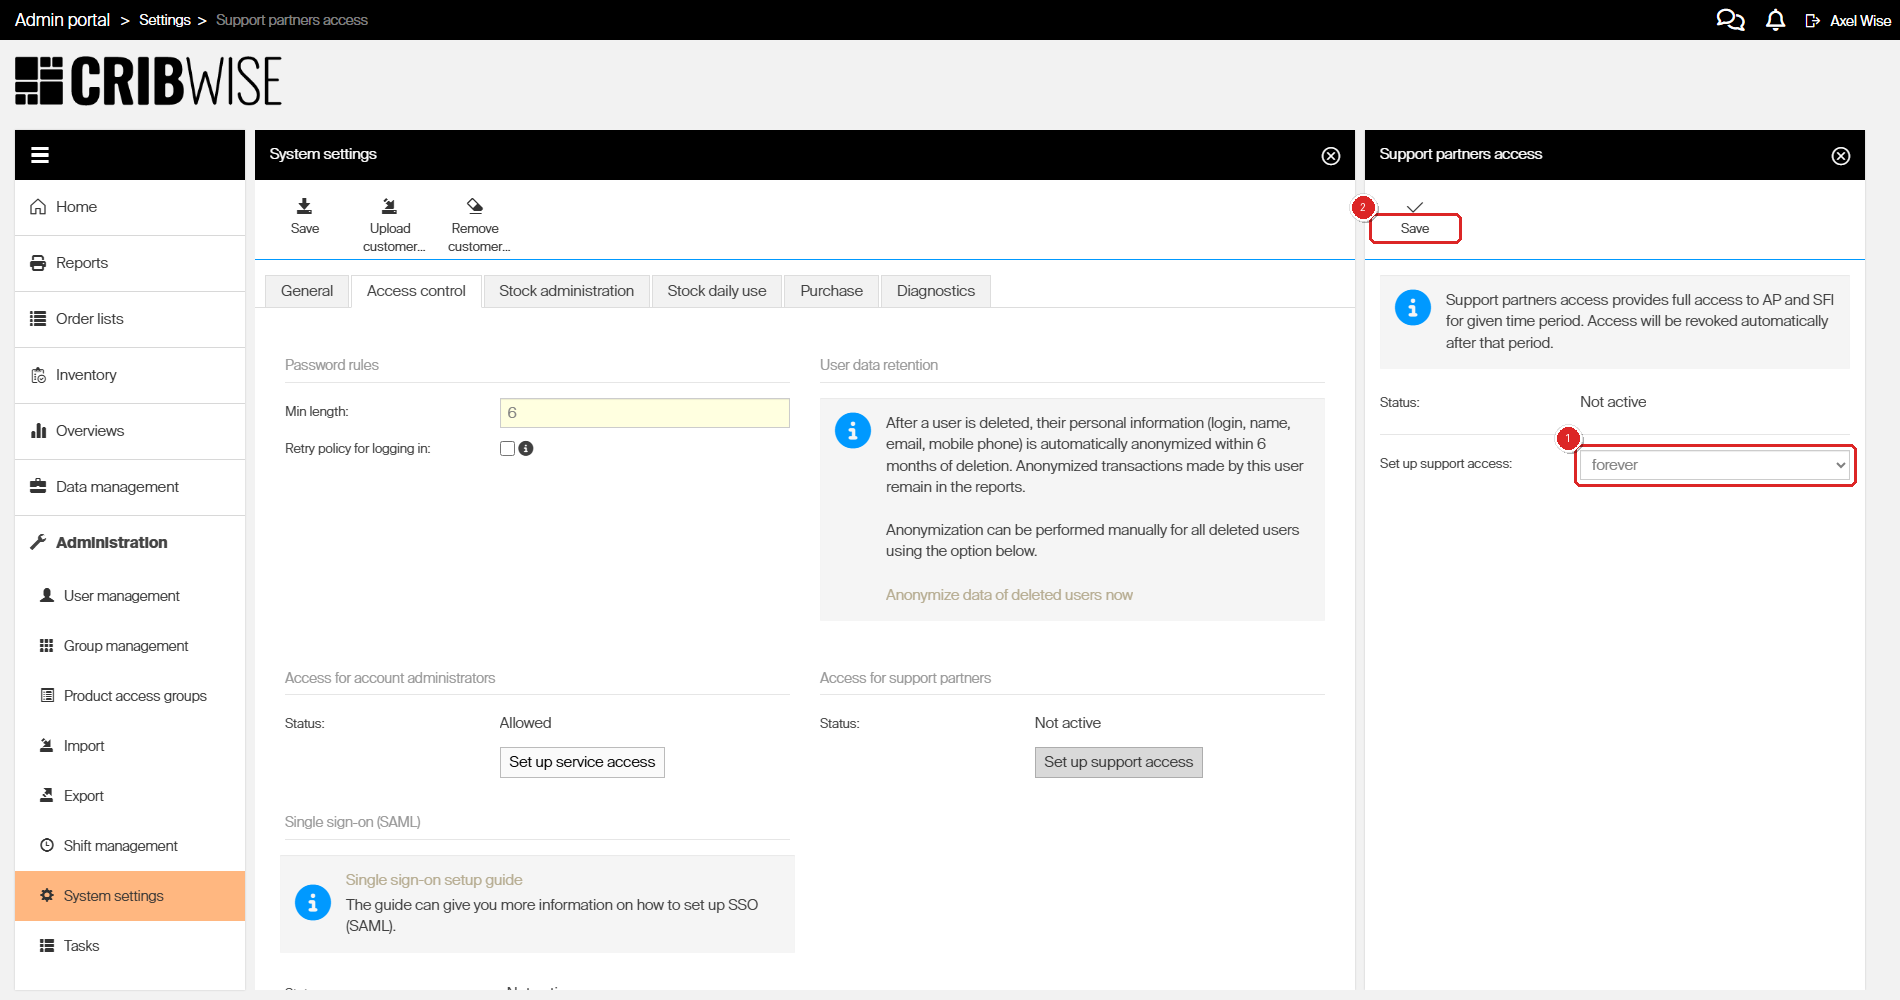
Select (1) a duration from the dropdown, then click (2) Save.
Step 5 — Copy and share the credentials
- Copy the Support access login and Support access password (1) using the copy buttons next to each field.
- Share the credentials with your support partner through a secure channel.
The panel now shows:
- Status — “Allowed” with the expiry information.
- Support access login — a numeric login.
- Support access password — a numeric password.
- Disable (2) — revoke access immediately before the time period expires.
- Create new password — generate a new password without changing the expiry.
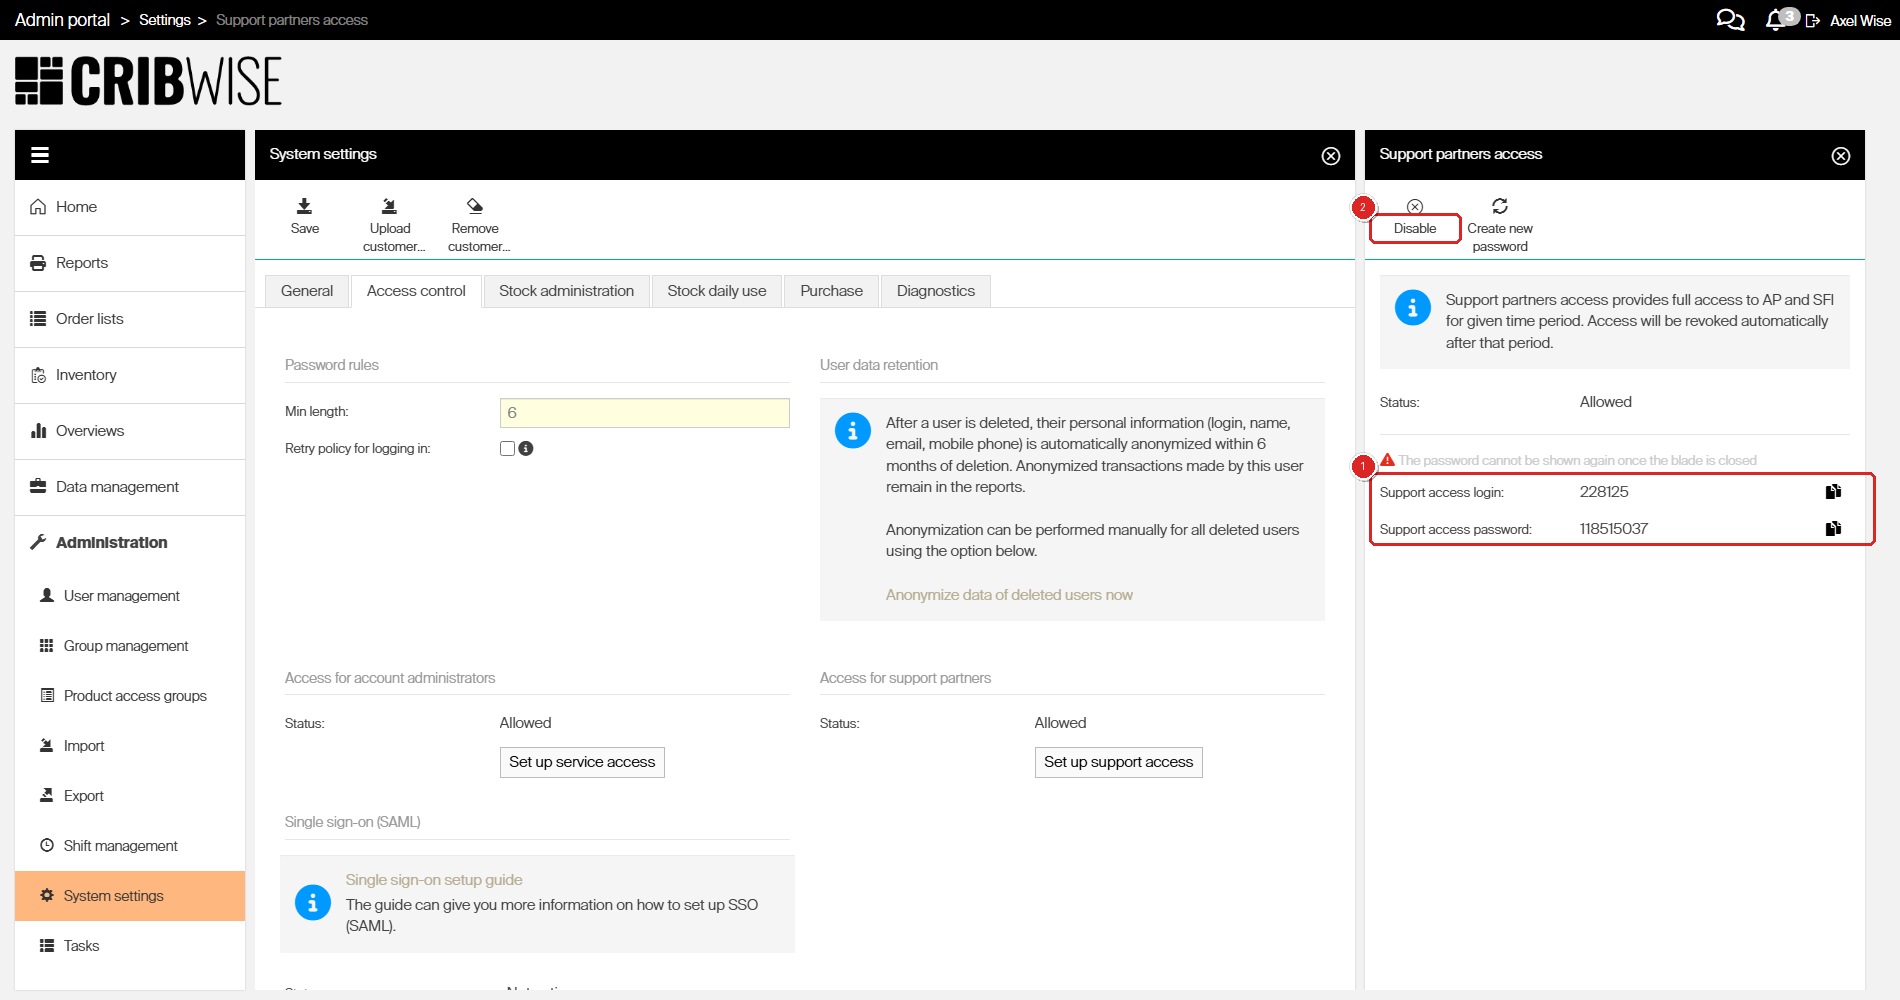
After saving: (1) copy the login and password, and use (2) Disable to revoke access early if needed.
Warning: The password is only visible while the Support partners access panel is open. If you exit the page and return later, the password is masked and cannot be retrieved. You would need to click Create new password to generate a new one.
Success: The status under “Access for support partners” changes to Allowed. Your support partner can now log in using the generated credentials.
Next steps
After completing this task:
- Monitor the expiry — access is revoked automatically when the time period ends. No action needed.
- Revoke early if needed — open the Support partners access panel and click Disable to end access before the timer expires.
Troubleshooting
| Problem | Likely cause | Fix |
|---|---|---|
| “Set up support access” button is not visible | Your user group does not have access to the Access control tab in System settings. | Ask an administrator to grant your group the AP System Settings — Access control privilege. |
| Forgot to copy the password before closing the panel | The password is masked after you leave the page. | Go back to System settings > Access control, click Set up support access, and click Create new password to generate a new one. |
| Support partner says the credentials are not working | The access period may have expired, or the password was regenerated. | Check the status in the Access control tab. If expired, set up a new access period. If active, click Create new password and share the new credentials. |
| Need to extend access beyond the selected time | There is no option to extend an active session. | Wait for the current period to expire (or disable it), then set up a new access period with a longer duration. |