What you can do
Install on-premise to run the Admin Portal (AP) and Shop Floor Interface (SFI) as a fully offline solution on your own server. This guide walks you through generating the hardware key, applying your license file, and configuring the server, database, email, and proxy in the Application Manager.

The Application Manager runs the on-premise installation, starting with the hardware key.
Before you start
- You need a Windows server that meets the minimum requirements below, plus access to your reseller, support partner, or the Customer Management Portal (CMP) to obtain a license file.
- The license file is hardware-bound and cannot be transferred between servers. It is generated from this server’s unique hardware key.
- Have your local SMTP server details ready — on-premise installations need them to send order, report, and notification emails.
Minimum Admin Portal requirements
Hardware
- 2 CPUs @ 2 GHz (x64)
- 8 GB RAM
- 100 GB HDD storage
- 1 Gbps network
Software
- Windows Server 2016 or higher
- MS SQL Express 2014 LocalDB (included in installer)
- .NET Framework 4.6 (included in installer if not already present)
- Microsoft Visual C++ 2012 Redistributable (included in installer if not already present)
- MongoDB 3.2 (included in installer)
Network
- The SFI connects to the AP over HTTPS (44333) for data synchronization.
- The SFI connects to the AP over HTTP (80) to receive software updates.
Quick start
Experienced installers complete the setup in 6 steps:
- Generate the server hardware key in the Application Manager.
- Upload the hardware key in CMP and download the license file.
- Add the license file in the Application Manager and accept the terms.
- Set the Admin Portal server address.
- Configure SQL Server, MongoDB, SMTP, and the proxy as needed.
Steps
Step 1 – Generate the hardware key
- In the Application Manager, click Download hardware key (1) to generate the server’s unique hardware key.
- Submit the key to your reseller, support partner, or CMP to obtain your license file.
Click Download hardware key to generate the hardware key that binds your license to this server.
Important: The license file is hardware-bound. If you move the AP to a different server, you must re-generate the hardware key and the license file.
Step 2 – Get the license file from CMP
Note: If you are an end customer, you can skip this step. Your reseller handles it once you provide the hardware key.
- In CMP, open the Subscription tab (2).
- Click Update hardware key (3) and upload the hardware file.
- Click Download license file (4), save it, and transfer it to your server.
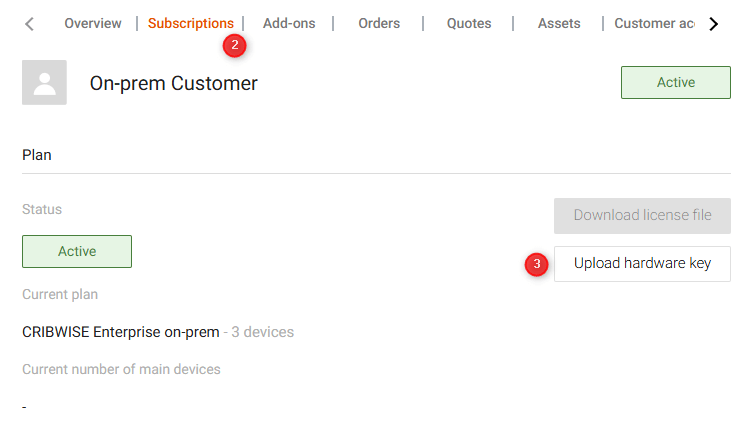
In CMP, upload the hardware key from the Subscription tab using Update hardware key.
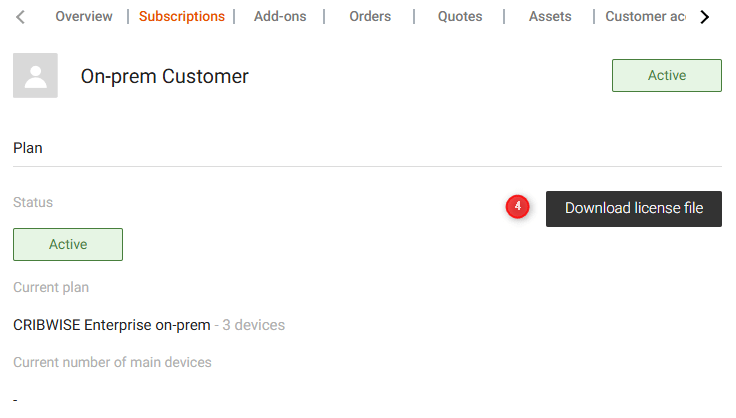
Click Download license file, then transfer the file to your Admin Portal server.
Note: The license file contains your customer configuration, device limits, add-ons, and renewal dates. Whenever devices or add-ons change, the license file must be re-generated to reflect them.
Step 3 – Add the license file in the Application Manager
- On the AP server, open the Application Manager and upload the license file (5).
- Review the subscription information (6) to confirm the features included in your license.
- Click Next to move through the installation settings.
- On the final page, select the Agree to Terms and Conditions checkbox before continuing.

The uploaded license file with the subscription information listing your included features.
Step 4 – Set the server address
- Enter the Admin Portal server address (8). It can be a URL or an IP.
This is the address that devices and the SFI connect to.

Enter the server address that the SFI and devices will use to reach the Admin Portal.
Step 5 – Configure SQL Server
By default, SQL runs on the same server as the AP. To use a custom SQL server instead, enter the credentials needed to connect to it.

Keep the default to run SQL on the AP server, or enter credentials for a custom SQL server.
Step 6 – Configure MongoDB
MongoDB stores all images and other documents. By default it runs on the Admin Portal server, but it can also point to a remote server.

Keep MongoDB on the AP server, or configure it to use a remote server.
Step 7 – Configure SMTP for outgoing emails
On-premise installations must use the local company’s SMTP server to send emails.
- Enter your local SMTP server details.
- If your server requires it, select Use secured connection (SSL/TLS).
Warning: If the SMTP fields are left empty or the credentials are wrong, no emails can be sent – including orders, reports, and notifications.
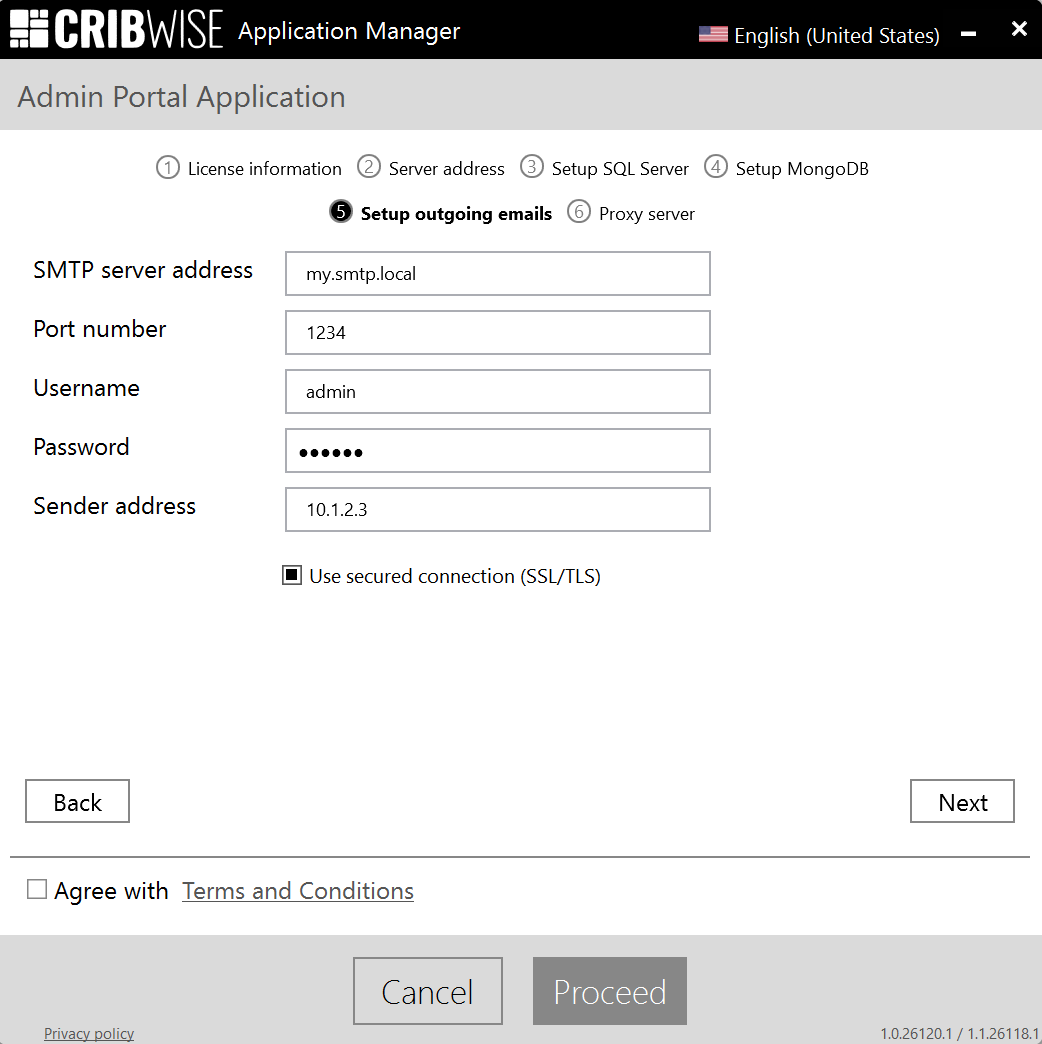
Enter the local SMTP server so the AP can send orders, reports, and notifications.
Step 8 – Configure the proxy server (optional)
By default, no proxy is used, and the Admin Portal does not use the proxy set in Windows. If your company requires a proxy:
- Set the proxy server, username, and password.
- To bypass the proxy for specific addresses, add them (IP or URL) in the exclusion box, separated with ;.
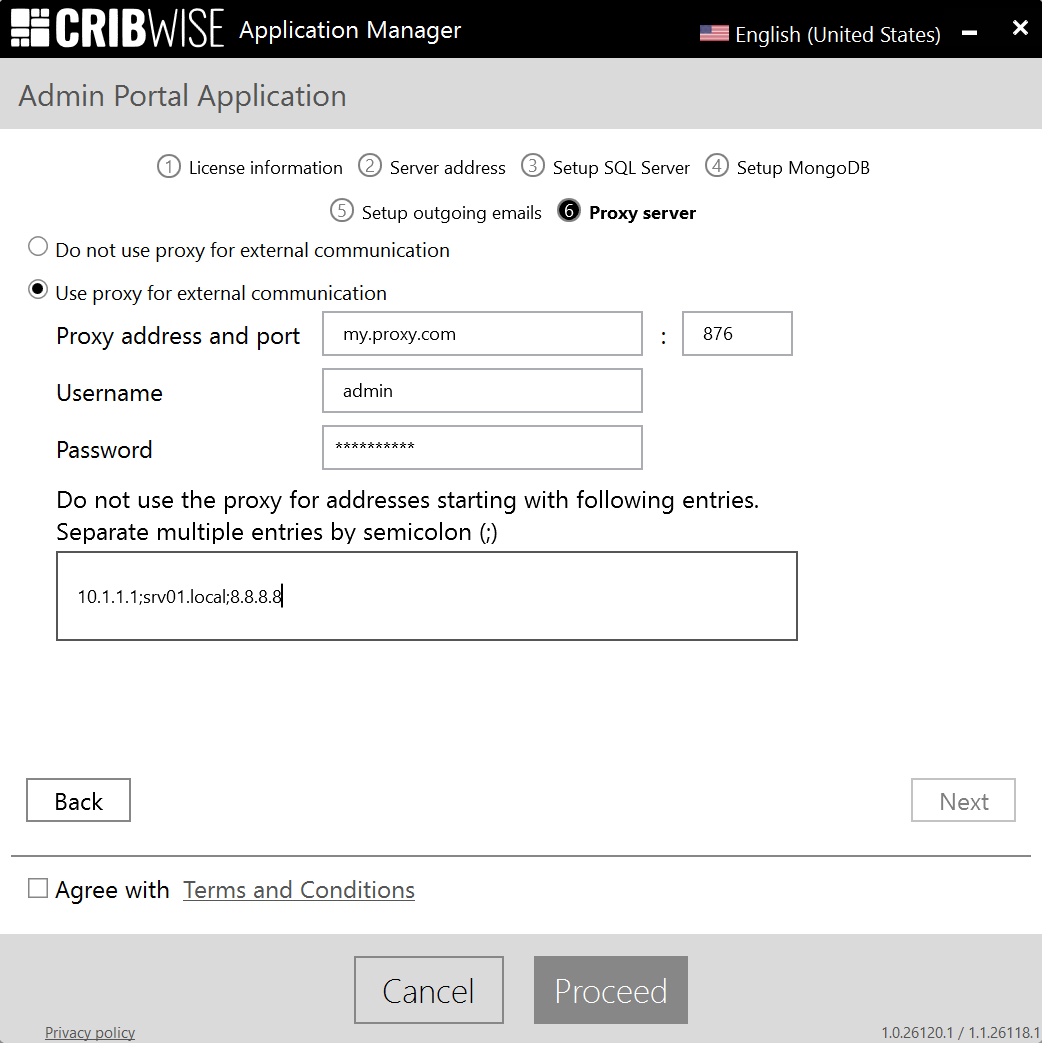
Set the proxy server and credentials, and list any addresses to exclude, separated with a semicolon.
Note: In the example above the srv01.local will also consider srv01.local.test, like a semi wild card
Step 9 – Whitelist catalog service URLs
To enable the default catalogs used in the Import Item Search, whitelist the following URLs:
- https://toolsunited.com (ToolsUnited)
- https://productdata.walter-tools.com (Walter)
- https://productinformation.sandvik.coromant.com (Coromant)
- https://secotools.azure-api.net (SECO search API)
- https://secoresources.azureedge.net (SECO item store)
Success: The installation finishes with your license features active, the server reachable at the address you set, and emails sending through your SMTP server. The SFI can now synchronize with the Admin Portal over the network.
Update the license file later
Download the license file again whenever your subscription changes – for example a renewal, an additional service, or more devices – to enable the new features. The hardware key does not need to be updated to download an updated license file.
- Open the Application Manager on the AP server and click Modify (7).
- Add the new license file and click Proceed.
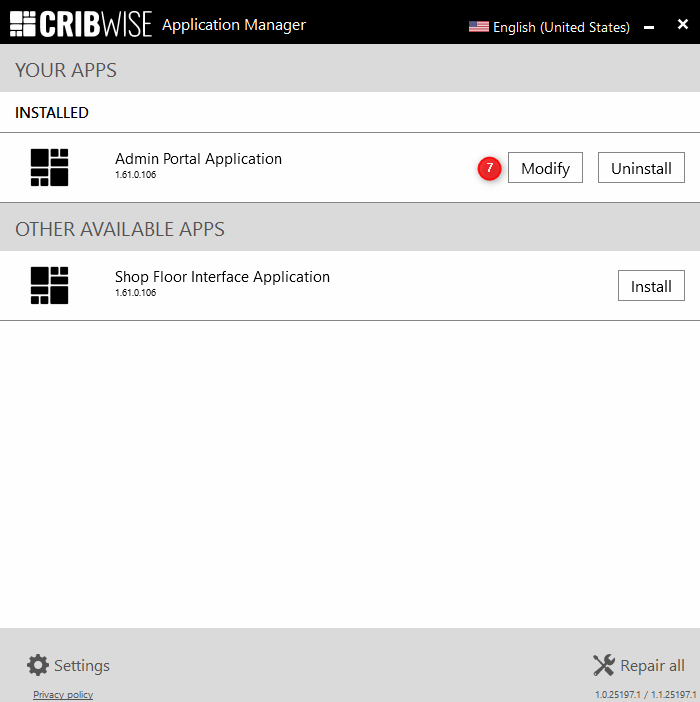
Use Modify to apply an updated license file after a subscription change.
Note: Changing the registered hardware key can only be done by a support partner. The old hardware key and license file are revoked when a new server hardware key is registered.
Troubleshooting
| Problem | Likely cause | Fix |
|---|---|---|
| No emails are sent (orders, reports, notifications) | SMTP server is empty or the credentials are wrong | Enter a valid local SMTP server and credentials; select Use secured connection (SSL/TLS) if your server requires it |
| License file is rejected or features are missing | License is bound to a different server, or the subscription changed | Re-generate the license against this server’s hardware key, or download an updated license file after the subscription change |
| SFI cannot synchronize with the Admin Portal | Required network ports are blocked | Allow the SFI to reach the AP over HTTPS (44333) for data sync and HTTP (80) for software updates |
| Import Item Search returns no results | Catalog service URLs are not whitelisted | Whitelist the ToolsUnited, Walter, Coromant, and SECO URLs listed in Step 9 |
| Proxy connections fail | The AP does not use the Windows proxy, or some addresses must bypass the proxy | Set the proxy server and credentials in the Application Manager; add bypass addresses (IP or URL) separated with ; |
Related articles
- Getting started with Admin Portal: layout, navigation, and lists – find your way around the Admin Portal after installation.
- Getting started with Shop Floor Interface: layout and menus – set up the SFI that connects to your on-premise Admin Portal.
- How to import items from a catalog – use the catalog services you whitelisted during installation.
- How to configure item notifications – set up the email notifications that rely on your SMTP server.
- Getting started with the CRIBWISE API – connect external systems to your CRIBWISE installation.