
What you can do
Get a new CRIBWISE portal running: set up system settings, users, a vendor and items, then assign and pick your first item in the Shop Floor Interface.
This guide follows the 30-day trial, where a cloud device replaces a physical vending cabinet. The same steps apply to a production portal.
Before you start
- Activate your Admin Portal and service account first – see How to activate a new portal and create your first user.
- Have your regional settings ready: language, date format, currency and units of measure.
- Know which vendor and which items you want to start with. The examples below import from the Sandvik Coromant catalog.
Important: The Administrator account you sign up with cannot log in to the Shop Floor Interface. You must create a system user (Step 3) before anyone can use the SFI.
How CRIBWISE is organised
Two interfaces
Administration Portal (AP) – app.cribwise.com/AdminPortal/<shortname>. This is where the system is administrated.
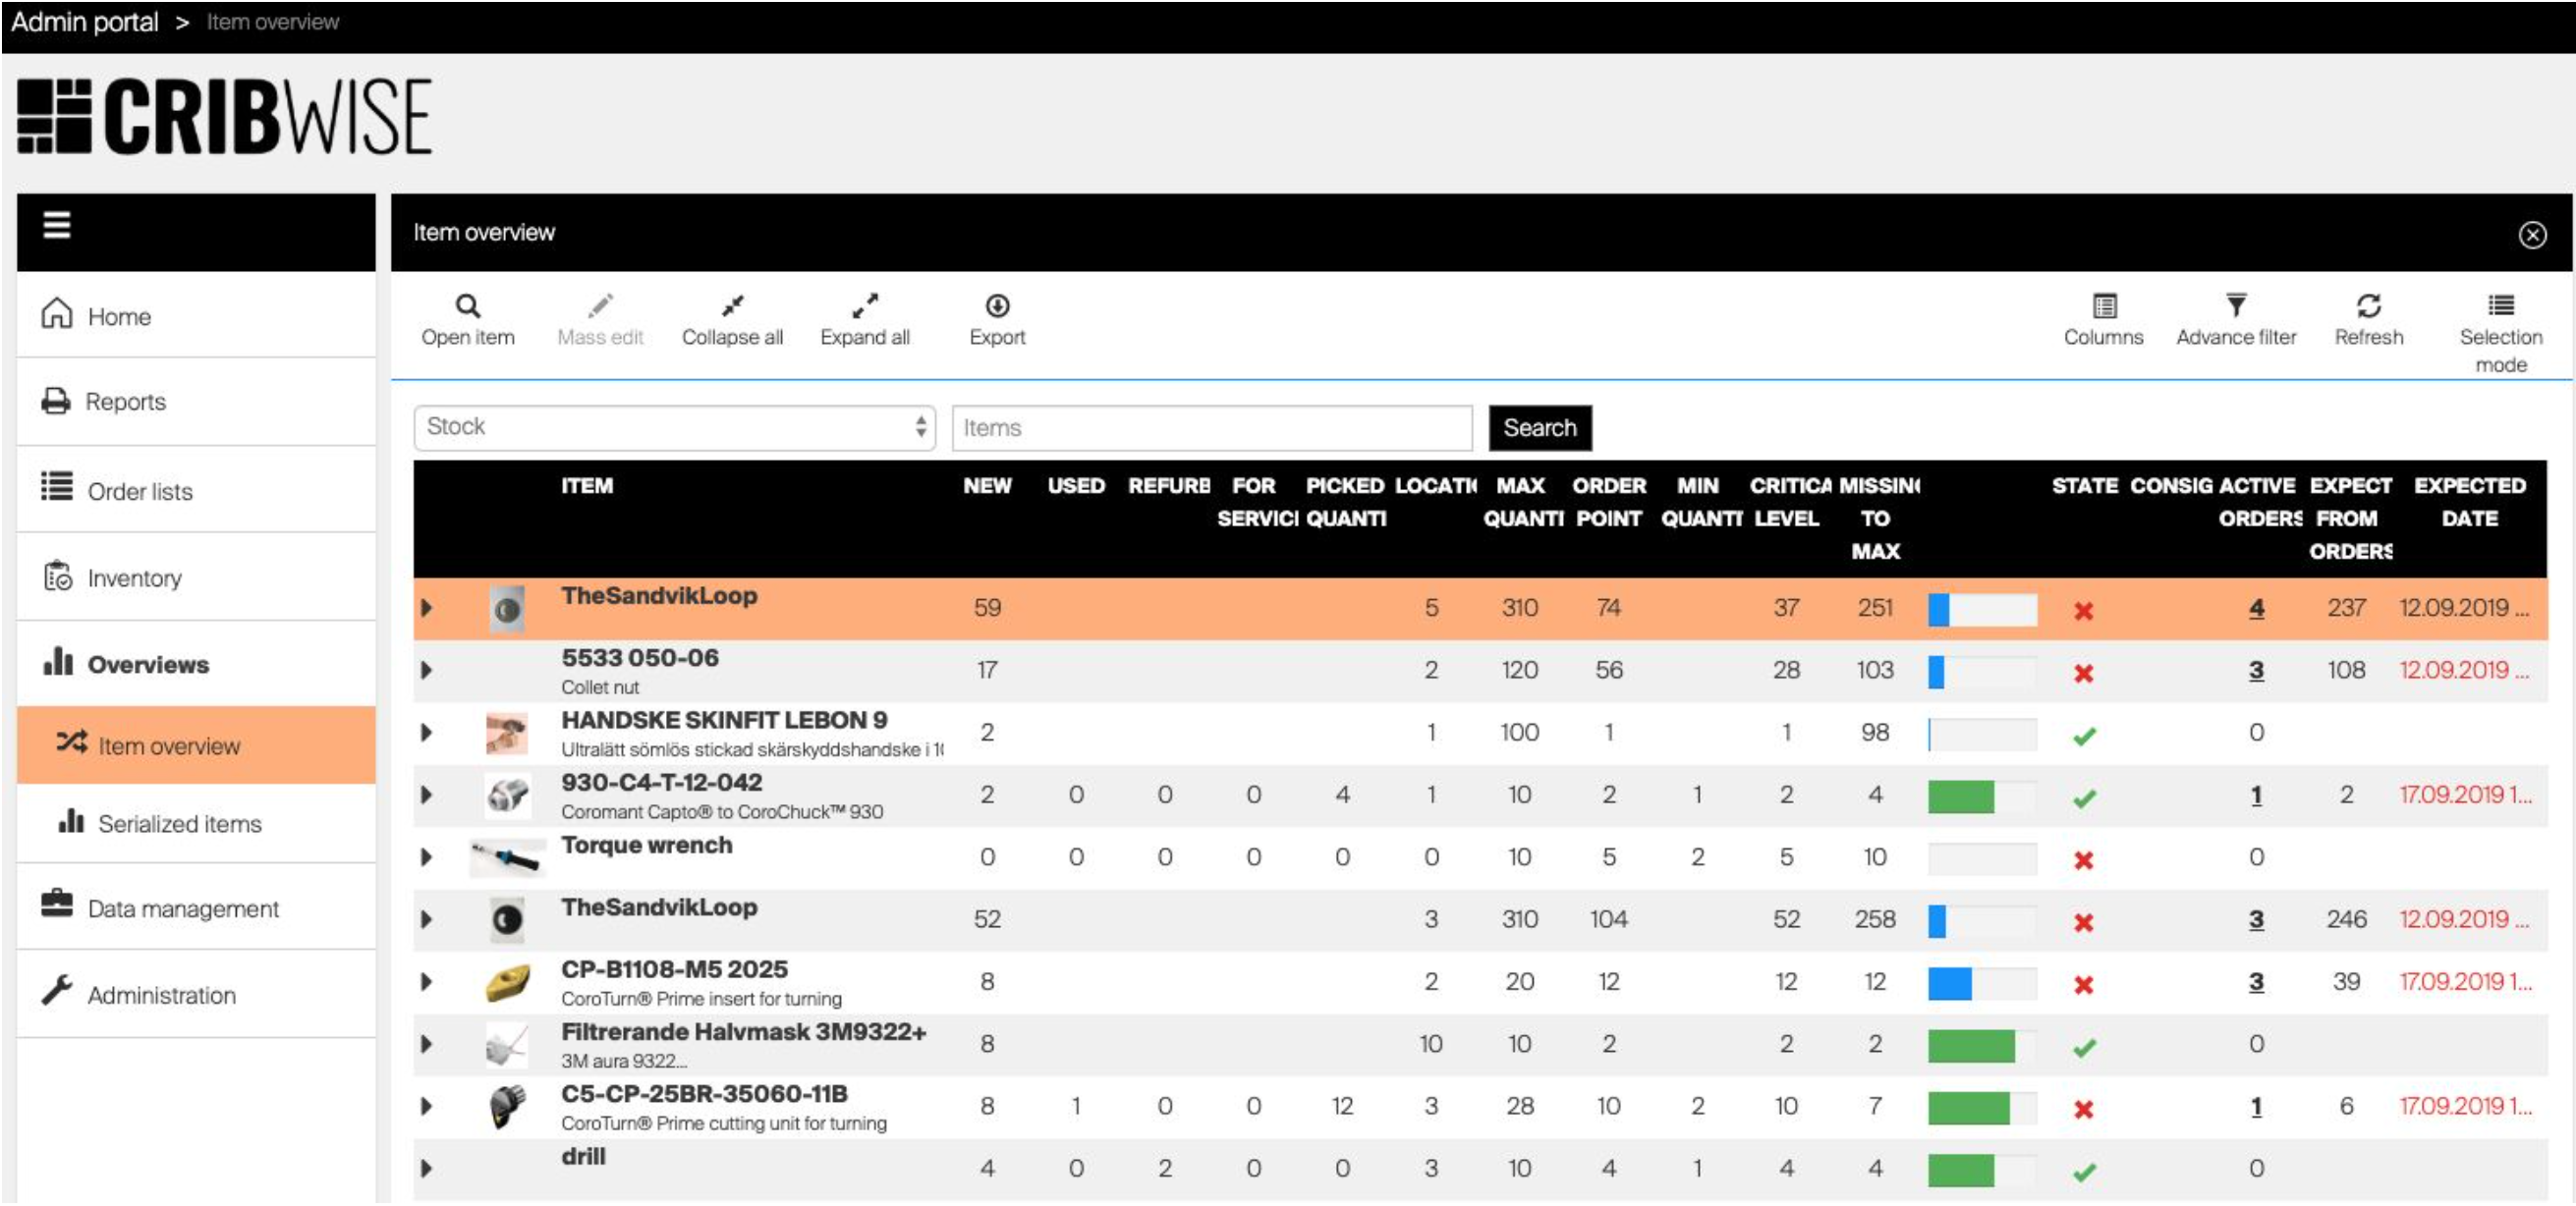
The Administration Portal, where items, users, devices and settings are managed.
Shop Floor Interface (SFI) – app.cribwise.com/ShopFloorInterface/<shortname>. This is the production environment where items are dispensed.
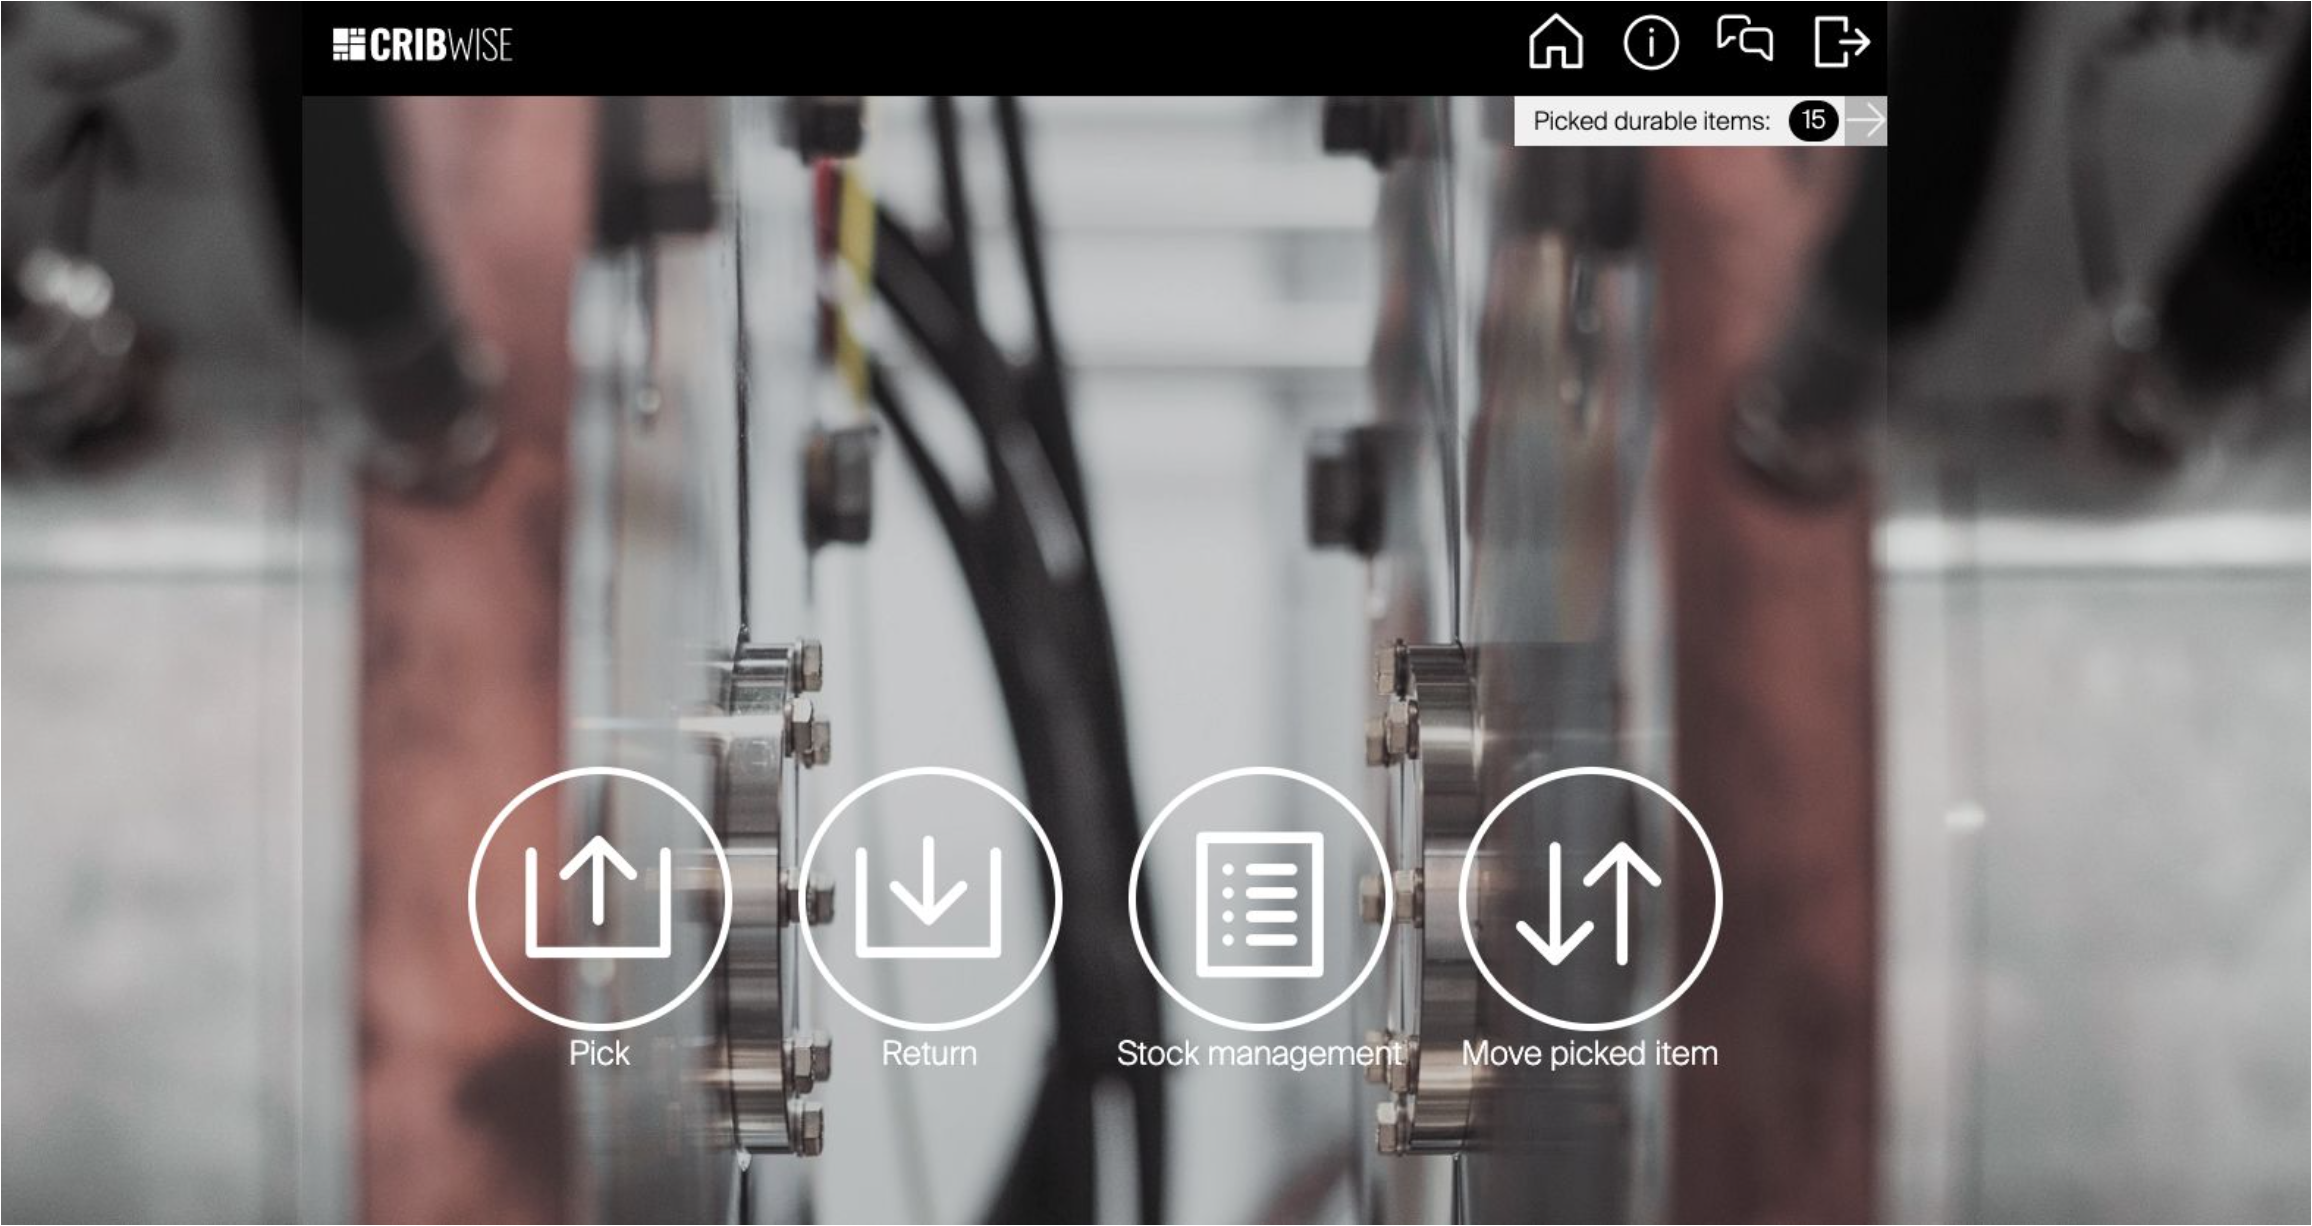
The Shop Floor Interface, used by operators to pick and return items.
Stock and device structure
The stock structure is a logical and physical set of objects, related to each other in the application:
Stock → Device → Storage device → Storage module → Storage location → Item

How stocks, devices, storage devices, modules, locations and items relate.
To get started with the 30-day trial you need a cloud device. No physical vending cabinet is required – digital storage locations act as a virtual replication, and the cloud device can be used from a browser on any PC, tablet or phone.
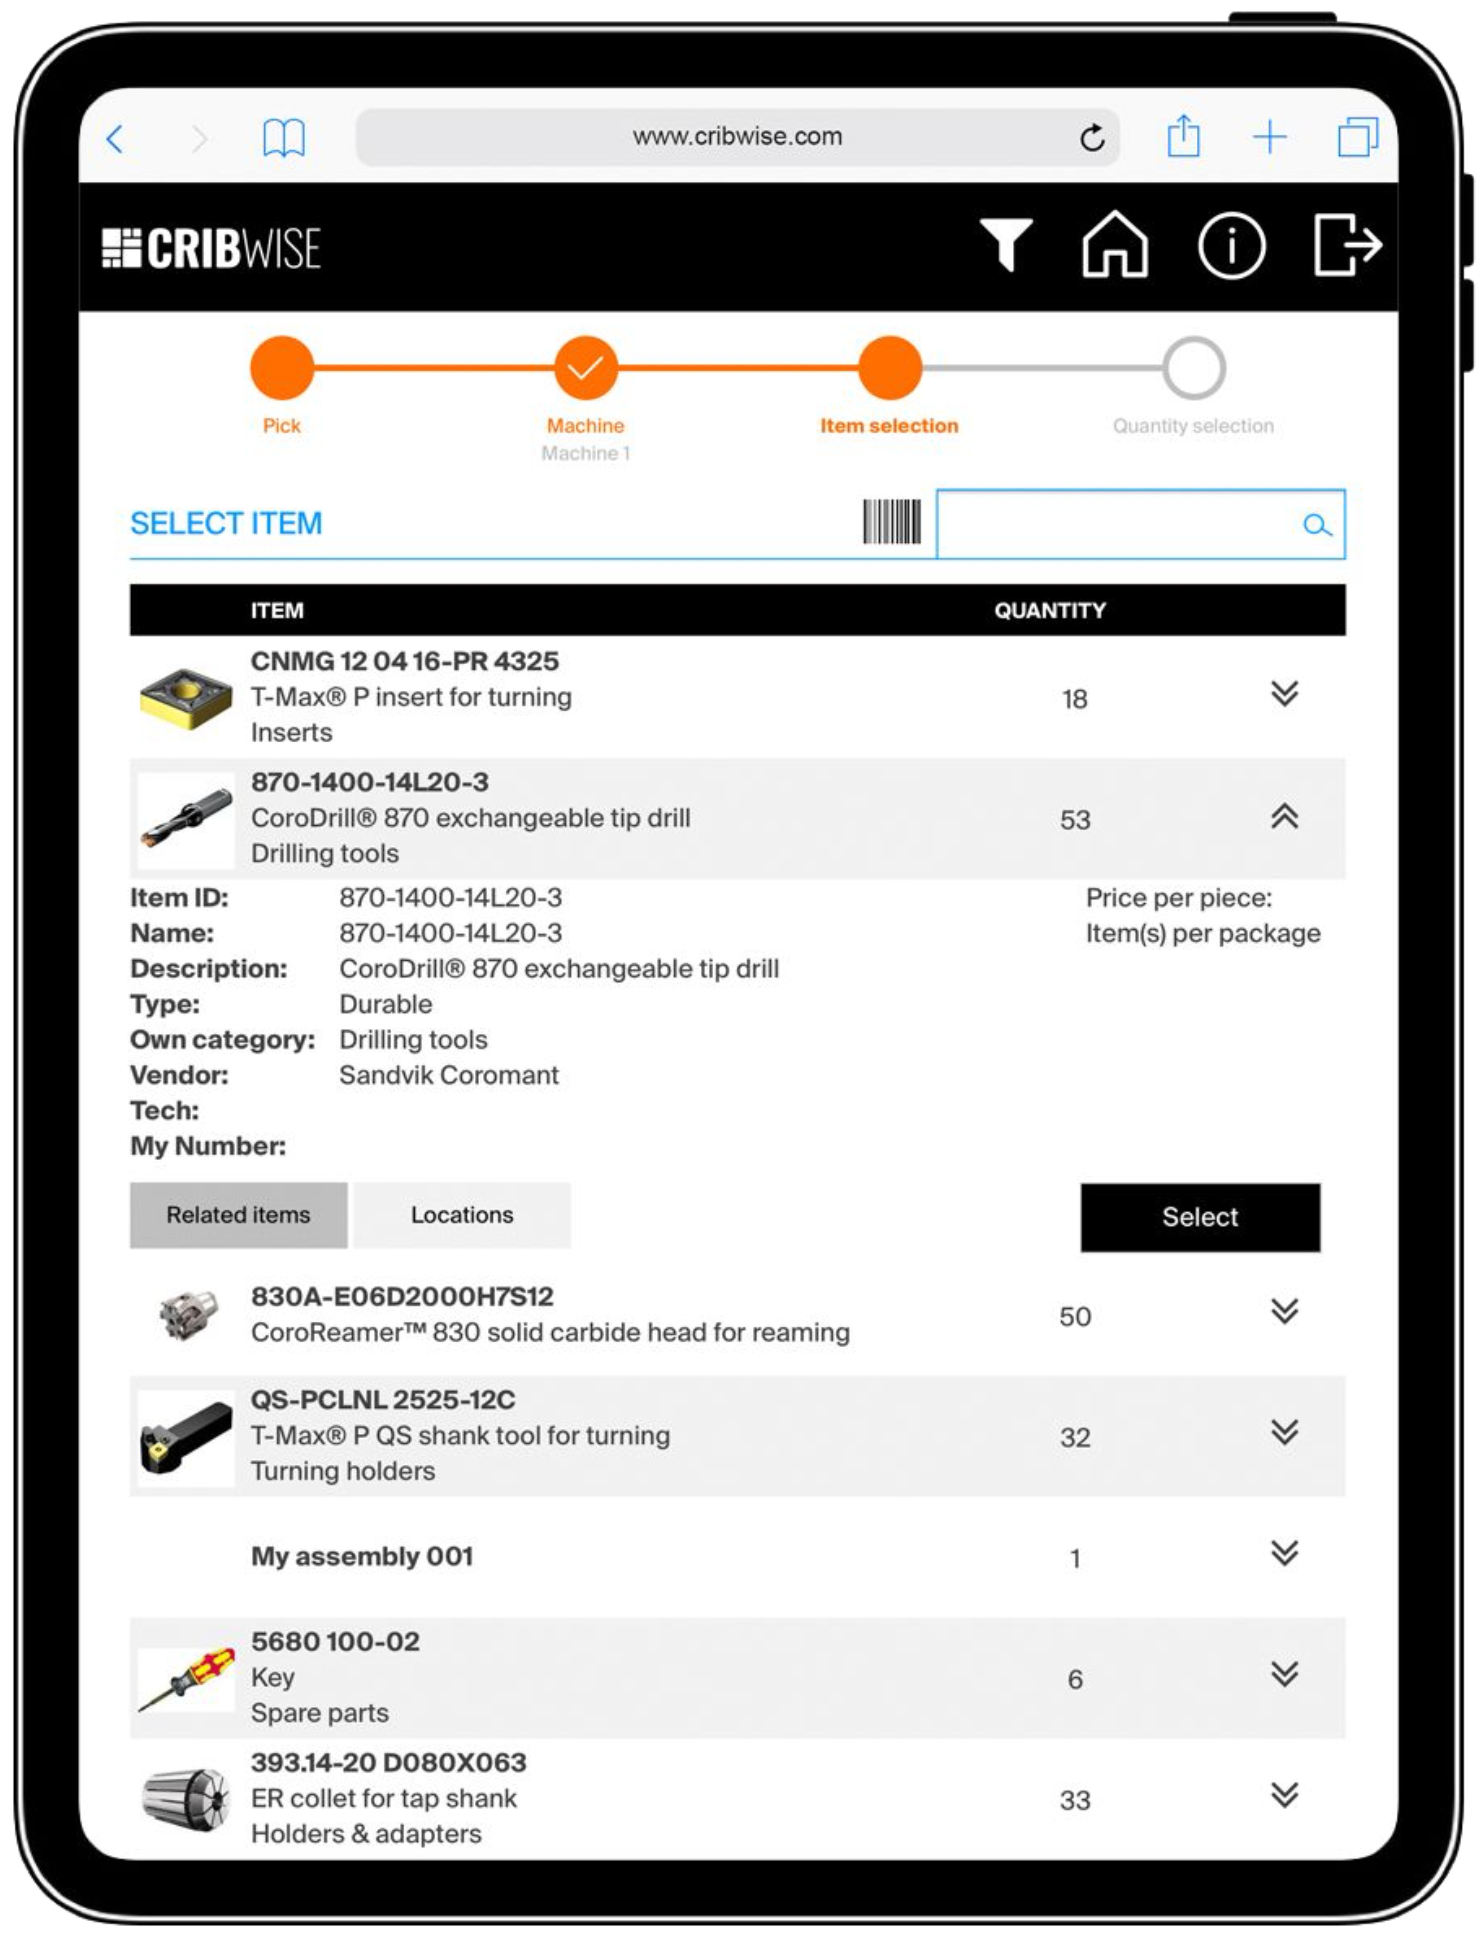
A cloud device replaces physical hardware during the trial.
Quick start
Experienced users – get to a first pick in 6 steps:
- Review the seeded Demo Mode data.
- Update system settings under Administration.
- Create a system user with the Administrator user group.
- Create a vendor, then import items from a catalog and set them to Released.
- Assign an item to a stock location in the SFI under Stock management.
- Pick the item from the SFI home screen.
Need more detail? Follow the full steps below.
Steps
Step 1 — Explore Demo Mode
After your first login the portal opens in Demo Mode.

Demo Mode pre-populates the portal so you can explore straight away.
Demo Mode seeds a cloud device, stock locations, basic items and assignments of items to locations, so you can see how the application works before entering your own data. A link takes you to the Shop Floor Interface.
Note: You still need to create a system user (Step 3) to reach the Shop Floor Interface, and to deactivate Demo Mode when you move into production – see Reset the Demo Mode.
Step 2 — Update system settings
- Go to the menu option Administration and open System settings.
- Update the regional settings to your preference.
- Click Save.
Fields marked in yellow are system requirements and must be filled in.
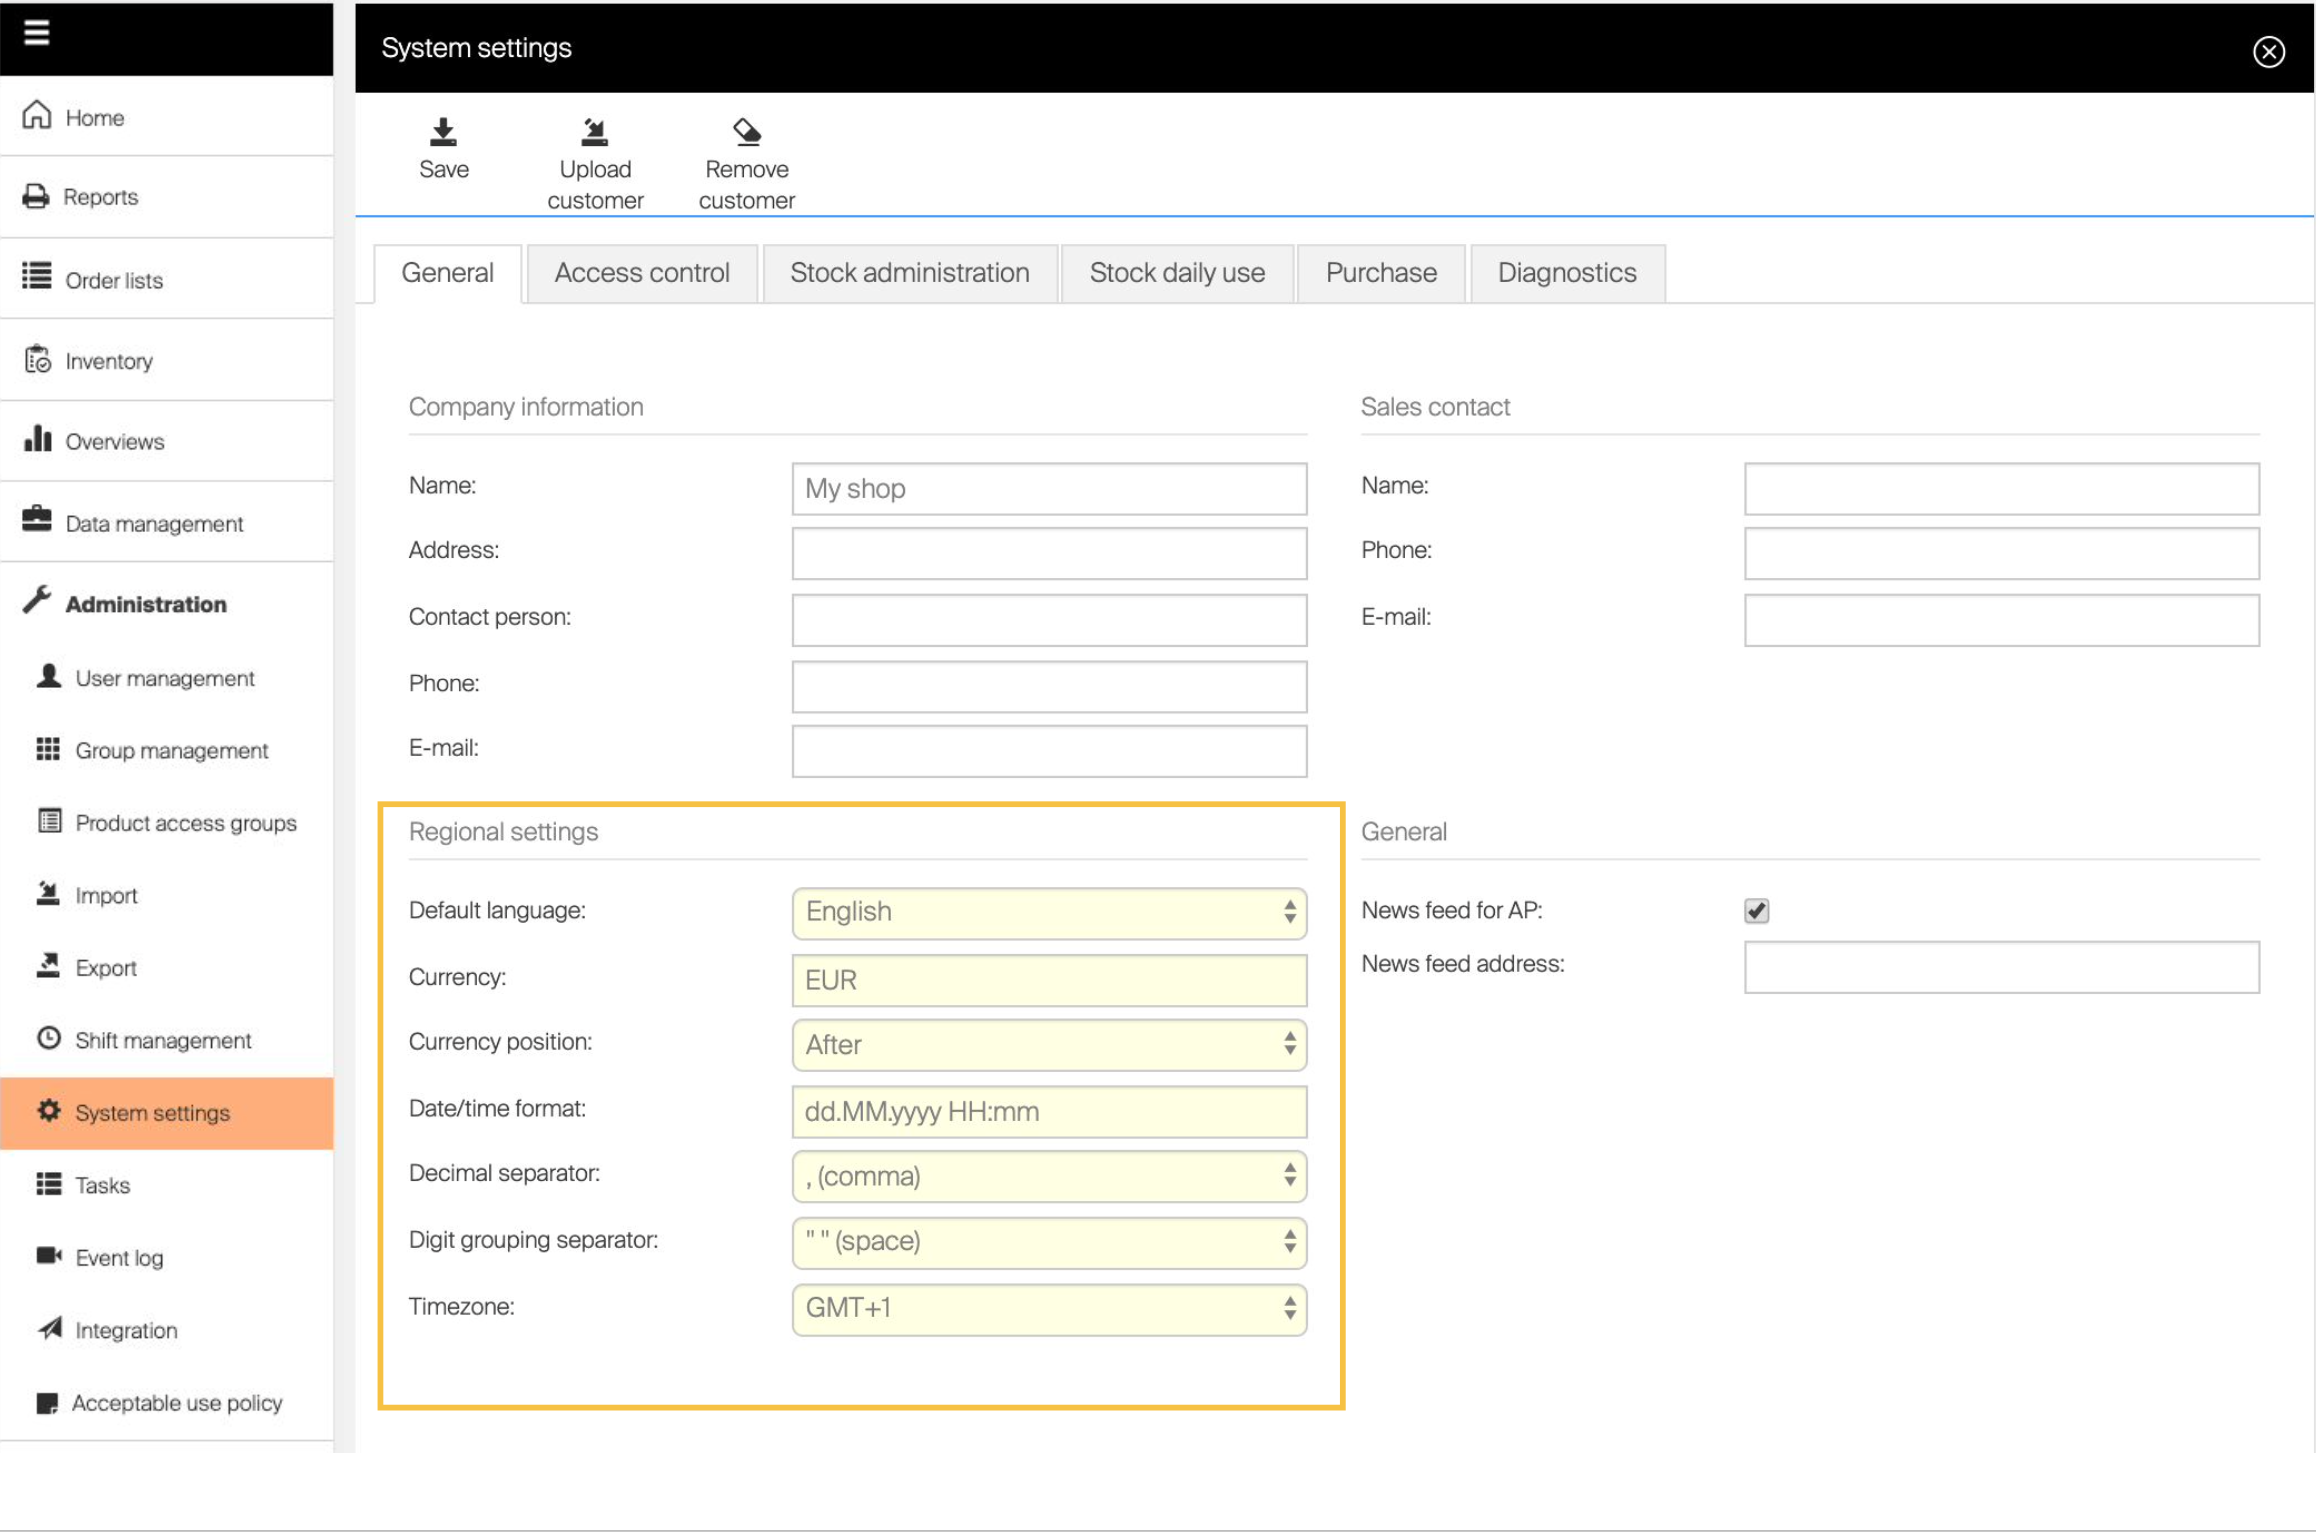
System settings, where regional and system-wide options are set.
Read more in System settings.
Step 3 — Create users
User management is found under the menu option Administration.
- Click New user.
- Fill in the user information. The minimum password length is 6 characters by default and can be changed in system settings.
- Set the user group to Administrator for full access.
- Click Save user.
Optionally create a second user with Operator privileges to see the difference in SFI access rights.
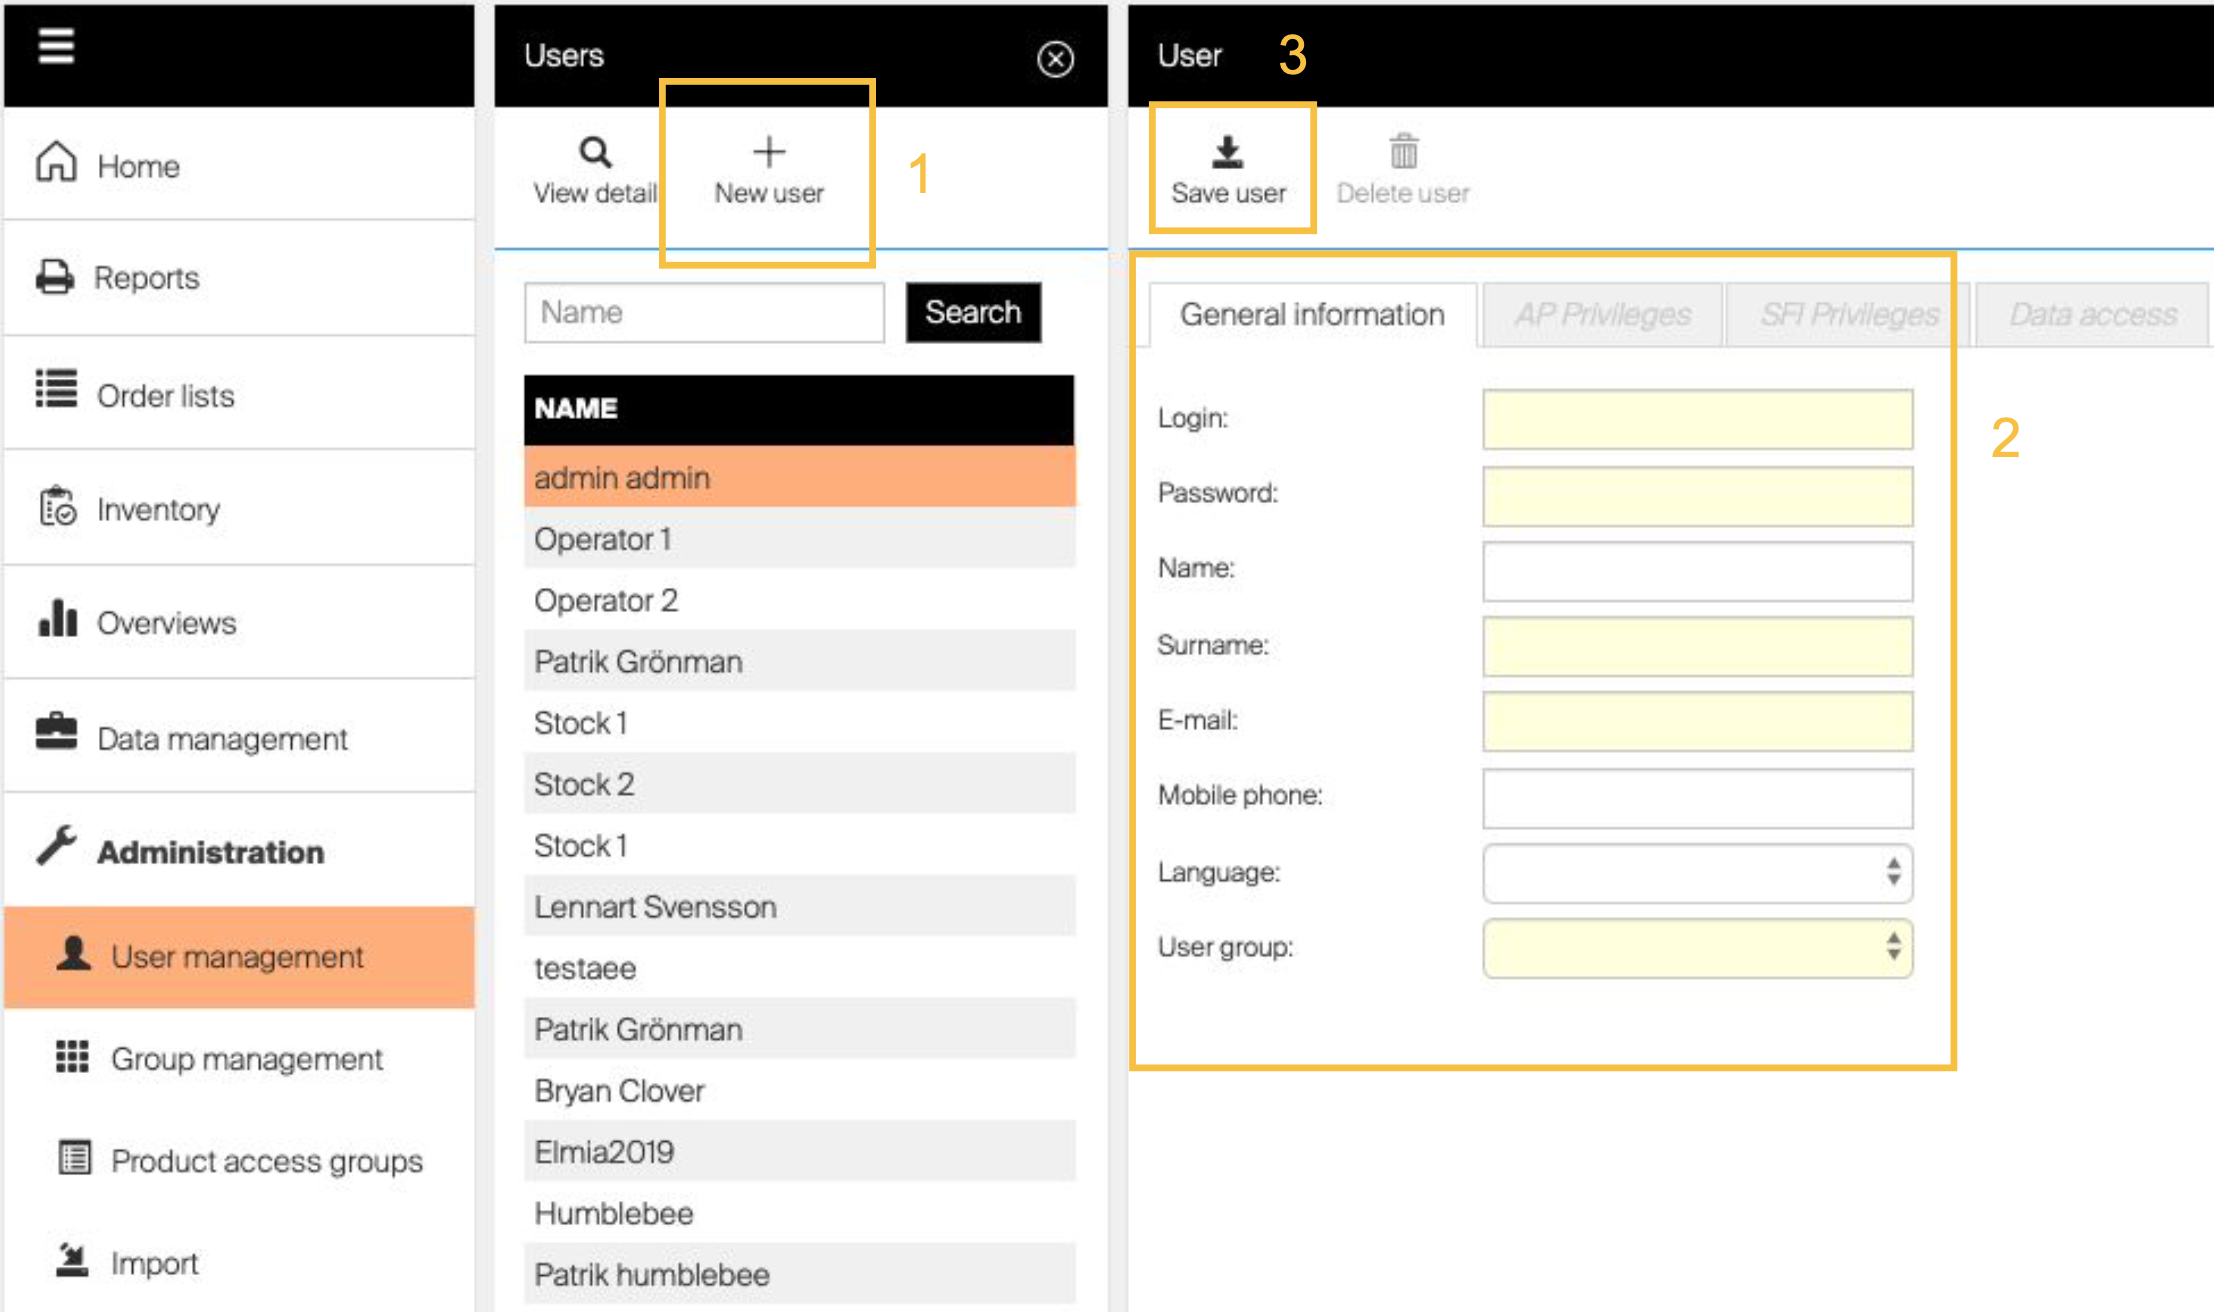
Creating a system user. This user – not the sign-up Administrator – can log in to the SFI.
Important: A new system user must be created before anyone can access the Shop Floor Interface.
Read more in How to create and manage users.
Step 4 — Create a vendor
The vendor list is found under the menu option Data management.
- Click New vendor.
- Specify the vendor ID and name.
- Choose the default order template, used later when purchase orders are created for this vendor.
- Click Save vendor.
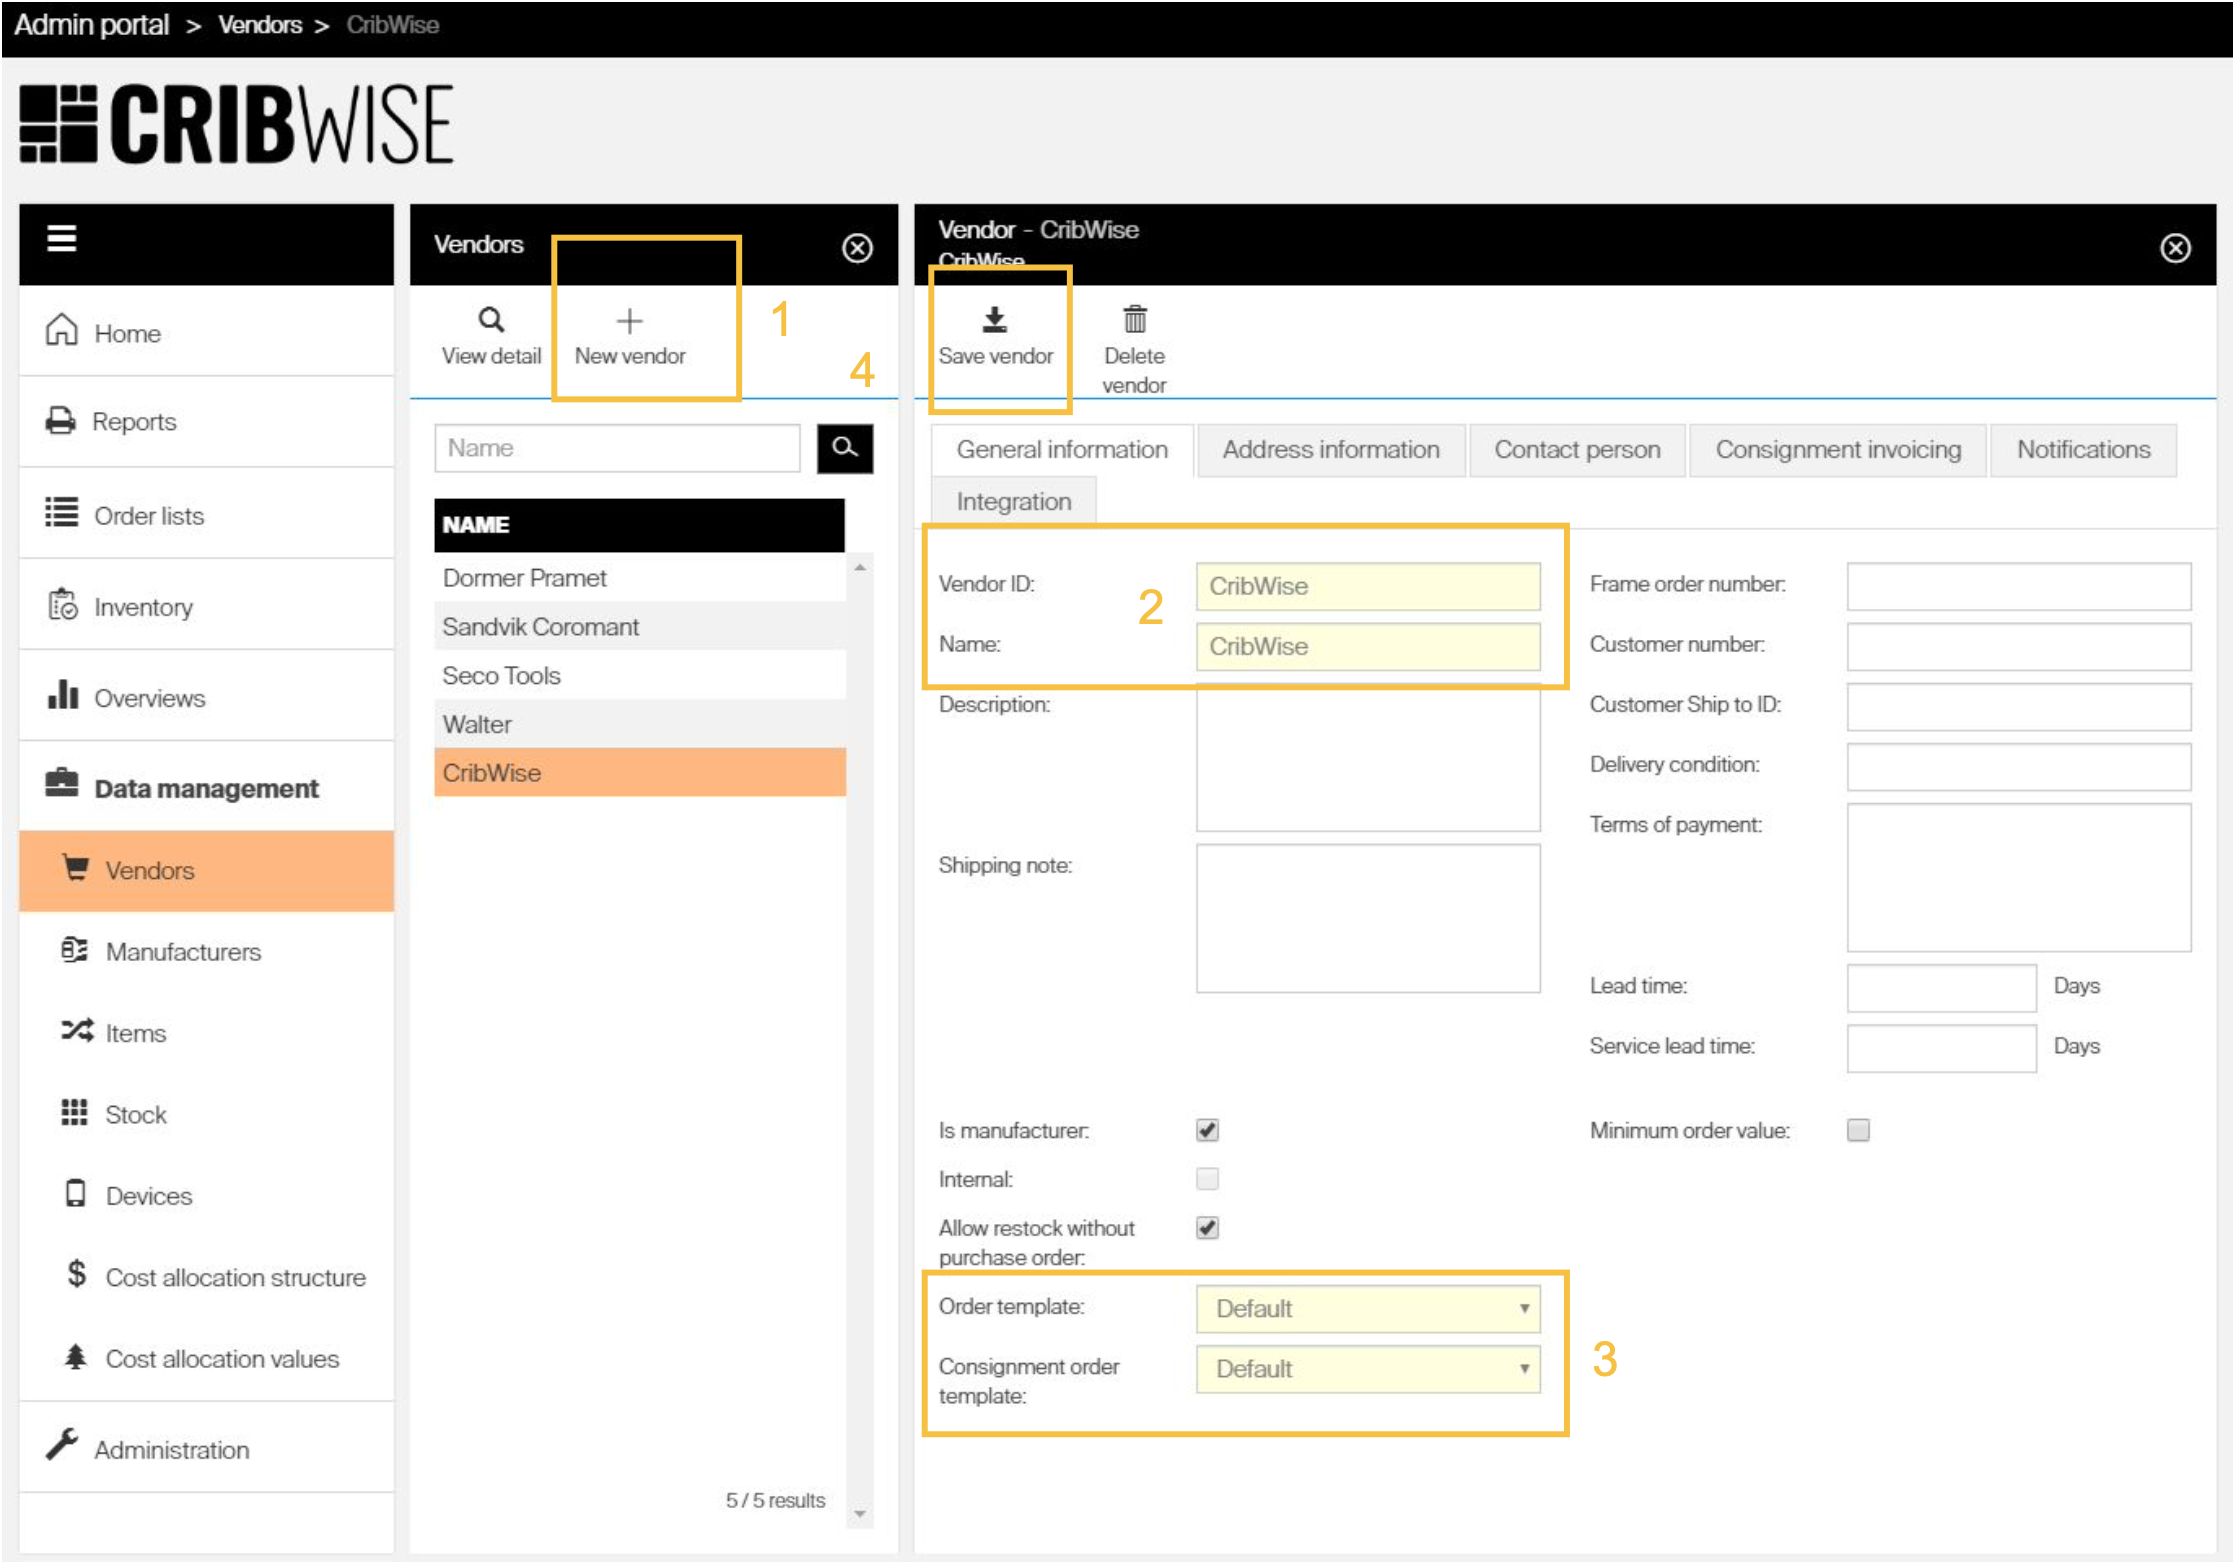
Creating the vendor that imported items will belong to.
Read more in How to manage vendors.
Step 5 — Import items from a catalog
All items are found under the menu option Data management. Items can be created manually, by Excel import, or from a catalog. This guide uses the catalog import.

General item information as shown on the item detail.
- In the item list view, select the import items option.
- Select the catalog to import from.
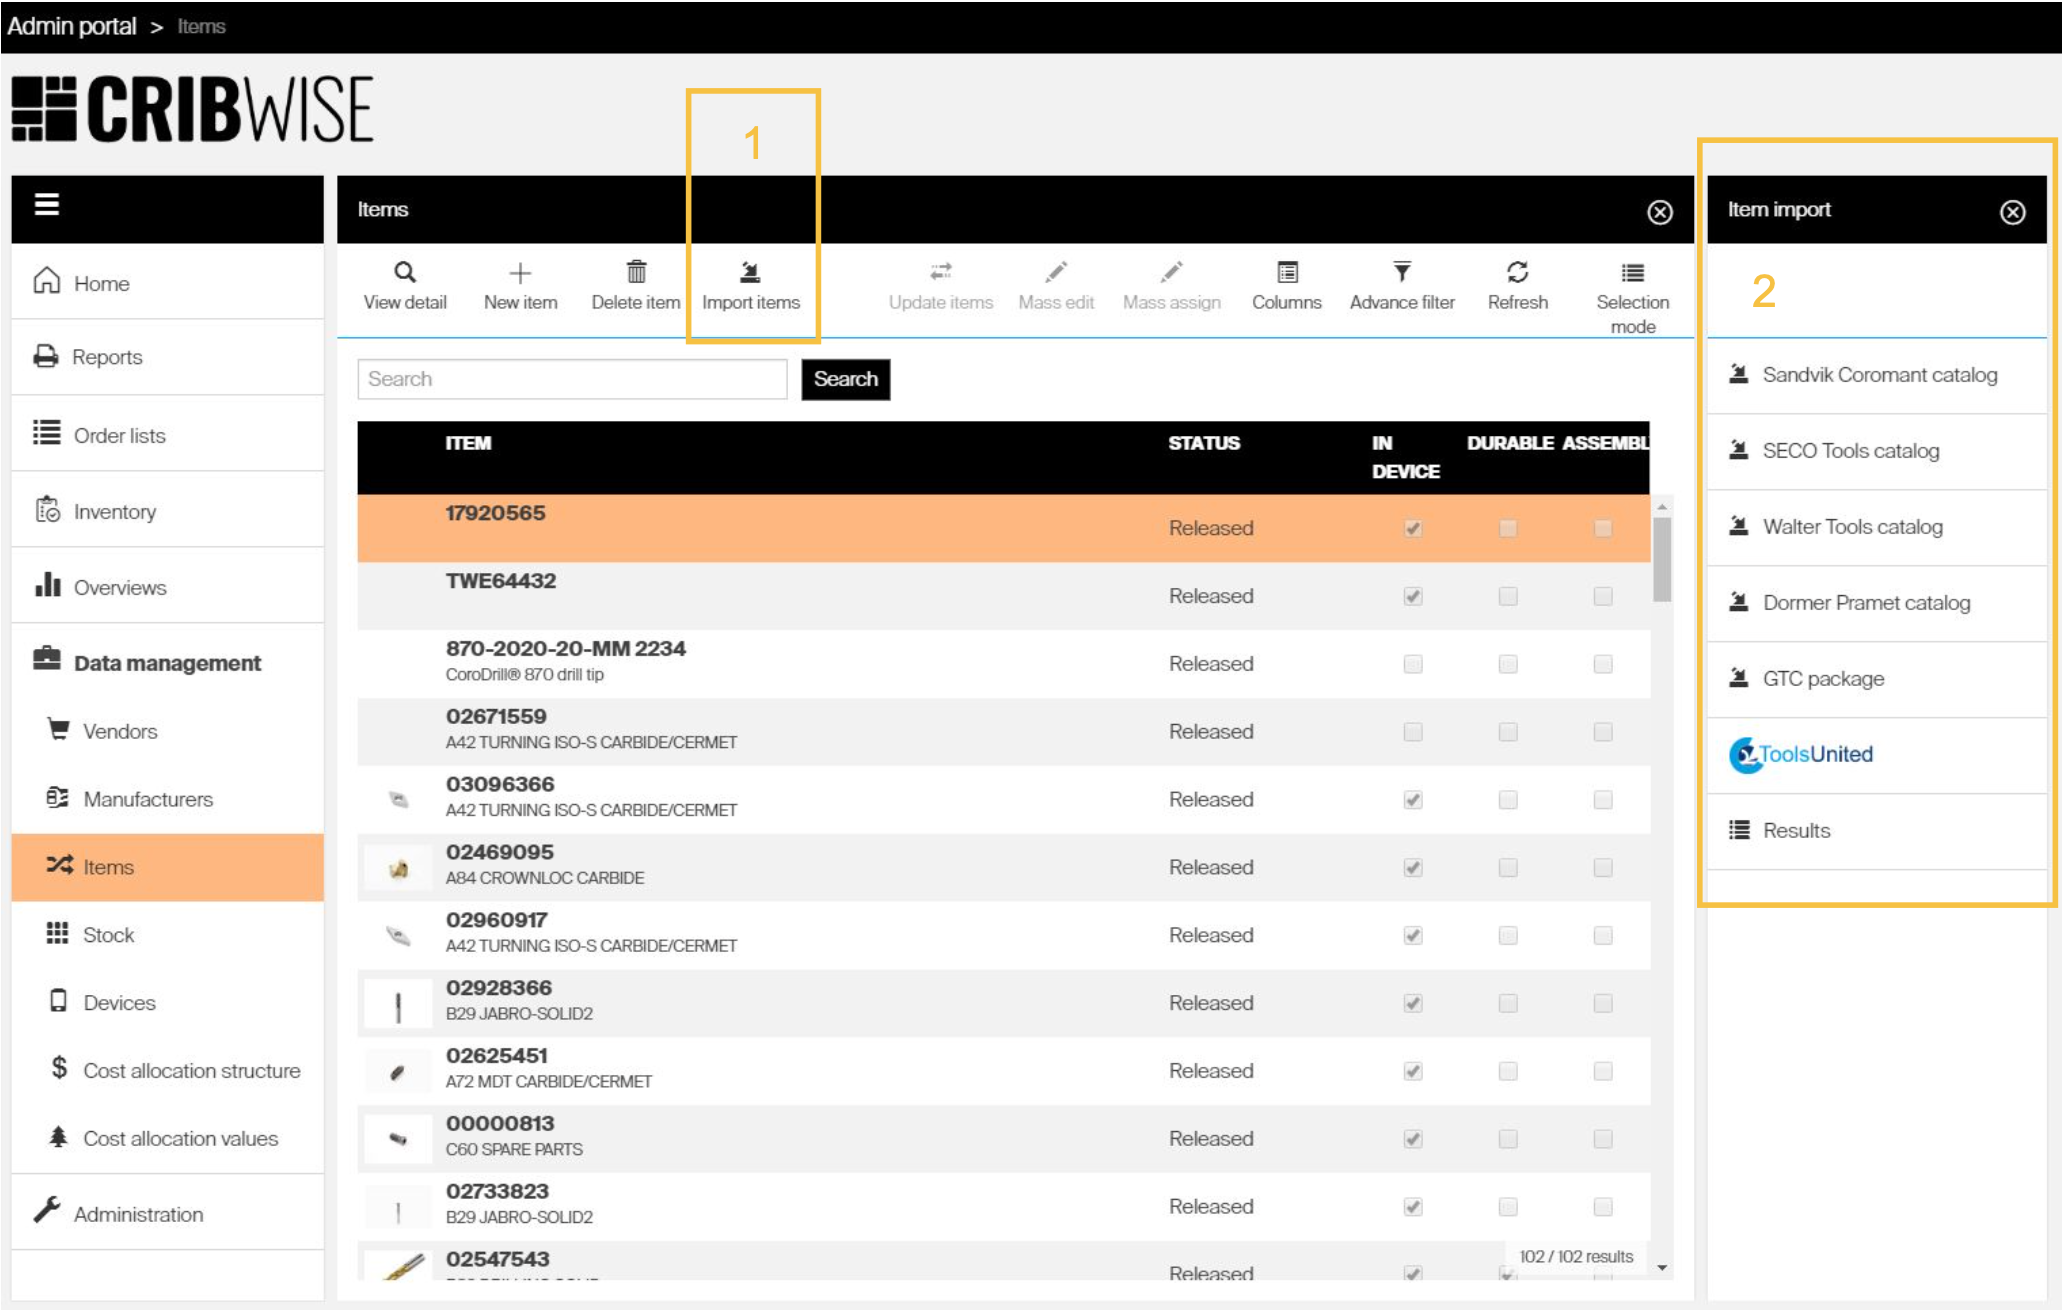
Starting a catalog import from the item list.
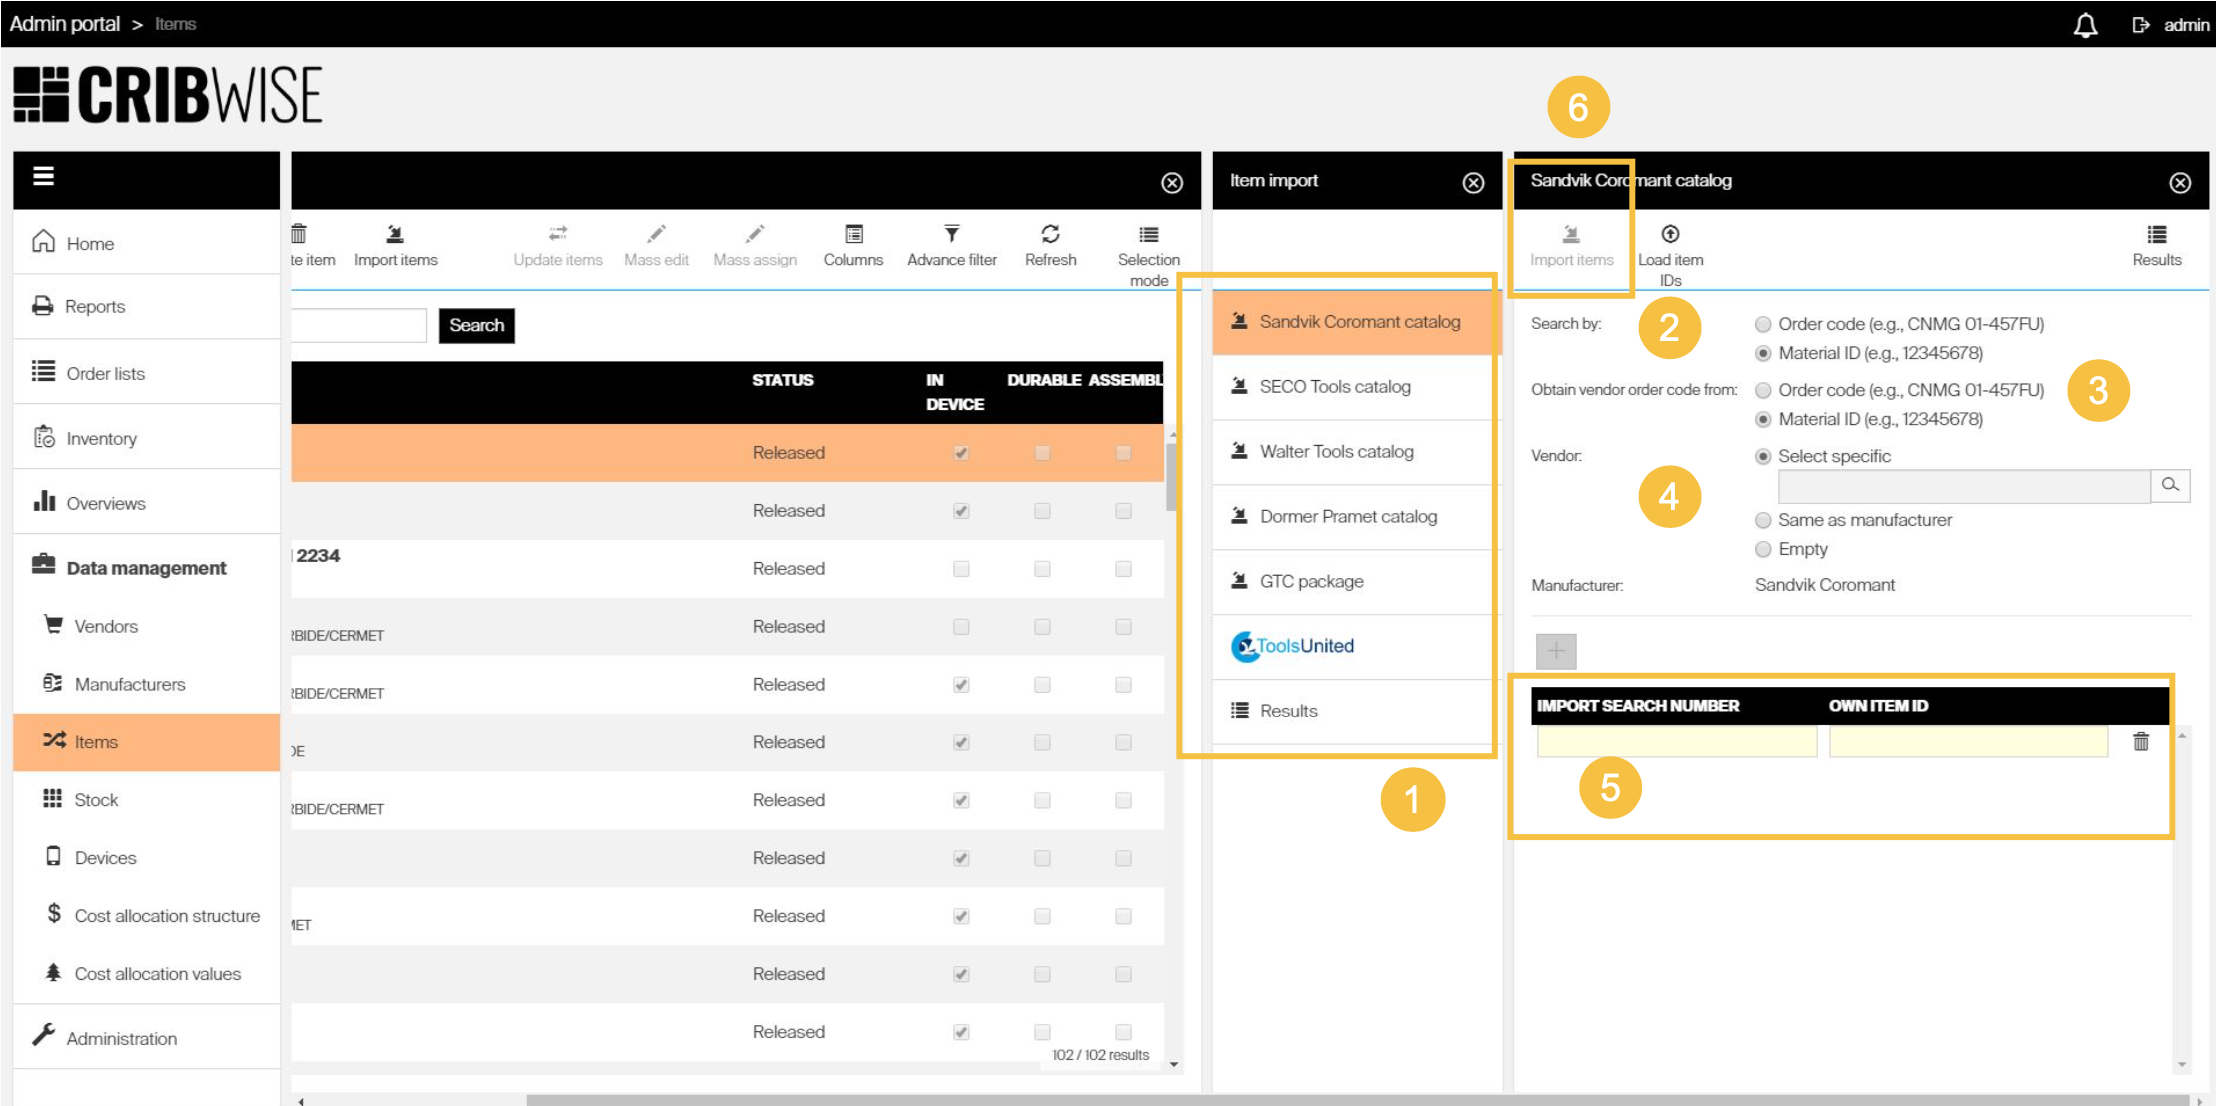
Choosing which catalog to import from.
For an import from the Sandvik Coromant online catalog:
- Set whether the item is searched by order code or material ID.
- Specify where to obtain the order code from.
- Choose the vendor you created in Step 4.
- Enter a search ID – how the item is found in the catalog – and an item ID – how it is stored in CRIBWISE.
- Start the import.
Add more items to the same search with the + button.
Tip: Example Coromant material IDs to try: 7800842, 6067790, 5760443.
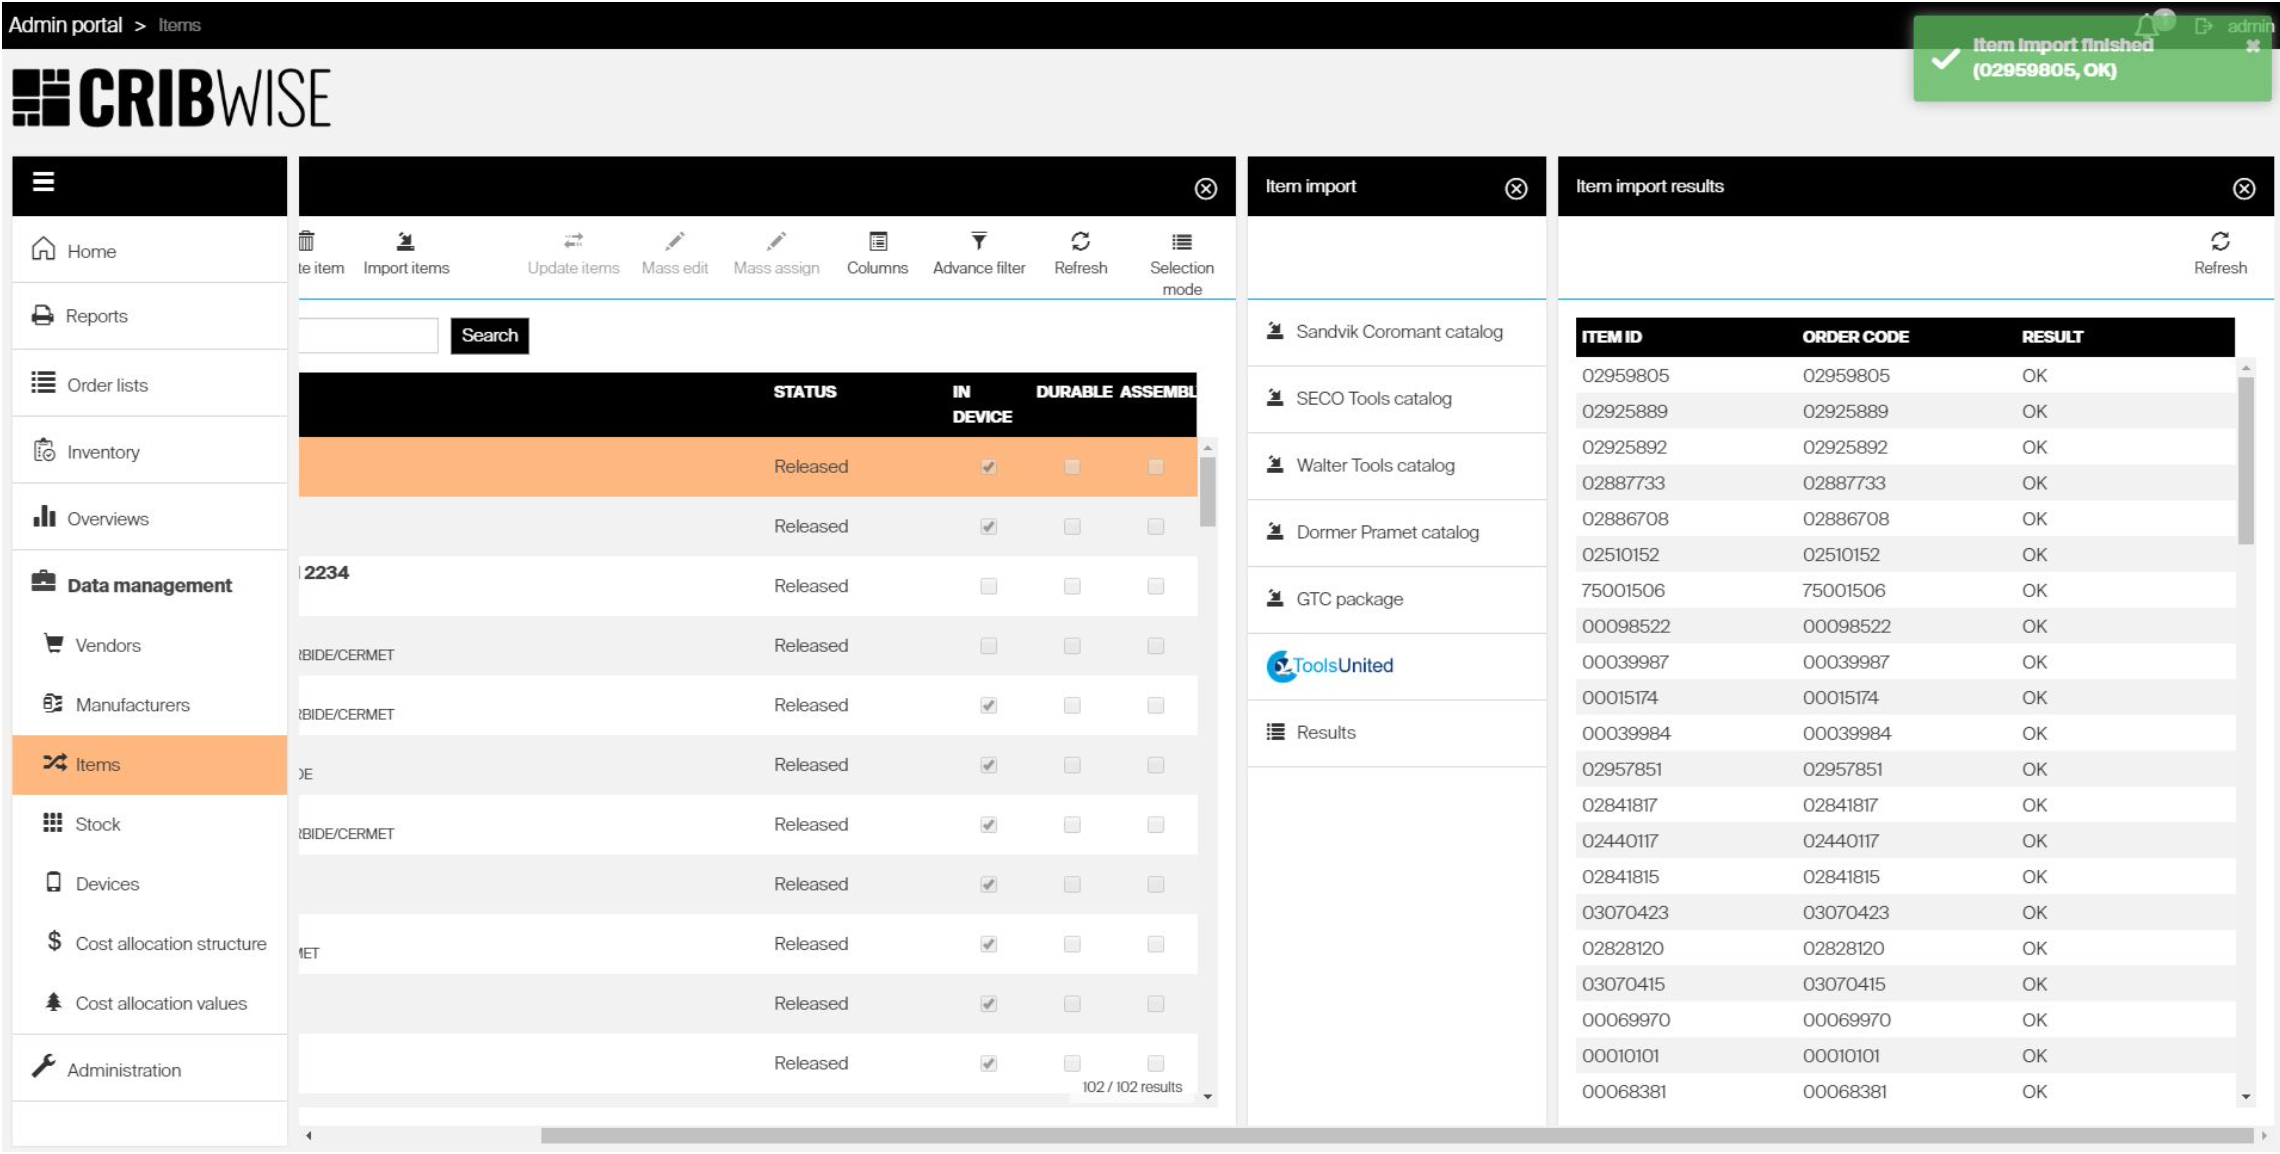
The import result opens with information about the process. Necessary spare parts are downloaded together with the imported items.
Read more in How to import items from a catalog.
Step 6 — Release items to the SFI
Items created through catalogs are imported with the status Defined imported. An item must be released before it is visible in the production environment.
- Change the status to Released.
- Click Save item.
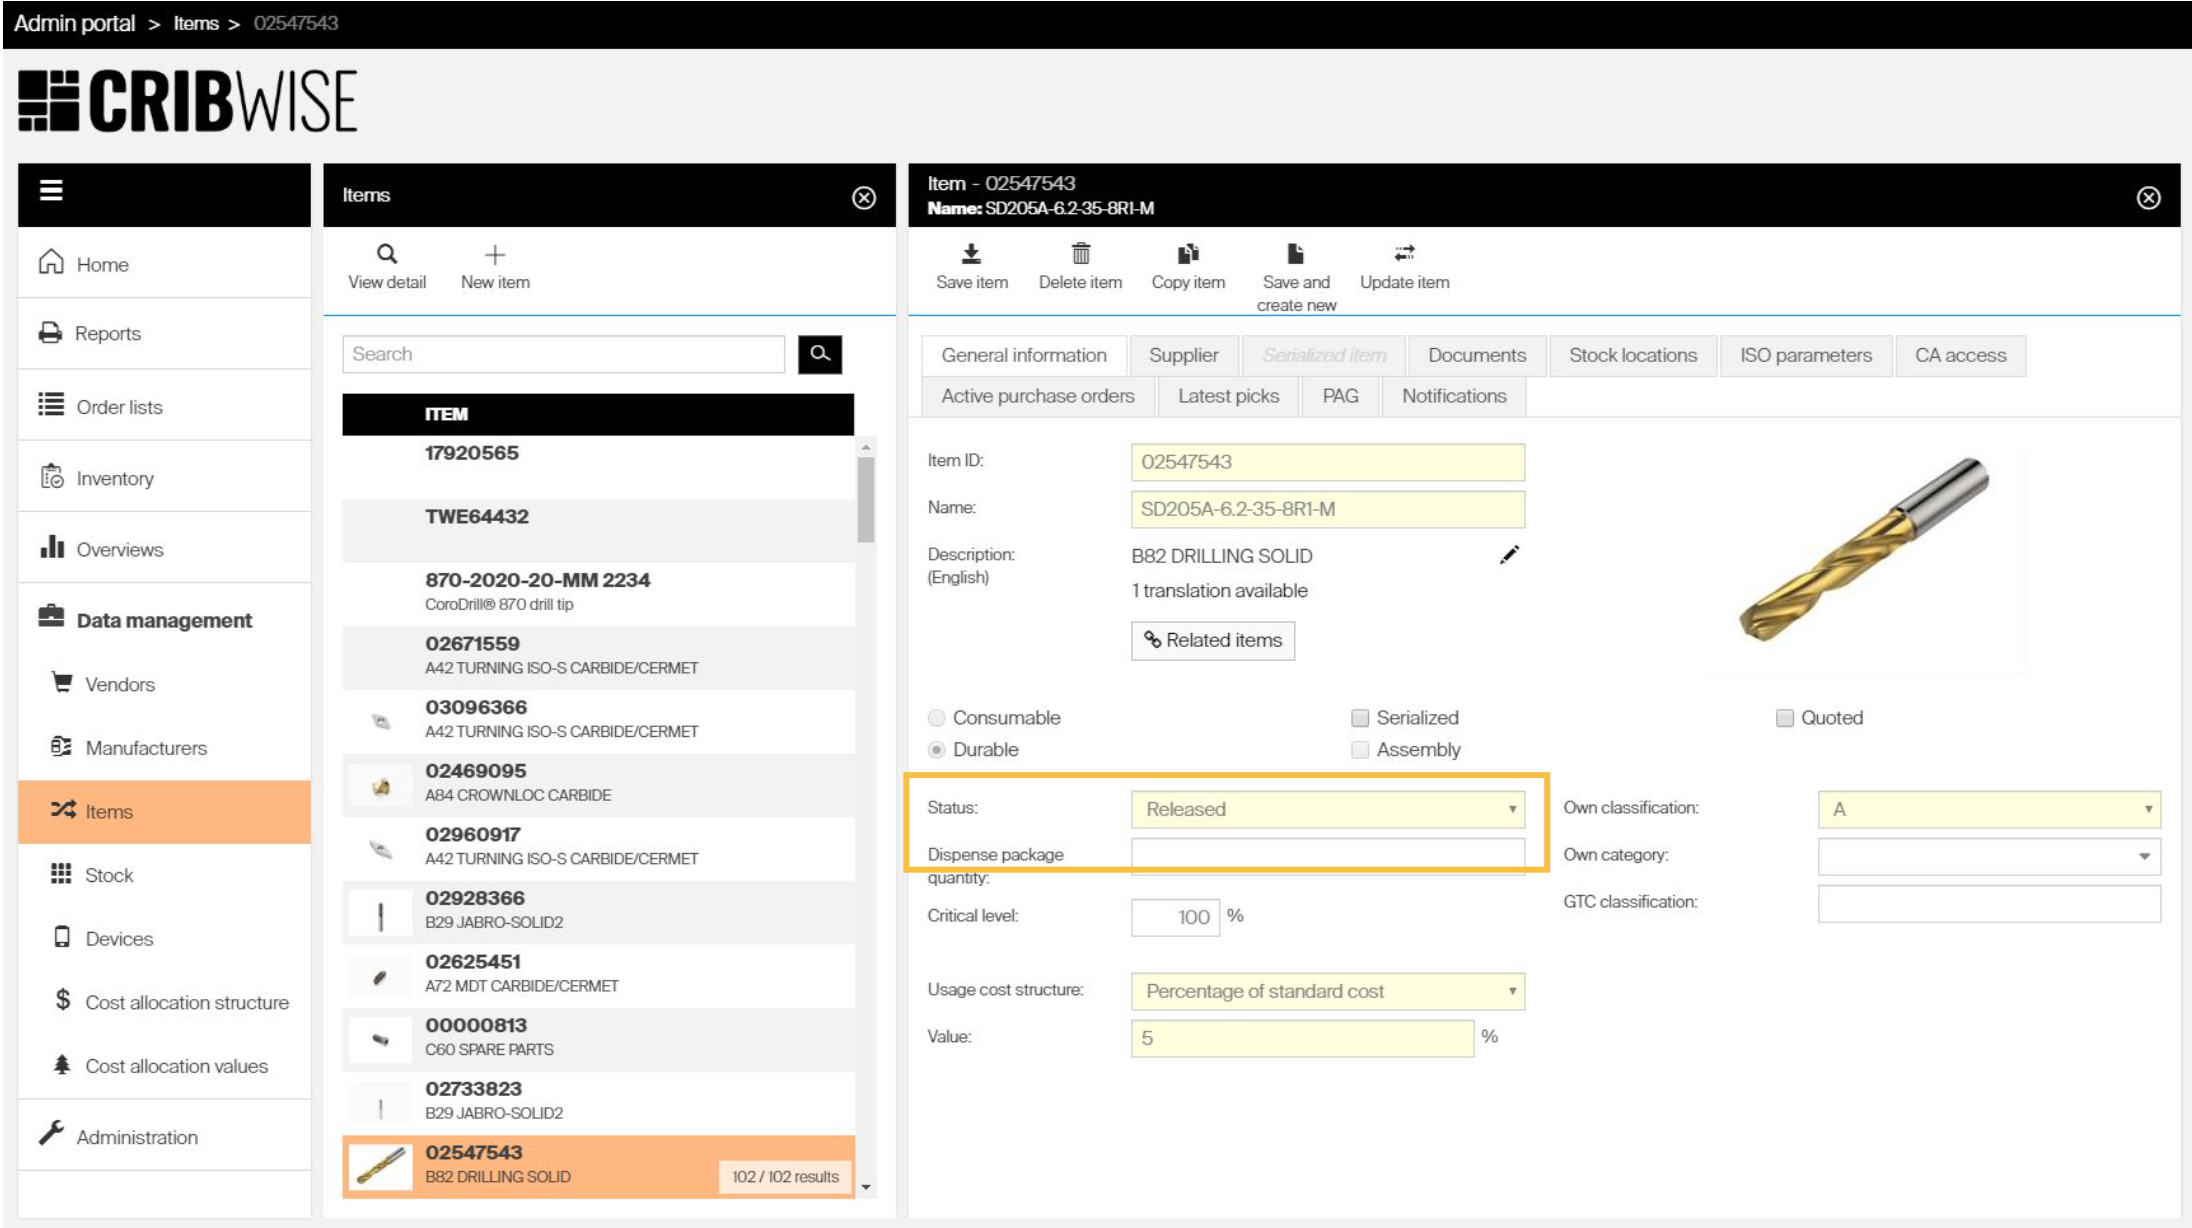
Releasing an item makes it available in the Shop Floor Interface.
Step 7 — Create a device (optional)
This step is optional – one device is already present in Demo Mode. The device list is found under the menu option Data management.
- Click New device.
- Add a name and choose a stock.
- Click Save device.
- Open the Storage devices tab to see all storage devices attached to this device.
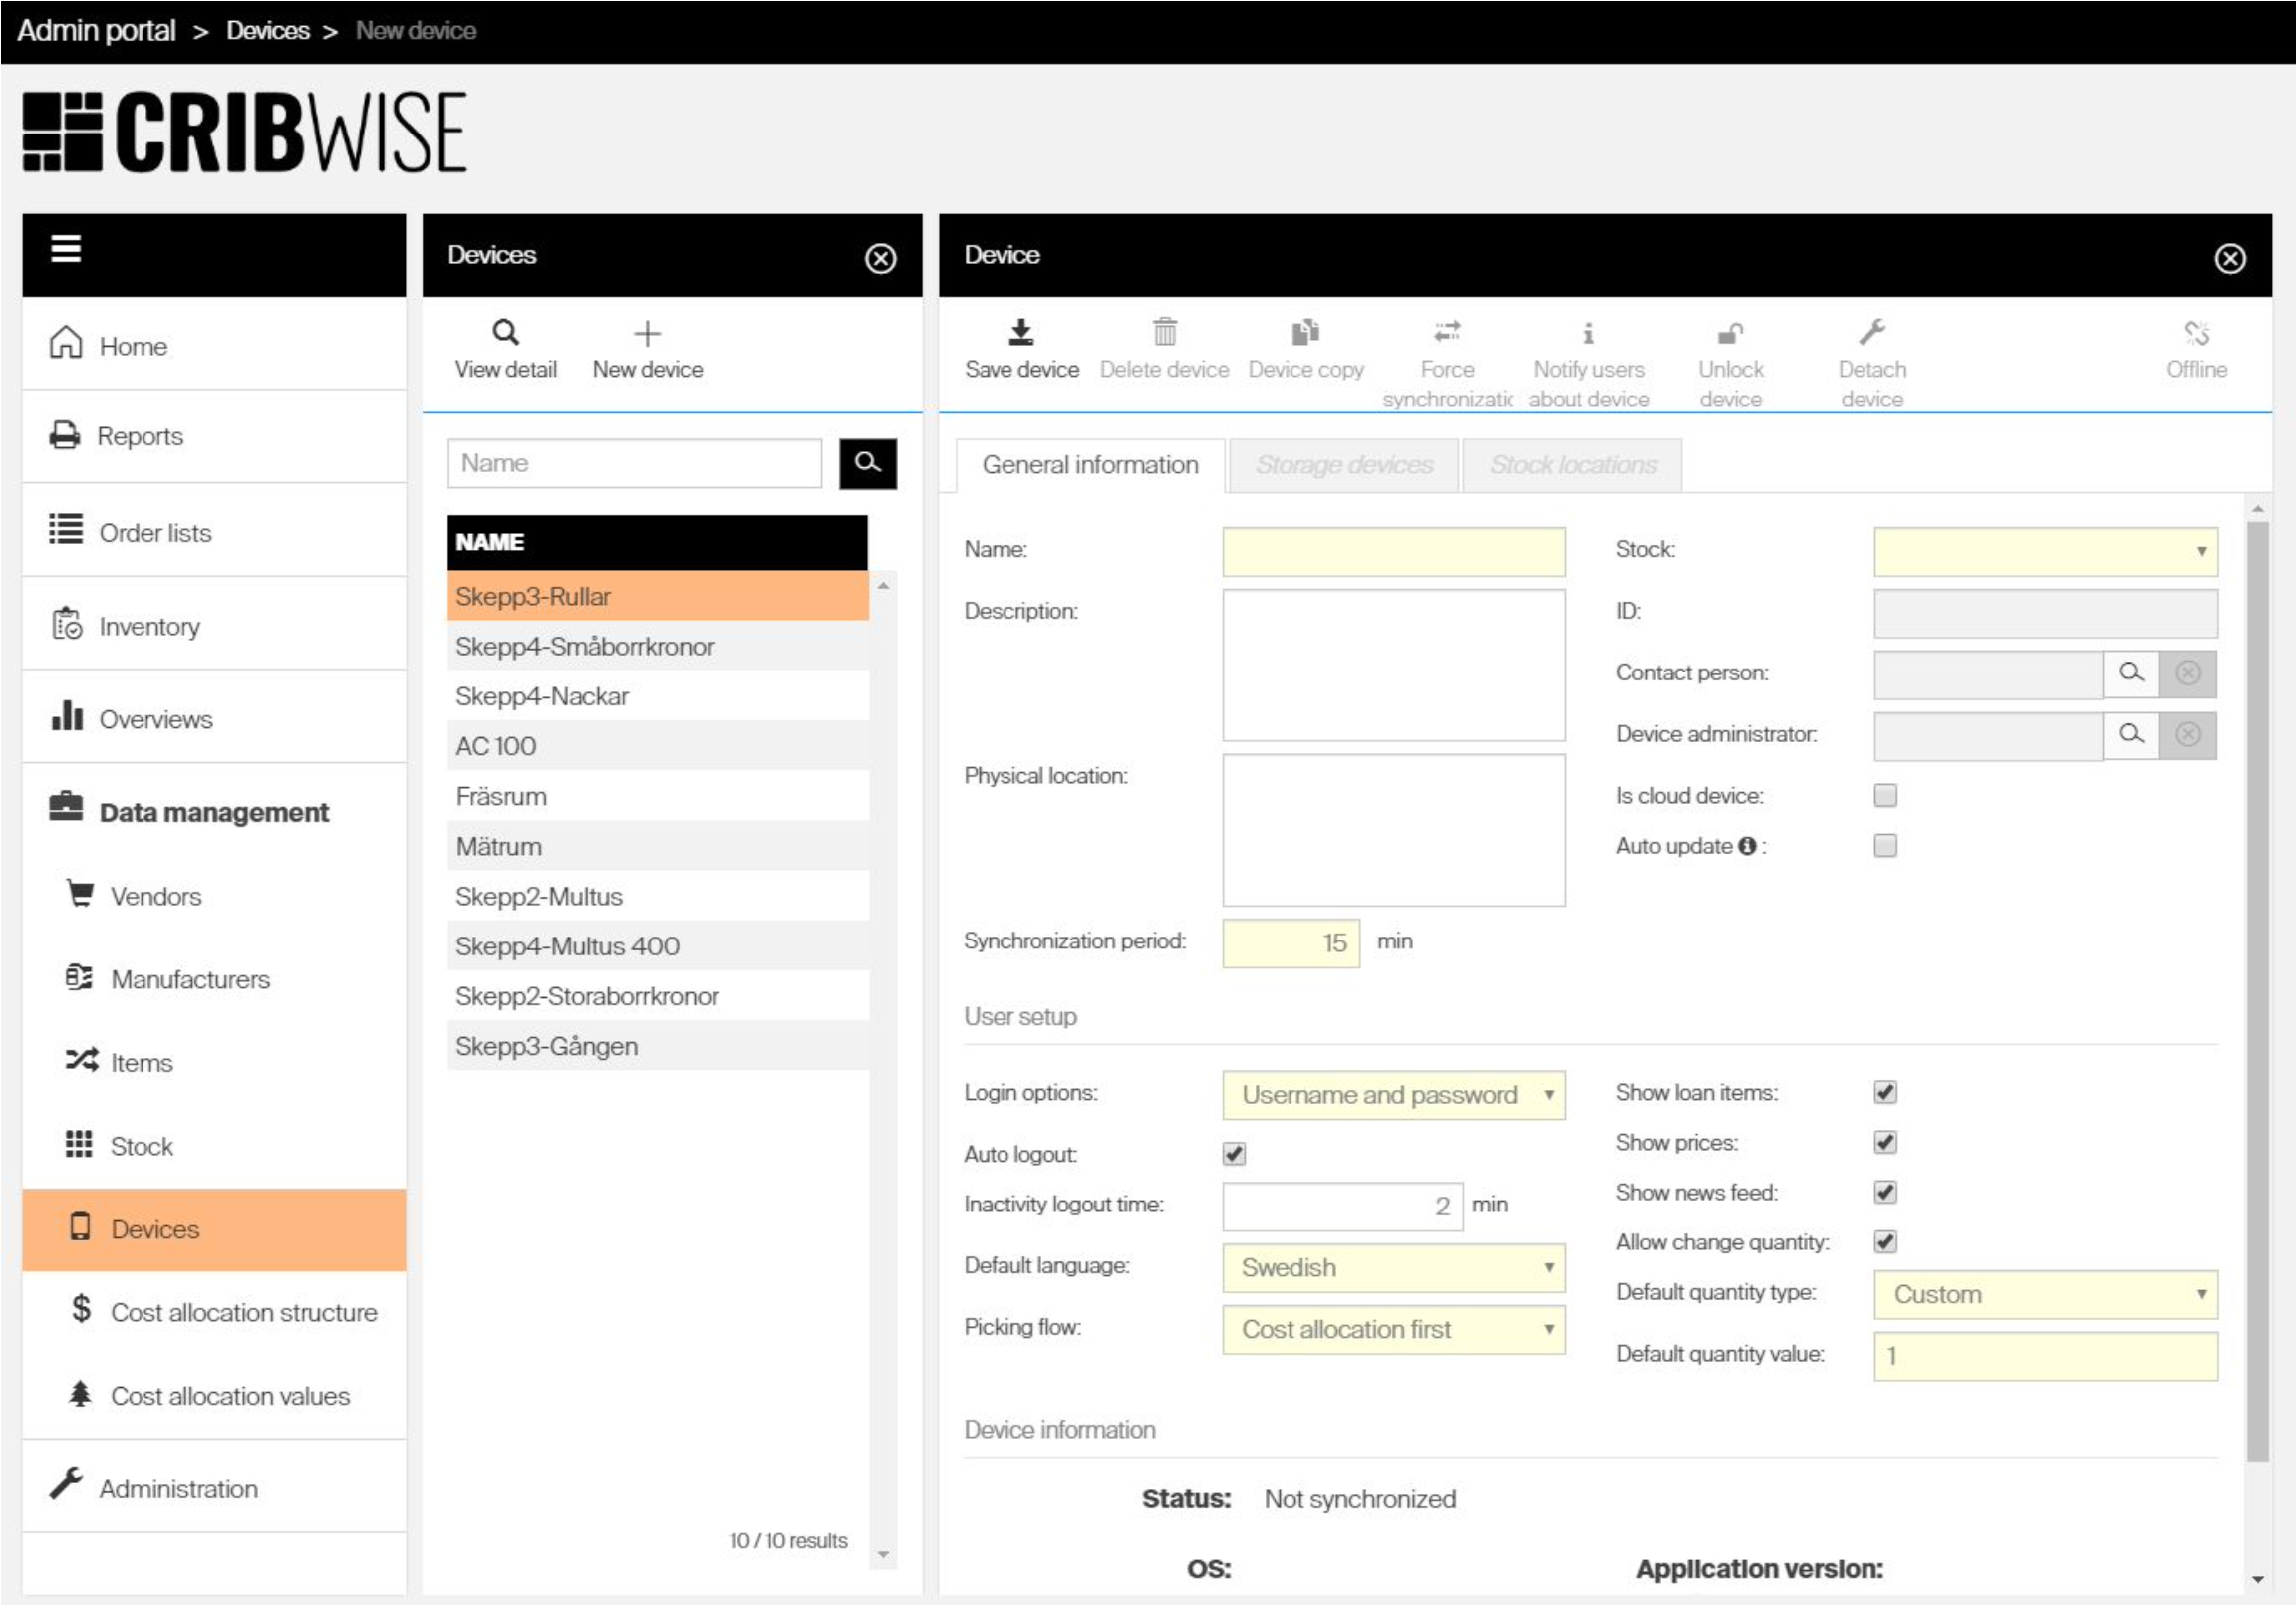
Creating a device and attaching it to a stock.
Read more in Device management.
Step 8 — Create an open storage device and stock locations (optional)
This step is optional – one storage device with locations is already present in Demo Mode. On a new device the storage device list is empty.
- Select Add new storage device.
- Enter a name and select Open storage as the type.
- Enter a range of stock locations in three dimensions. Recommended: 1-1, 1-2, 1-4, which creates 8 locations.
- Click Save. The stock locations are created.
- Release the storage device to production so the SFI can use it.
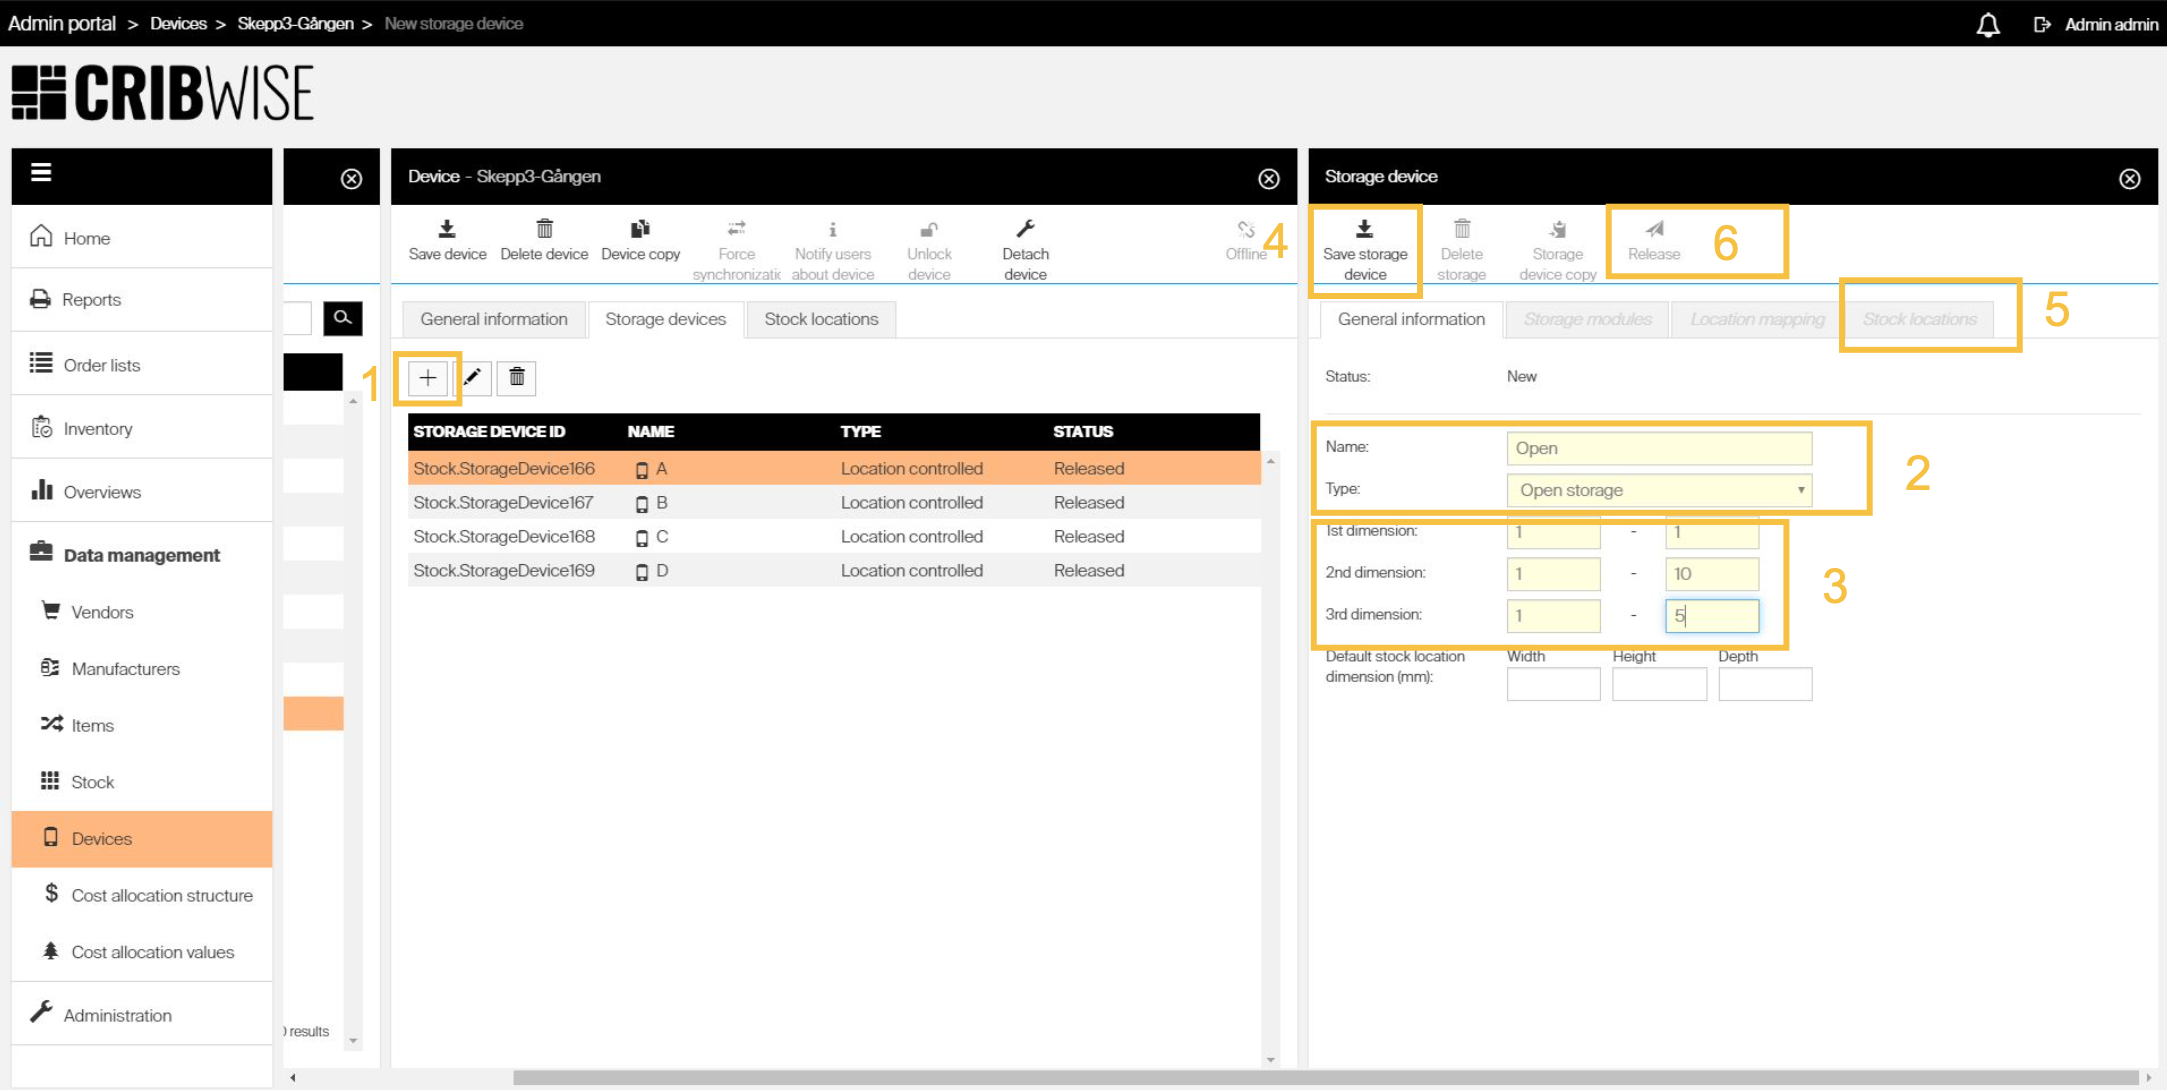
Creating an open storage device and its stock locations.
Read more in Storage device management.
Step 9 — Log in to the Shop Floor Interface
Go to app.cribwise.com/ShopFloorInterface/<shortname>, or click Go to SFI in the top right corner during Demo Mode.
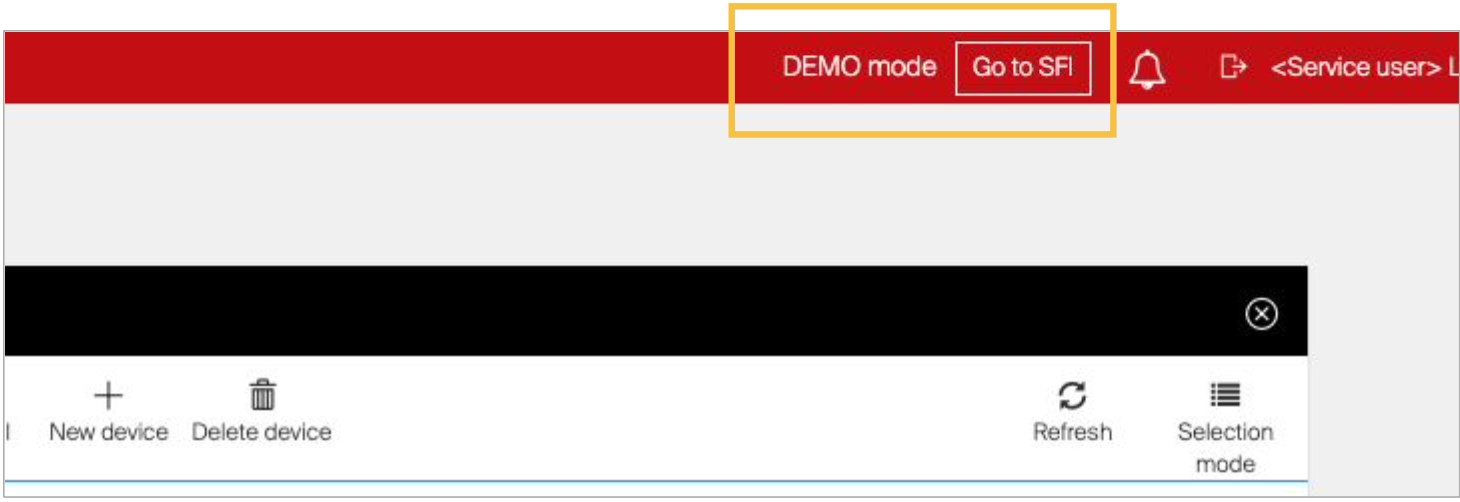
Opening the Shop Floor Interface from the Admin Portal.
Log in with the system user you created in Step 3.
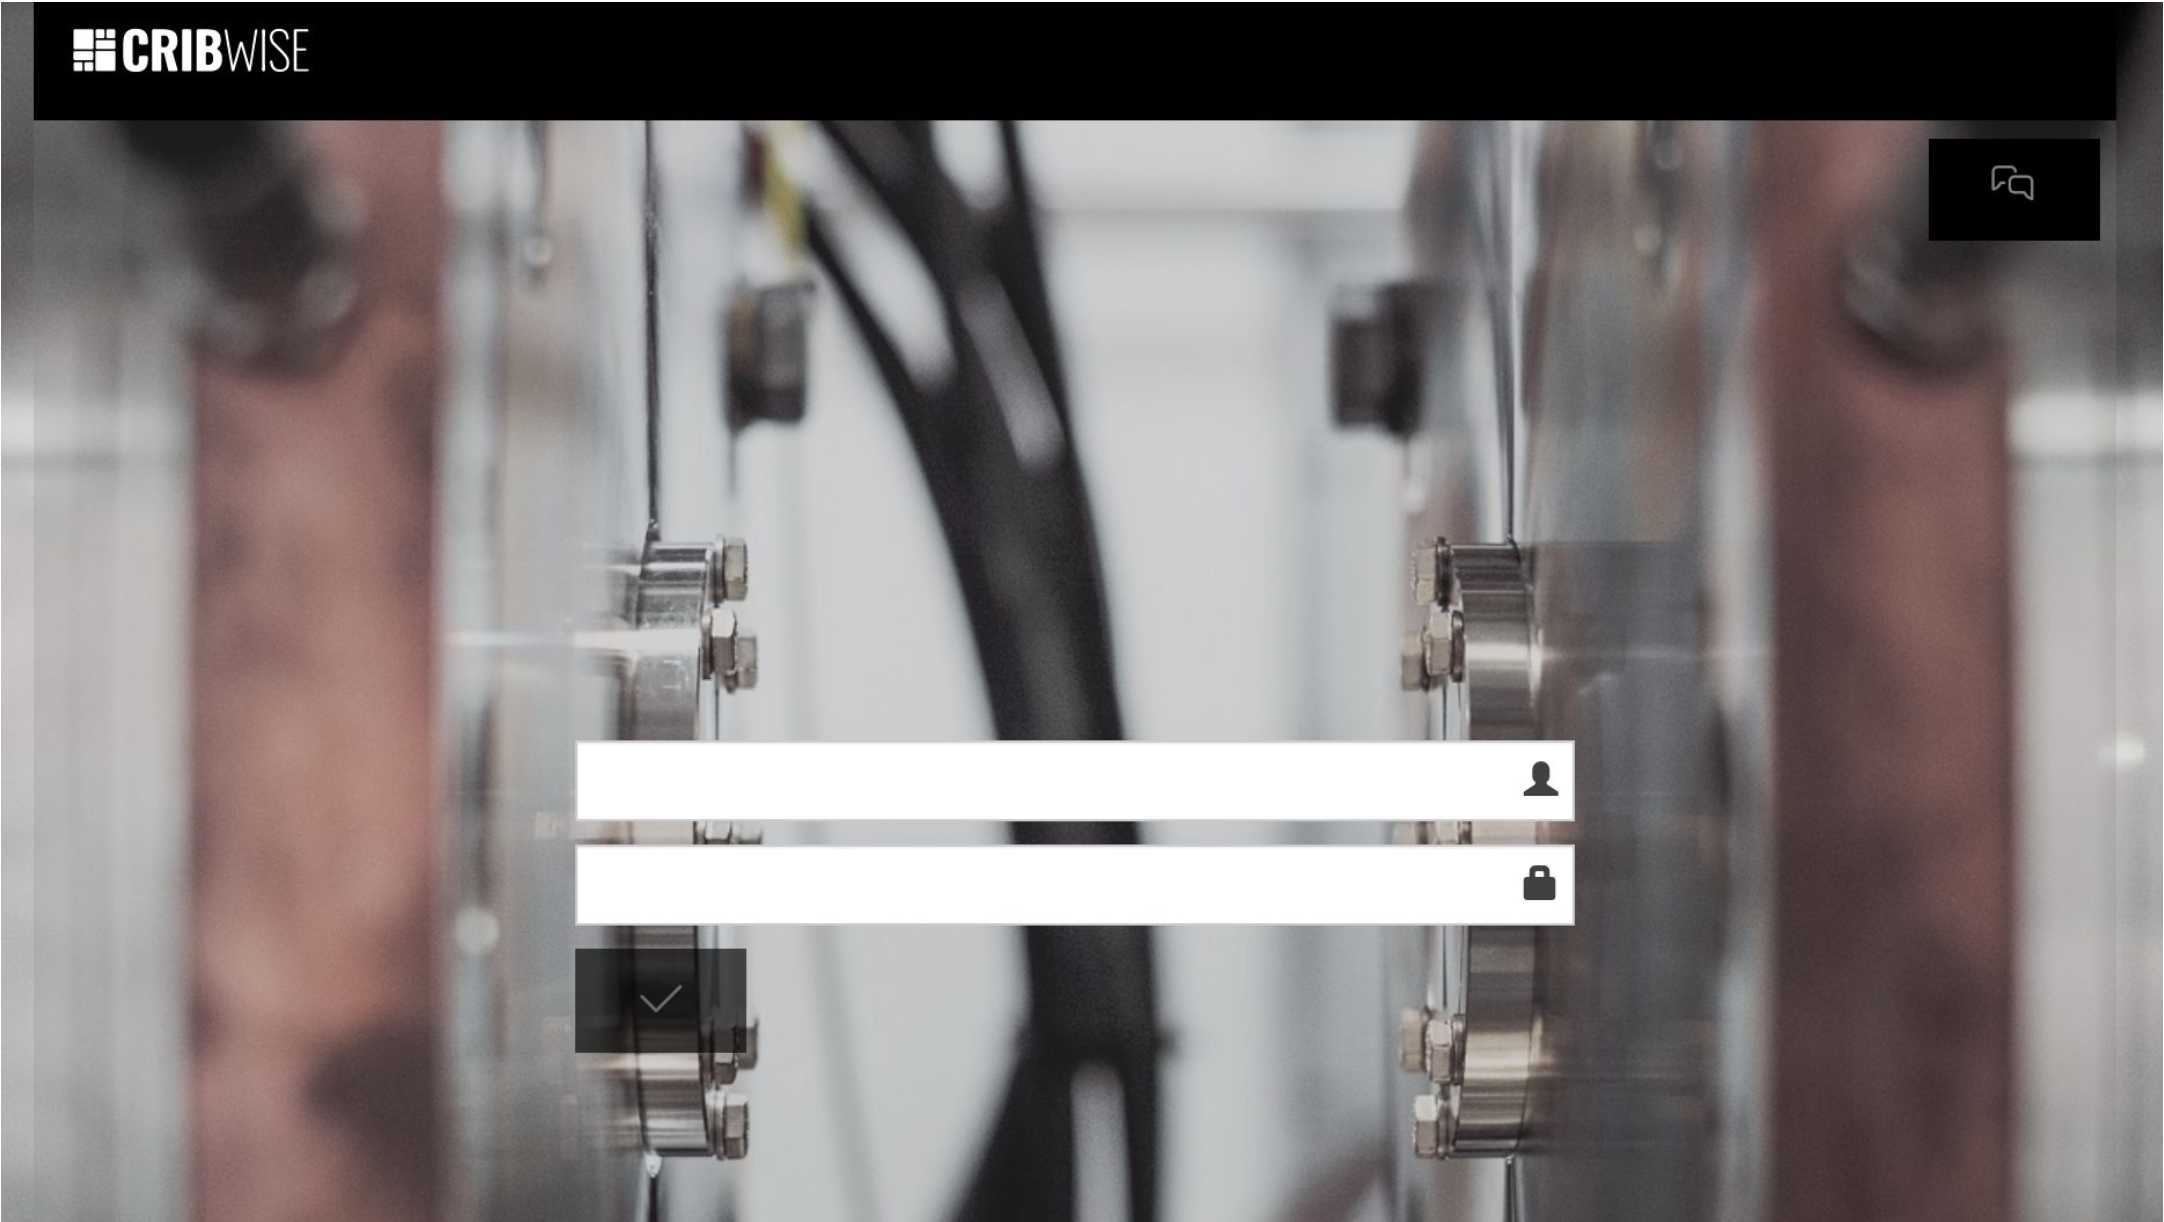
The SFI login. The sign-up Administrator credentials do not work here.
Step 10 — Assign an item to a stock location
- Go to Stock management.
- Click Assign item.
- Choose one item.
- Pick one location.
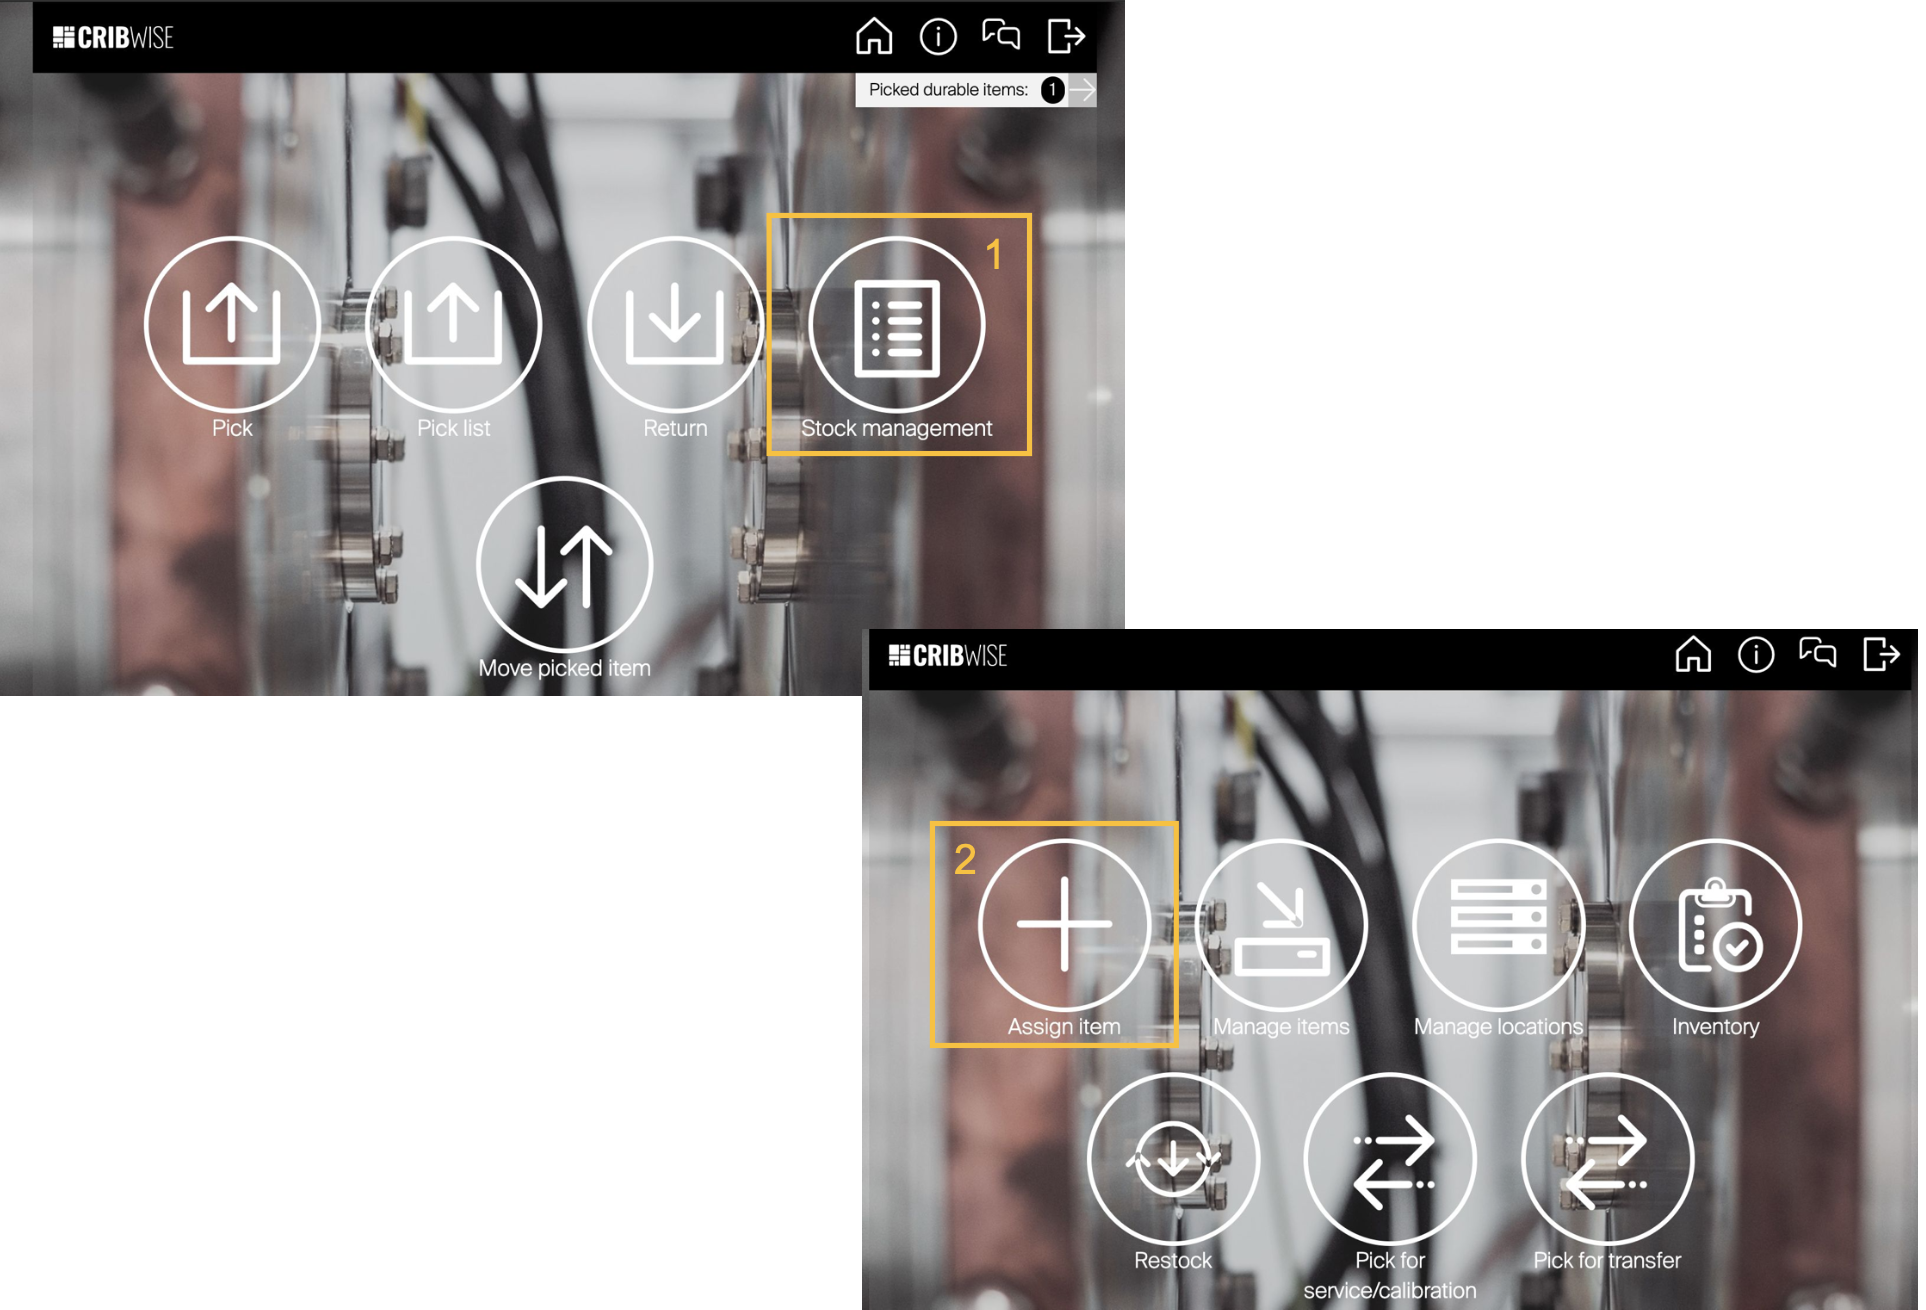
Assigning an item to a location from SFI stock management.
Then fill in the assignment options:
- Fill in the Location assignment. Physical max quantity is how much of the item fits in the assigned compartment; quantity is what is actually placed and available in that location.
- Fill in the Device assignment. Max qty is the maximum quantity stored in the device, and order point can be used as the order trigger.
- Click Save.
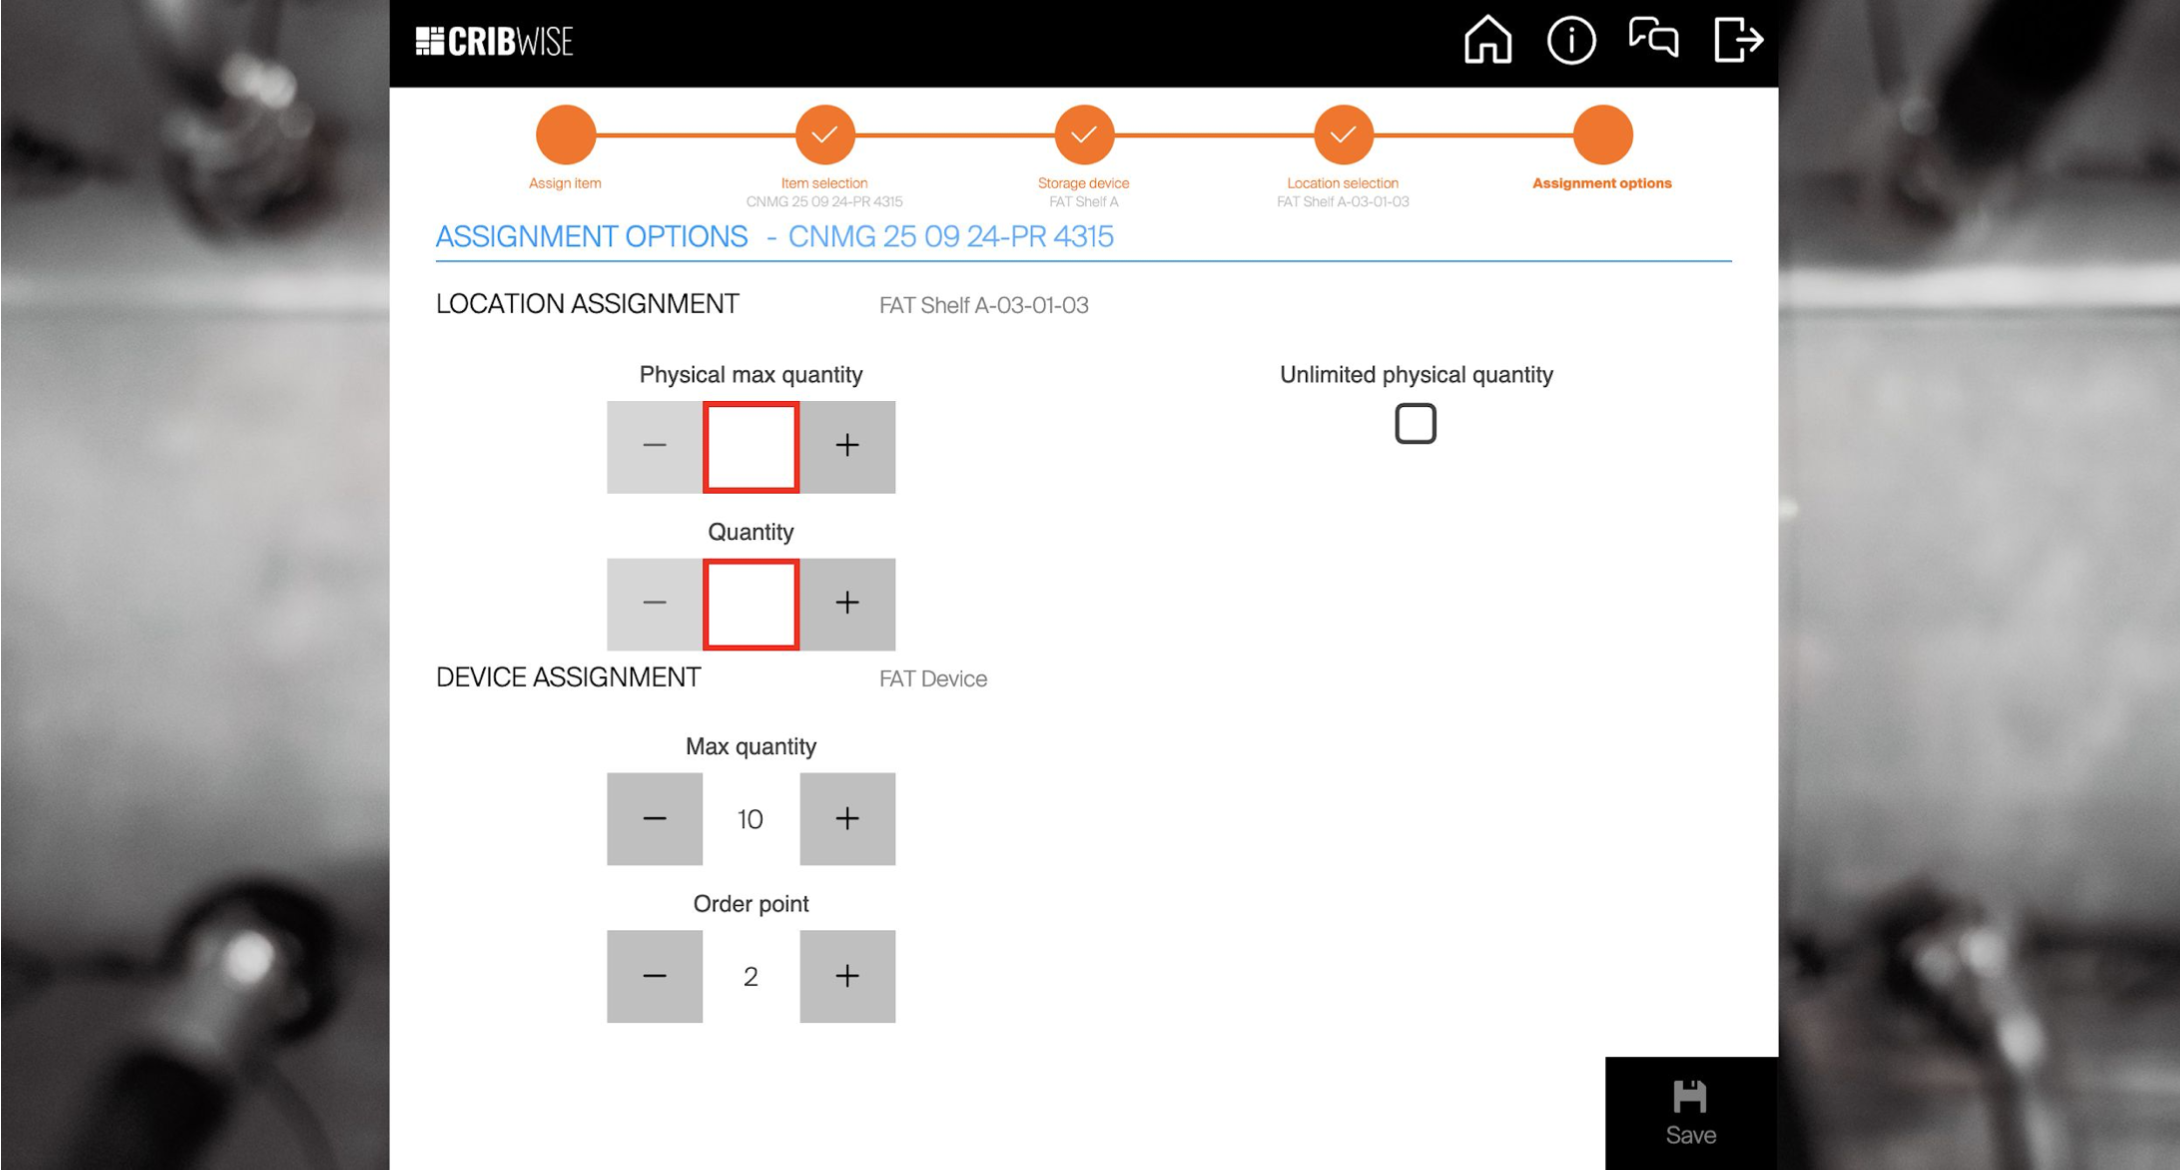
Location and device assignment parameters, which are also used for ordering.
Read more in How to assign an item to a location (Shop Floor Interface).
Step 11 — Pick an item
From the SFI home screen, choose Pick and follow the instructions.
Success: The pick is confirmed in the SFI and the quantity in the stock location is reduced. Your portal is now working end to end.

Picking the item you just assigned.
Read more in How to pick an item.
Reset the Demo Mode
When you want to go live, the initial user created in the sign-up flow (the CRIBWISE Azure AD B2C Administrator) or a CRIBWISE support partner can deactivate Demo Mode.
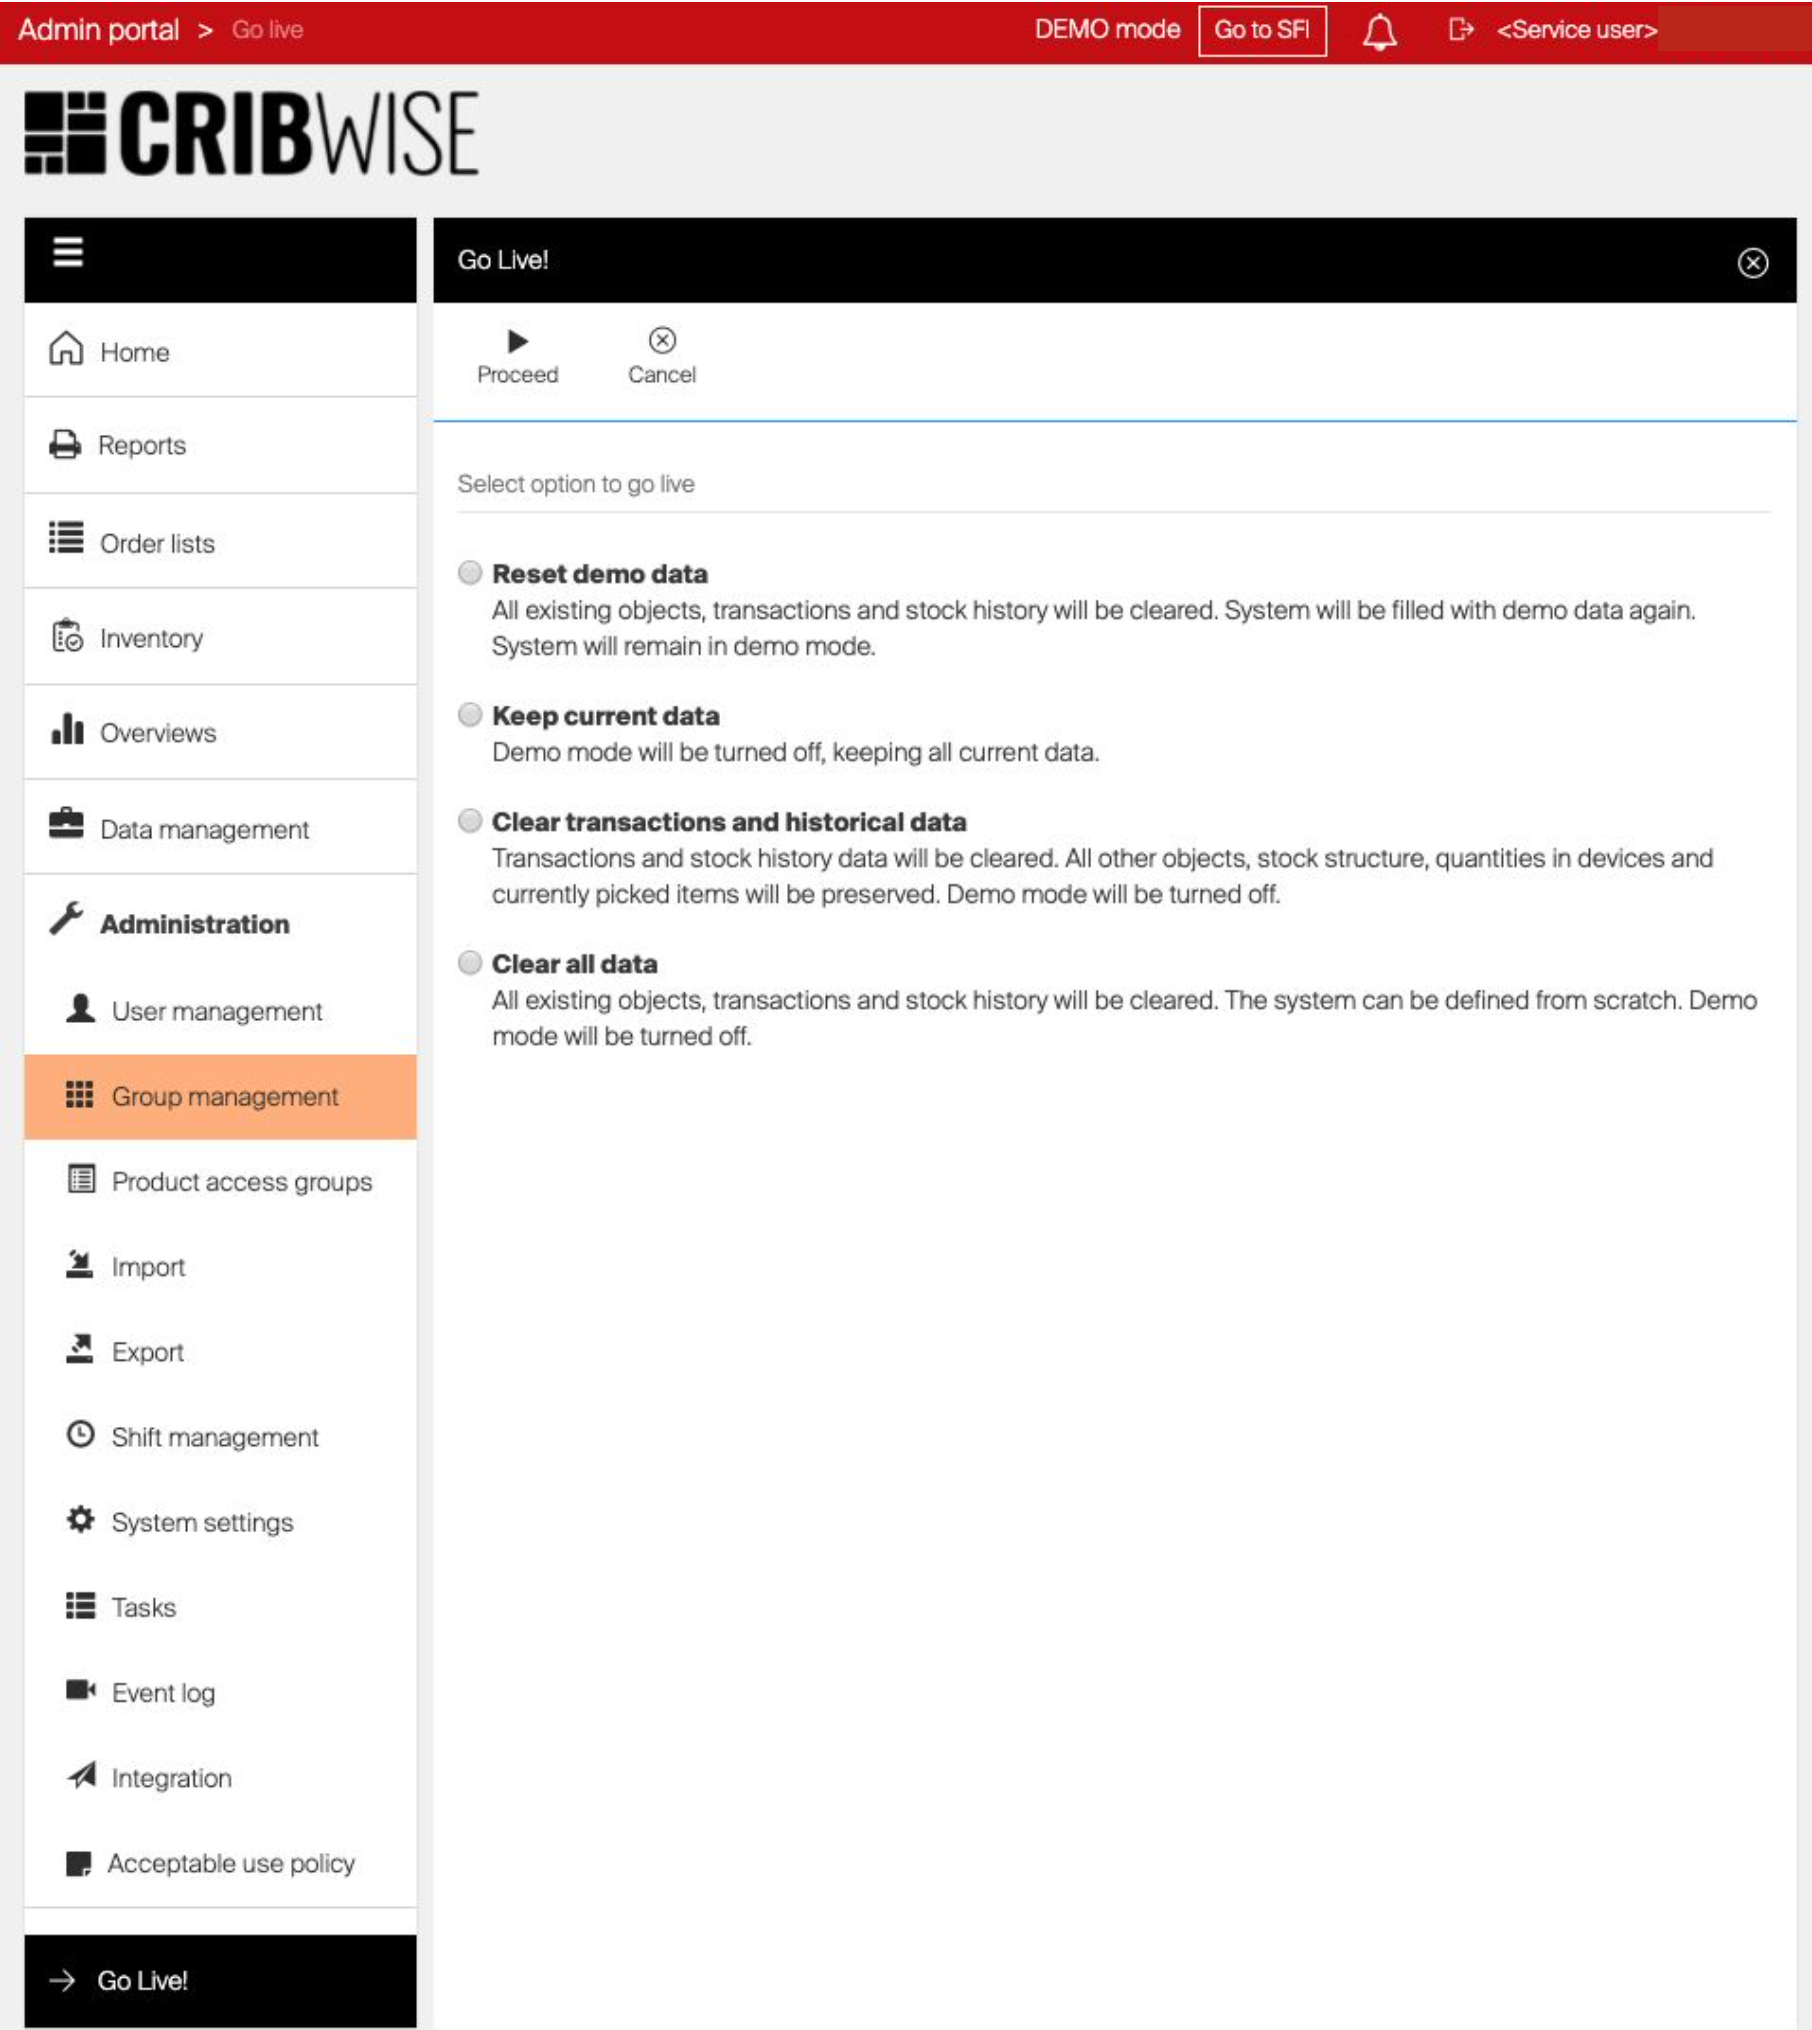
The Go Live! button, available while the portal is in Demo Mode.
Click Go Live! in the bottom left corner. Four options are presented:
- Reset the demo data and keep the portal in demo mode.
- Keep all created data and transactions, and move the portal into production mode.
- Keep all data but clear transactions, and move the portal into production mode.
- Clear all data and start from scratch in production mode.
Select your option and press Proceed.
Warning: Options 3 and 4 delete data permanently. Be sure which one you need before pressing Proceed.
Next steps
- Read the manuals – the AP administration manual and the SFI user manual cover manual item creation, automated purchase and service orders, item types, order scripts, item classifications, restock and reporting.
- Ask for help – contact your sales representative, or send a request to help@cribwise.com and the CRIBWISE Product Team will get back to you.
Troubleshooting
| Problem | Likely cause | Fix |
| The Administrator credentials are rejected in the SFI. | The sign-up Administrator is not a system user. | Create a system user in the Admin Portal (Step 3) and log in with that. |
| An imported item does not appear in the SFI. | The item still has the status Defined imported. | Set the status to Released and save the item (Step 6). |
| No stock locations are available when assigning an item. | The storage device has not been released to production. | Open the storage device and release it (Step 8). |
| System settings cannot be saved. | A required field – marked in yellow – is empty. | Fill in every yellow field, then save again. |
Related articles
- How to activate a new portal and create your first user – the prerequisite before this guide.
- System settings – every system-wide option in the Admin Portal.
- How to create and manage users – create and manage the users who log in to CRIBWISE.
- How to import items from a catalog – the full catalog import procedure.
- How to assign an item to a location (Shop Floor Interface) – assignment parameters in detail.
- How to pick an item – the operator’s daily flow in the SFI.