How to create and manage users
Read time: ~5 minutes
Applies to: Admin Portal and Shop floor interface
What you can do
Add new users to the system, edit their details, assign them to a user group, and manage login keys for alternative authentication methods.
Before you start
- You need Administrator privileges in Admin Portal.
- At least one user group must exist.
- For the new user, have ready: login name, full name, email address, and which user group to assign.
Quick start
Experienced users — create a user in 5 steps:
- Go to Administration > User management.
- Click New user.
- Enter login, password, surname, and email.
- Select a User group.
- Click Save user.
Need more detail? Follow the full steps below.
Steps
Step 1 — Open user management
- In the left sidebar, click Administration.
- Click User management.
The user list shows all existing users with their name, login, email, and phone.
Step 2 — Create a new user
- Click New user in the toolbar.
- Fill in the required fields:
| Field | Required | What to enter |
|---|---|---|
| Login | Yes | A unique login name. Cannot be changed after saving. |
| Password | Yes | A password meeting the minimum length set in system settings. Only shown when creating a new user. |
| Confirm password | Yes | Re-enter the same password. |
| User must change password at next login | No | If enabled, the user must set a new password the first time they log in to AP or SFI. |
| Name | No | First name |
| Surname | Yes | Last name |
| Yes | Email address. | |
| Mobile phone | No | Contact phone number. |
| Language | No | Preferred language for AP and SFI. If empty, the system default is used. |
| User group | Yes | Select the group that defines this user’s permissions. |
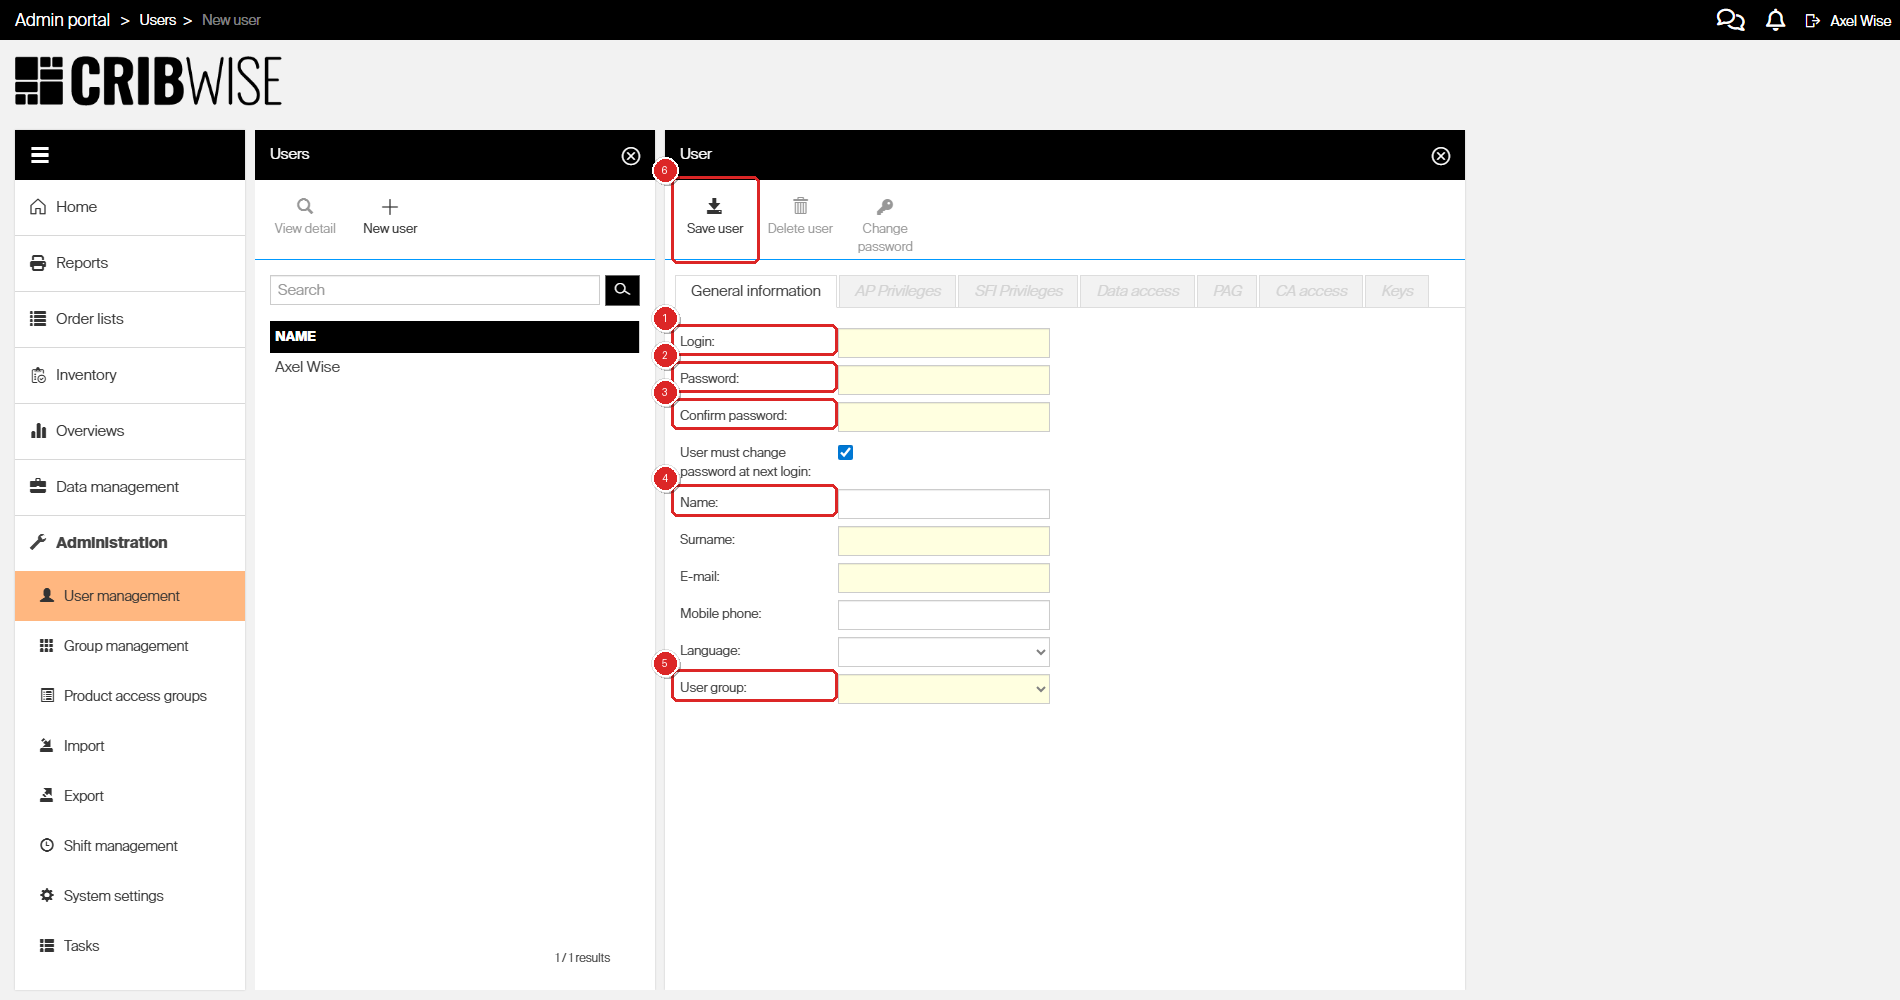
The new user form — fill in login credentials, personal details, and assign a user group.
Step 3 — Save the user
- Click Save user in the toolbar.
Success: The user appears in the user list and can now log in with the credentials you provided.
Tip: Enable User must change password at next login for security — the user sets their own password on first login on AP or SFI.
Edit an existing user
- In User management, double-click the user in the list (or select and click View detail).
- Edit any field on the General information tab.
- Click Save user.
Note: This is the only place where a password can be reset.
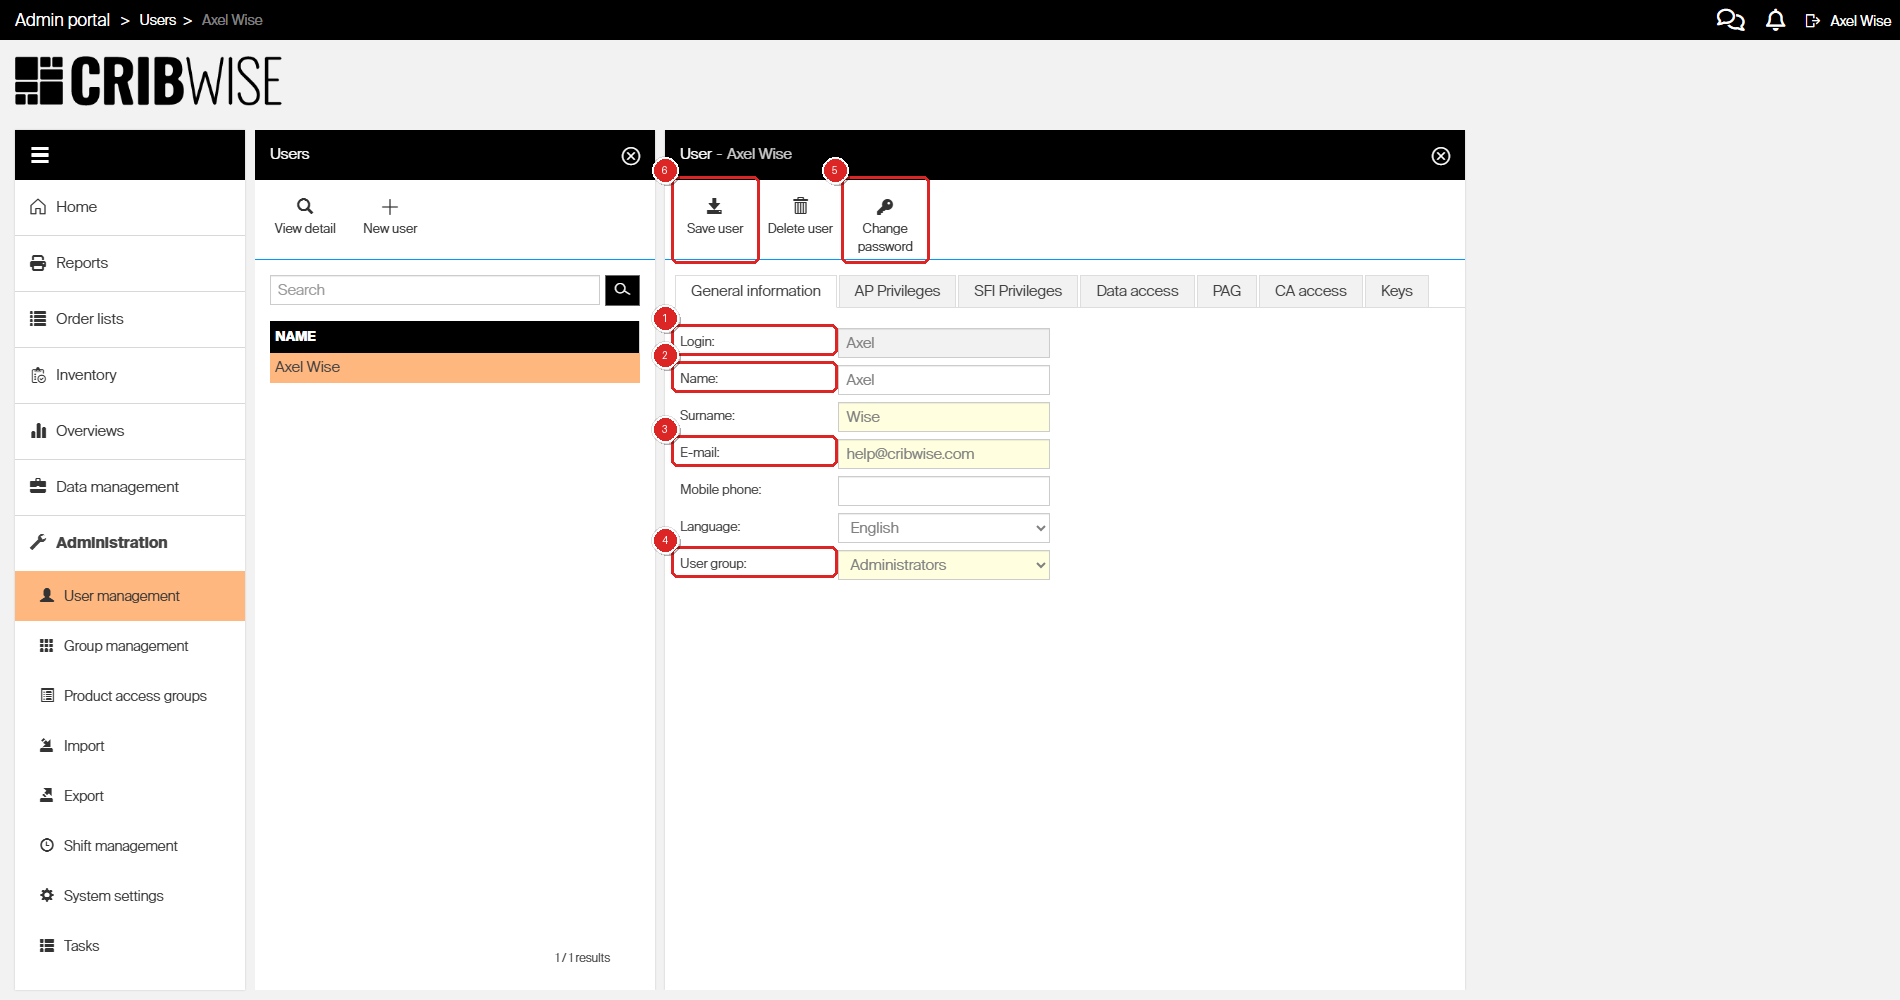
The user detail view — edit personal details or change the user group assignment.
Note: The Login field cannot be changed after the user is saved for the first time.
Override group permissions for a user
If the user’s group has Enable privileges override enabled:
- Open the user’s detail page.
- Go to the AP Privileges or SFI Privileges tab.
- Enable Override group settings for the section you want to customize.
- Adjust the individual permissions.
- Click Save user.
This lets you grant or revoke specific permissions for one user without creating a separate group.
Manage login keys (RFID, Coges)
If your system uses alternative login methods (RFID or Coges keys):
- Open the user’s detail page.
- Click the Keys tab.
- Click the Add button.
- Enter the key value and select the key type (RFID or Coges).
- Click Save user.
The key is now associated with the user. To edit or remove a key, use the Edit or Delete buttons on the Keys tab.
Troubleshooting
| Problem | Likely cause | Fix |
|---|---|---|
| Cannot find the user in the list | The user may belong to a group your account cannot see (data access restriction on user groups) | Ask an administrator to check user group data access settings |
| “Login already exists” error | Another user has the same login name | Choose a different login name — logins must be unique |
| User cannot log in to SFI | The user’s group does not have Shop floor interface users enabled | Enable SFI access on the user’s group (How to configure a user group) |
| Override options are not available | Enable privileges override is not enabled for this user’s group | Enable it on the group’s AP Privileges tab, or move the user to a group where it is enabled |