Read time: ~5 minutes
Applies to: Admin Portal
What you can do
Control which items specific users or user groups can pick in CRIBWISE by creating Product Access Groups (PAG). Items can be included or excluded from available items for those users to pick. Items being included can have restrictions like quantity, time, or both.
Before you start
- You need administrator access to the Admin Portal.
- Decide which items to restrict and which users or groups should be affected.
- If you want to restrict by user group rather than individual users, set up user groups first in Administration > Group management.
Important: PAG restrictions apply on top of other permissions. Administrator users are not subject to PAG rules for picking items.
Quick start
Experienced users — restrict item access in 5 steps:
- Go to Administration > Product access groups.
- Click New group and enter a name.
- Open the Included items or Excluded items tab and activate the list.
- Assign items to the include or exclude list.
- Assign the PAG to users or user groups via their PAG tab.
Need more detail? Follow the full steps below.
How PAG work
A Product Access Group defines a set of rules that determine which items a user can see and pick. There are three mechanisms:
| Mechanism | What it does | Use when |
|---|---|---|
| Included items | Only items on this list are available to pick. All other items are hidden. | You want a short allow list — e.g., “production team can only pick carbide inserts.” |
| Excluded items | Items on this list are hidden. All other items remain available. | You want to block a few specific items — e.g., “apprentices cannot pick expensive tools.” |
| Quantity restriction | Limits how many units of an item a user can pick per period. | You want to control consumption — e.g., “max 5 gloves per shift.” |
Note: If both the included and excluded lists are active on the same PAG, the exclude list takes priority. An item must be on the included list and not on the excluded list to be available.
PAGs are assigned at two levels:
- User group — all users in the group inherit the PAG. This is the recommended approach.
- Individual user — overrides the group-level PAG when the Override group settings checkbox is enabled on user level.
Steps
Step 1 — Open Product Access Groups
- In the Admin Portal sidebar, click Administration.
- Click Product access groups.
The PAG list opens, showing all existing groups with their included, excluded, and restricted item counts.
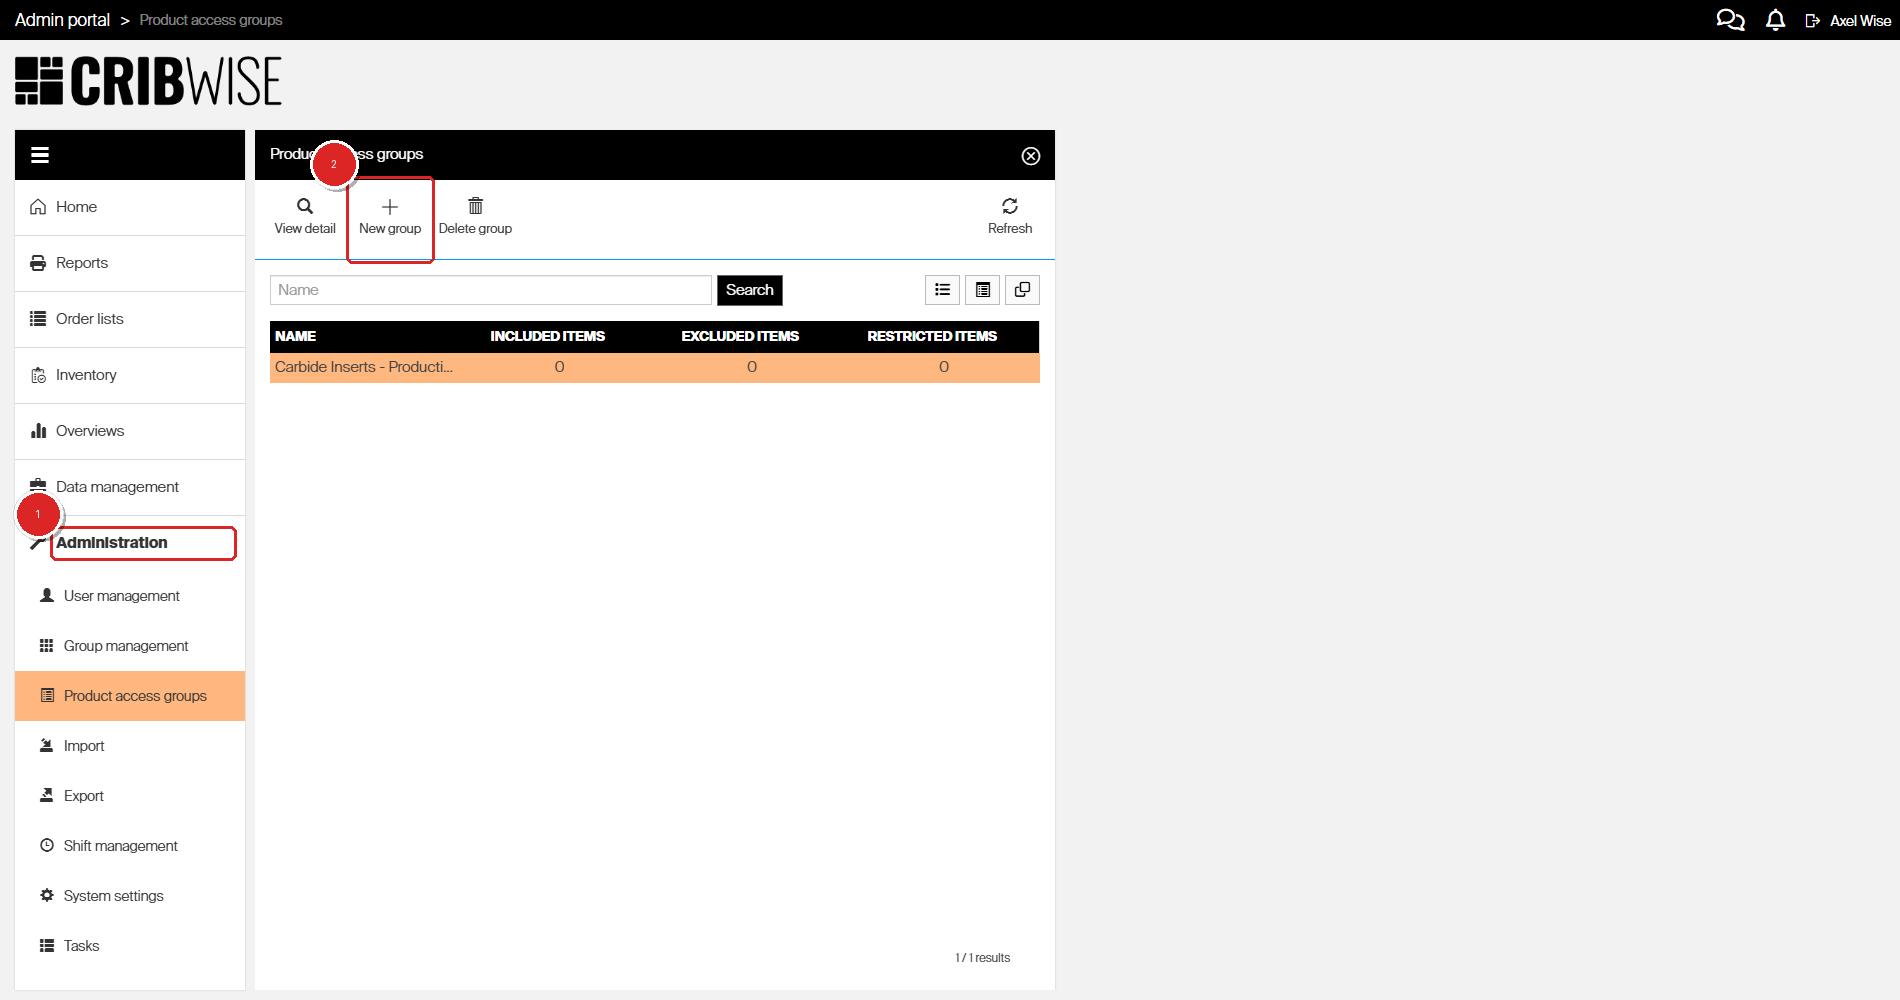
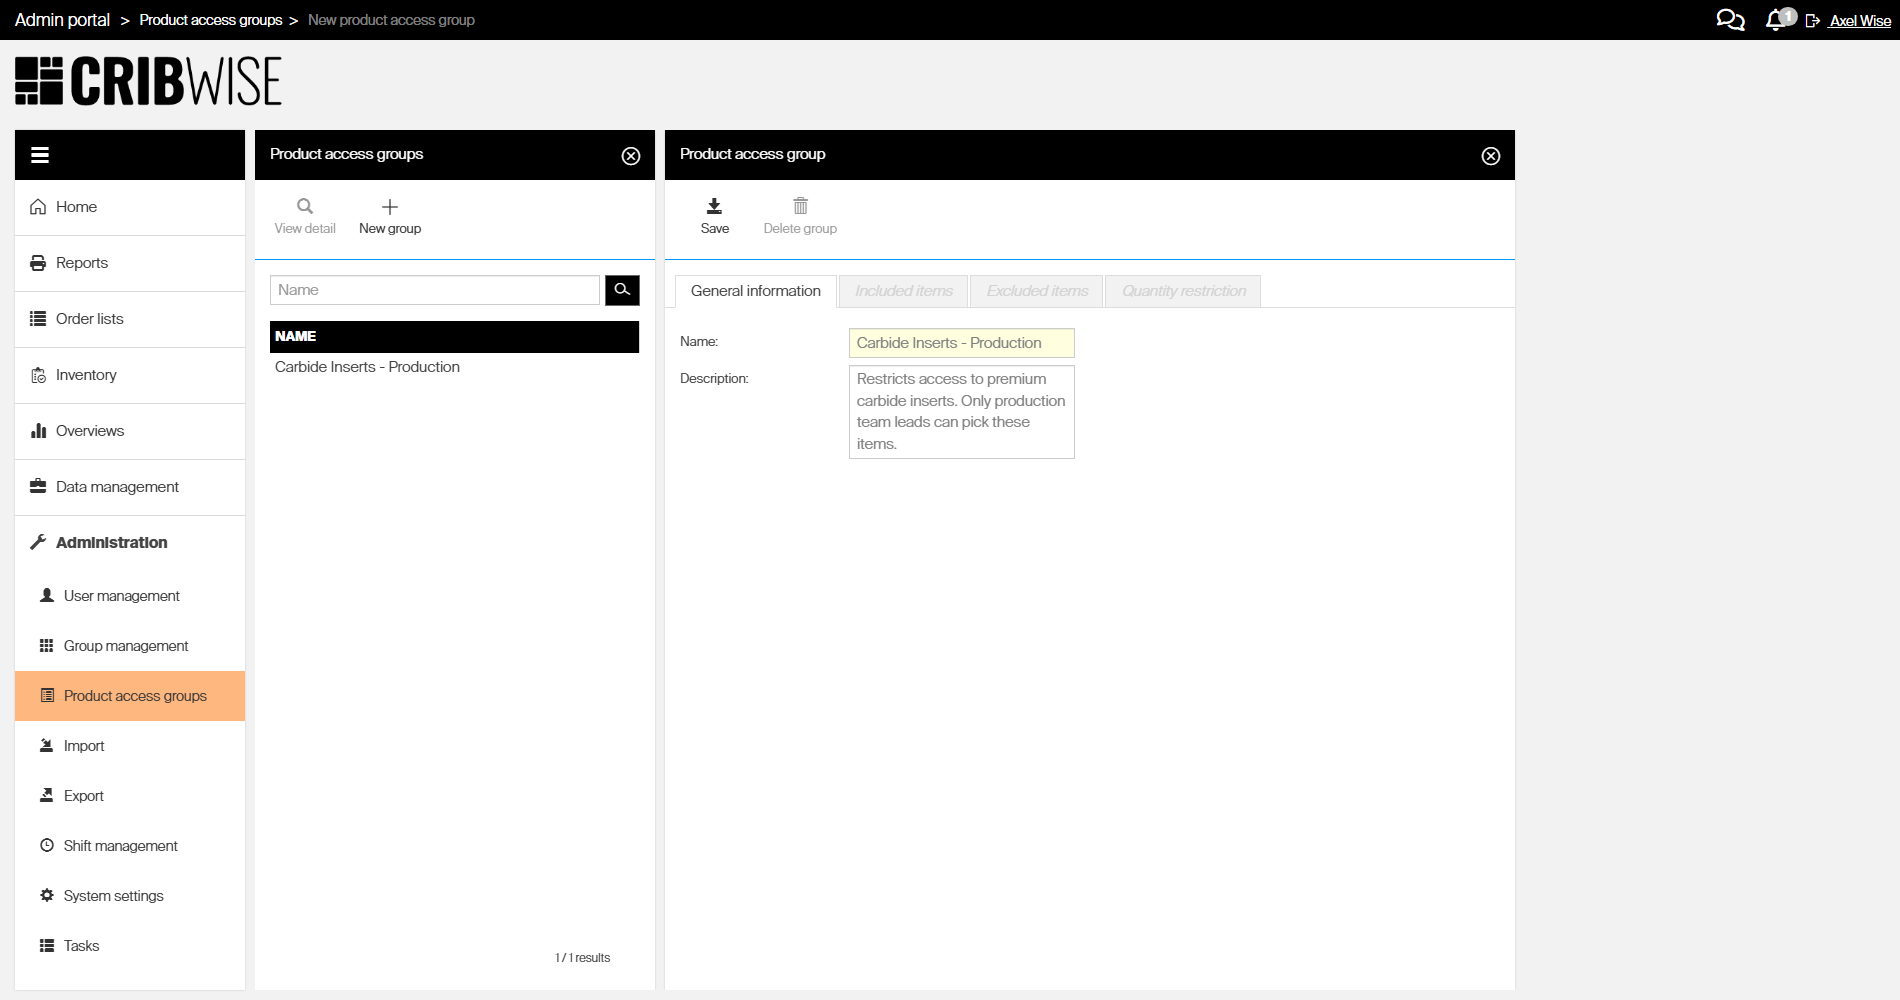
Step 2 — Create a new group
- Click New group in the toolbar.
- Enter a Name for the group (e.g., “Carbide Inserts – Production”).
- Optionally, enter a Description explaining the group’s purpose.
- Click Save.
| Field | Required | What to enter |
|---|---|---|
| Name | Yes | A descriptive name that identifies the restriction (e.g., “PPE – Apprentices” or “Carbide Inserts – Production”). |
| Description | No | A brief explanation of why this group exists and who it applies to. |
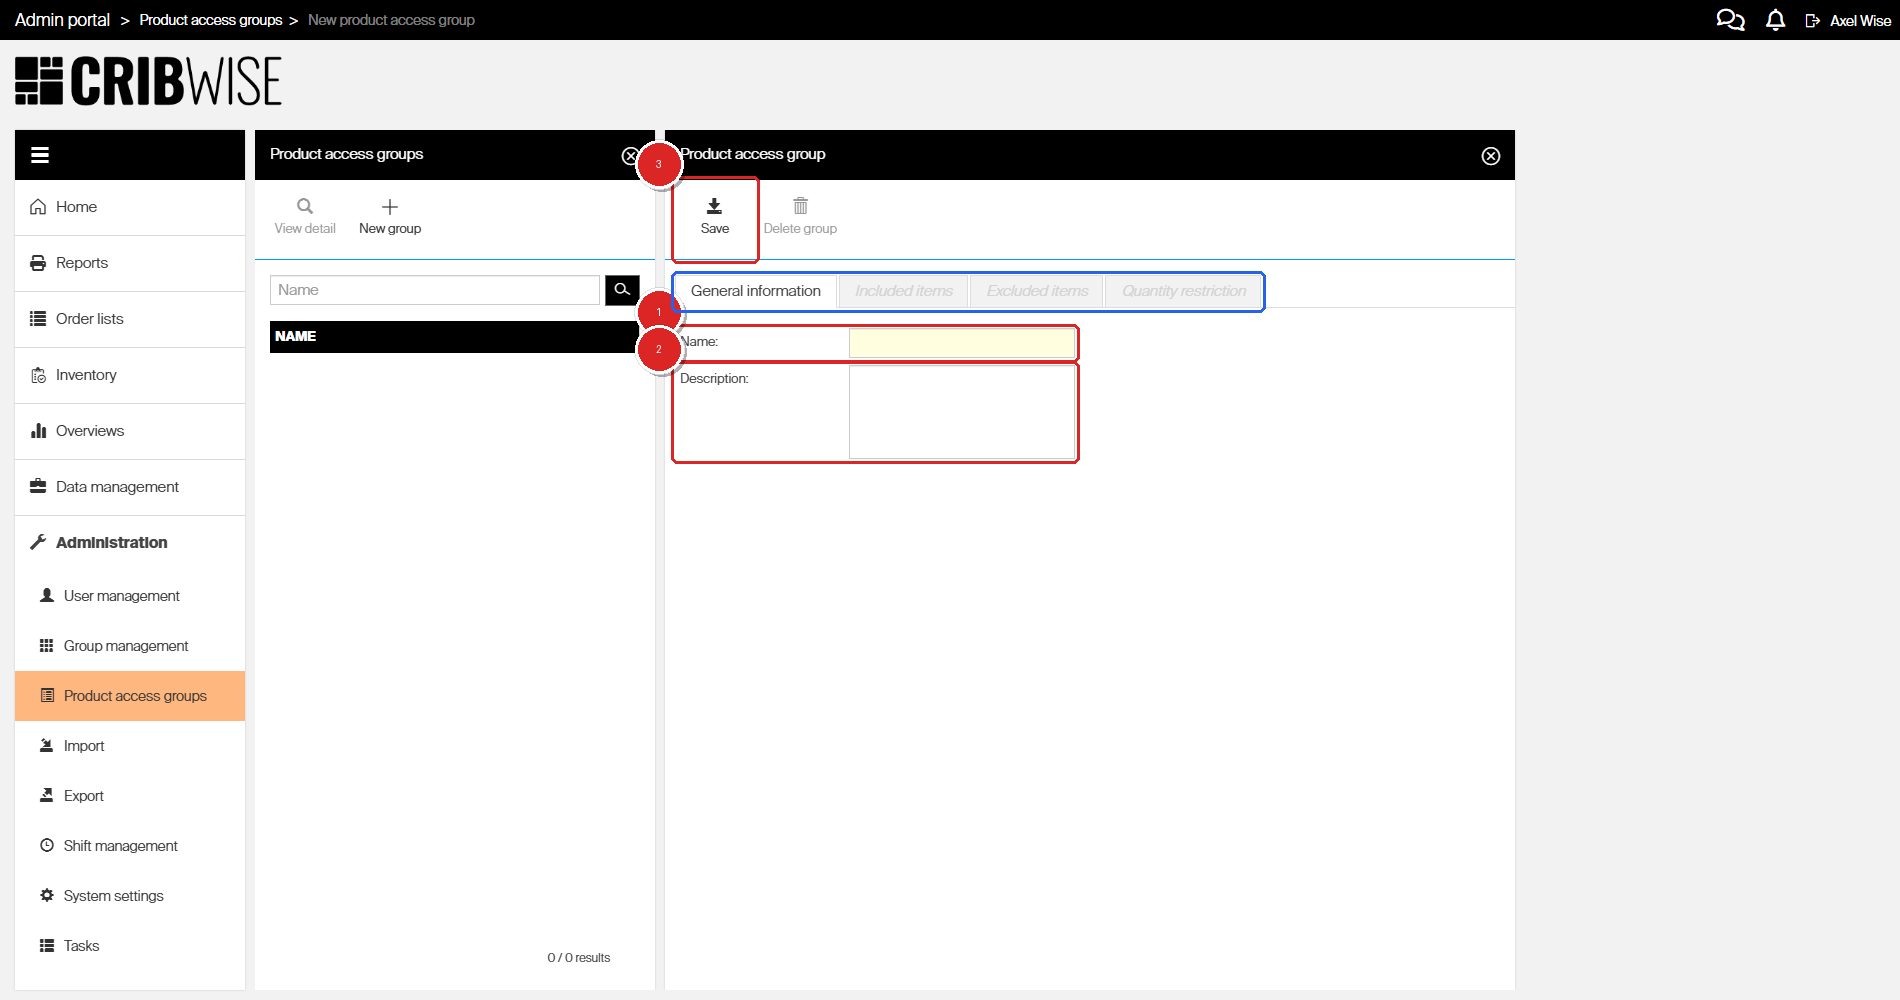
| Tab | Purpose |
|---|---|
| General information | Name and description. |
| Included items | Allowlist — only these items are available. |
| Excluded items | Blocklist — these items are hidden. |
| Quantity restriction | Per-item pick limits per time period. |
Step 3 — Configure the item lists
Choose whether to use an included list (allowlist), an excluded list (blocklist).
Note: Exclude list trumph the include list in case an item exists in both.
Option A: Included items (allowlist)
- Click the Included items tab.
- Check Activate include list.
- Click the Assign item button (+ icon) to add items.
- Select the items you want to allow and confirm.
- Click Save.
When the include list is active, users assigned to this PAG can only pick items on this list. All other items are hidden from them.
Option B: Excluded items (blocklist)
- Click the Excluded items tab.
- Check Activate exclude list.
- Click the Assign item button (+ icon) to add items.
- Select the items you want to block and confirm.
- Click Save.
Important: Remember to activate the lists with the checkmark box above the list view.
When the exclude list is active, users assigned to this PAG can pick all items except those on this list.
Tip: Start with an excluded list if you only need to block a few items. Use an included list when users should only access a specific, limited set of items.
Step 4 — Set quantity restrictions (optional)
- Click the Quantity restriction tab.
- Click the Assign item button to add items.
- For each item, enter:
- Availability units/value — the maximum quantity.
- Per — the time period (e.g., per day, per shift, per week).
- Click Save.
Quantity restrictions work independently of the include/exclude lists. You can use them alone or in combination.
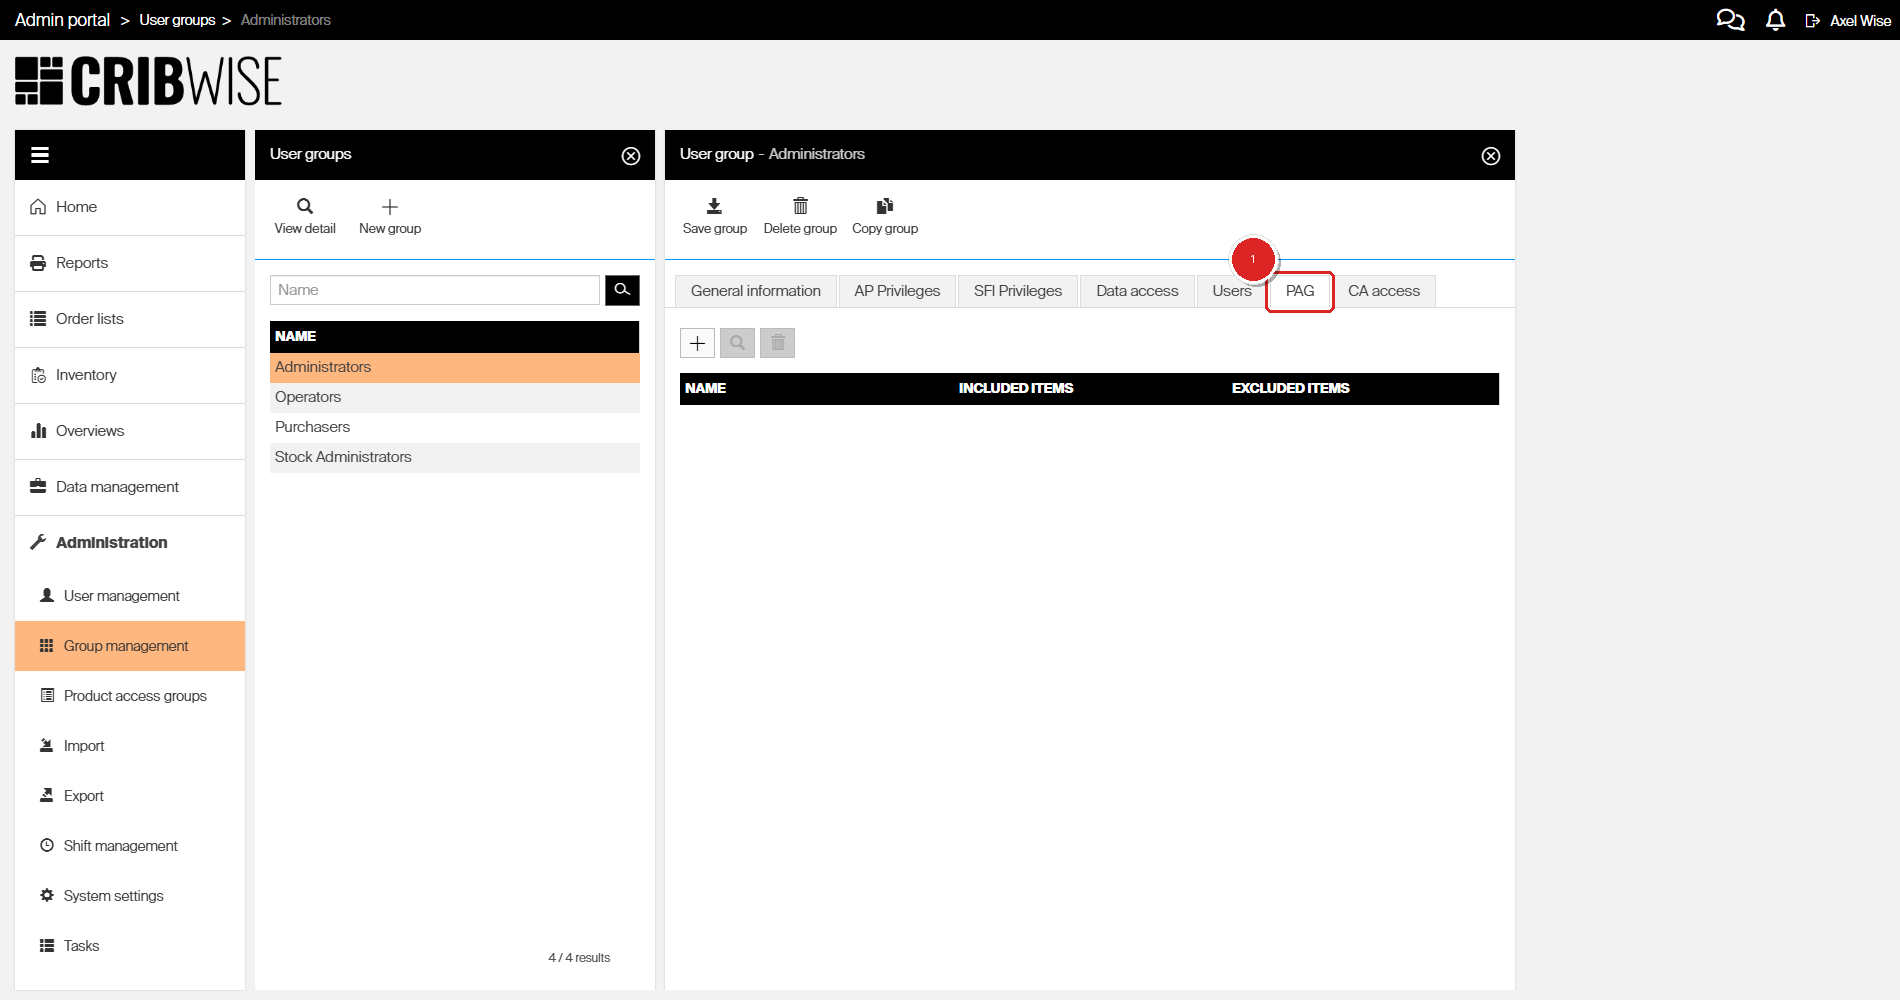
Step 5 — Assign the PAG to users or user groups
You can assign PAG at the group level (recommended) or at the individual user level.
Assign to a user group
- Go to Administration > Group management.
- Select the group (e.g., “Operators”) and click View detail.
- Click the PAG tab.
- Click the + button (Assign PAG).
- Select the PAG you created and confirm.
- Click Save group.
All users in this group now inherit the PAG restrictions.
Assign to an individual user
- Go to Administration > User management.
- Select the user and click View detail.
- Click the PAG tab.
- Check Override group settings if the user belongs to a group with a different PAG.
- Click the Assign PAG button.
- Select the PAG and confirm.
- Click Save user.
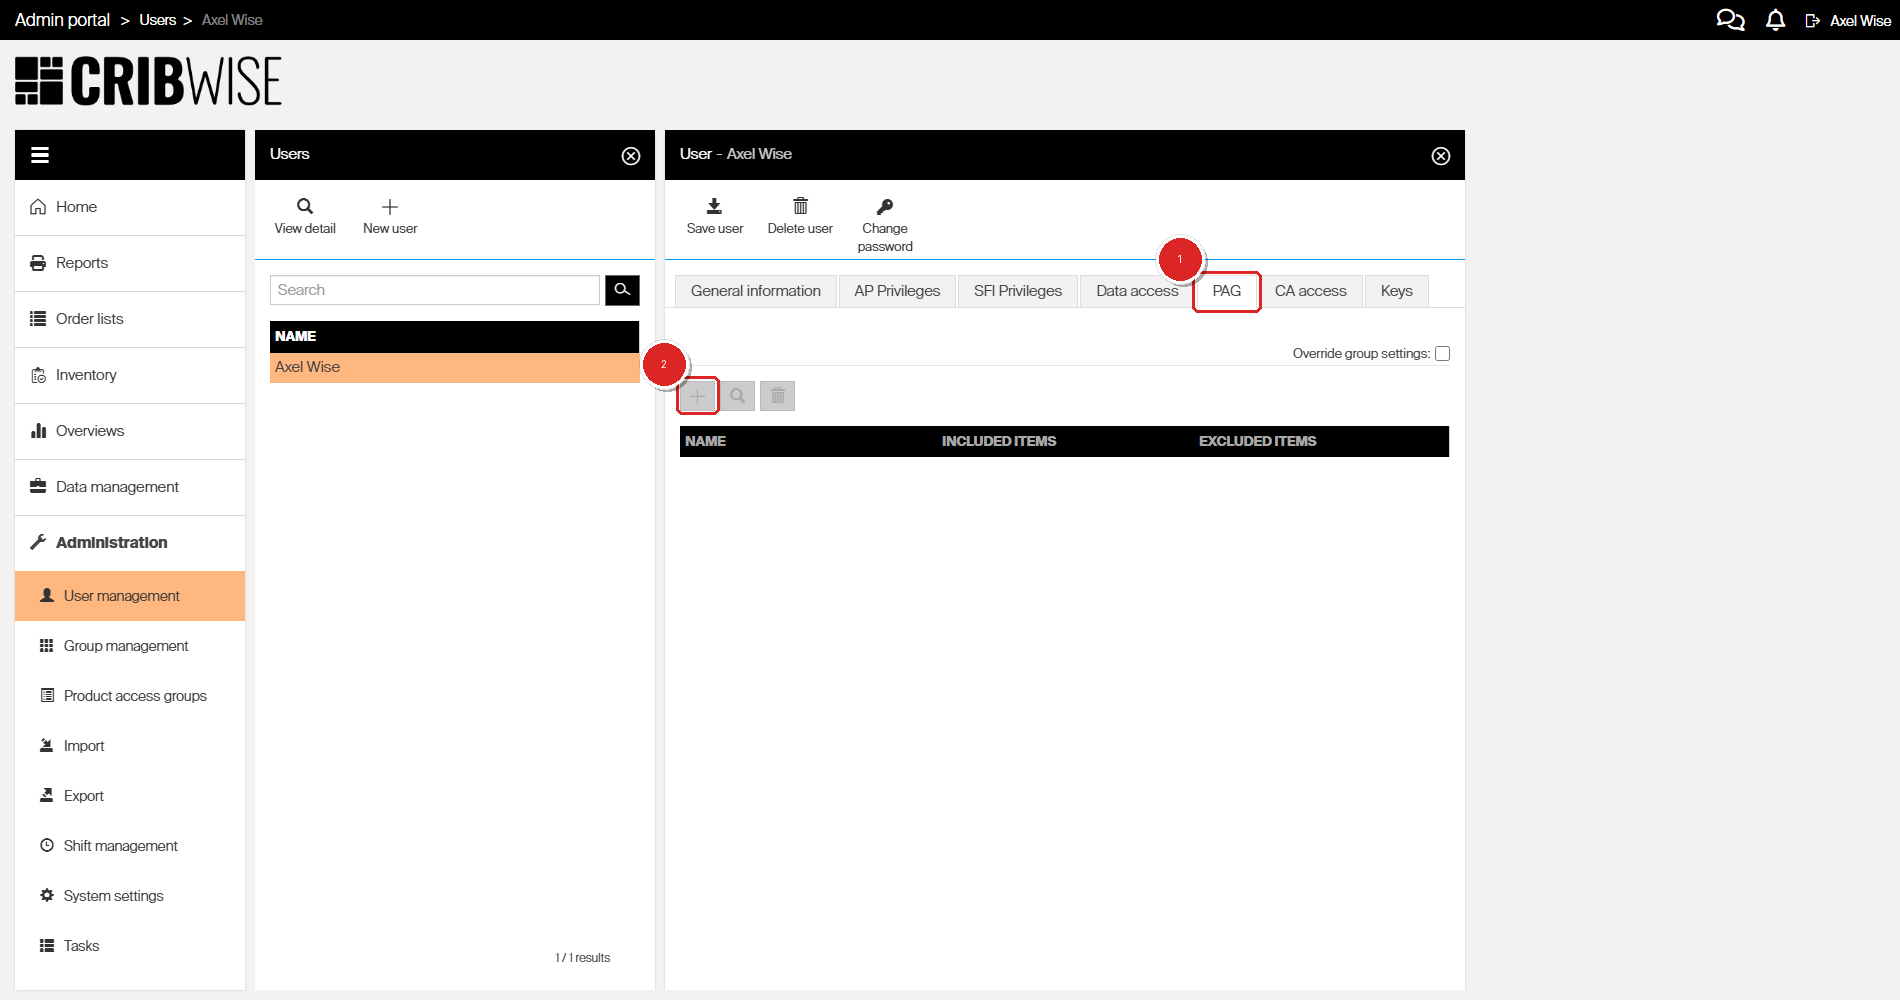
Note: When Override group settings is checked, the user’s individual PAG assignments replace any group-level PAG. When unchecked, the user inherits PAGs from their user group.
Success: The PAG appears in the PAG list with item counts. Users assigned to this PAG — either directly or through their user group — now see only the permitted items when picking in Shop Floor Interface or Admin Portal.
Next steps
After creating a PAG:
- Test the restriction — log in as an affected user on the Shop Floor Interface and verify that only the correct items appear when picking.
- Review existing users — check that all relevant users or groups have the PAG assigned.
Troubleshooting
| Problem | Likely cause | Fix |
|---|---|---|
| User can still see blocked items | PAG is not assigned to the user or their group. | Open the user’s or group’s PAG tab and verify the PAG is listed. |
| User cannot see any items | The included list is active but empty, or the wrong PAG is assigned. | Open the PAG and check that the include list has the correct items. |
| User sees items from a different PAG than expected | Override group settings is not checked on the user record. | Open the user’s PAG tab and enable Override group settings if individual assignments should take priority. |
| Changes to PAG do not take effect | The user session is cached. | Ask the user to log out and log back in. PAG changes apply on next login. |
| Quantity restriction is not enforced | The restriction was added but the group was not saved. | Open the PAG, check the Quantity restriction tab, and click Save. |