
What you can do
Activate a brand-new CRIBWISE portal with the initial password from your welcome e-mail, then create the first Admin Portal user for everyday work.
A new portal has no Admin Portal users at all. The only way in is the portal owner account — the e-mail address registered when the portal was created. You activate that account first, then create the users your team will actually log in with.
Before you start
- You are the designated portal owner, and you can open the mailbox of the address the portal was registered with.
- You have received the welcome e-mail from
noreply@cribwise.com. It contains your initial password. - You know your portal’s web address. It ends with your portal name — for example
https://app.cribwise.com/AdminPortal/yourportal. The exact host may differ if you buy CRIBWISE through a reseller.
Important: When the portal account administrator leaves the company make sure to transfer the ownership to the new person in charge. Contact your support partner to make the change. Recommended is to keep the account administrator e-mail address and password somewhere safe, and make sure more than one person can reach that mailbox. If nobody can log in as a normal user and nobody can reach the account administrator mailbox, no one can open the portal in case something would happen to the normal users.
Quick start
Experienced users — activate the portal in 6 steps:
- Open the welcome e-mail, copy the initial password, and select Complete account creation.
- Sign in with the owner e-mail address and that initial password.
- Set a new password.
- Accept the terms and conditions.
- Open your Admin Portal address, select the key icon, and sign in with your e-mail address and the new password.
- Go to Administration > User management and create your first Admin Portal user.
Need more detail? Follow the full steps below.
Steps
Step 1 — Open the welcome e-mail
When your portal is created, CRIBWISE sends a welcome e-mail to the owner address. It greets you by name, states your initial password, and carries a Complete account creation button.
- Open the e-mail from
noreply@cribwise.com. - Copy the initial password. Take care not to include a leading or trailing space.
- Select Complete account creation.

Step 2 — Sign in with the initial password
The button opens a sign-in form. This is the account activation screen, not your portal’s login page — so there is no key icon to look for yet.
- Enter the owner Email Address.
- Enter the initial password from the e-mail.
- Select Sign in.

Step 3 — Set a new password
You are asked to replace the initial password straight away. The form shows three fields.
- In Password, enter the initial password from the e-mail again.
- In New Password, enter the password you want to use from now on.
- In Confirm New Password, enter the same password again.
- Select Continue.

The initial password stops working once you have replaced it. Note the new password down — you need it in step 5. If you select Cancel, nothing is changed and you are returned to the sign-in form.
Step 4 — Accept the terms and conditions
Next you are asked to review the terms and conditions. The screen links to the Data processing, Terms of Service, Privacy policy, and Cookie Policy documents.
- Open and read each of the four linked documents.
- Select Accept.

Your owner account is now active.
Step 5 — Open your Admin Portal and sign in with the key icon
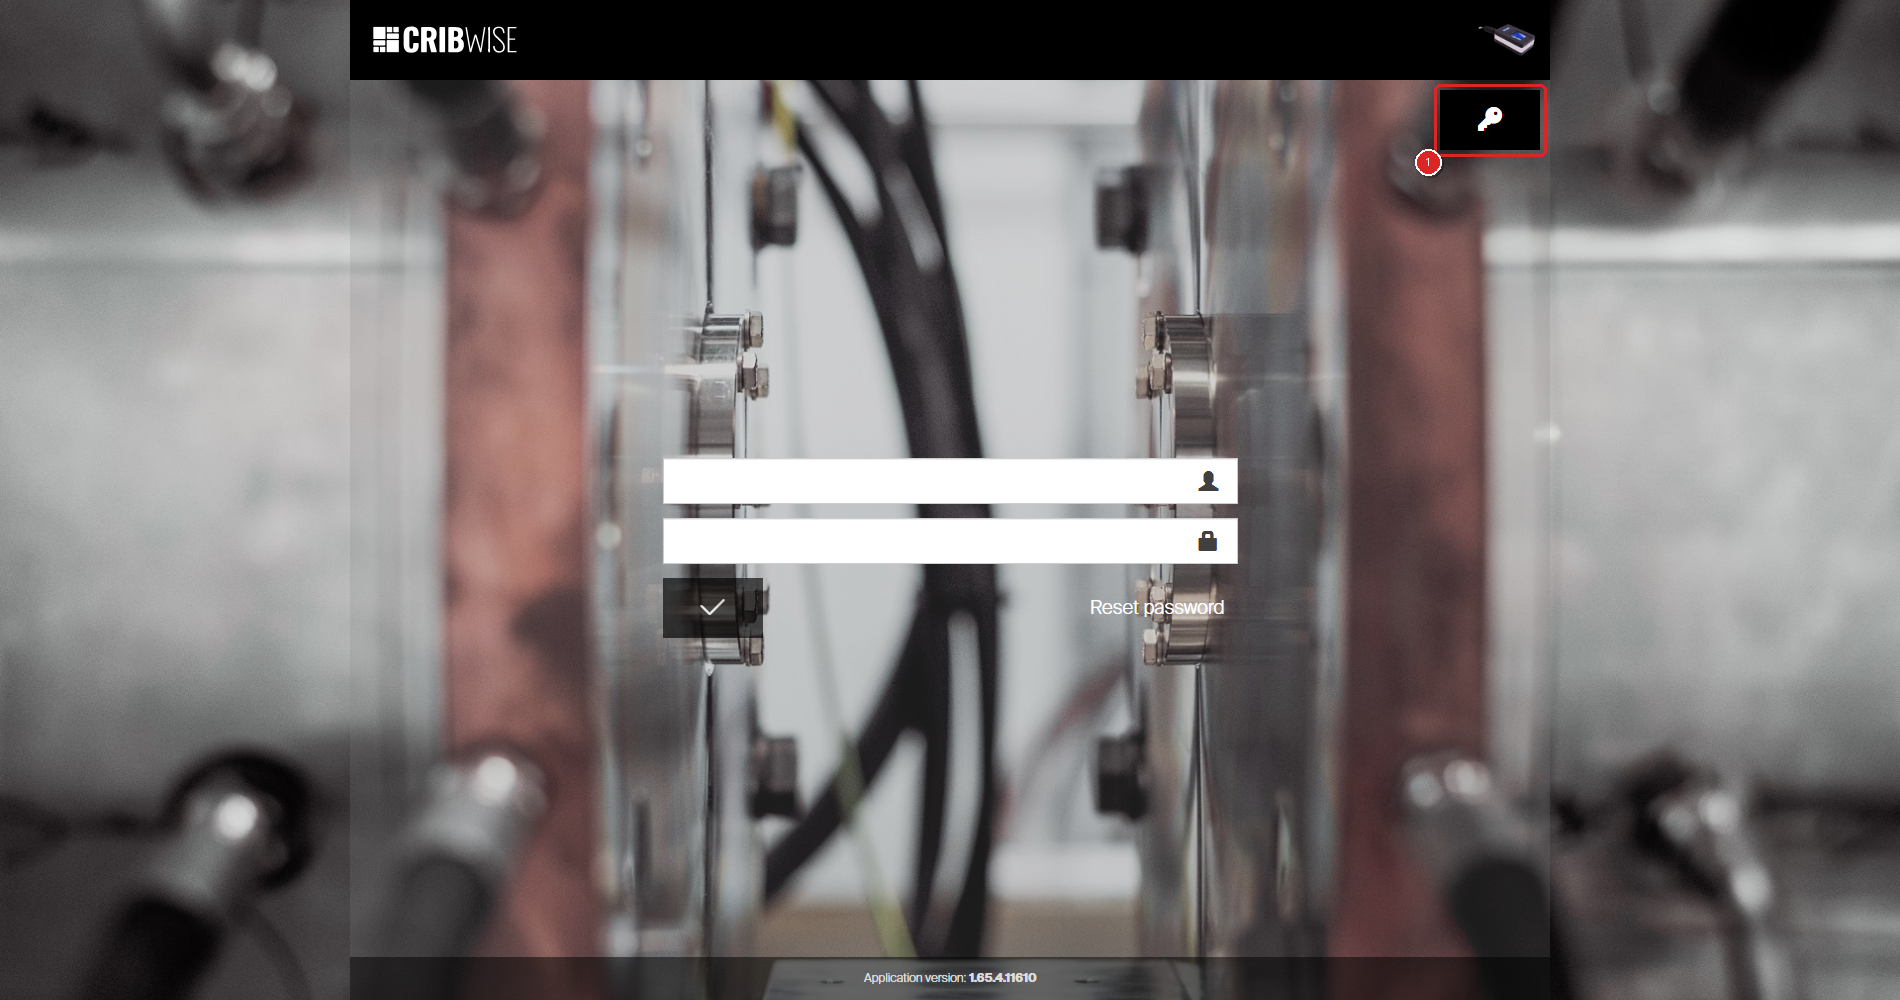
Now go to the portal itself. The owner account is not an Admin Portal user, so it does not use the normal username and password form — it uses Administrator login, which you reach with the key icon in the top-right corner of the login panel.
- Open your Admin Portal address in a browser.
- Select the key icon in the top-right corner of the login panel.
- Enter your owner e-mail address.
- Enter the new password you set in step 3.
- Select Sign in.
Step 6 — Create your first Admin Portal user
Success: The Admin Portal opens on the home dashboard. Your portal is activated and you are signed in as the portal owner.
The owner account exists to get you in and to get you back in. It is not meant for daily work, so create a normal Admin Portal user next.
- Select Administration in the left menu.
- Select User management.
- Select New user in the toolbar.

(1) Administration, (2) User management, and (3) the New user button.
Give this first account the Administrators user group, so it can manage the portal without the owner login. For the full walkthrough of the form, follow How to add an administrator user.
Tip: Leave User must change password at next login ticked — it is ticked by default — so the person chooses their own password the first time they sign in.
Success: The new user appears in the user list with their login, name, and e-mail address. From now on you sign in with that user, not with the key icon.
Why the owner login always works
The portal owner — the account administrator — is not an Admin Portal user. It is authenticated against the e-mail account registered with CRIBWISE, outside the portal’s own user list. That is what makes it the way back in.
Administrator login keeps working when:
- Every administrator user is locked out or has forgotten their password.
- The last user with permission to manage users was deleted.
- No Admin Portal users exist at all — as on the brand-new portal you just activated.
The key icon stays available for good, so keep the owner credentials retrievable even after your team is up and running.
Warning: When the person who owns the portal account leaves the company, transfer the ownership to whoever takes over. Contact your support partner to make the change — it cannot be done from inside the Admin Portal.
If the key icon is missing from your login screen, Administrator login is not configured for your portal. Contact your CRIBWISE distributor or support.
Next steps
- Sign in as your new user — use the normal username and password form, not the key icon. See Getting started with Admin Portal: layout, navigation, and lists.
- Add the rest of your team — see How to create and manage users.
- Match permissions to roles — adjust the supplied user groups or create your own. See How to create and configure a user group.
- Learn your way around — see Getting started with Admin Portal.
Troubleshooting
| Problem | Likely cause | Fix |
|---|---|---|
| No welcome e-mail arrived | It was filtered as spam, or the wrong owner address was given at sign-up. | Check the junk folder. If it is not there, ask your reseller to confirm the registered owner e-mail address. |
| The initial password is rejected in step 2 | It was copied with a leading or trailing space, or it has already been replaced. | Retype it by hand. If it was already used, reset it instead — see How to reset a forgotten Admin Portal password. |
| The Accept button does nothing | Browser zoom or a blocked pop-up is preventing the screen from completing. | Reset zoom to 100% with Ctrl+0, allow pop-ups for the portal address, and try again. |
| Your new password is rejected on the portal login screen | You are using the normal username and password form. The owner account signs in through the key icon, with an e-mail address. | Select the key icon first, then enter your e-mail address and the new password. |
| The key icon is not on the login screen | Administrator login is not configured for this portal. | Contact your CRIBWISE distributor or support. |
| The login page does not load | The portal URL is wrong, or a network or proxy issue. | Check the address ends with your portal name. Try another browser. |
| Save user is refused in step 6 | A mandatory field is empty. Surname, E-mail, and User group are all required, and are easy to miss. | Fill every yellow field, then save again. |
| The new user sees “User does not currently have permission to access Admin Portal” | The chosen user group has no Admin Portal access. | Grant the group Admin Portal access — see the Admin Portal permissions reference. |
| “User is not fully set up in the database yet” | The user was created moments ago and permissions are still being generated. | Wait a moment, then sign in again. |
Related articles
- How to add an administrator user — the full walkthrough of the New user form used in step 6.
- Getting started with Admin Portal: layout, navigation, and lists — day-to-day login once the portal is set up.
- How to reset a forgotten Admin Portal password — for both portal users and the portal owner.
- How to create and manage users — add the rest of your team and maintain their accounts.
- How to create and configure a user group — decide what each role can do.
- Getting started with Admin Portal: layout, navigation, and lists — find your way around once you are in.