
What you can do
Pick items out of a storage device against a service order or service list, so they can go for repair, regrinding or calibration. You work through the Pick for service flow on the Shop Floor Interface, one order or list at a time.
Before you start
- Access to Stock management. A shop-floor operator login usually shows only Pick and Return. Picking for service needs an account whose user group allows Stock management on the Shop Floor Interface.
- Items already requested for service. An item reaches a service order or list when someone returns it with the condition For service, or when a service script or a tool-life limit puts it there.
- Service switched on for the item. On the item’s Supplier tab in the Admin Portal, tick Service. That reveals Type, Service vendor, Service price and Minimum quantity for service. An internal service vendor routes the item to a service list; an external one routes it to a service order.
- Somewhere to put the items. The device needs a stock location whose Location rule is For service. Without one, returning for service stops at Available space 0.
Important: Until Service is ticked on the item, it cannot be returned for service at all — it will not appear under Return > For service, and so it never reaches a service order or list.
Quick start
Experienced users – pick for service in 6 steps:
- Select Stock management on the main menu.
- Select Pick for service.
- Select the service order or service list.
- Tick the items, set the quantities, then select Confirm.
- Take each item out, tick its row, then select Picking finished.
- Check the summary and select Close.
Need more detail? Follow the full steps below.
Steps
Step 1 — Open Stock management
On the Shop Floor Interface main menu, select Stock management.
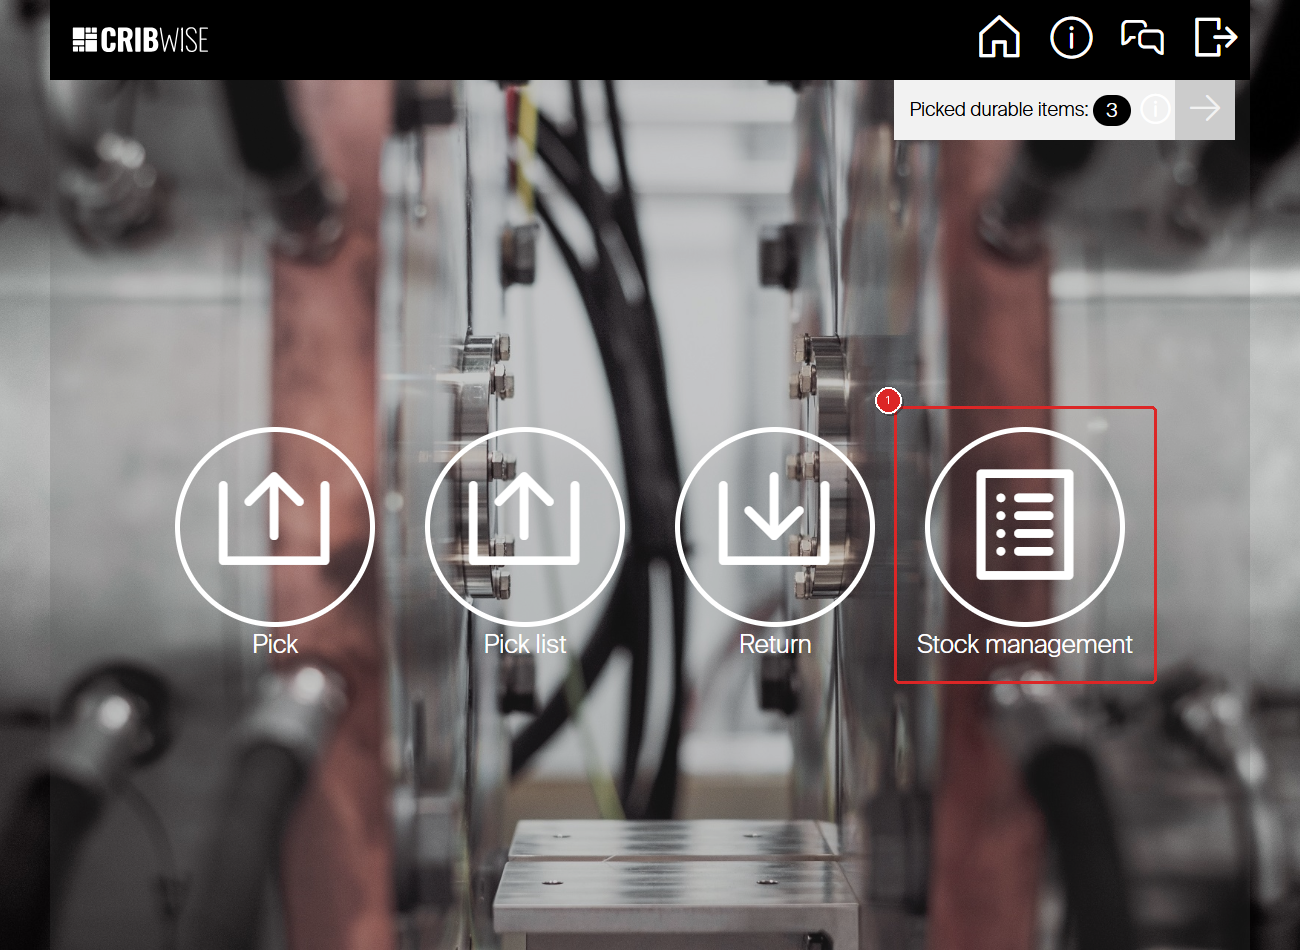
The main menu. Stock management holds the stock administrator’s tasks, including service picks.
Step 2 — Select Pick for service
In the Stock management menu, select Pick for service.
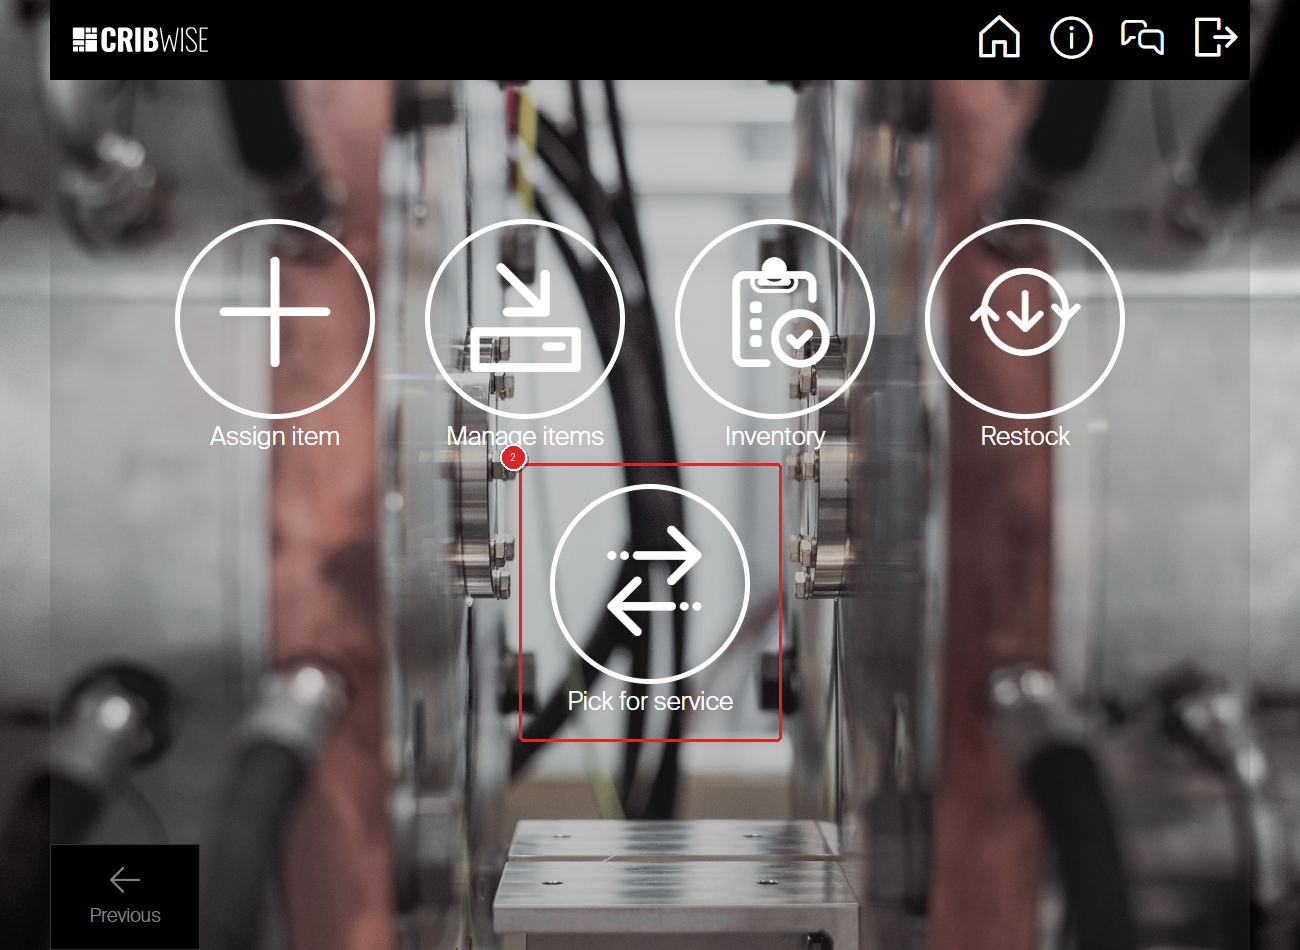
Pick for service sits alongside Assign item, Manage items, Inventory and Restock. The tiles you see depend on the device and on your user group.
Step 3 — Choose the service order or list
The Select service list screen opens. It offers every service order and service list for this device that still has a quantity waiting for service. Each row names the list and shows two counts: Quantity at service (already picked and away being serviced) and Qty for service (still in the device, waiting for you).
Select the order or list you want to work through.
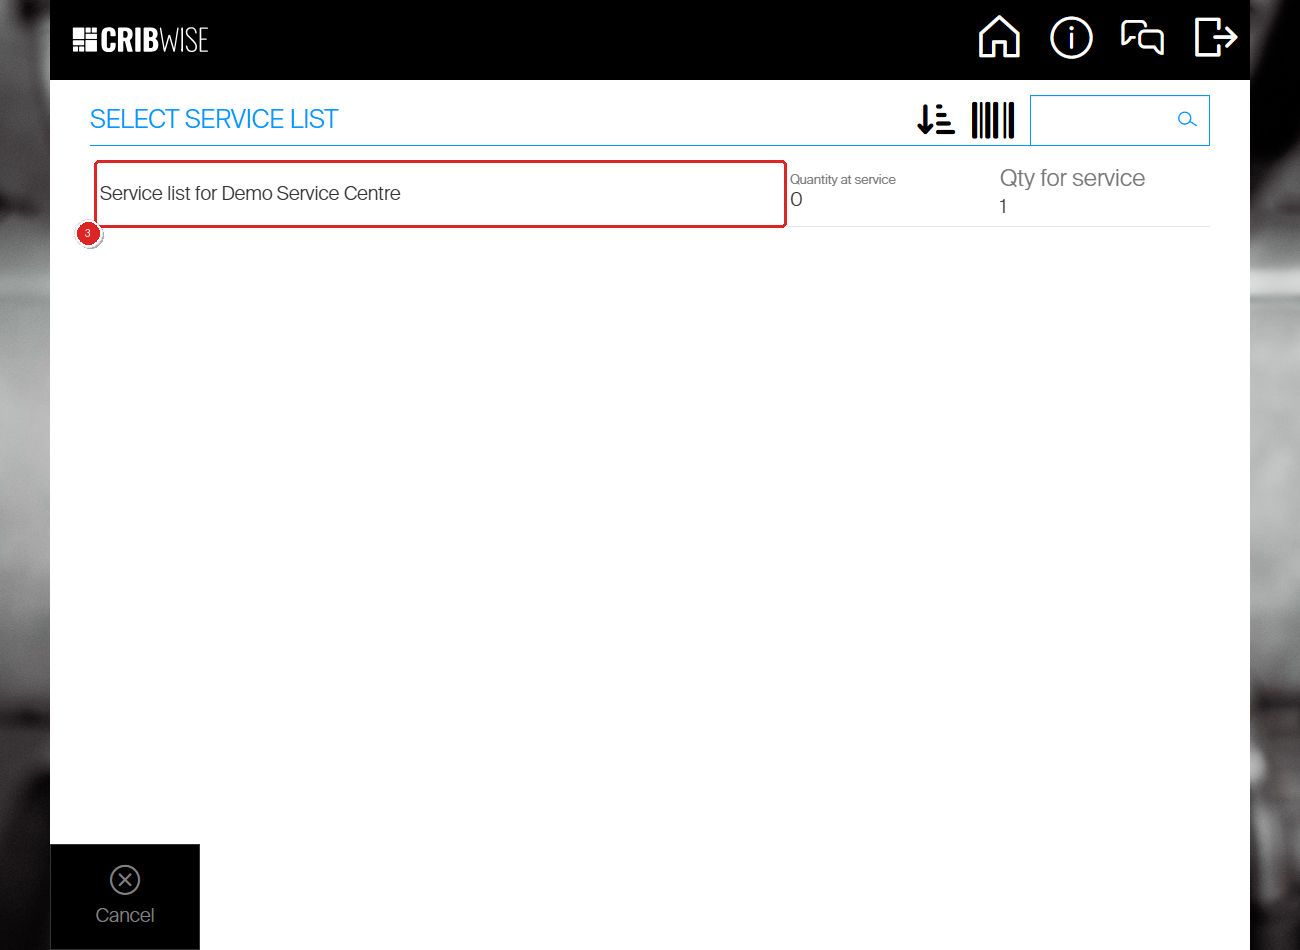
One service list waiting, with one piece still to pick out of the device.
Note: A list drops off this screen as soon as its Qty for service reaches zero. An empty screen means nothing on this device is waiting for service — not that you lack access.
Step 4 — Choose the items and quantities
- Tick the item you want to pick. Quantity to pick becomes a stepper and starts at 1.
- Set the quantity with the − and + buttons.
- Select Confirm. It stays greyed out until at least one item is ticked.
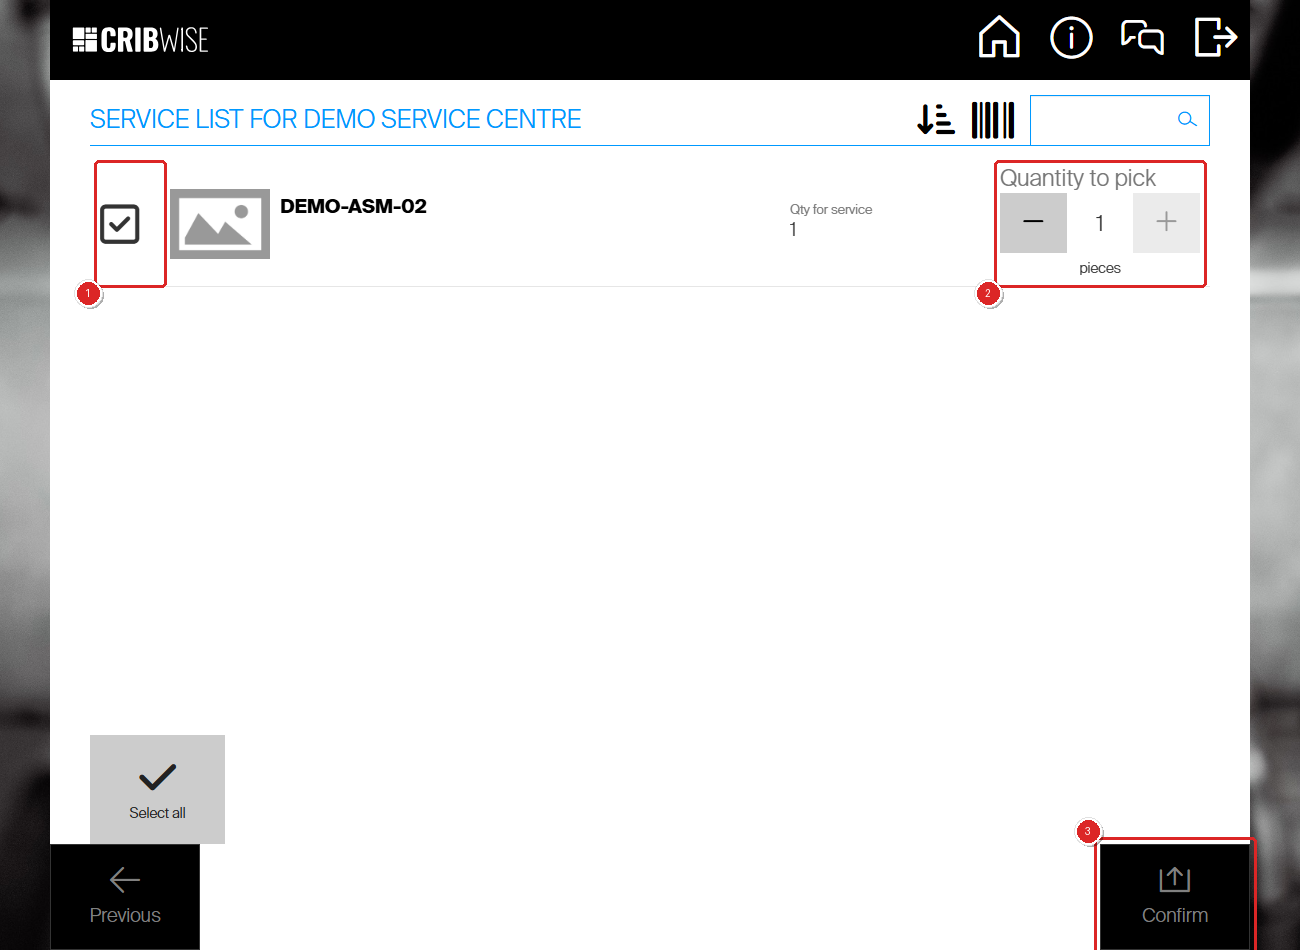
Tick the row (1), set the quantity to pick (2), then confirm (3). Qty for service on the left is how much the list still wants.
Tip: Use Select all to tick every row at once. You do not have to empty the list in one go either — whatever you leave stays on it, so you can come back for the rest later.
Step 5 — Take the items out of the device
The Items to pick screen opens. Each row tells you where to find the item: its Location, the Status of that location (the location rule, such as For service), and the Quantity to take.
- Go to the location and take the item out.
- Make sure the item’s row is ticked. A row that needs no serial number may already be ticked for you.
- If you took a different amount than shown, select Change picked quantity and correct it.
- When every row is ticked, select Picking finished.
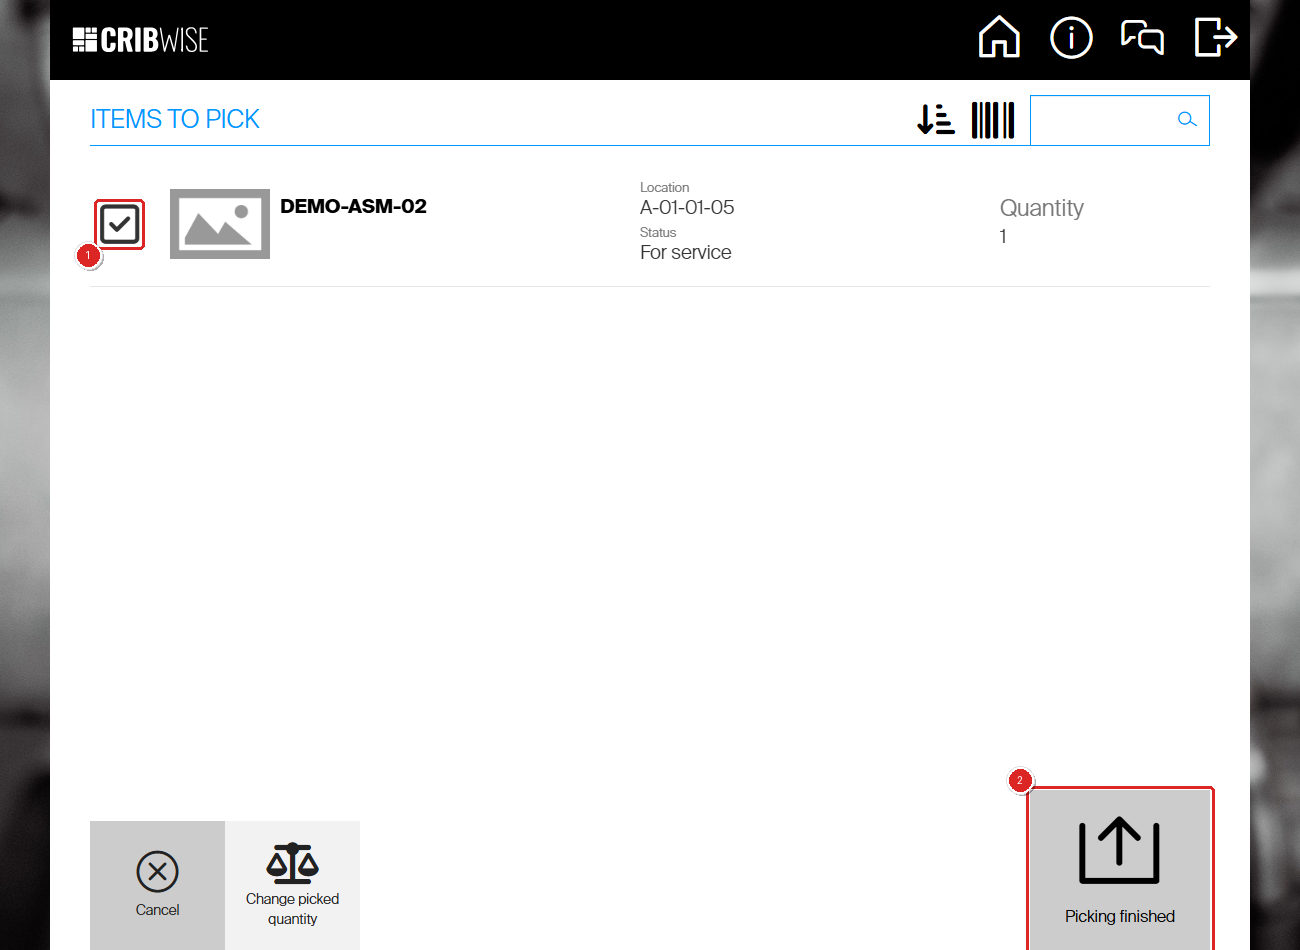
Tick the row once the item is in your hand (1), then finish the pick (2). Location A-01-01-05 carries the For service location rule.
Serialized items
Ticking the row of a serialized item opens Select serial number(s) for item. The counter under the title, such as Select: 1/1, shows how many serial numbers you still need to choose.
- Tick the serial number of the instance you took out. Its Condition reads For service.
- Select Confirm.
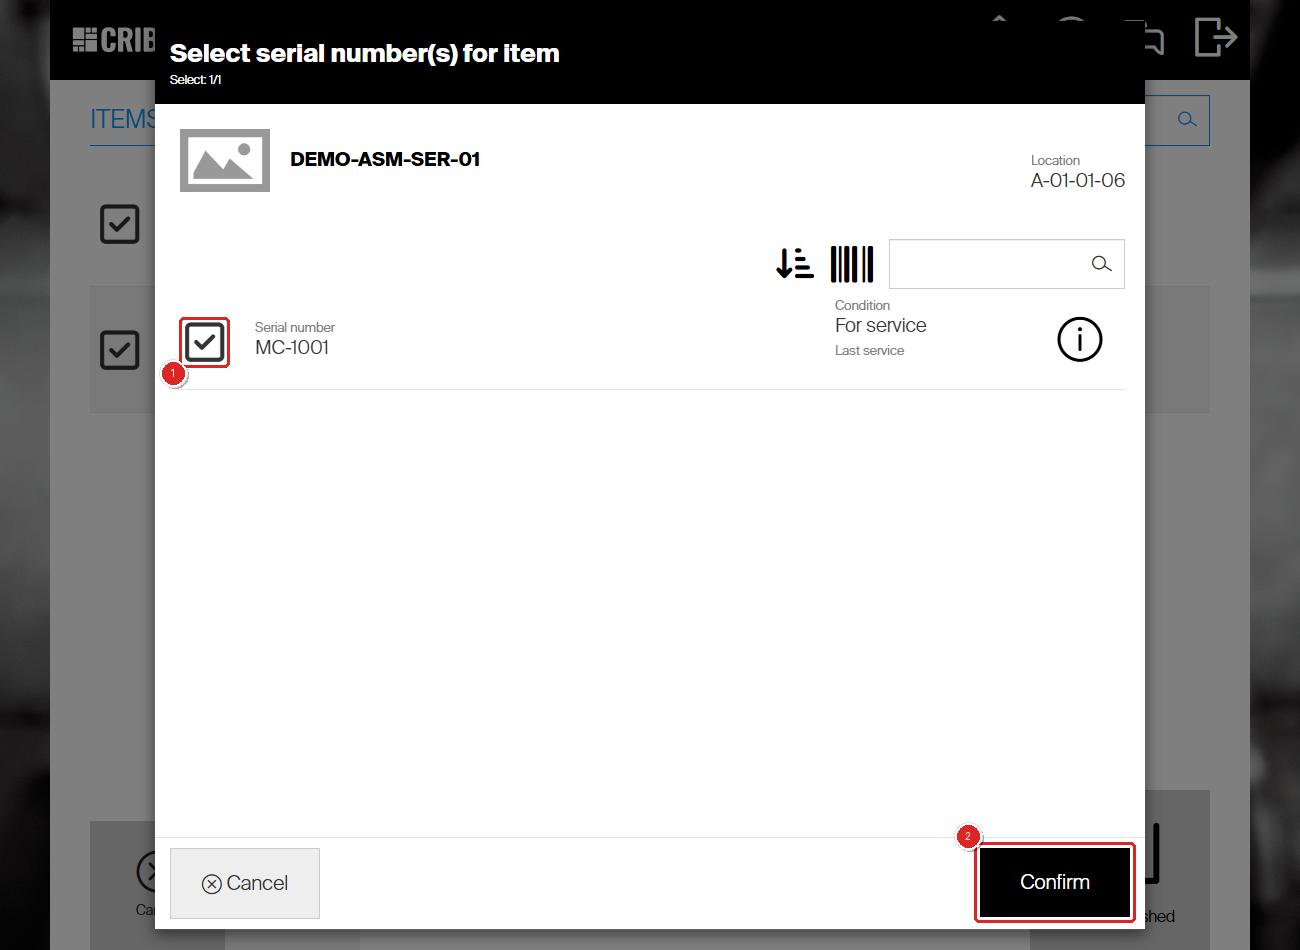
Choose the exact instance (1) and confirm (2). You can also scan the serial number or search for it.
Important: Nothing is saved until you select Picking finished and the summary appears. If you close the serial-number dialog without confirming, Picking finished does nothing.
Step 6 — Check the summary
The Summary of list screen shows each item with its Quantity picked and its Remaining Qty — what is still waiting on the list. Select Close.
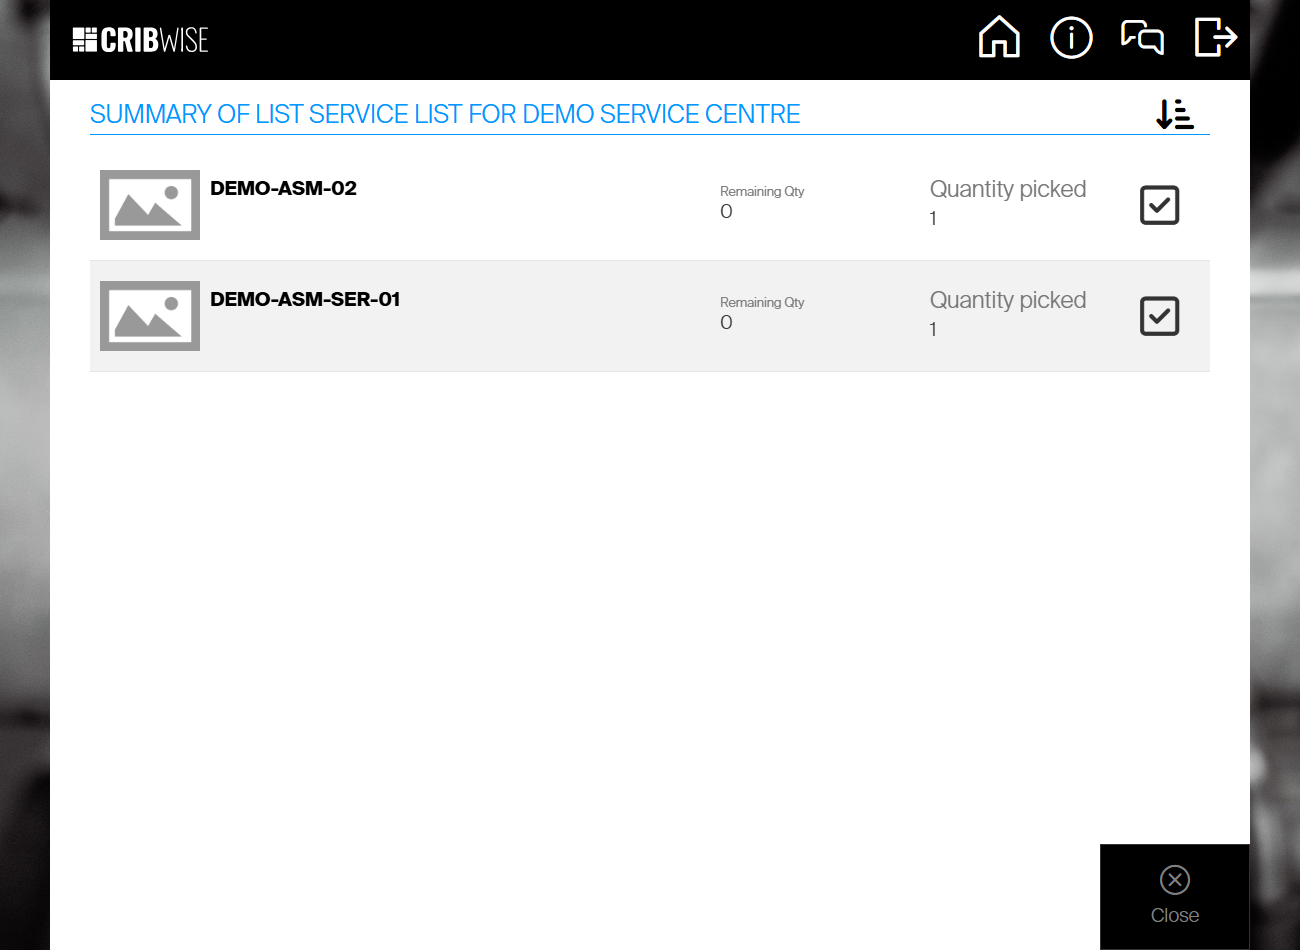
Both items picked, nothing remaining on the list.
Success: The picked items have left the device. On the order or list, Quantity at service rises and Qty for service drops by what you picked. The list disappears from the Select service list screen once its Qty for service reaches zero, and comes back as soon as another item is returned for service.
Next steps
- Send the items for service. Service orders go to an external vendor; service lists are handled internally and are never sent anywhere.
- Restock them when they come back. See How to restock items on the Shop Floor Interface. Restocking or scrapping an item removes it from the list.
Troubleshooting
| Problem | Likely cause | Fix |
|---|---|---|
| The Pick for service tile is missing. | Your user group does not allow Stock management on the Shop Floor Interface, or you are signed in as a shop-floor operator. | Sign in with an account that has stock administration rights, or ask an administrator to adjust the user group. |
| No order or list is offered. | Nothing on this device has a quantity waiting for service. | Return an item with the condition For service, or wait for the service script to run. |
| An item never reaches a service order or list. | Service is not ticked on the item’s Supplier tab, so it cannot be returned for service. | Tick Service on the item in the Admin Portal, set a Service vendor, then request service again. |
| Returning for service stops at Available space 0. | No location in the device has the For service location rule. | Select Assign item on that screen, pick an empty location, set Location rule to For service, and save. |
| An item is missing from the service order. | Items with an internal service vendor go on service lists, not orders. | Look for the item on the service list for that vendor and device. |
| Picking finished does nothing. | A serialized row was ticked but its serial numbers were never confirmed. | Tick the row again, choose the serial number in Select serial number(s) for item, select Confirm, then finish. |
| The list still shows after picking. | Part of the quantity is still waiting, or another item was returned for service since. | Check Qty for service on the row and pick the rest. |
Related articles
- Understanding service lists – how an internal service request reaches a list, and why the list is stateless.
- Understanding service order scripts – how a scheduled script sends waiting items to service automatically.
- How to set up tool life tracking and automatic service triggers – request service automatically when a tool reaches its usage limit.
- Understanding purchasing and service workflows – the rule that decides order versus list.
- How to return, scrap, and recycle items in SFI – the For service condition that starts this flow.
- How to restock items on the Shop Floor Interface – what to do when the items come back.
- Managing serialized items and serial numbers – serial numbers, instance conditions and service history.