
What you can do
Prepare a Sielaff ASK200 or TB300 cabinet for use and work with its extra functions: scan the shelves to create locations, assign shelf codes for the scanner, change the location structure, light up locations, and open the doors.
Unlike other vending machines, these cabinets allow location sizes and structure to be customised freely. Locations are not created by an administrator when the storage device is defined – the machine creates them itself once the SFI is installed.
Before you start
- Your SFI user needs the privilege to set up the device. Without it, the location setup option is not shown.
- The SFI must be installed on the machine, with a storage device created for the device given during installation.
- Have the code scanner at hand if you want to assign shelf codes.
Important: Items must not reach the rear edge of a shelf during scanning. An item pressed against the rear edge makes the scan fail.
Prepare a new device
- Install the SFI on the ASK200 or TB300 machine, making sure a storage device exists for the device defined during installation.
- When the SFI has started and the first synchronisation is done, go to Stock management → Manage ASK200 or TB300 locations.
- With several cabinets, select the one to set up.
- The cabinet door opens so you can change the locations physically. Set the locations up to suit the items – items can be placed straight away and assigned after the rescan.
- On the Manage ASK200 or TB300 screen, which shows the current shelves and locations, select Rescan new/removed shelves to set up all installed shelves (1).
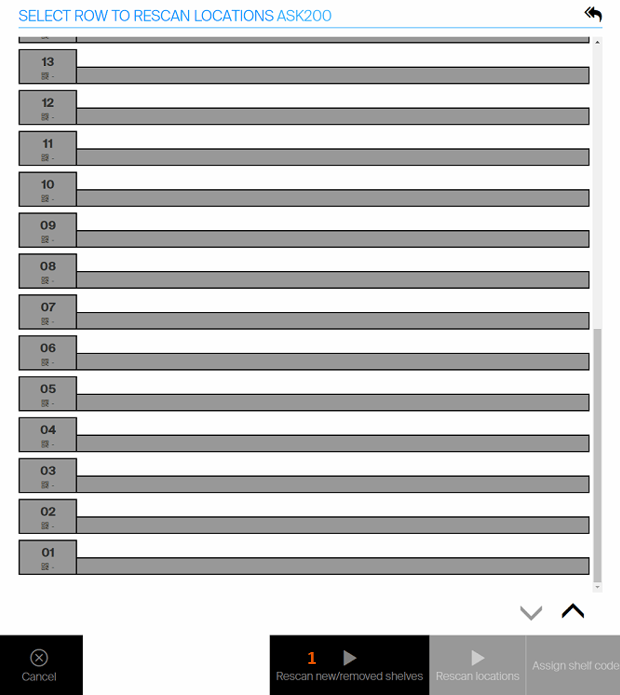
Registering the shelves that are physically installed.
- Select the shelves to scan – specific ones (2) or all of them (3) – and start with Rescan locations (4).
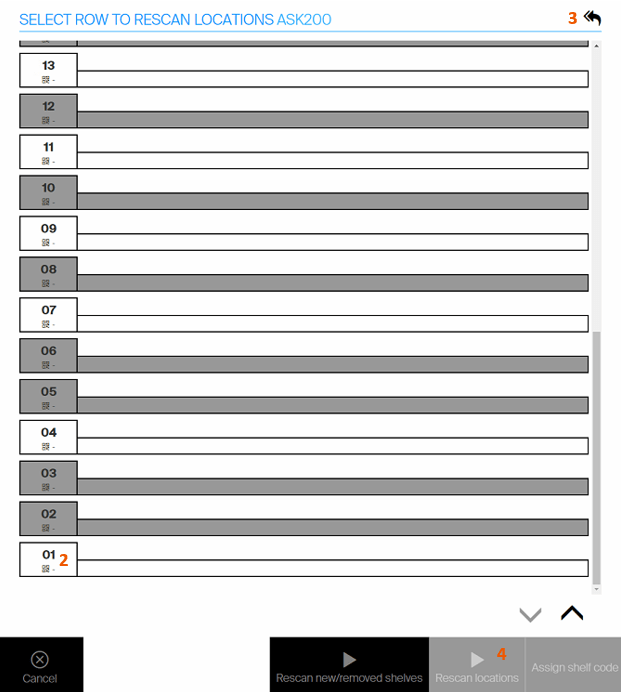
Scanning the positions of the selected shelves.
Scanning takes roughly one minute per shelf, and the SFI is unavailable while it runs.
Success: Every location found is listed on the Setup ASK200 or TB300 screen and is ready for item assignment. Close the cabinet door.
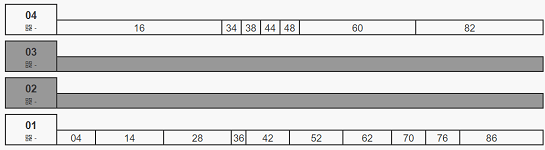
The scanned location structure.
Assign a shelf code to a shelf
Each shelf has a unique six-digit shelf code, printed on its right side. Assigning it in the system lets you select locations by scanning the Data Matrix codes printed on the shelves.
Important: Without an assigned code, the locations of that shelf cannot be selected with the code scanner.
- Open the Setup ASK200 or TB300 screen from Stock management. The cabinet door opens automatically. A shelf without a code shows a dash in its header (1).
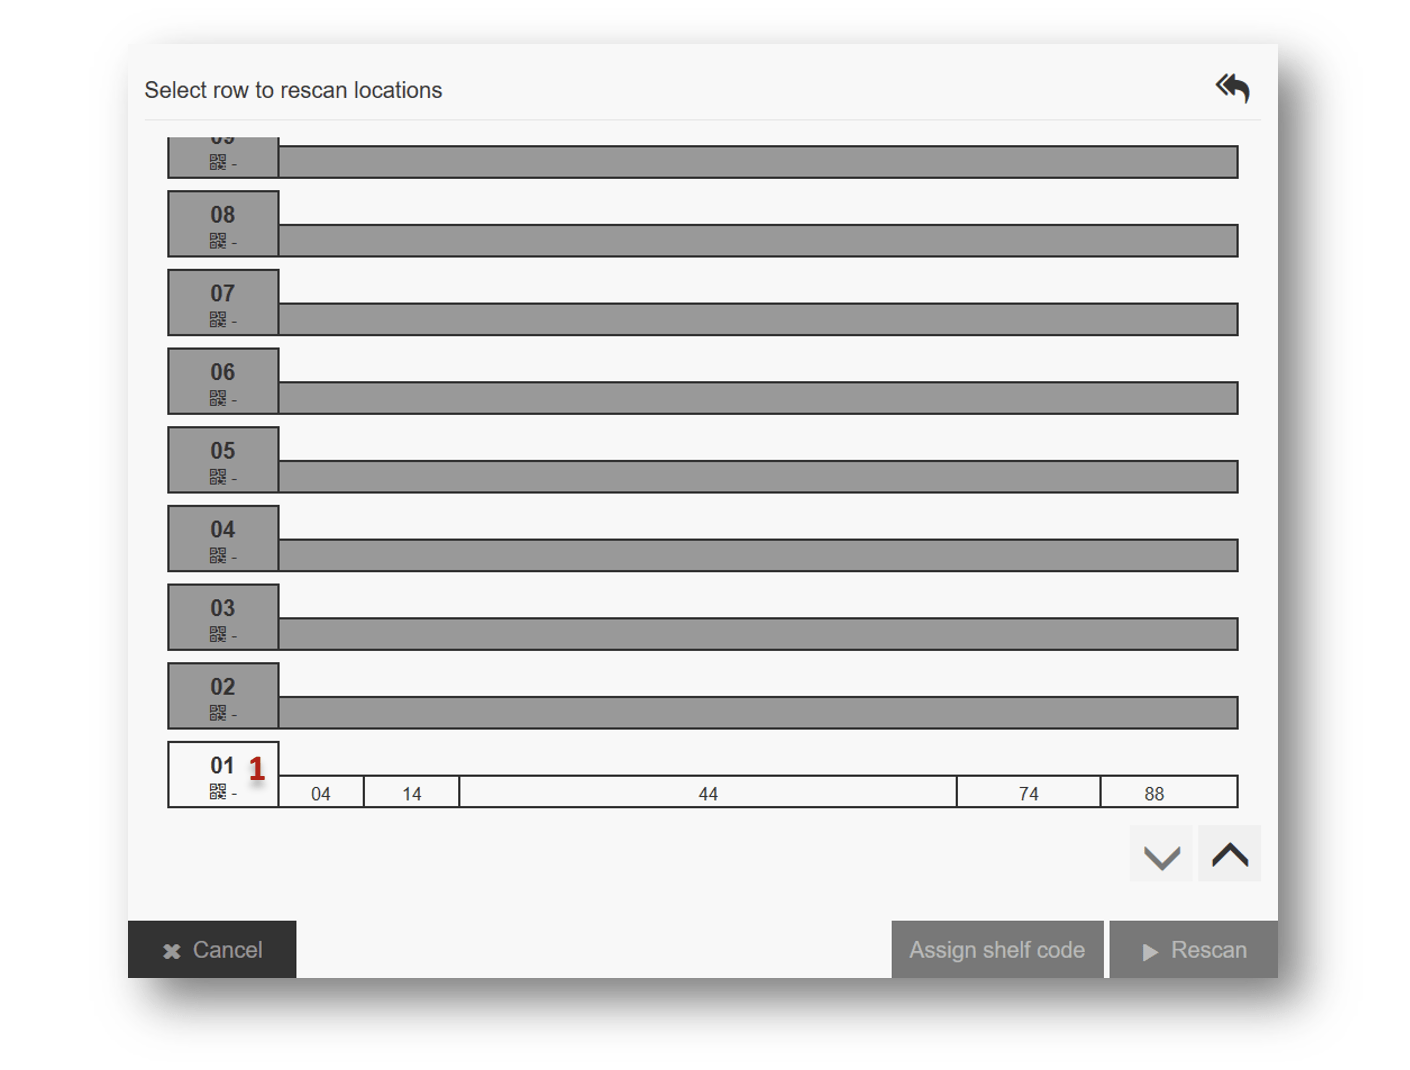
A shelf without an assigned code.
- Select the shelf (1) and press Assign shelf code (2).
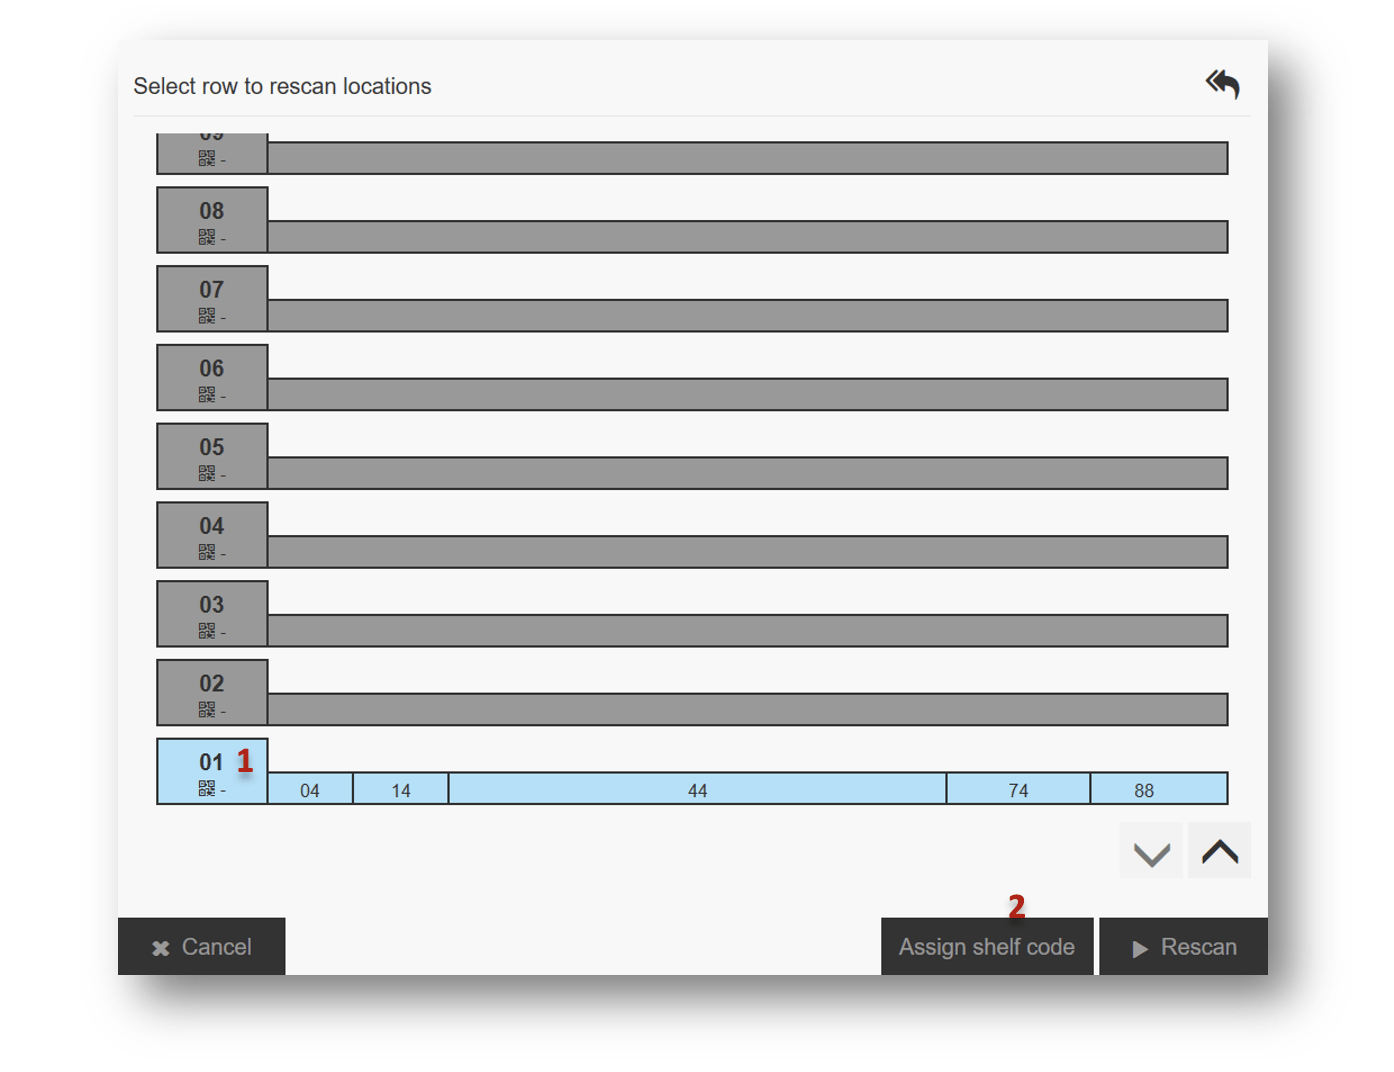
Starting the code assignment.
- Scan the shelf code printed on the right side of the shelf, next to the six-digit code.
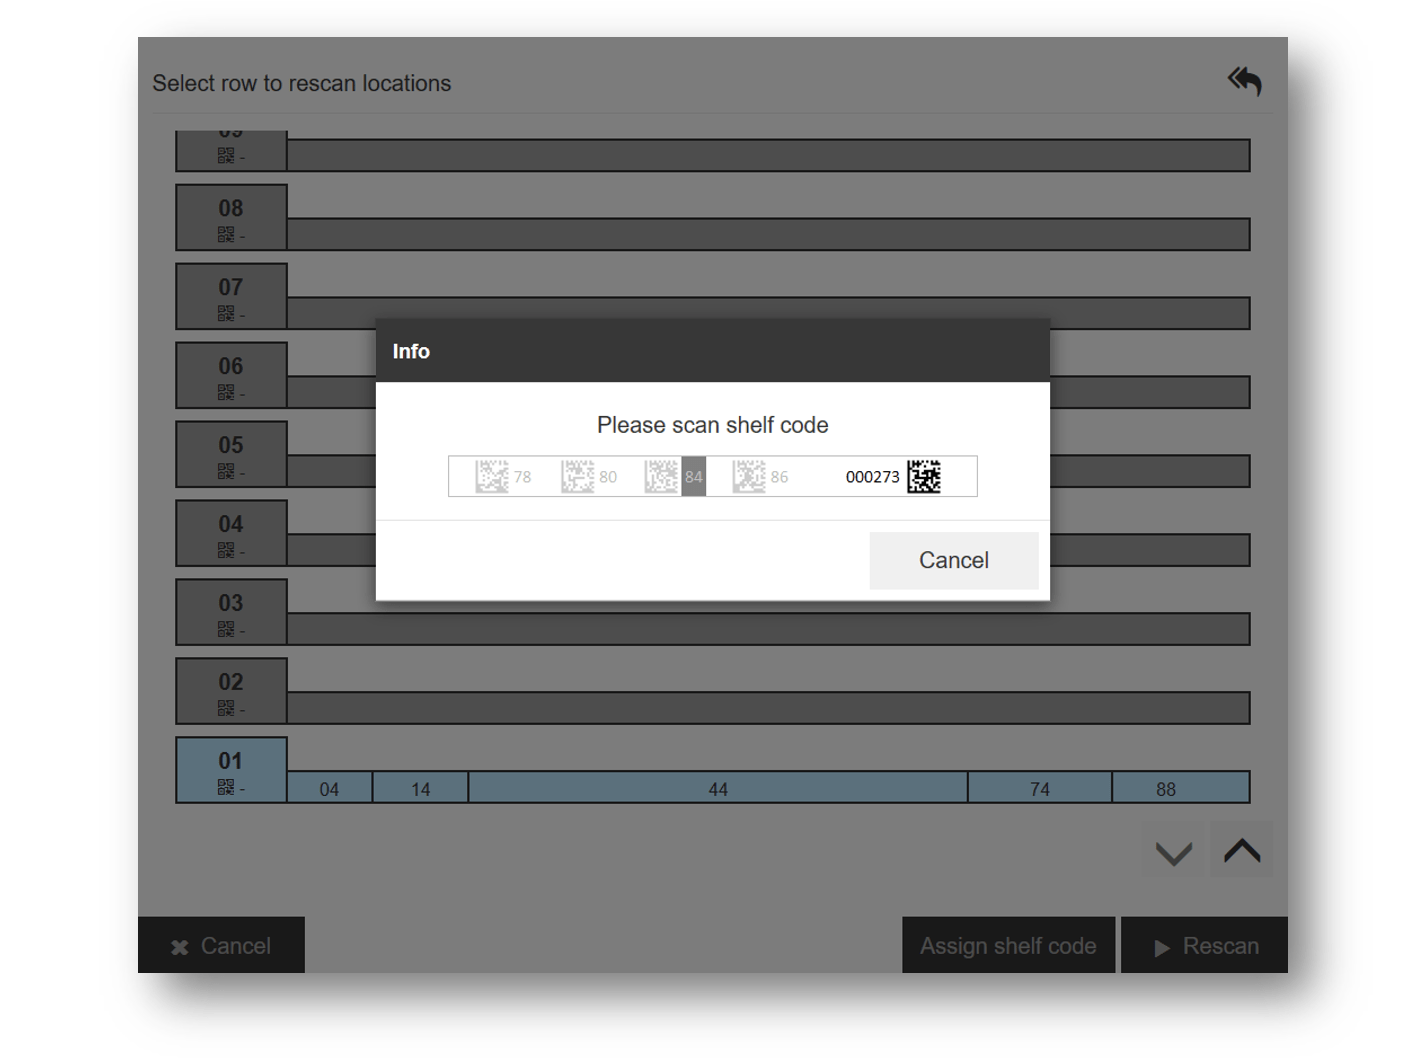
Scanning the printed code.
Success: The code appears in the shelf header (1), and both the shelf and its locations can now be selected with the scanner. Close the cabinet door.
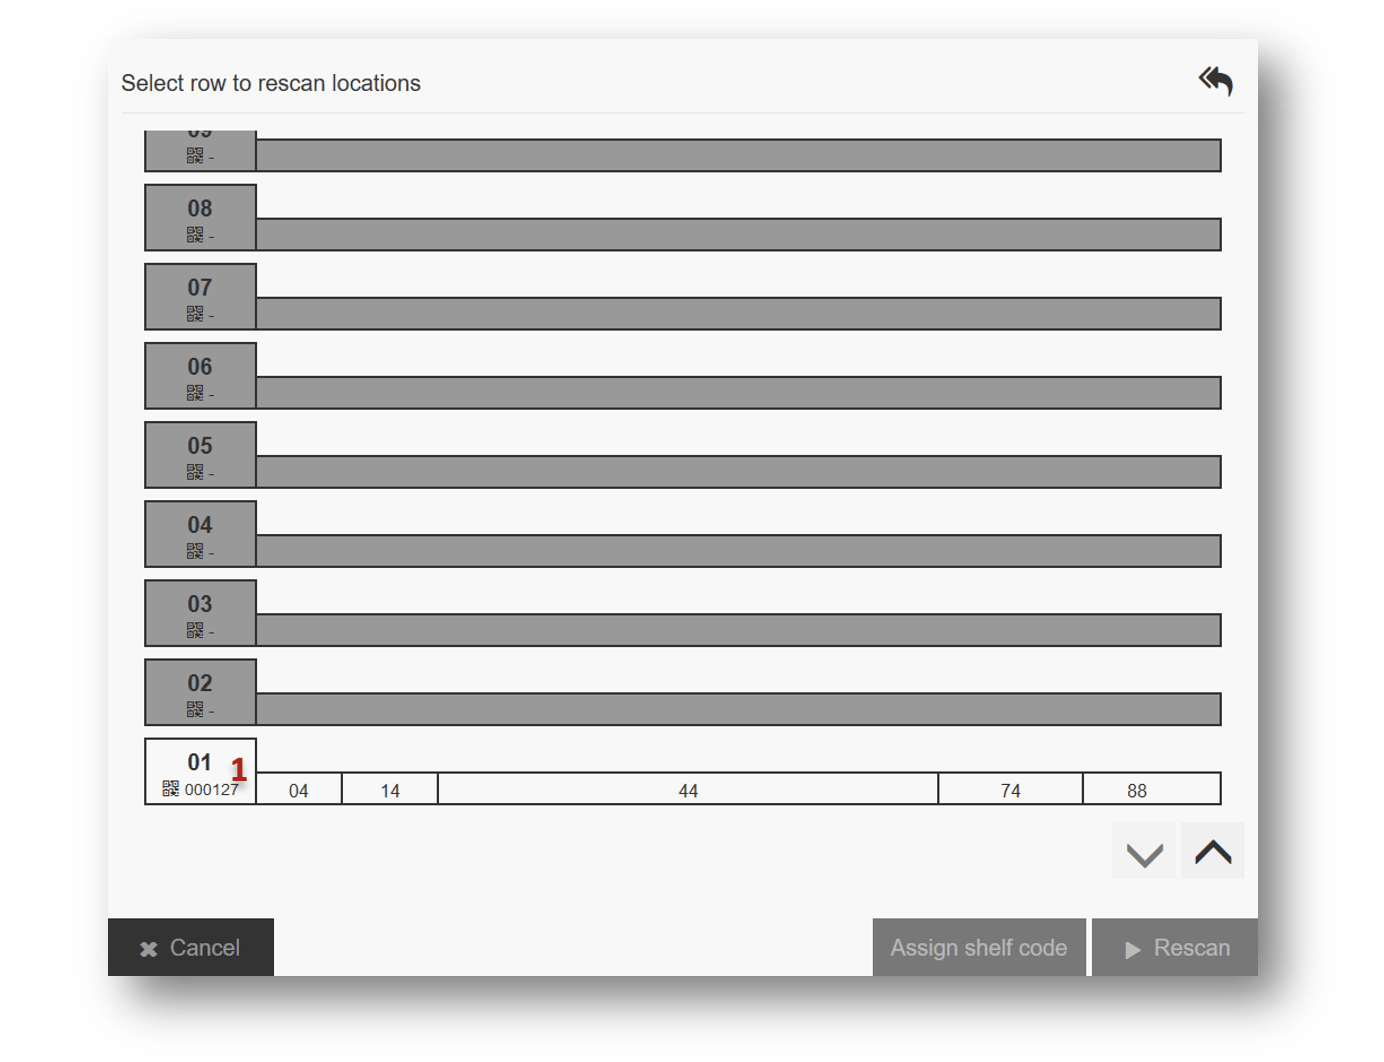
The assigned shelf code.
Change the location structure
Locations and shelves can be added, removed or resized after the cabinet is defined. Assignments on unchanged locations are untouched.
Warning: When a location that has an assigned item is removed or resized, that assignment is deleted – even if physical items are still in it.
- Open the Setup ASK200 or TB300 screen in the Stock management menu. The door opens automatically.
- Make the physical changes, remembering that assignments in changed locations are removed.
- If a shelf was added or removed, press Rescan new/removed shelves.
- Select the shelves you changed. The shelf number matches the number printed on the left side of the cabinet, 1 to 28.
- Select Rescan locations to scan for changed positions.
- Wait for the rescan – about one minute per shelf. The location structure is then updated.
- Close the cabinet doors.
Light up locations
During inventory and restock, a Show location icon (1) is shown for every location. Press it to light the location up for 5 seconds.
Note: Where an inventory or restock mixes an ASK200 or TB300 with another type of storage device, the icon appears only for the ASK200 and TB300 locations.
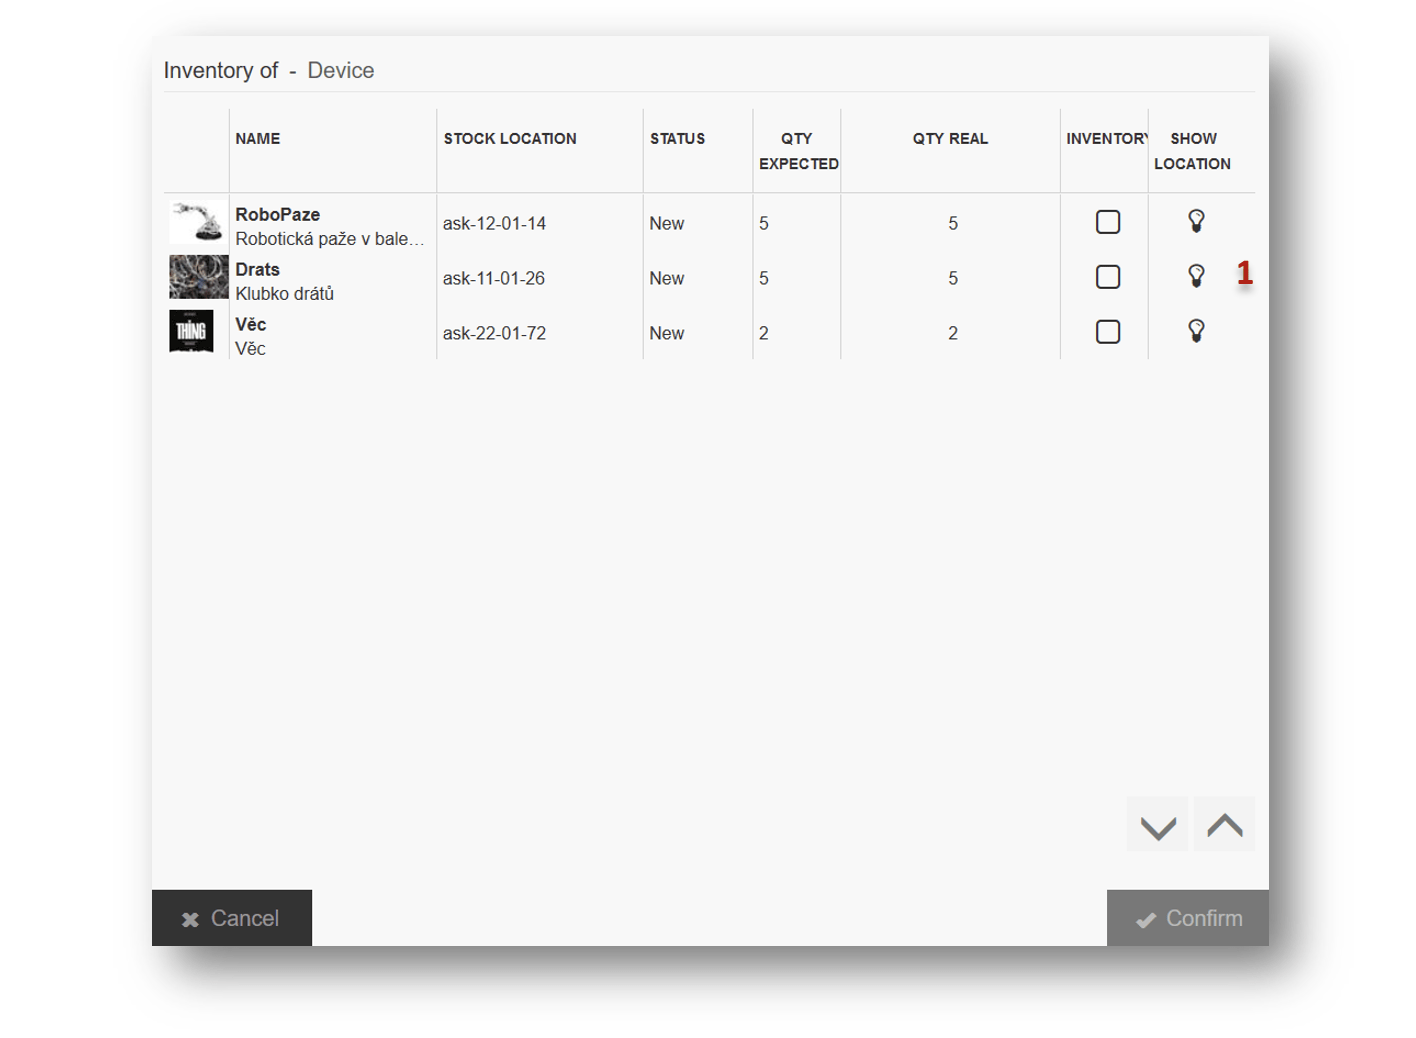
Lighting up a location.
Open doors
With a single ASK200 or TB300 cabinet, the main door opens automatically when you:
- enter the Update location screen,
- are about to select locations for inventory,
- start an unfinished inventory,
- confirm a restock of items, or
- are about to assign a new item.
With several cabinets of these types, select Open doors during the operation and choose the cabinet. Doors are closed by hand afterwards – hold them closed until the automatic lock engages.
Important: Doors must be closed before any picking operation is possible.
Select locations with the scanner
Once shelf codes are assigned, the scanner can be used in several flows.
| Flow | What scanning does |
| Update locations | Scan the shelf code – the right-most code printed on the shelf – to start rescanning that shelf. |
| Assign item | On the location selection screen, scan a location code to select that location. The flow continues automatically. |
| Inventory | Scan a location code to start inventory of that location, if an item is assigned there. Scan the shelf code to select every location on the shelf. |
Note: Where one location covers several codes, scanning any of them selects that location. The scanner can also be used to enter information such as item barcodes in the usual way.
Troubleshooting
| Problem | Likely cause | Fix |
| The location setup option is missing. | The user lacks the privilege to set up the device. | Grant the privilege, or use a user that has it. |
| The scan finds the wrong locations. | Items were touching the rear edge of a shelf. | Pull the items forward and rescan the shelf. |
| A location cannot be selected with the scanner. | The shelf has no shelf code assigned. | Assign the shelf code as described above. |
| Picking is blocked. | A cabinet door is still open. | Close the door and hold it until the lock engages. |
| The SFI is unresponsive after starting a rescan. | Scanning takes about a minute per shelf, and the SFI is unavailable meanwhile. | Wait for the scan to finish. |
Related articles
- Sielaff ASK 200 Master cabinet – storage device setup – the storage device settings.
- Sielaff ASK 200 Extension cabinet – storage device setup – adding further cabinets.
- How to set up ASK200 extension cabinets (networking and IP) – wiring and IP addresses.
- Configure RFID scanner for ASK200 – reader setup for operator login.
- How to assign an item to a location (Shop Floor Interface) – the assignment wizard used after scanning.