
What you can do
Get a Sielaff ASK200 master cabinet talking to its extension cabinets: give every extension PLC and IP camera its own static address, add the TwinCAT routes, and register each cabinet in ASK Control.
The steps come from configuring an ASK200 master cabinet with three extension cabinets.
Before you start
- You need physical and Windows access to the master cabinet, and the extension cabinets connected to it.
- A switch must sit inside the master cabinet. Cable from the master cabinet PLC to the switch, and from the switch to every extension cabinet.
- Plan the addresses: PLCs get 10.60.80.22, .32, .42 and so on, cameras 10.60.80.23, .33, .43.
The state cabinets arrive in
- The master cabinet has the standard image, everything default, working as a single unit.
- Every extension cabinet is identical, configured to be the one and only extension of the master cabinet.
Why that is a problem
- The master cabinet configuration file has no configuration for the extension cabinets.
- TwinCAT on the master cabinet is not configured to talk to them.
- Every extension cabinet has the same static IP address, 10.60.80.12, so connecting them together causes a conflict and only one is reachable.
- The IP cameras all share 10.60.80.13, with the same result.
Important: Keep all extension cabinets connected to the master cabinet and configure them one at a time, until none is left on the default address. Repeat every step below per extension cabinet.
Steps
Step 1 — Set the PLC static IP address
- Start
c:\DRIVERs\CERHOST.exe. - Select File → Connect and enter 10.60.80.12 as the host name.
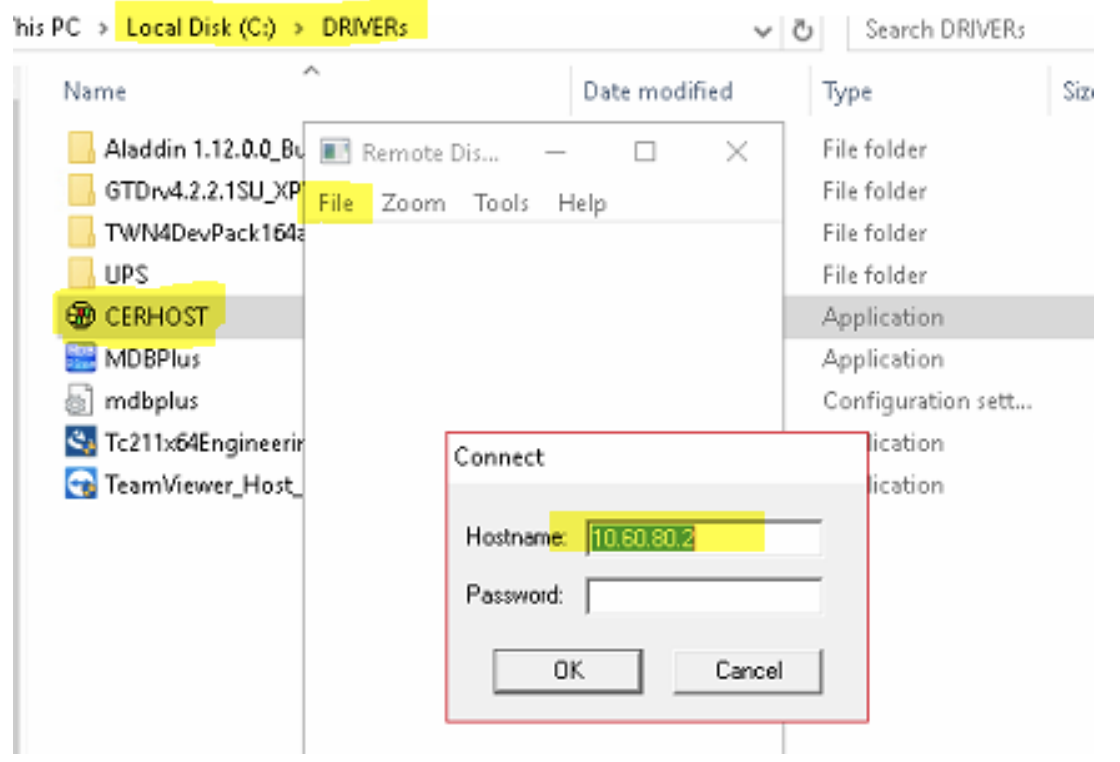
Connecting to the Windows CE running on the PLC.
- Once connected, go to Start → Control Panel → Network and Dial-up Connections.
- Double-click the FEC1 connection, change the IP to the new one – 10.60.80.22, for example – and confirm with OK in the window header.
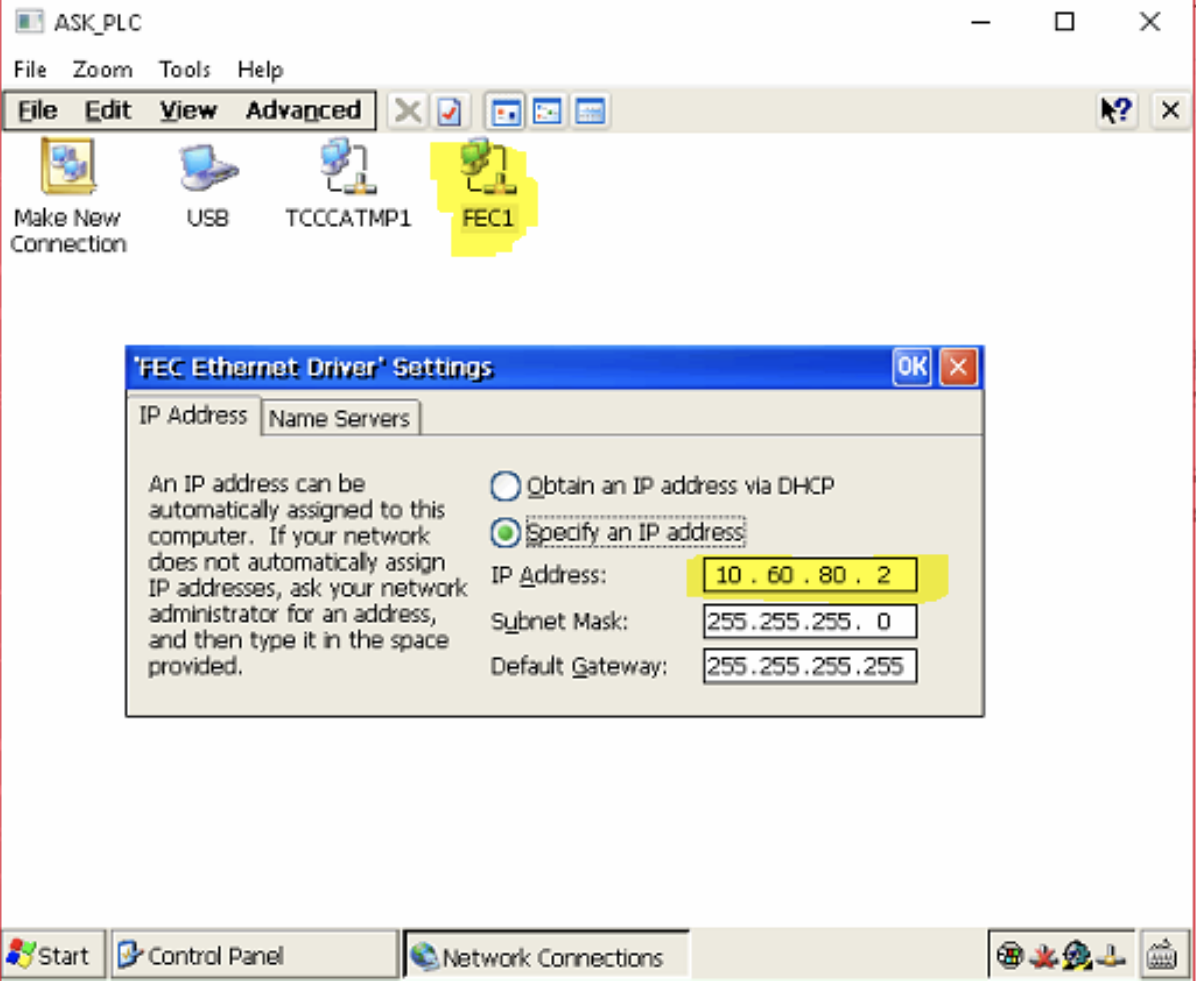
Giving the PLC its own address.
- The remote connection drops. Wait a moment, then select File → Disconnect and File → Connect again, using the new address.
- Open Start → Programs → Windows Explorer, go to Hard Disk → System and start TcAmsRemoteMgr.exe. Change the AMS Net Id to match the new IP address – from 10.60.80.12.1.1 to 10.60.80.22.1.1, for example – and close with OK.
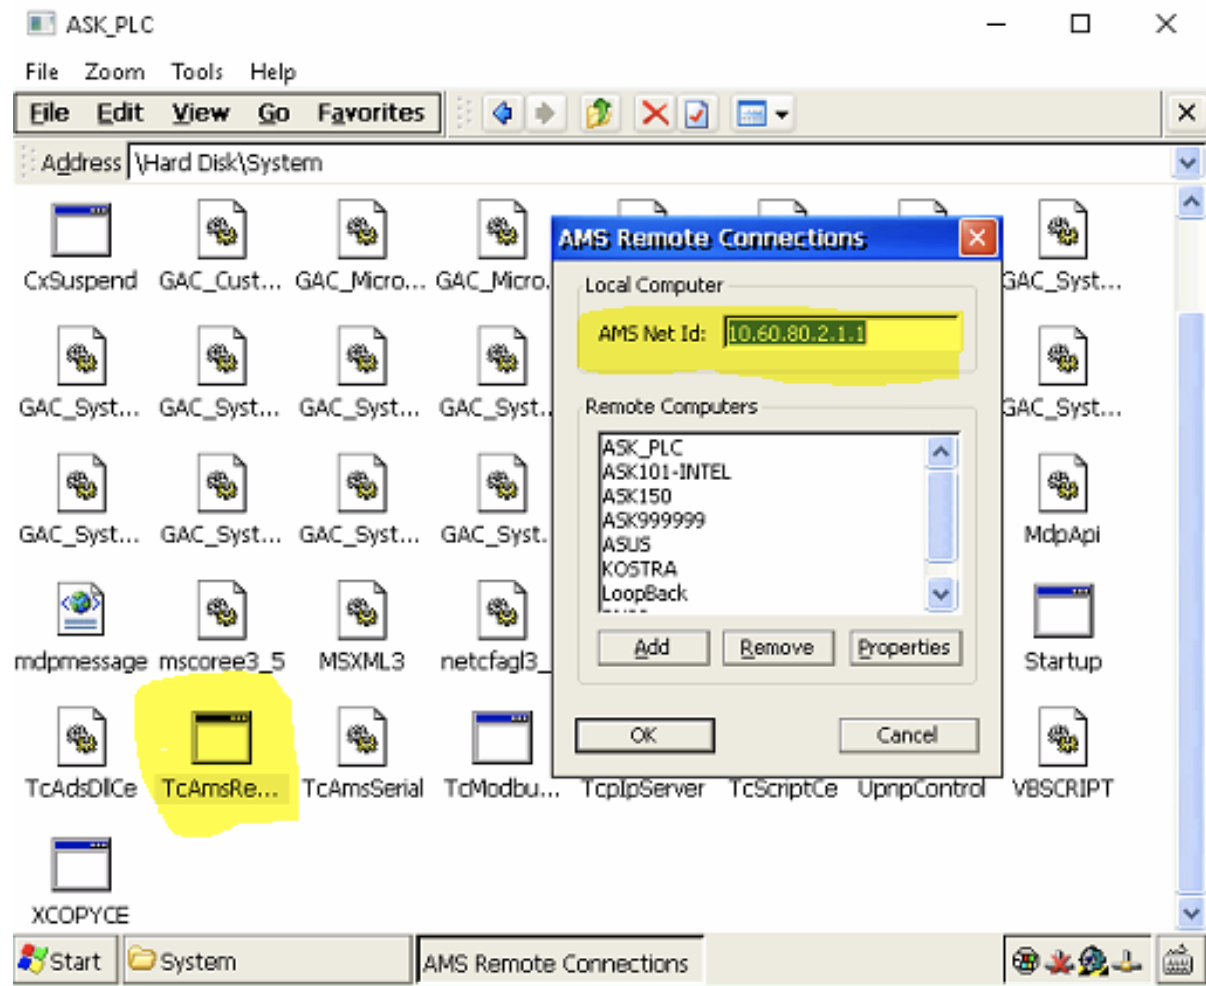
The AMS Net Id must follow the IP address.
- Press Start → Reset for a fresh start of the PLC system.
- Close CERHOST.exe. Verify the change by pinging the new address from cmd.exe – the PLC should respond.
Step 2 — Add the TwinCAT route on the master cabinet
- In Windows on the master cabinet, start TwinCAT System Manager.
- In the left tree, go to SYSTEM – Configuration. Press Choose Target, then Search (Ethernet) to open the Add Route Dialog, and press Broadcast Search.
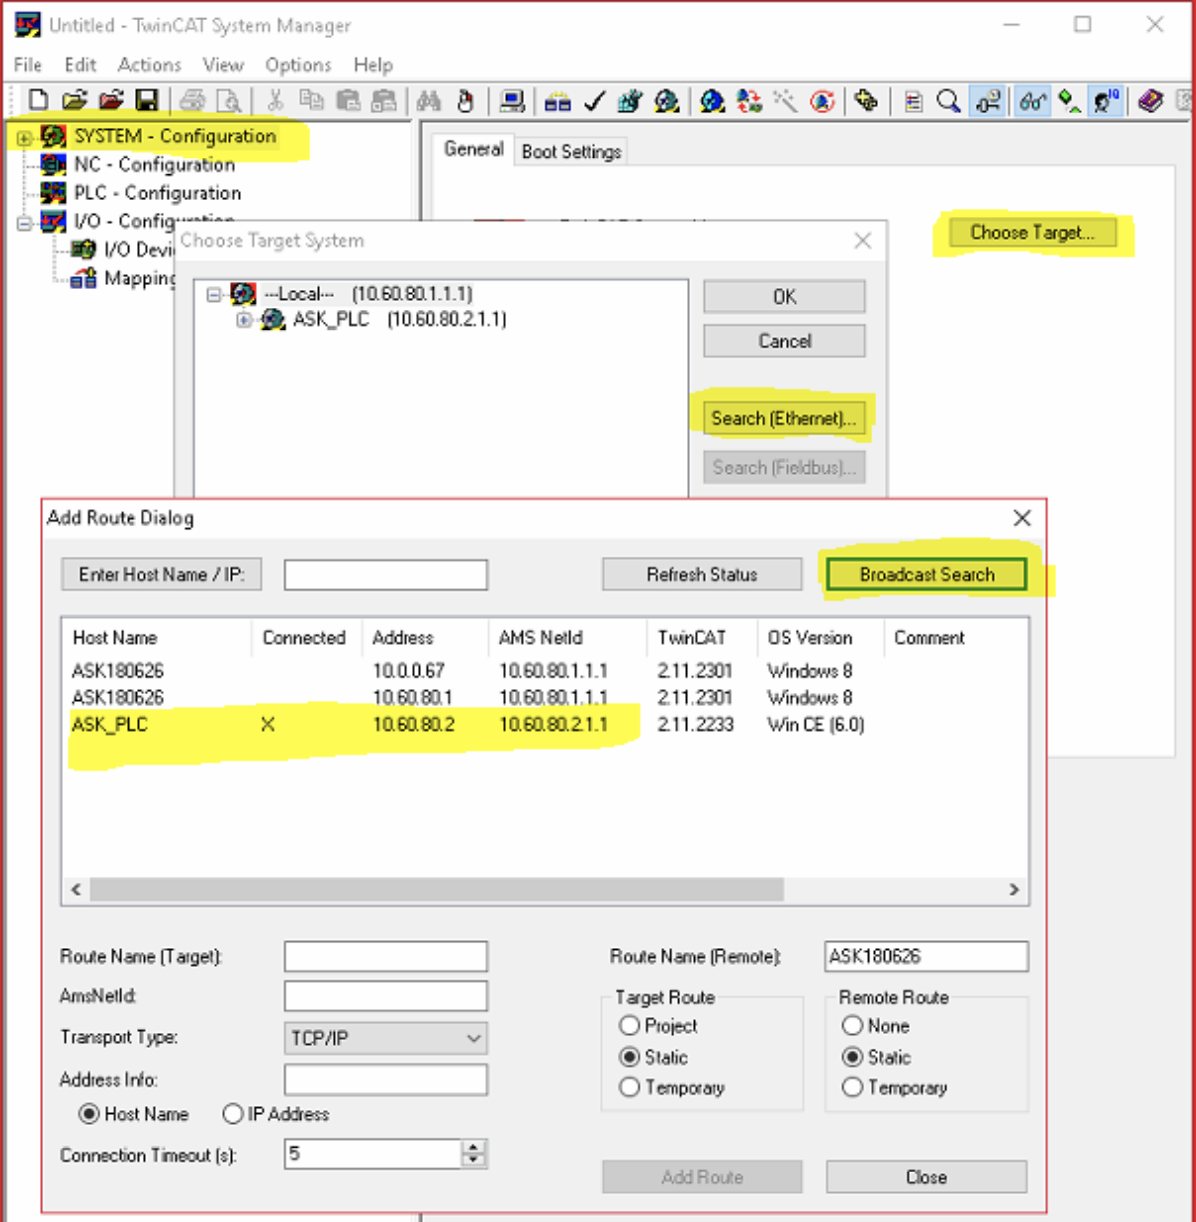
Searching for the PLC on the network.
- The dialogue fills with entries. Find the address you set in Step 1 – 10.60.80.22 – with its AMS NetId, 10.60.80.22.1.1. The Connected column has no X yet.
- Select that entry, name the route at the bottom of the window – ASK_PLC_22, for example – switch the option box from Host Name to IP Address, and press Add Route. An X appears in the Connected column.
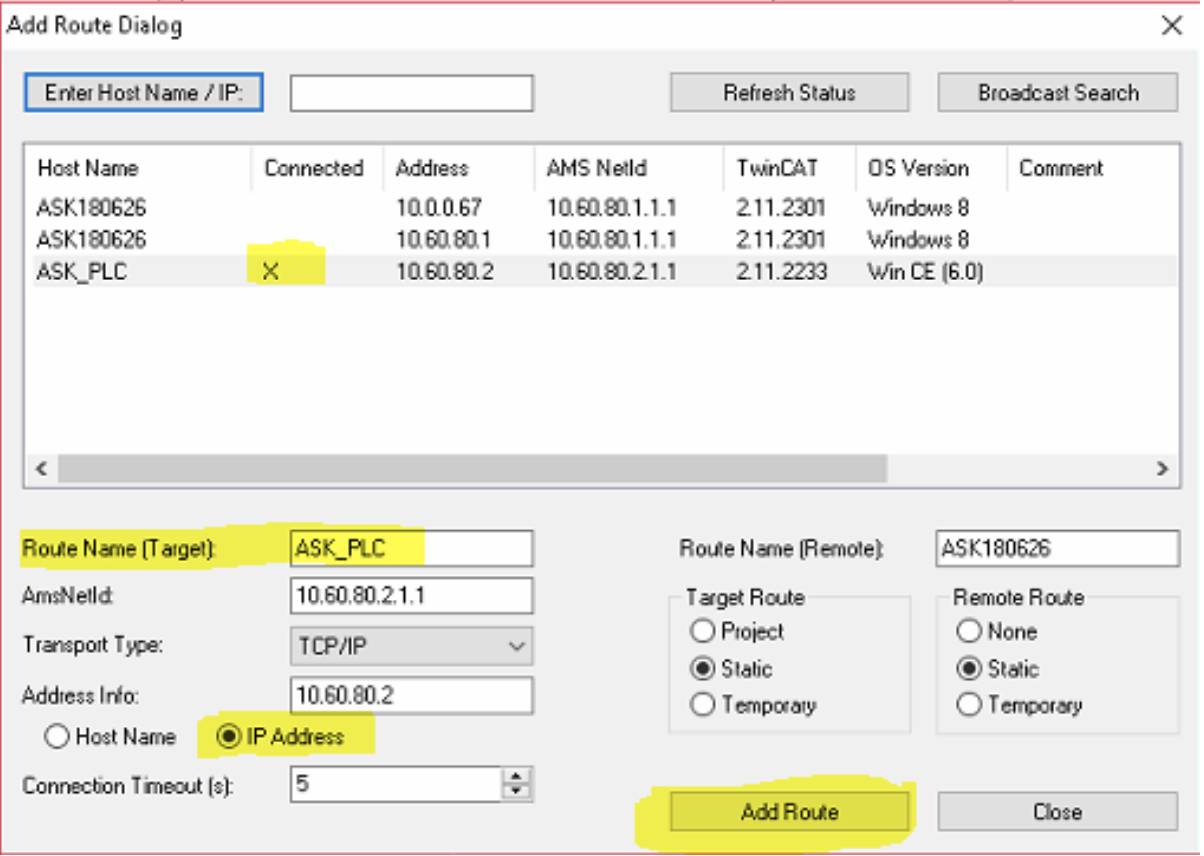
Adding the route to the extension PLC.
- Close the Add Route Dialog and Choose Target System. Select the new route and press OK.
Success: The main window status bar shows a successful connection to the PLC. Close the TwinCAT System Manager.

A connected extension PLC.
Step 3 — Configure the IP camera
- Open Internet Explorer and go to 10.60.80.13, the camera configuration page.
- Log in with name admin and password admin.
Tip: The login window sometimes hides behind the browser – check with ALT+TAB.
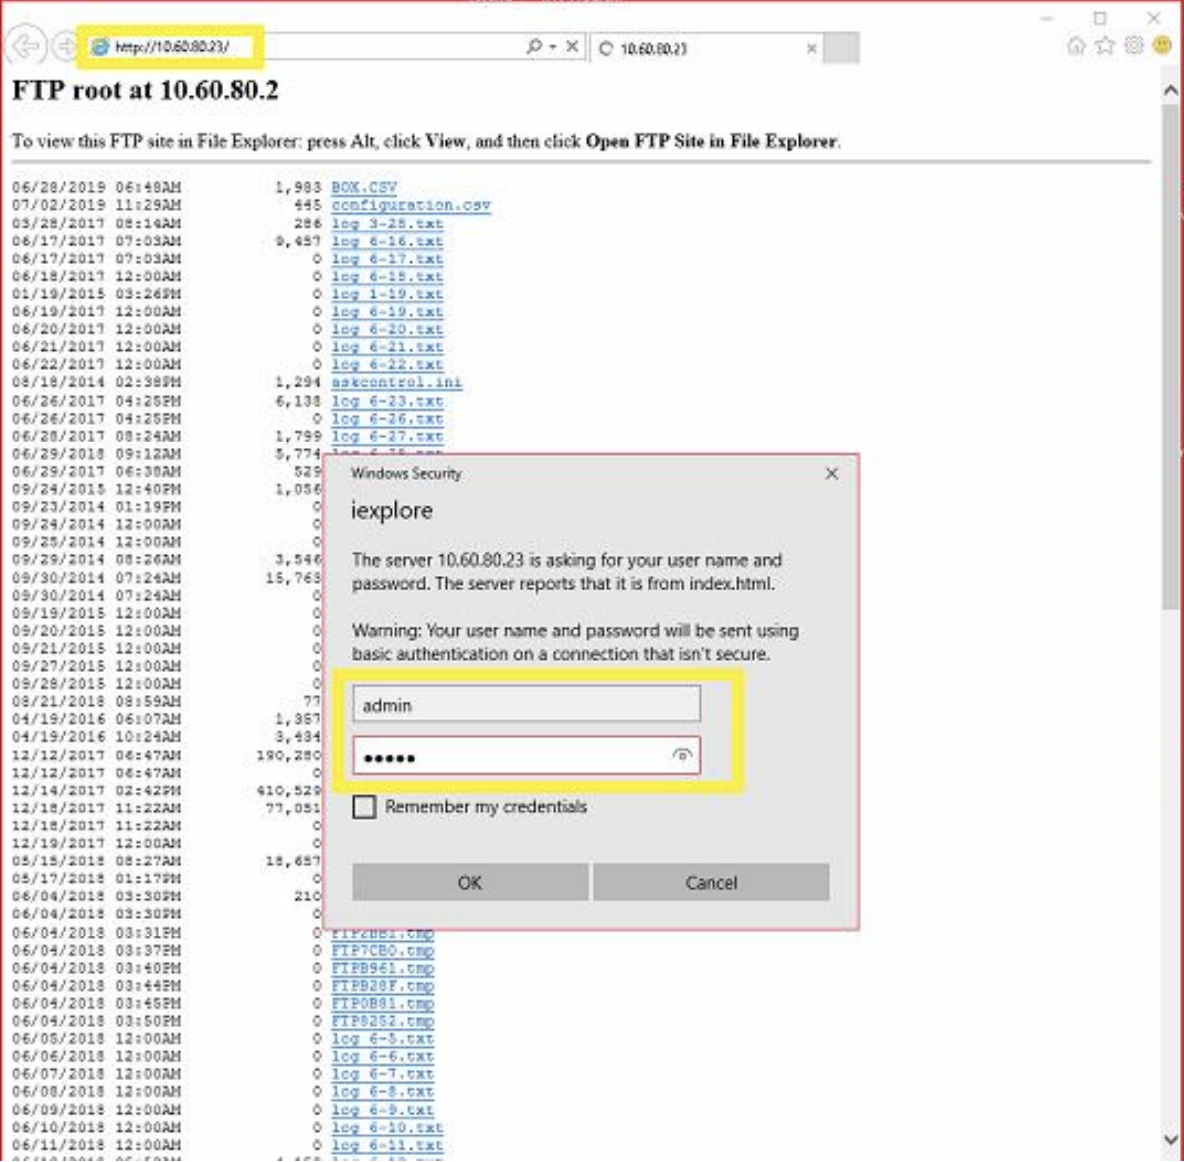
The camera configuration page.
- Switch the language to English and go to PC view.
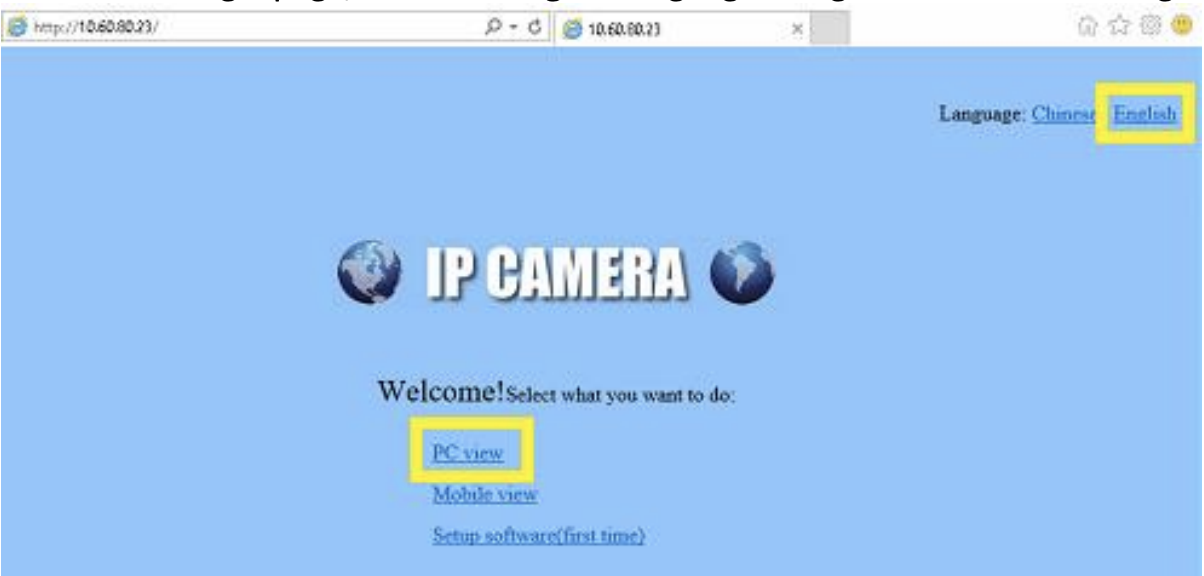
PC view gives the full configuration.
- Go to Settings in the left pane, then Network → Network. Change the camera IP address to the new one – 10.60.80.23, for example – and press Apply.
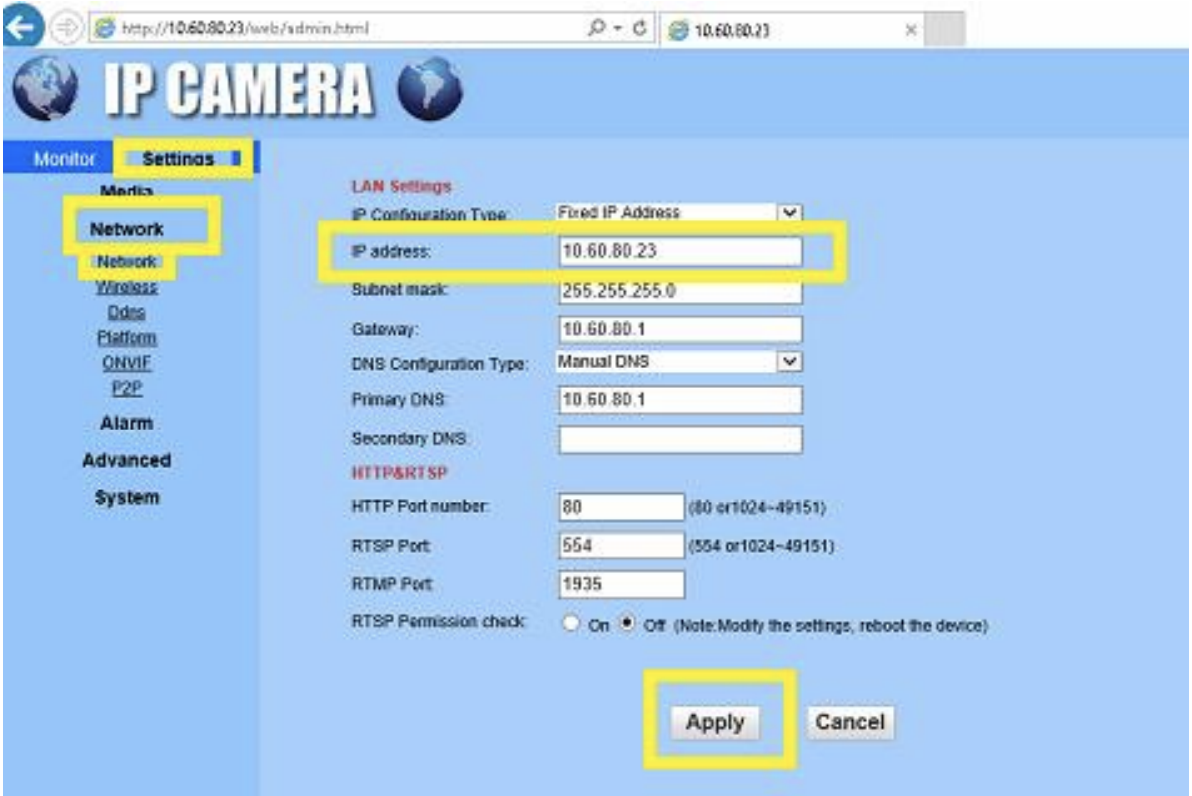
Giving the camera its own address.
The change disconnects you. Verify it by browsing to the new address, logging in again.
Step 4 — Install the IP camera filters, if missing
- Download the RTSP/RTMP/HTTP/ONVIF DirectShow Source Filter from this link.
- Extract it anywhere on the file system.
- Run DatasteadRTSPFilterInstaller.exe and follow the instructions, or register the filters manually as described in Install_Readme.txt inside the zip.
Note: That is an external download link. If it is broken, contact CRIBWISE support for the file.
Step 5 — Add the cabinet to ASK Control
- Open
C:\ASK\INIs\ASK_askcontrol.ini.
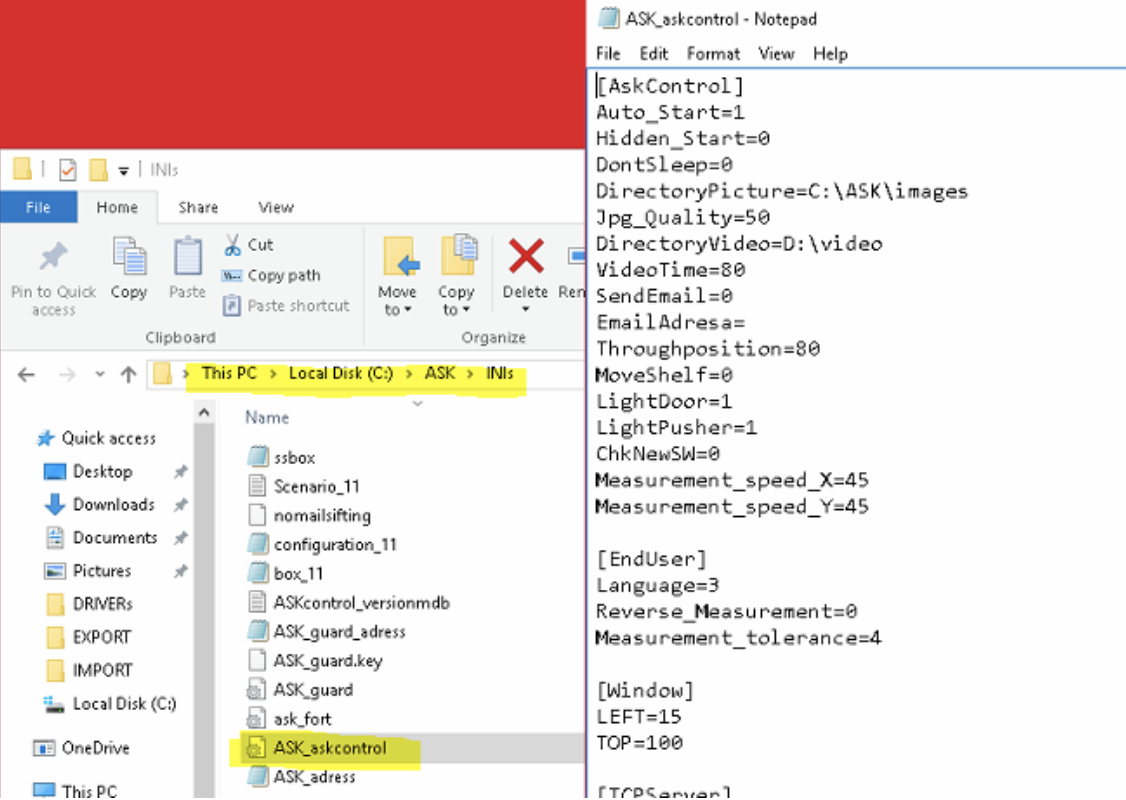
The ASK Control configuration file.
- Find the section marked [TB1] and copy all of its fields into a new section [TBx], where x is the next number in the sequence – 2, for example. That number is the ID of the extension cabinet, which then goes into the Smart Supply slave cabinet configuration.
- Set IP_control to the new IP address of the extension cabinet, and NetID_4 to the last number of that address – 22, for example.
- Give Name something meaningful, such as Extension cabinet 1. It is shown in ASK Control during configuration.
- Set IP_camera to
rtsp://admin:admin@10.60.80.23:554/33>buffer=0>lowdelay=1>vidsync=0, using the camera address from Step 3.
The new entry should look like this:
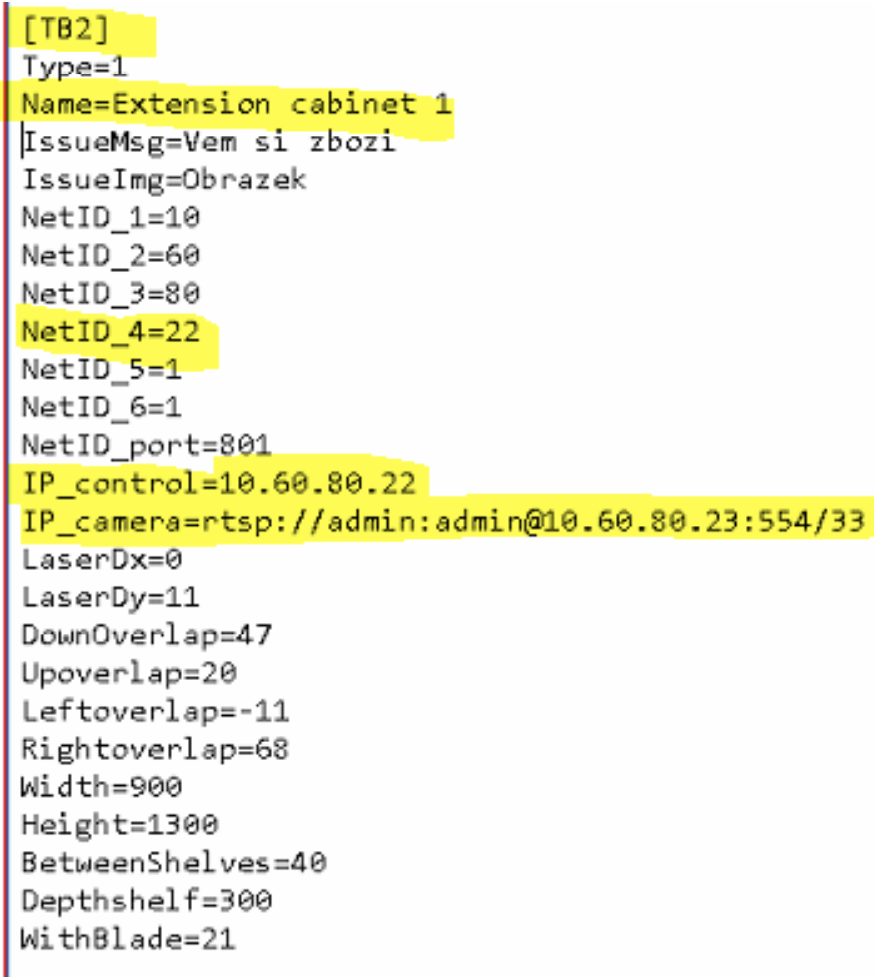
A finished extension cabinet section.
- Save and close the file.
- Exit ASK Control and start it again from
C:\ASK\ASK_askcontrol.exe.
Success: The extension cabinet appears in ASK Control, for example in the bottom bar. Clicking it makes that cabinet active so its shelves can be rescanned and codes assigned.

The extension cabinet is now selectable.
Troubleshooting
| Problem | Likely cause | Fix |
| Only one extension cabinet is reachable. | Several cabinets still share the default address 10.60.80.12. | Configure them one at a time, giving each its own address. |
| The PLC answers but TwinCAT will not connect. | The AMS Net Id still matches the old IP address. | Update it in TcAmsRemoteMgr.exe to match the new address. |
| No camera image in ASK Control. | The DirectShow filters are missing, or IP_camera points at the wrong address. | Install the filters and check the rtsp URL against the camera address. |
| The camera login window never appears. | It is hidden behind the browser. | Press ALT+TAB. |
Related articles
- Sielaff ASK 200 Extension cabinet – storage device setup – the storage device settings in CRIBWISE.
- Sielaff ASK 200 Master cabinet – storage device setup – the master cabinet these extensions belong to.
- How to use Sielaff ASK200 and TB300 – rescanning shelves and assigning shelf codes afterwards.
- Configure RFID scanner for ASK200 – the other ASK Control configuration file.