
What you can do
Change the compartment layout of an existing AutoCrib VX500 or VX1000 by exporting the configuration file, editing it, and importing it back.
Use it when items need a different compartment size than the cabinet was set up with.
Before you start
- You need Admin Portal access to Administration → Export and to Data Management → Devices.
- Plan the change when the cabinet is not in use – the device is locked during the process.
- Know which column and row you are changing.
Warning: Updating a configuration erases all item assignments for the entire row of the column being modified – row 11X, level 1, for example. If a location has 3 compartments and you change it to 6, every assignment on 11X-1 is removed when the new configuration is applied. This works in both directions: increasing or decreasing the number of compartments clears all existing assignments and location quantities for that row.
Quick start
Experienced users – update the configuration in 4 steps:
- Export the assignment datasets as a backup.
- Lock the device and export the configuration file.
- Edit the yellow fields in the Excel file.
- Import the file, save, and unlock the device.
Steps
Step 1 — Make a backup
- Go to Administration → Export.
- Export these datasets:
- Item device assignments
- Item location assignments
- Item location quantities
- For a full backup, use Select All at the top of the export list instead.
This gives you a complete record of the existing setup in case you need to restore it.
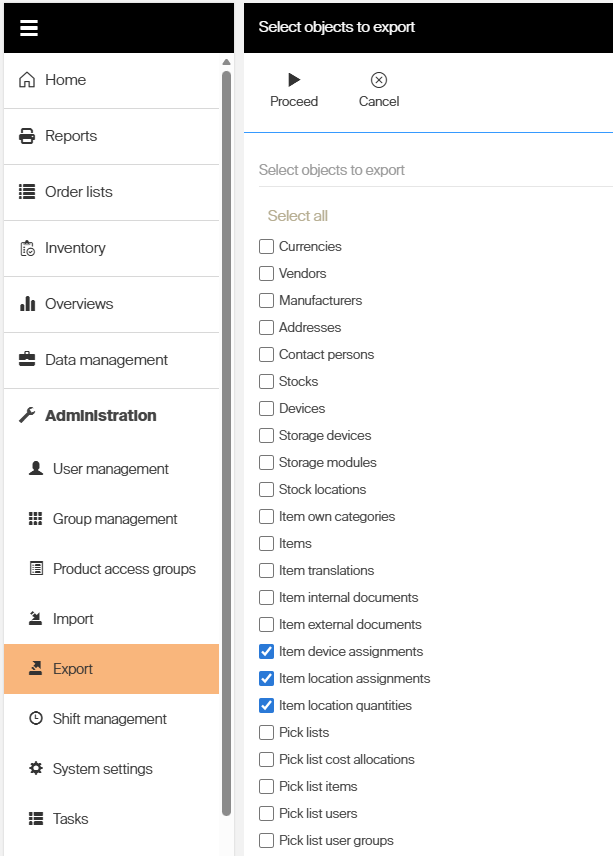
Exporting the assignment datasets before changing anything.
Step 2 — Get the current configuration
- Go to Data Management → Devices and select your device.
- Select Lock device in the menu at the top, to prevent changes during the process.
- With the device locked, Export the configuration file.
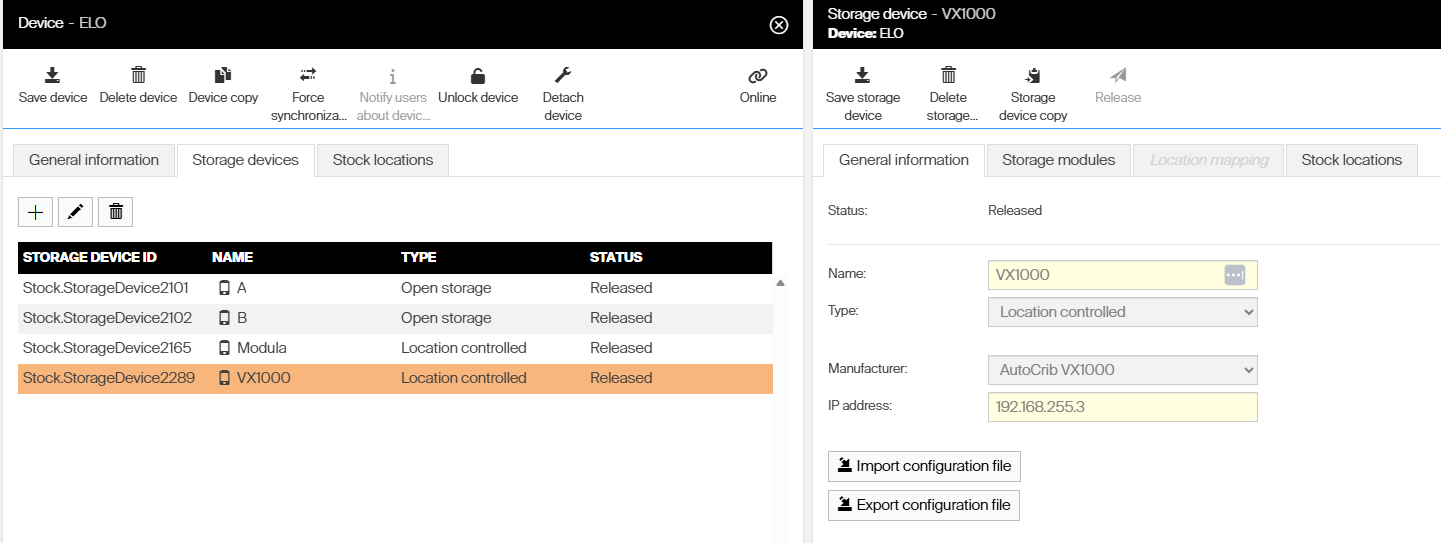
The export and import options appear once the device is locked.
Step 3 — Update the configuration file
Edit the yellow fields in the Excel file. The numbers say how many locations that column and row has.
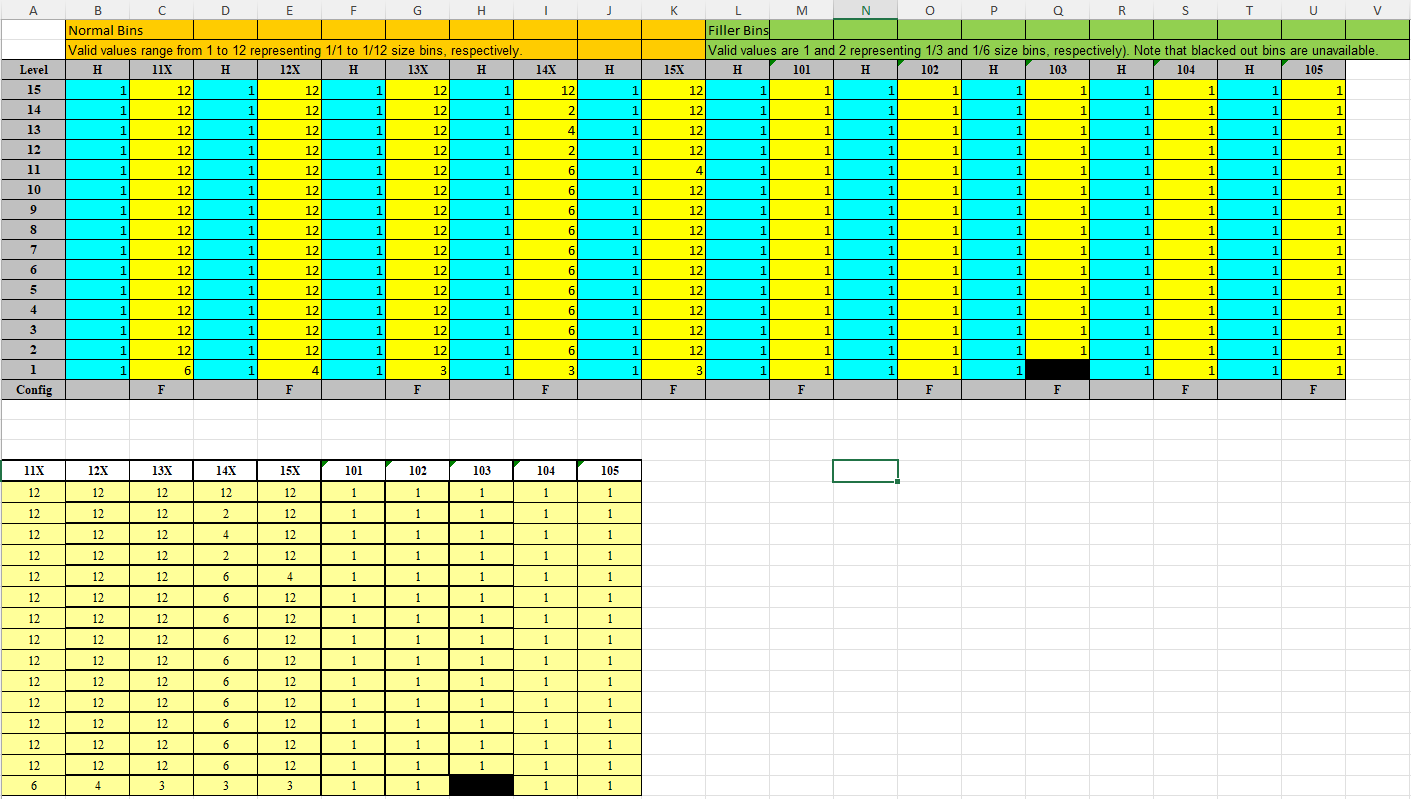
Only the yellow fields are edited.
Step 4 — Import the updated configuration
- Go to Data Management → Devices, select your device and your cabinet.
- Click Import.
- Upload the updated Excel configuration file.
- Click Save.
- Go back to the device and click Unlock device at the top.
Success: The cabinet has the new compartment layout, and the device is available again.
Next steps
- Reassign the items on the affected row – every assignment there was cleared by the update.
- Check the quantities against your export, since location quantities on that row were cleared too.
Troubleshooting
| Problem | Likely cause | Fix |
| Export and import are not offered on the device. | The device is not locked. | Select Lock device in the top menu first. |
| Assignments disappeared after the import. | Expected – the whole row of the modified column is cleared. | Reassign the items using the export you made in Step 1. |
| The import is rejected. | Fields outside the yellow ones were changed, or the wrong cabinet was selected. | Export a fresh file, edit only the yellow fields, and select the right cabinet. |
| The cabinet stays unavailable. | The device is still locked. | Click Unlock device at the top of the device. |
Related articles
- AutoCrib VX500 – storage device setup – the settings and location structure of the VX500.
- AutoCrib VX1000 – storage device setup – the same for the VX1000.
- How to configure storage devices – create and configure a storage device.
- How to create and manage devices – where the device is locked and unlocked.