
What you can do
Set up a scheduled script so CRIBWISE reorders items or sends them to service on its own — on a fixed weekday and time, or at a repeating interval. This guide covers the setup of a classic script from start to activation.
Note: This article covers classic scripts, which use a fixed set of predefined rules. If you need to combine conditions or filter on more than item classification, see custom scheduled scripts instead.
Before you start
- You need Admin Portal access with permission to open Order lists > Scheduled scripts.
- Decide what the script should do: create purchase orders, or create service orders. One script does one or the other.
- Know which rule should trigger it. The rules are explained in purchase order scripts and service scripts.
- The thresholds the rules compare against — maximum quantity, order point, min in stock — are set per item assignment, not in the script.
Important: A saved script does nothing until you activate it. Activation is the last step, and it is easy to forget.
Quick start
Experienced users — set up a script in 6 steps:
- Open Order lists > Scheduled scripts and click New script.
- Choose Classic purchase or service script.
- Enter a unique Script name and pick the Script type.
- Tick at least one rule and at least one item classification.
- Set Run script at — a scheduled time or an interval — then click Save script.
- Click Set active.
Need more detail? Follow the full steps below.
Steps
Step 1 — Open the scheduled scripts list
- In the Admin Portal sidebar, expand Order lists and select Scheduled scripts.
- Click New script in the toolbar.
The list shows every existing script with its type, its state, and when it last ran.
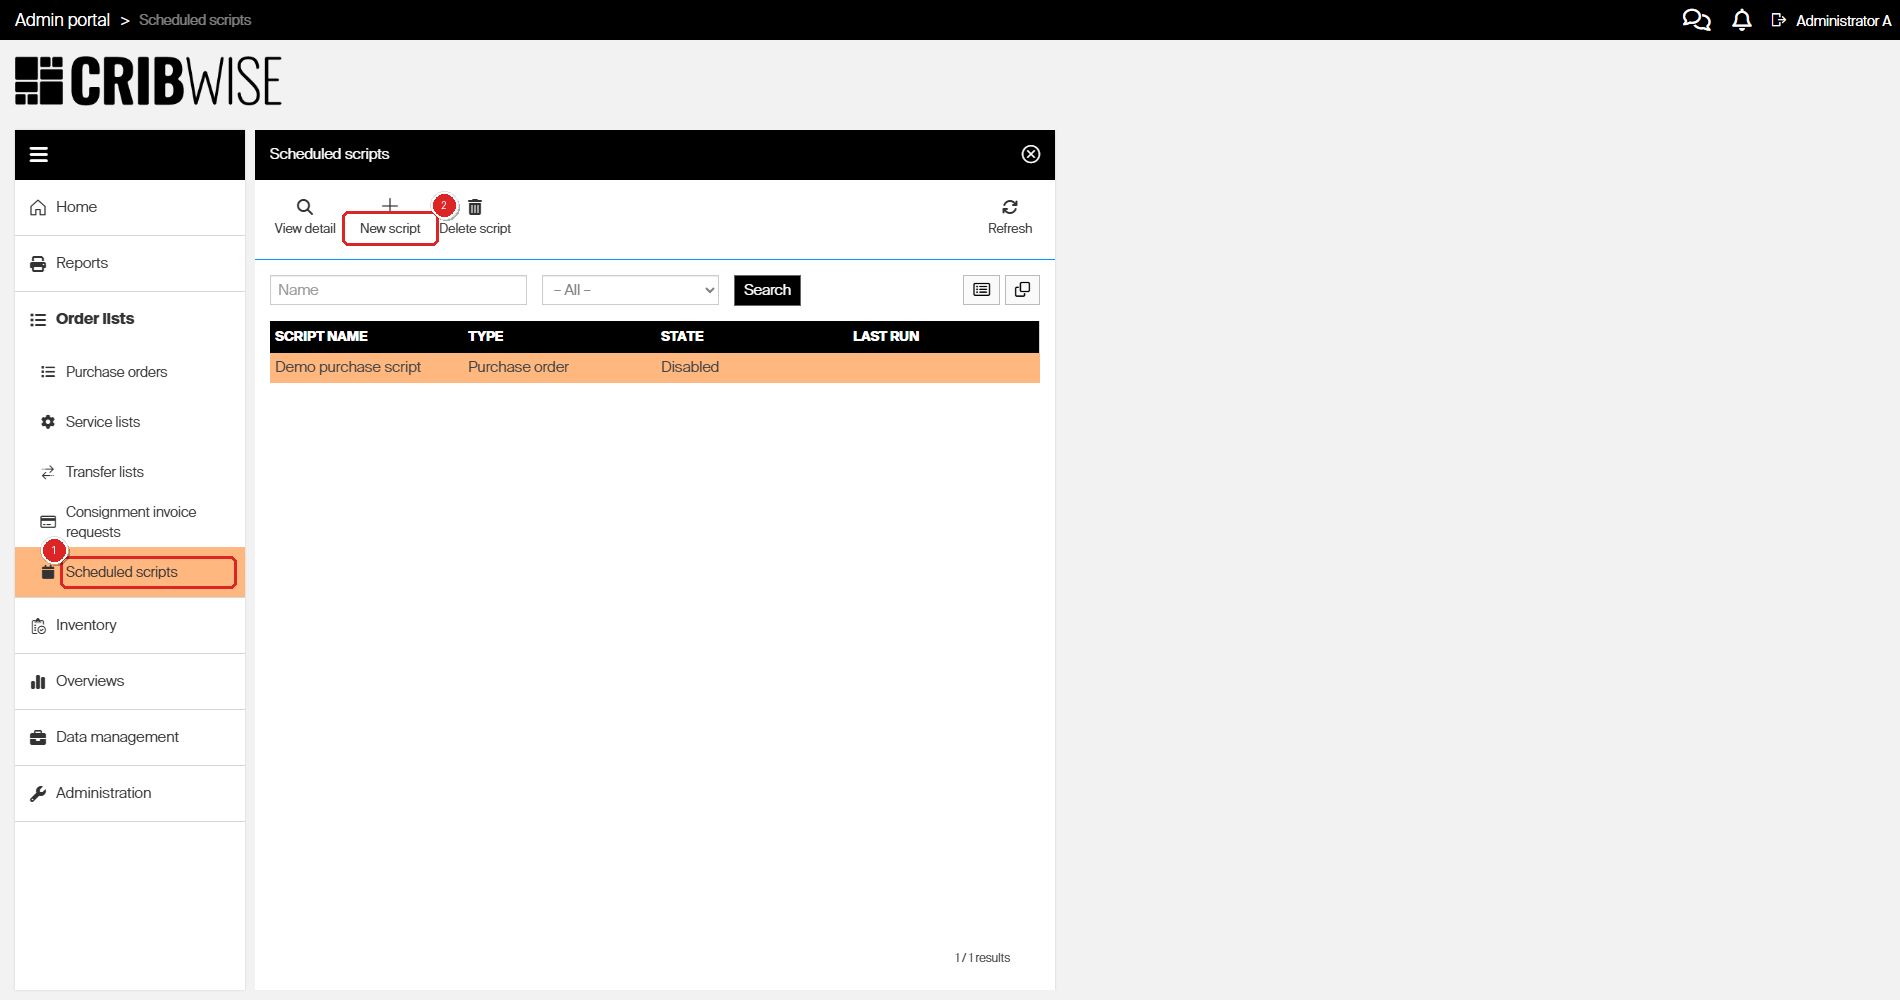
Scheduled scripts live under Order lists. The State column tells you at a glance which scripts are running.
Step 2 — Choose the classic script type
Select Classic purchase or service script.
The other two options open a different editor with its own rule builder. They are covered in custom scheduled scripts.
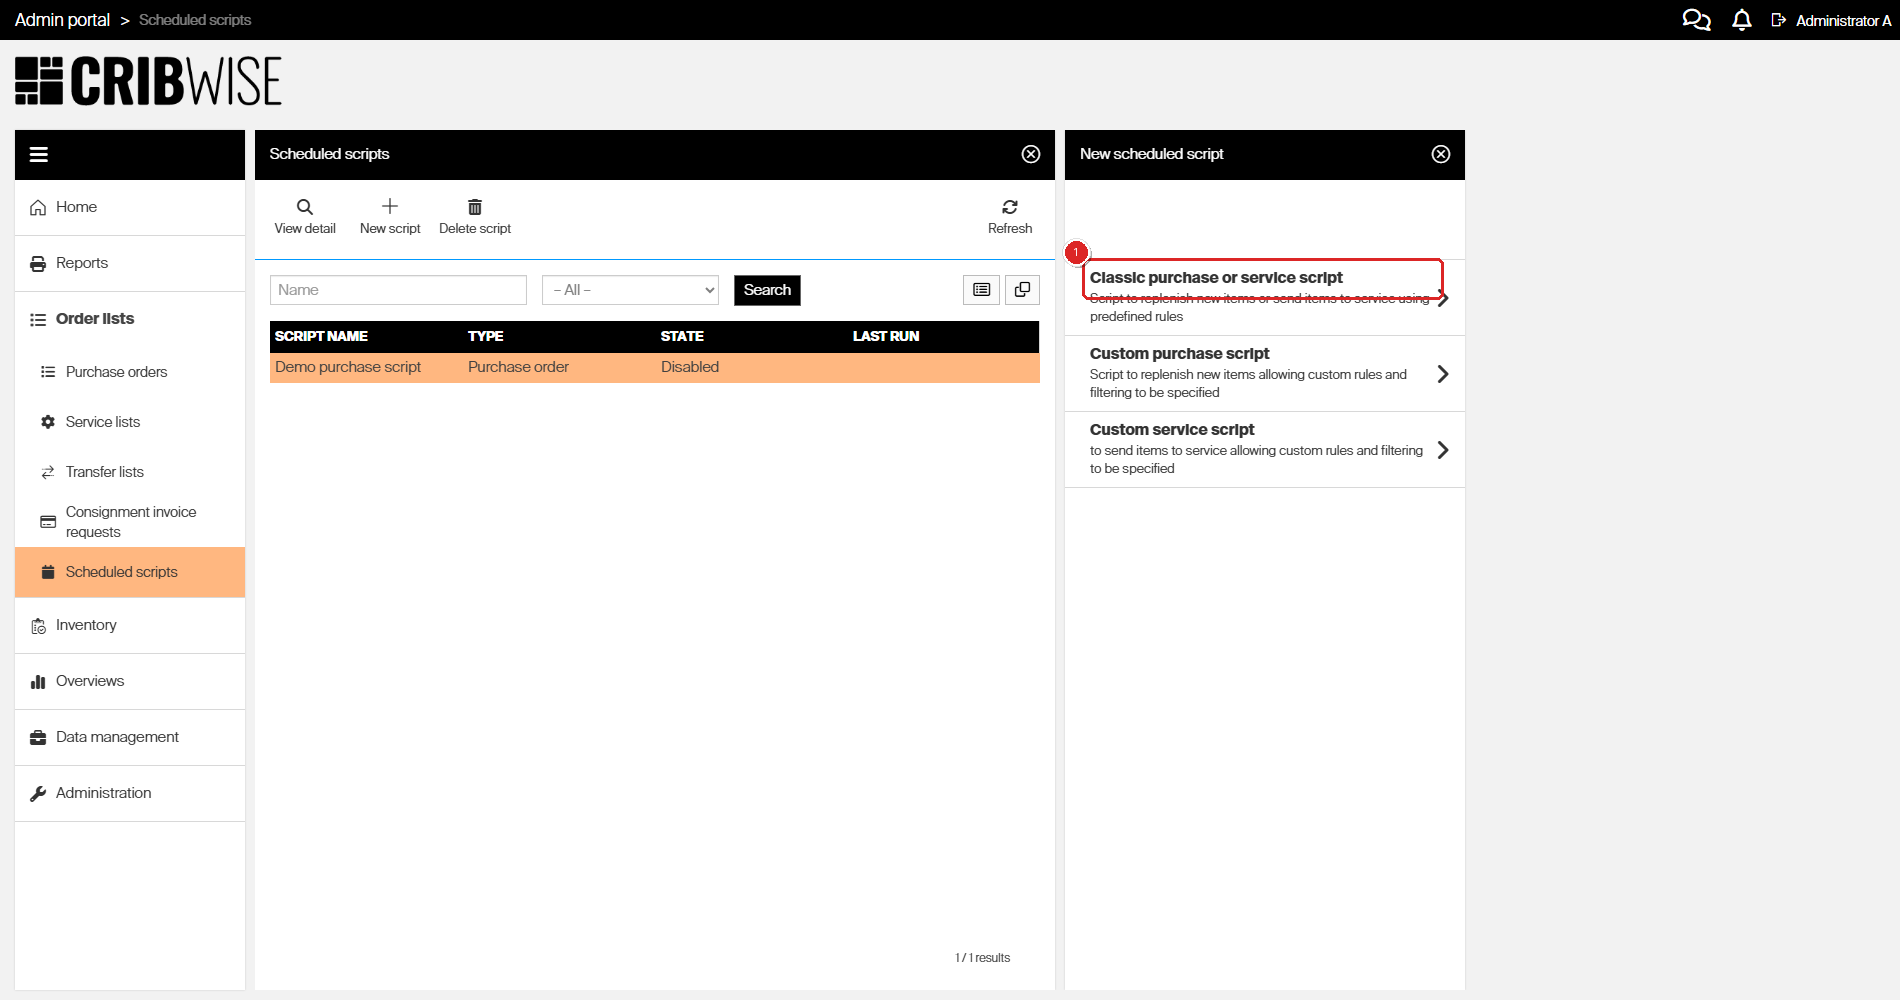
Pick the classic type for predefined rules. The two custom types let you write your own rules and filters.
Step 3 — Name the script and set the order options
- In Script name, enter a name that is unique in your portal. Include the schedule and the target, for example Weekly reorder – A items.
- In Script type, choose Purchase order or Service.
- Set the order options you need. All five are optional.
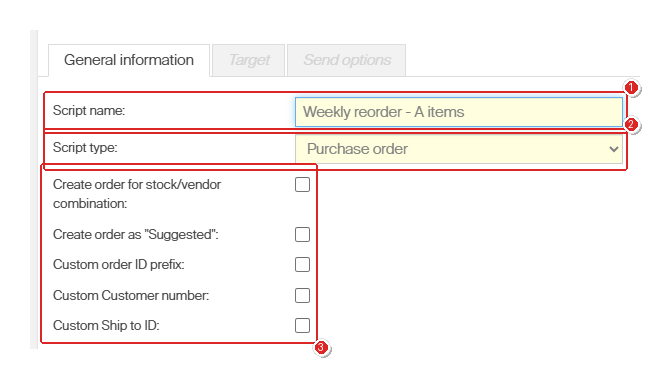
The General information tab. Script type decides which rules appear further down, so set it before you continue.
| Option | Leave blank | Tick it |
|---|---|---|
| Create order for stock/vendor combination | A separate order per device and vendor. | One order per stock and vendor, covering all devices in that stock. |
| Create order as “Suggested” | The script sets the order to Active and sends it to the vendor, provided the vendor’s minimum and maximum order values allow it. | Every order stays in Suggested state until someone reviews it and sets it to Active. |
| Custom order ID prefix | Uses the default order ID prefix from the vendor. | Reveals a field for a prefix that applies to this script’s orders only. |
| Custom Customer number | Uses the customer number from the vendor. | Reveals a field for a customer number that applies to this script’s orders only. |
| Custom Ship to ID | Uses the Ship to ID from the vendor. | Reveals a field for a Ship to ID that applies to this script’s orders only. |
Tip: Tick Create order as “Suggested” while you are testing a new script. Nothing reaches a vendor until you approve it, so you can check what the script picked up and delete it if the rules were wrong.
The three defaults the custom fields override are set per vendor — see how to manage vendors.
Step 4 — Choose the rules
Tick at least one rule and at least one item classification. The script runs an item into an order when it meets any ticked rule.
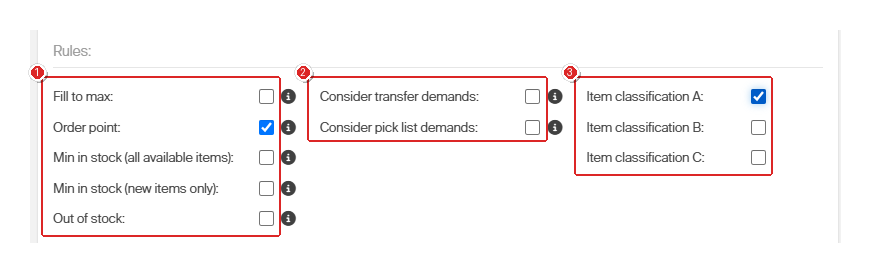
Rules for a purchase order script. Hover the ⓘ icon next to any rule or option to read its description without leaving the form.
A Purchase order script offers five rules:
| Rule | Triggers when |
|---|---|
| Fill to max | Available quantity in the device is below the maximum quantity. Orders up to maximum. |
| Order point | Available quantity is at or below the order point. Orders up to maximum. |
| Min in stock (all available items) | Available quantity of a durable item is at or below min in stock, counting any condition except items needing service. |
| Min in stock (new items only) | Quantity of a durable item in condition New is at or below min in stock. Does not apply to consumables. |
| Out of stock | Available quantity in the device has reached zero. Orders up to maximum. |
Two options widen what the rules count:
- Consider transfer demands — for central stock devices, also counts quantity still to be picked for transfer lists.
- Consider pick list demands — also counts quantity still to be picked from active predefined pick lists.
A Service script offers one rule instead, Quantity for service: enter how many items must be waiting for service in the monitored devices before an order is created. See service scripts.
Item classification A / B / C decides which items the rules are checked against. Classification is set per item, and at least one must be ticked. See understanding ABC classification.
Step 5 — Set when the script runs
Under Scheduler, choose one of two options in Run script at.
Scheduled time runs the script at a fixed clock time:
- Set Repeat. The fields beside it change with your choice.
- Fill in those fields, using the table below.
- Optionally set a Start date and an End date. The script never starts automatically before the start date or after the end date.
| Repeat | What to fill in |
|---|---|
| Once | A single Once field — pick when the one run should happen. |
| Daily | Time, as hours and minutes. |
| Weekly | Time, plus a tick on every weekday it should run. |
| Monthly | Time, plus the Day of the month. |
The Timezone shown below the fields is the one the time is read in. It is display-only.
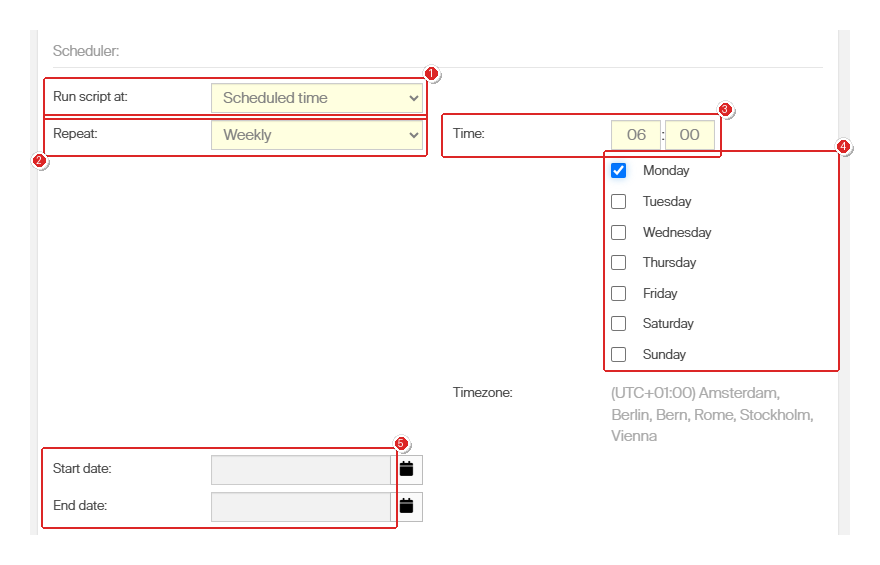
A weekly script set to run every Monday at 06:00. The time is read in the timezone shown below the weekdays.
Interval runs the script repeatedly instead. Enter how many times per Hour or per Day it should run.
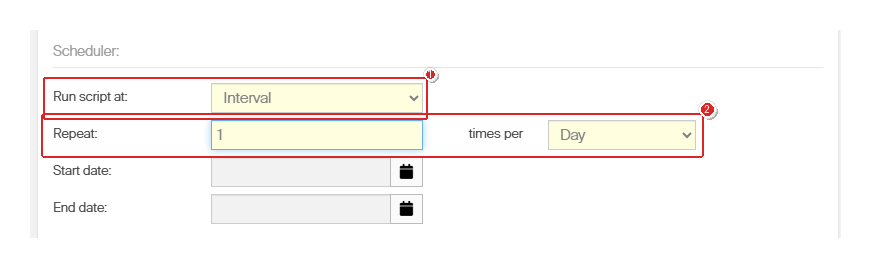
The same script as an interval: once per day, with no fixed clock time.
Tip: Schedule reorder scripts for early morning. The orders are then waiting for review when the purchasing team starts, instead of arriving through the day.
Step 6 — Save the script
Click Save script.
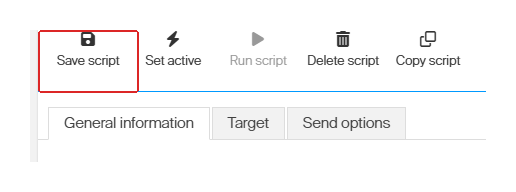
Save script. The Target and Send options tabs stay greyed out until this first save succeeds.
Success: The script appears in the list on the left with state Disabled, and the Target and Send options tabs become available.
If nothing happens when you click Save script, a required field is empty. Missing fields are outlined in red — most often Time, or the weekday list under Scheduled time.
Step 7 — Restrict the script to vendors, stocks, or devices (optional)
By default the script checks everything you have access to. Use the Target tab to narrow it down.
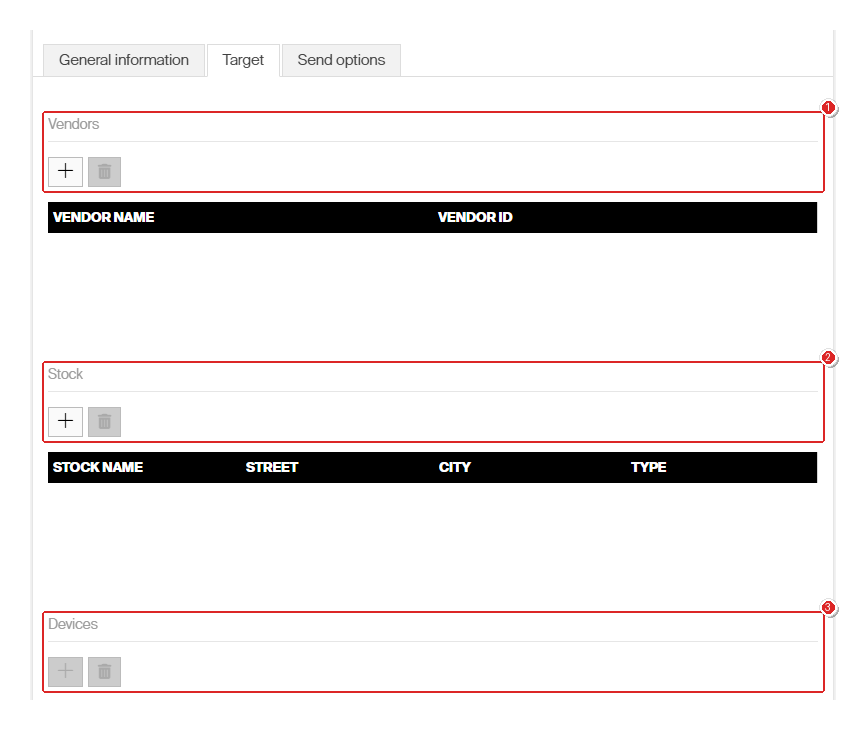
Three independent lists. Leave a list empty and no restriction of that kind is applied.
- Click + above the list you want to restrict — Vendors, Stock, or Devices.
- Search by name, select the record, and click OK.
- To remove an entry, select its row and click the bin icon.
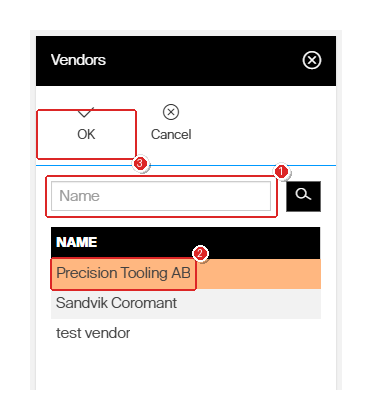
The picker opens as its own panel. Select a row, then confirm with OK.
The + button above Devices stays greyed out until you have added at least one stock. Add the stock first, then pick devices within it.
Step 8 — Choose how orders reach the vendor (optional)
Open the Send options tab and tick the channels this script’s orders should use: B2B, Web service, FTP, or Mail. For FTP and Mail, also tick the formats to attach — XML, PDF, or Excel — and choose a template for PDF and Excel.
Every order this script creates inherits these settings.
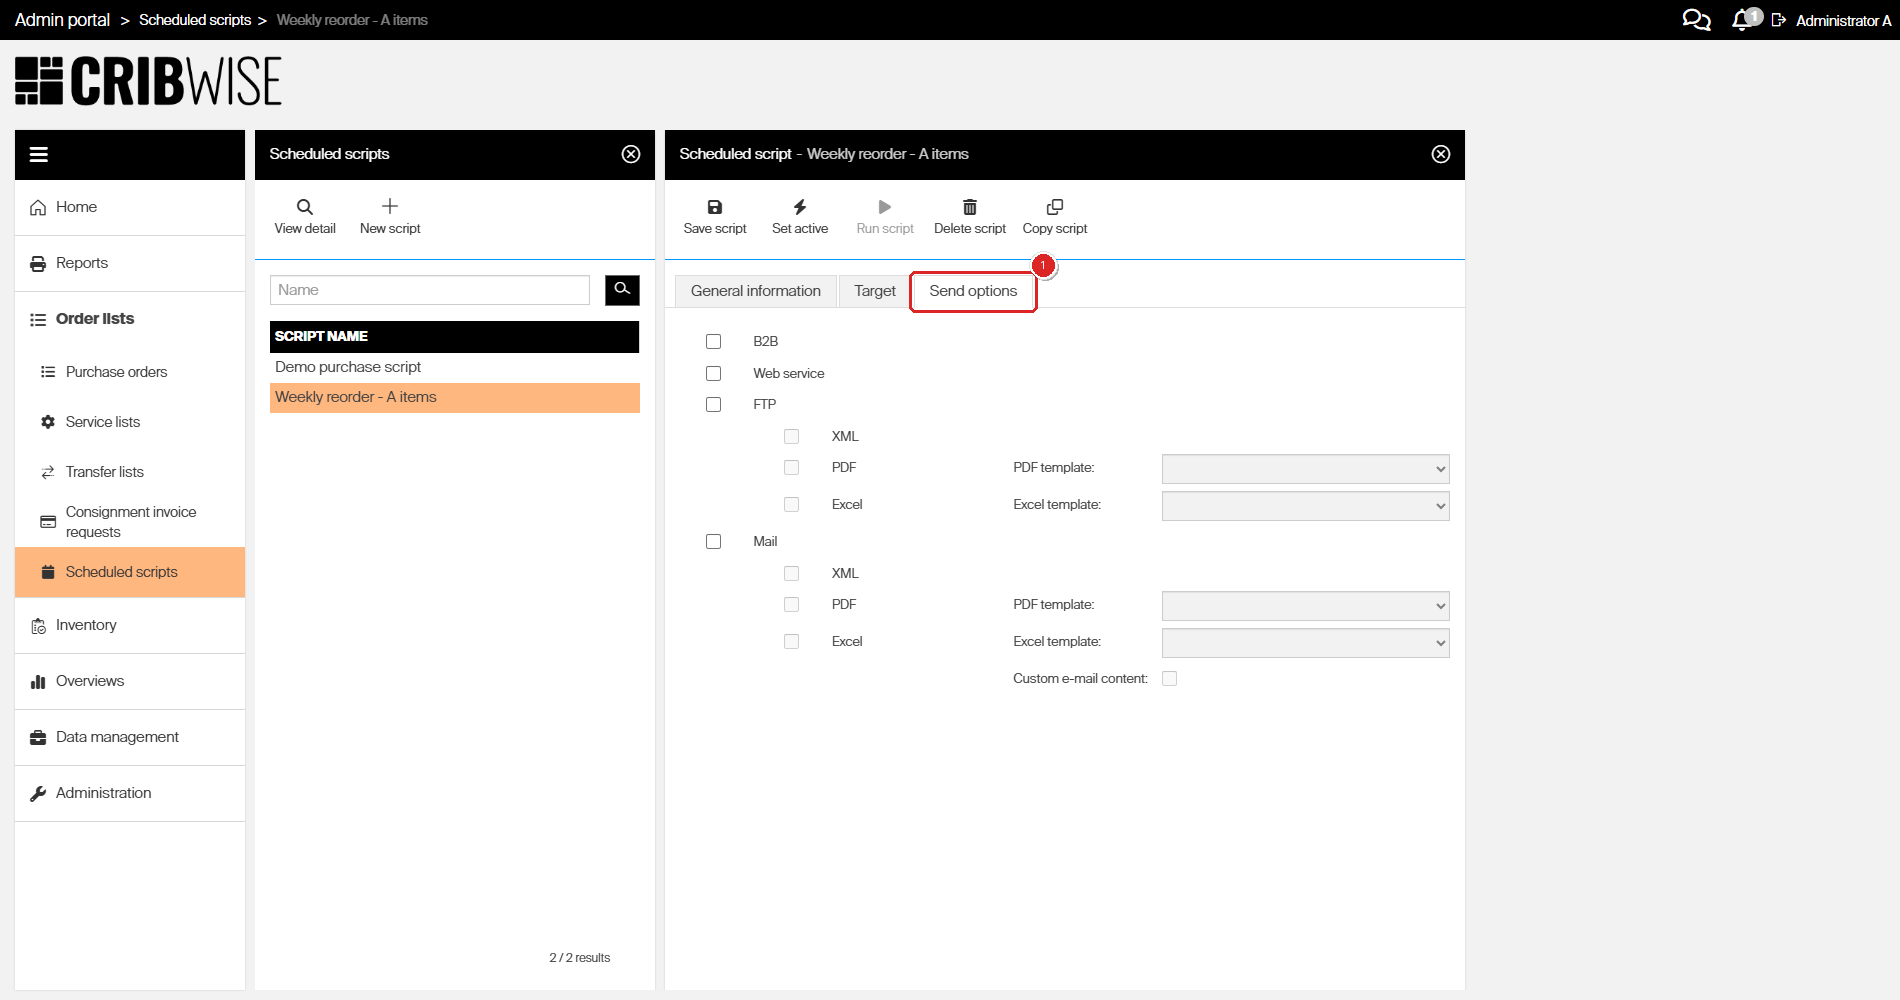
Send options are per script, not per order. Tick Custom e-mail content to override the standard mail text.
To change what the PDF or Excel attachment looks like, see how to customize purchase order email templates.
Step 9 — Activate the script
Click Set active.
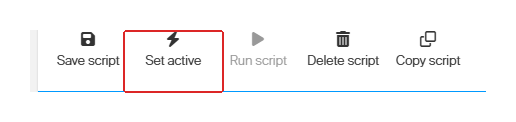
Set active. Until you click it, the script will never start on its own.
Success: Set active changes to Deactivate, Run script becomes available, and the script’s State in the list changes to Active.
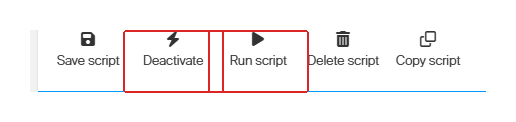
After activation. Run script triggers the script immediately, without waiting for the schedule.
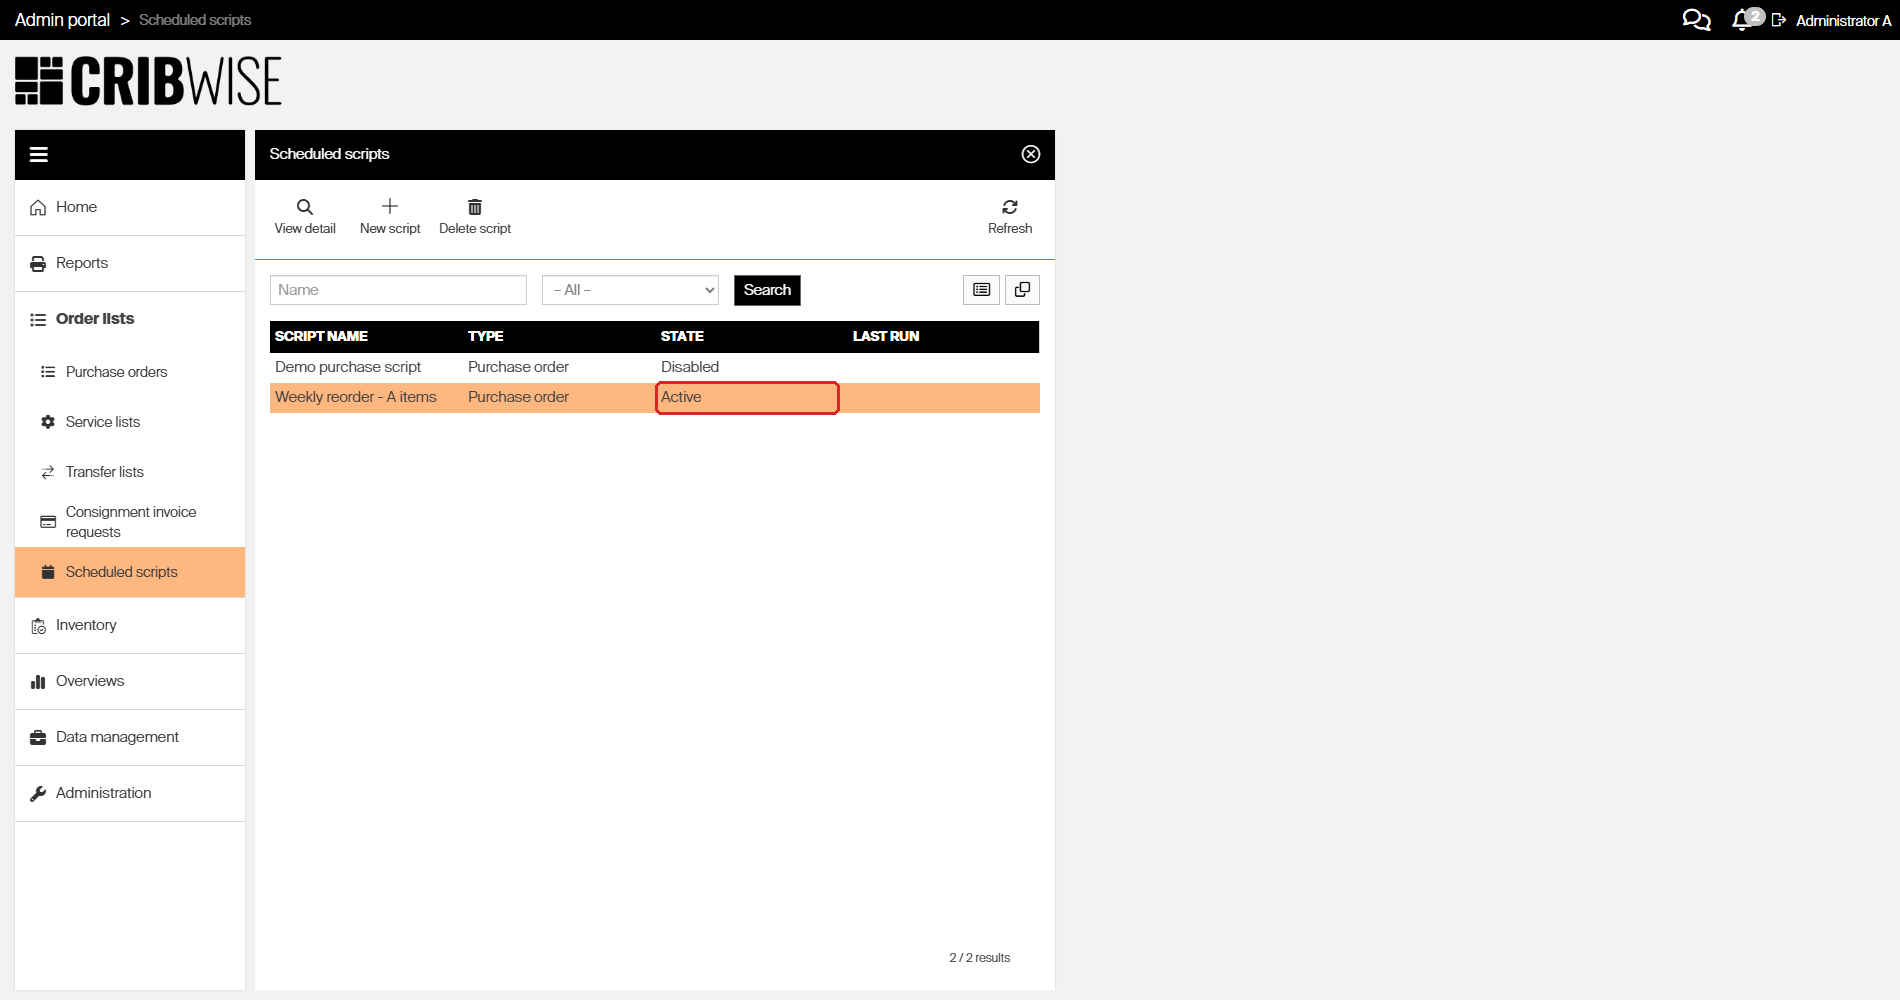
The finished script in the list, State Active. The Last run column fills in after the first run.
Next steps
- Test it once — click Run script and check what it produced, instead of waiting for the schedule.
- Check the result — every run is recorded in the event log. See how to use the event log for auditing.
- Review the orders — see how to view and filter purchase orders.
- Tune the thresholds — if the script orders too much or too little, the maximum quantity and order point on the item assignment are what to adjust. See how to optimize stock levels and order points.
Troubleshooting
| Problem | Likely cause | Fix |
|---|---|---|
| Clicking Save script does nothing | A required field is empty — usually Time, or no weekday ticked for a weekly schedule | Look for fields outlined in red and fill them in, then save again |
| The Target and Send options tabs are greyed out | The script has not been saved yet | Complete the General information tab and click Save script |
| The script never runs | Its state is still Disabled, or the start date is in the future | Click Set active; check Start date and End date on the General information tab |
| The script runs but creates no order | No item met a ticked rule, or the item’s classification is not ticked | Tick the relevant Item classification, and check the thresholds on the item assignments |
| Orders are created but never sent | Create order as “Suggested” is ticked, or no send channel is selected | Untick the option, or set the orders to Active manually; check the Send options tab |
| The + button above Devices cannot be clicked | No stock has been added to the target yet | Add a stock under Stock first, then add devices |
| An item you expected is missing from the order | Scripts skip items with state Obsolete and quoted items, and only order whole purchase packages | See purchase order scripts for the full list of exclusions |
Related articles
- Understanding purchase order scripts — what each purchase rule checks, and which items scripts skip
- Understanding service scripts — how the service rule finds items waiting for service
- Custom scheduled scripts — the flexible alternative when predefined rules are not enough
- How to manage vendors — the order ID prefix, Ship to ID, and customer number defaults a script can override
- Understanding ABC classification — how items get classification A, B, or C
- How to view and filter purchase orders — find and review the orders a script created
- How to use the event log for auditing — check whether a run succeeded