
What you can do
Let the Stock Optimizer propose order points and max levels for your consumable items, based on real purchase lead times and consumption, then accept, adjust or decline each proposal.
It removes the manual work of maintaining order parameters on thousands of items, lowers the capital tied up in tools, and aims to match or beat what an experienced user achieves by hand.
The optimization process
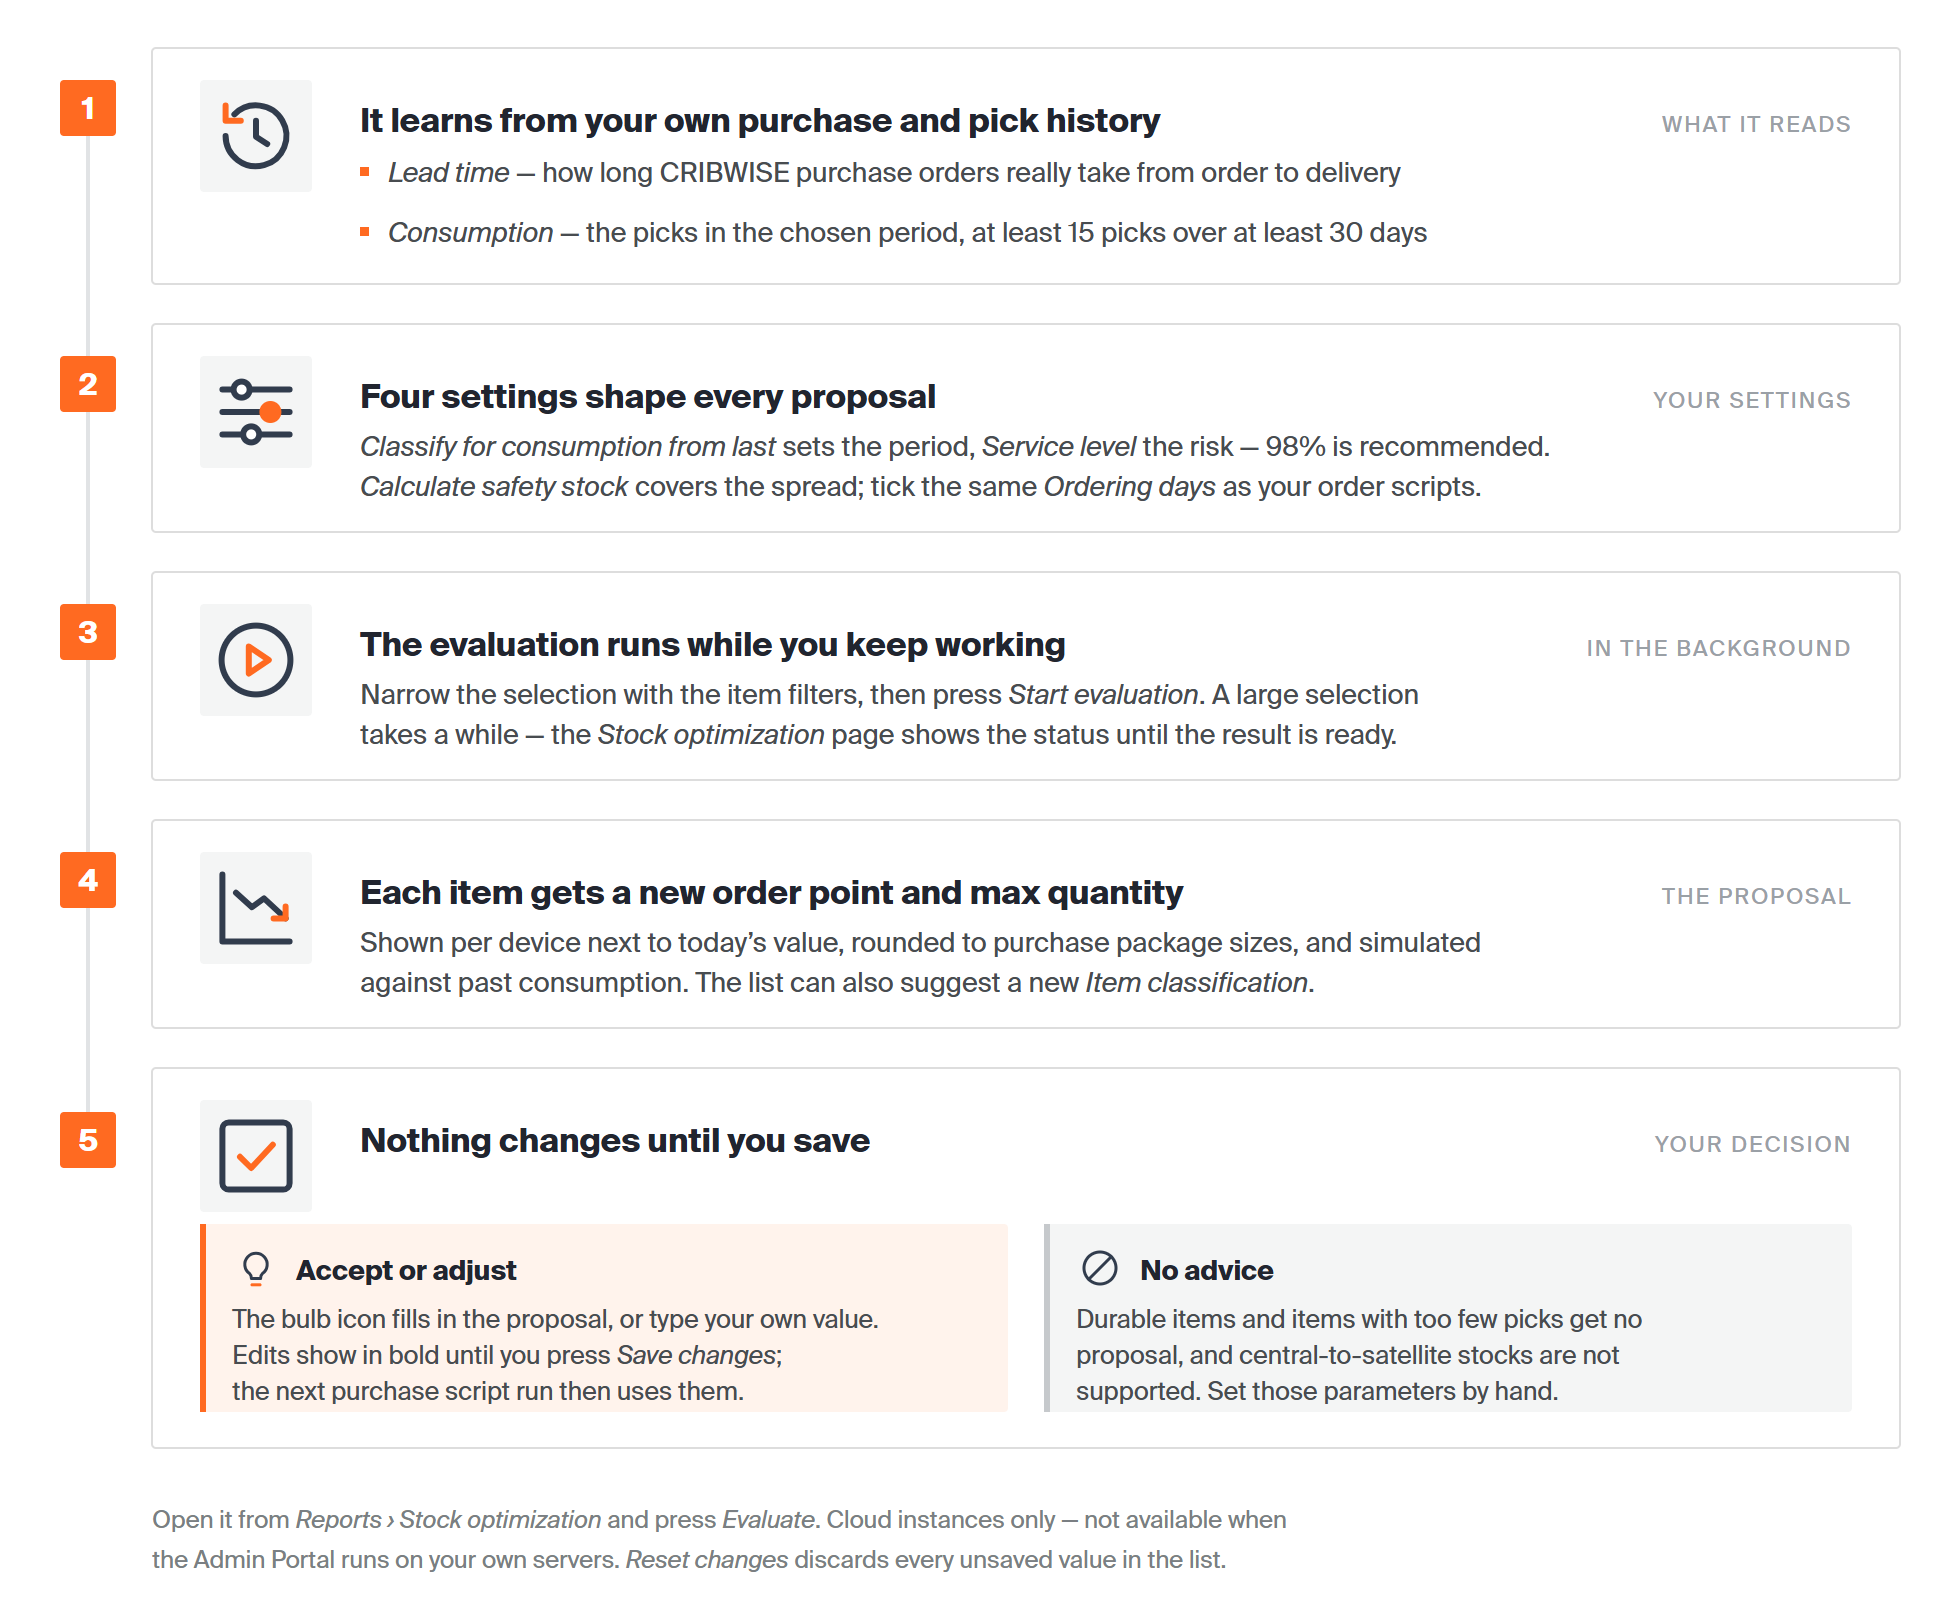
From history to saved order parameters. The optimizer only proposes – every value stays as it is until you press Save changes.
| Step | What you do |
| Classify your items | Use the ABC function to classify items by consumption value. A items are the ones to focus on – they carry 70% of the consumed value in stock. ABC classification runs on its own or as part of the Stock Optimizer. |
| Review order frequency | Review the reorder frequency in the purchase scripts. Buying A items more often than B and C items lets the optimizer lower order points and ordered quantities. |
| Optimize stock | Run the optimizer on consumable items to get order point and max level proposals from historical lead times and consumption patterns. |
| Review results | Monitor stock levels against consumption in reports and dashboards. |
| Cut the tail of slow movers | Use the slow-moving item reports to remove unused items from stock. The optimizer also shows picks and consumption during the training period, which helps you decide. |
Before you start
- Consumable items only – only consumables can be optimized. Durable items are shown in the optimizer too, and their parameters can be changed manually there.
- The CRIBWISE purchase function must be in use – that is what captures the actual lead time from order to delivery per item, and the spread used for safety stock.
- There must be consumption – at least a 30-day measurement period with at least 15 picks in the selected training period, so consumption and its spread can be calculated.
- Normal stocks only – central-to-satellite setups are not supported, because a transfer from central stock does not count as consumption and a restock to a satellite does not count as a purchase.
- Cloud only – the optimizer is not available for customers running the Admin Portal on their own servers.
Optimizer settings
| Setting | What to choose |
| Training period | A longer period when production volumes are stable, a shorter one when they change over time. |
| Service level | 98% is recommended: stock can reach zero 2 days out of 100. Balance this against safety stock – a high service level plus safety stock gives a high stock level. |
| Include safety stock | No calculates on median lead time and median consumption per week. Yes also includes the spread of purchase lead times and consumption, and adds safety stock to cover it. |
| Order frequency | Set the values you use on the order scripts for the items you are optimizing. |
The optimizer proposes updated order points and max levels that you can accept, accept with a correction, or decline. Before approving, you can see a simulation of the new levels against historical consumption. Purchase package quantity sizes are taken into account, so proposals are workable from a purchasing point of view.
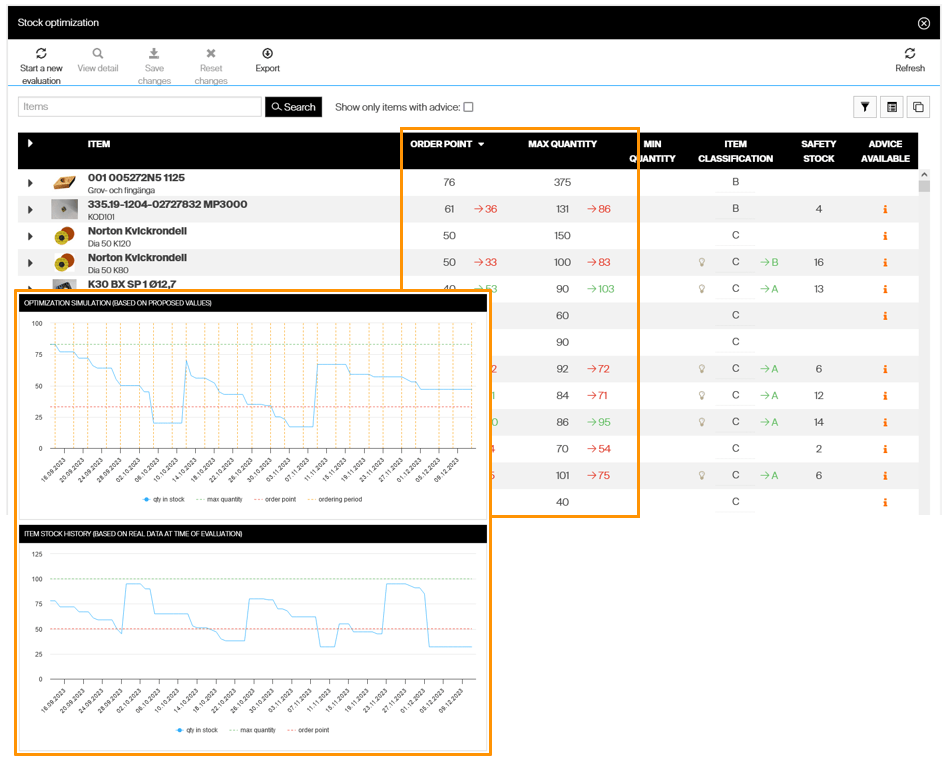
Proposed order parameters with the simulation of new levels.
Quick start
Experienced users – run an optimization in 4 steps:
- Open Reports and click the evaluate icon.
- Set training period, service level, safety stock and order frequency, and filter the items.
- Press Start evaluation and come back when it is done.
- Review the result list and save the parameters you accept.
Steps
Step 1 — Open the Stock Optimizer
The function sits in the menu under Reports. Click the evaluate icon to reach the optimization options.
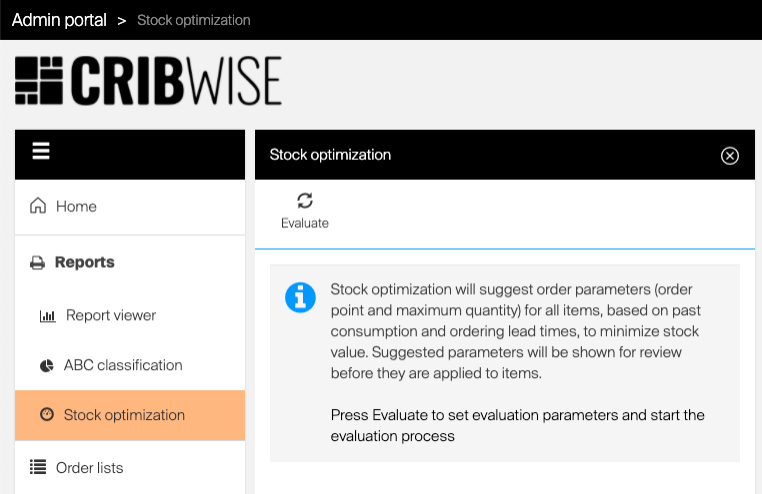
The evaluate icon opens the optimizer.
Step 2 — Set the options and start
- Select the options above.
- Make sure the ordering days you select match the ordering days on the order scripts for those items.
- Use the item filters so the selection fits the scripts and ordering period.
- Press Start evaluation.
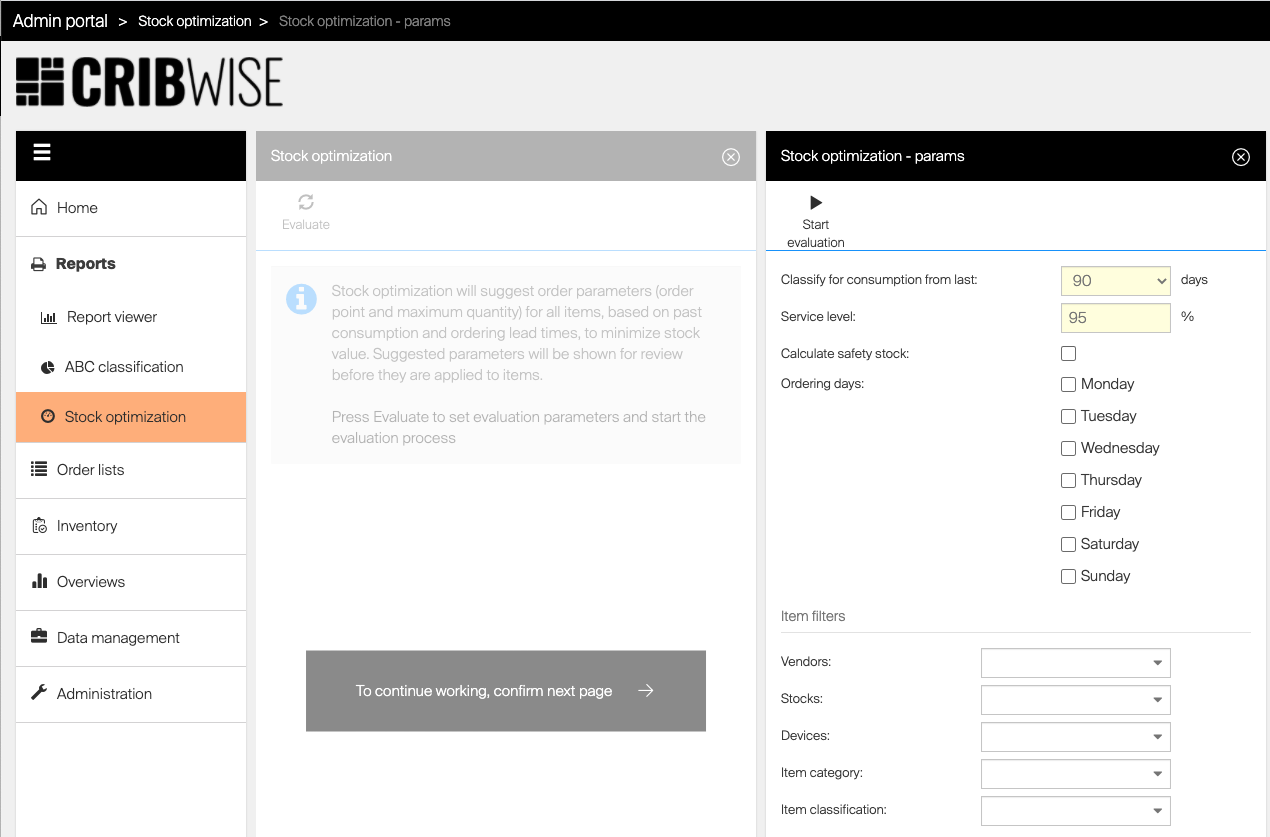
Settings and item filters before starting an evaluation.
Depending on how many items are analysed, the evaluation can take a while. You can keep working and come back later – the Stock Optimizer menu shows the evaluation status.
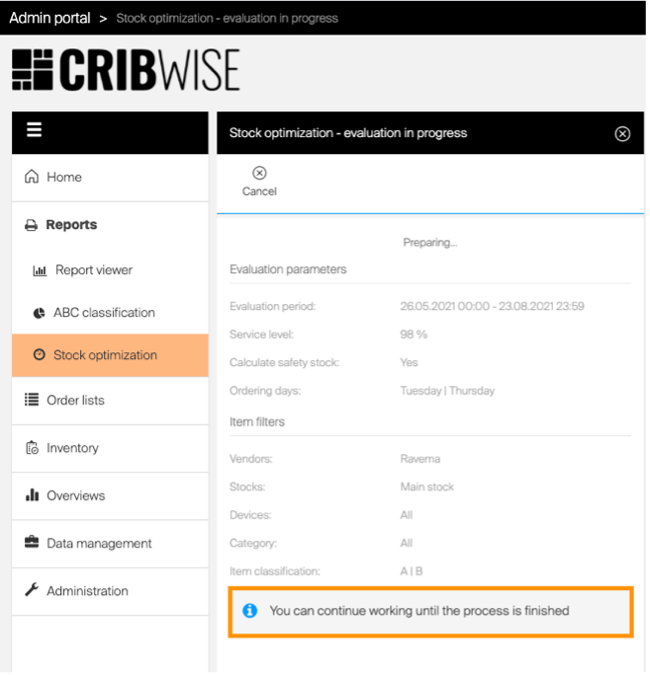
Evaluation status while the analysis runs.
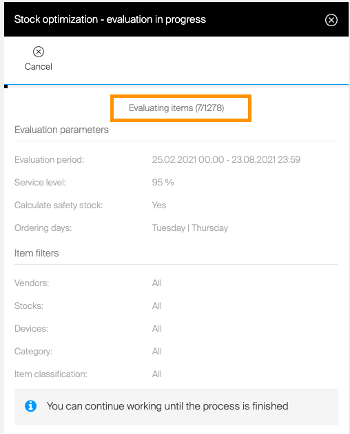
A completed evaluation.
Step 3 — Review the result list
Click the result icon to open the list of items and their proposed changes. Aggregated levels are shown first; expand one item or all of them to see the result per device. Click a column header to sort. The Show only items with advice switch hides items with no proposal.
Build your own view by selecting and reordering columns and applying filters with the  buttons. Save the current view, or restore one you saved earlier, with the
  button. Views are saved for your user only.
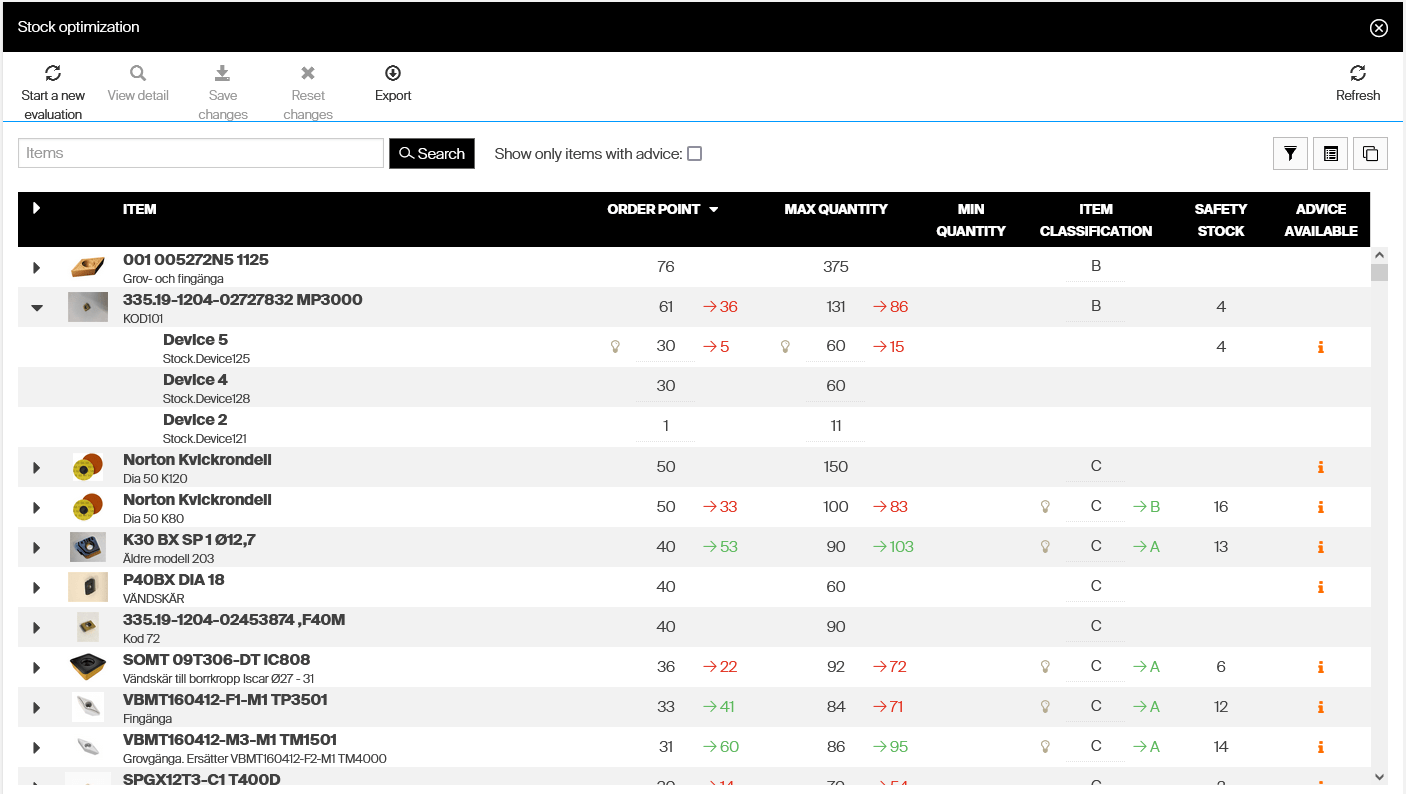
The result list with proposals.
Step 4 — Check an individual item
Select a row and press view detail – expand the item and select device level first – to see that item’s usage, stock status and proposed changes, with a graph of current and projected levels.

Usage and stock status for one item.
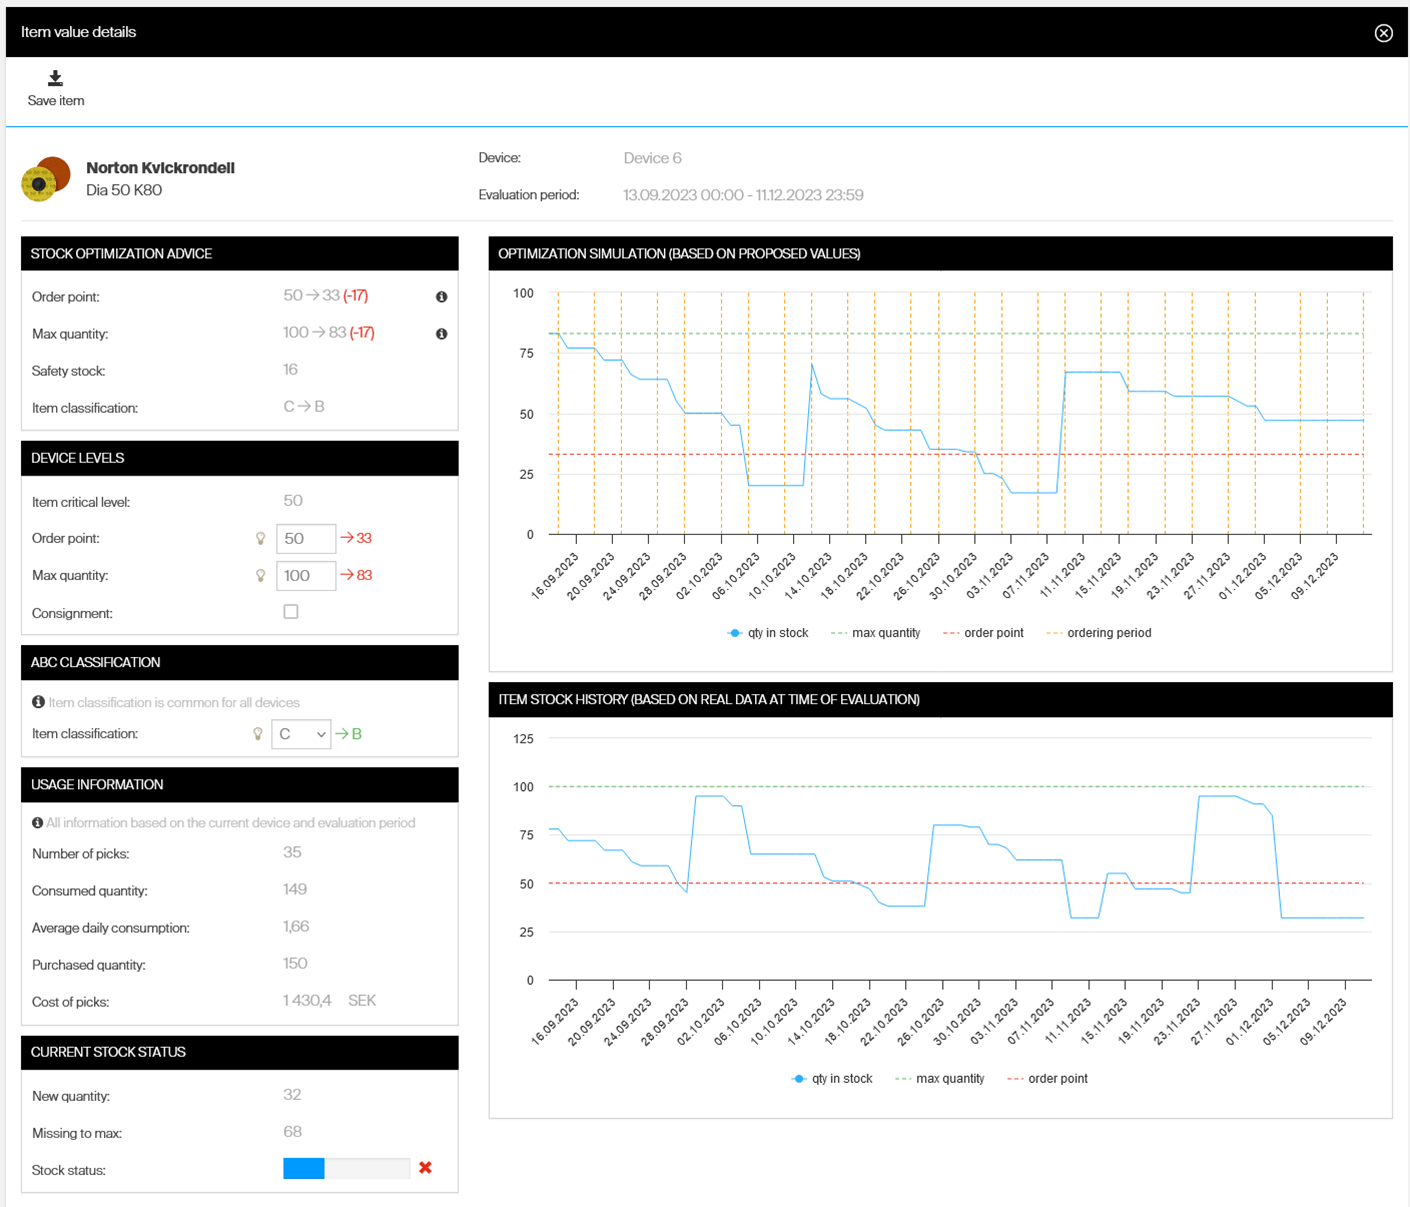
Current and projected levels.
Any advice for the item appears in the Stock optimization advice section.
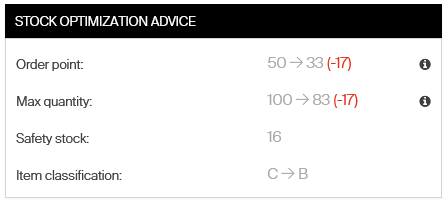
Advice for the selected item.
Step 5 — Apply and save the changes
A proposed change is shown next to the parameter. Change the value yourself, or click the bulb icon to fill in the proposed value. Changes must be saved afterwards.
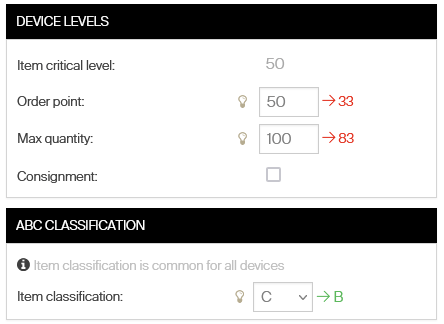
The bulb icon fills in the proposed value.
Parameters can also be changed straight in the result list, which is faster for several items and parameters at once. Every editable parameter is marked with a dashed underline, and the bulb icon works there too.
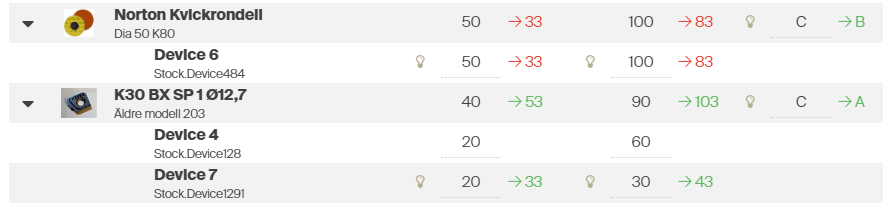
Editing parameters in the list.
A changed value is shown in bold and is not saved yet. Press Save changes in the toolbar to save, or Reset changes to revert every unsaved change in the list.
Success: The saved order points and max levels are in use for the next purchase script run.
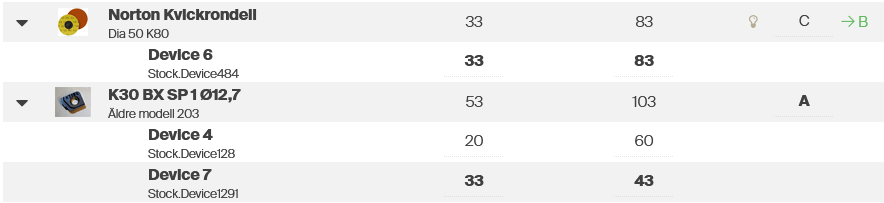
Saving the accepted proposals.
Step 6 — Export the result
Once you have reviewed the proposal, export the result to Excel to keep track of what changed.

Exporting the result.
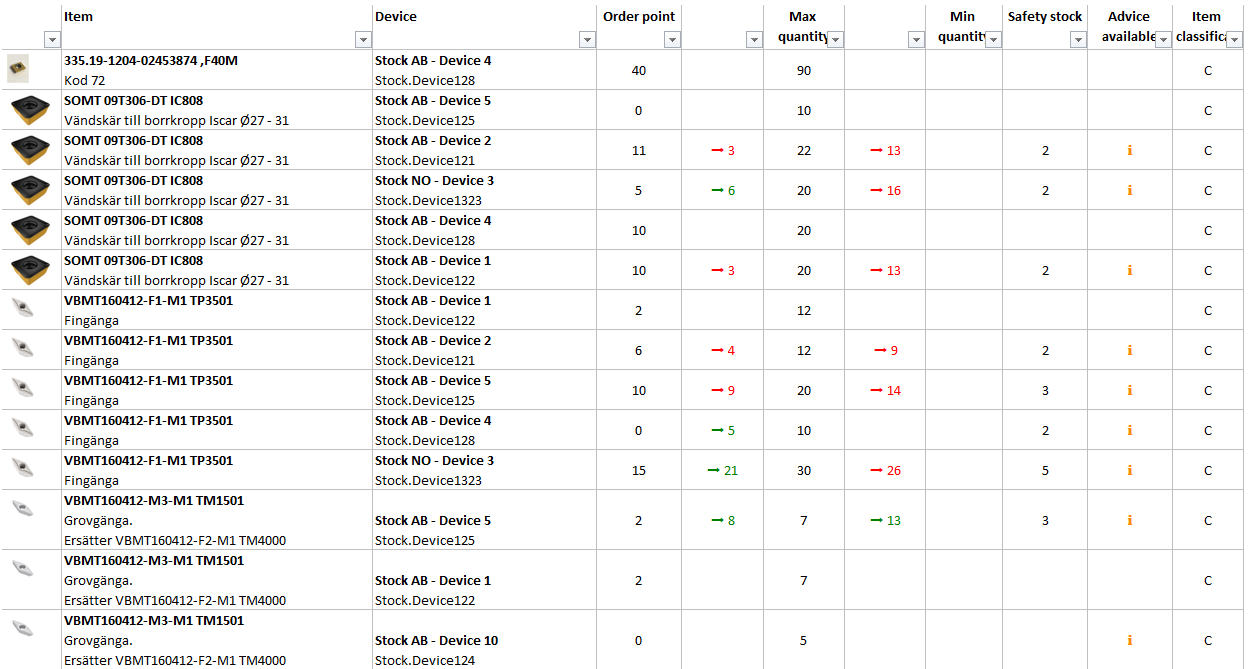
The exported file.
Troubleshooting
| Problem | Likely cause | Fix |
| An item gets no advice. | Too little consumption – fewer than 15 picks in the training period – or the item is durable. | Extend the training period, or change the parameters manually in the optimizer view. |
| The Stock Optimizer is not available. | The Admin Portal runs on your own servers. | The optimizer runs for cloud instances only. |
| Proposals look far off for satellite stocks. | Central-to-satellite setups are not supported, because transfers are not counted as consumption or purchase. | Optimize normal stocks only. |
| Changed values disappear. | Bold values are unsaved, and Reset changes reverts them. | Press Save changes in the toolbar before leaving the list. |
Related articles
- Custom scheduled scripts: flexible rules for automated ordering – the order scripts whose frequency the optimizer assumes.
- Default reports reference: 19 built-in reports – slow-moving item and consumption reports.
- How to configure dashboard widgets – keep stock levels visible after optimizing.
- Standard cost of item – the value behind consumption value and ABC classification.