
What you can do
Update the Shop Floor Interface (SFI) to a new version yourself when automatic update is switched off or cannot run. There are three ways to do it, and you can switch automatic update back on from the Admin Portal.
Before you start
- Decide which method you need. Updating from inside the SFI needs nothing but the device itself; the other two need access to the Windows desktop on the SFI computer.
- To leave the SFI you need an account with the privilege to exit the application.
- To change the automatic update setting you need an Admin Portal account with access to Data management > Devices.
Note: Plan the update for a time when the device is not in use. The SFI is unavailable while it updates, and methods 2 and 3 end with a restart of the computer. An update takes 5–15 minutes.
Quick start
Experienced users – pick one of the three methods:
- Log in to the SFI. Select the update icon in the SFI top bar, then Yes. Fastest, no Windows access needed.
- Exit the SFI to Windows and run the installer for the latest version. The latest version can be downloaded from the web.
- Exit the SFI to Windows, open the Application Manager and select Update.
Need more detail? Follow the full steps below.
Method 1 — Update from the Shop Floor Interface
Use this method first. It runs entirely inside the SFI, so no one has to reach the Windows desktop.
Step 1 — Select the update icon
On the SFI home screen, select the update icon in the top bar. It is the downward arrow above a tray, between the message icon and the log-out icon.
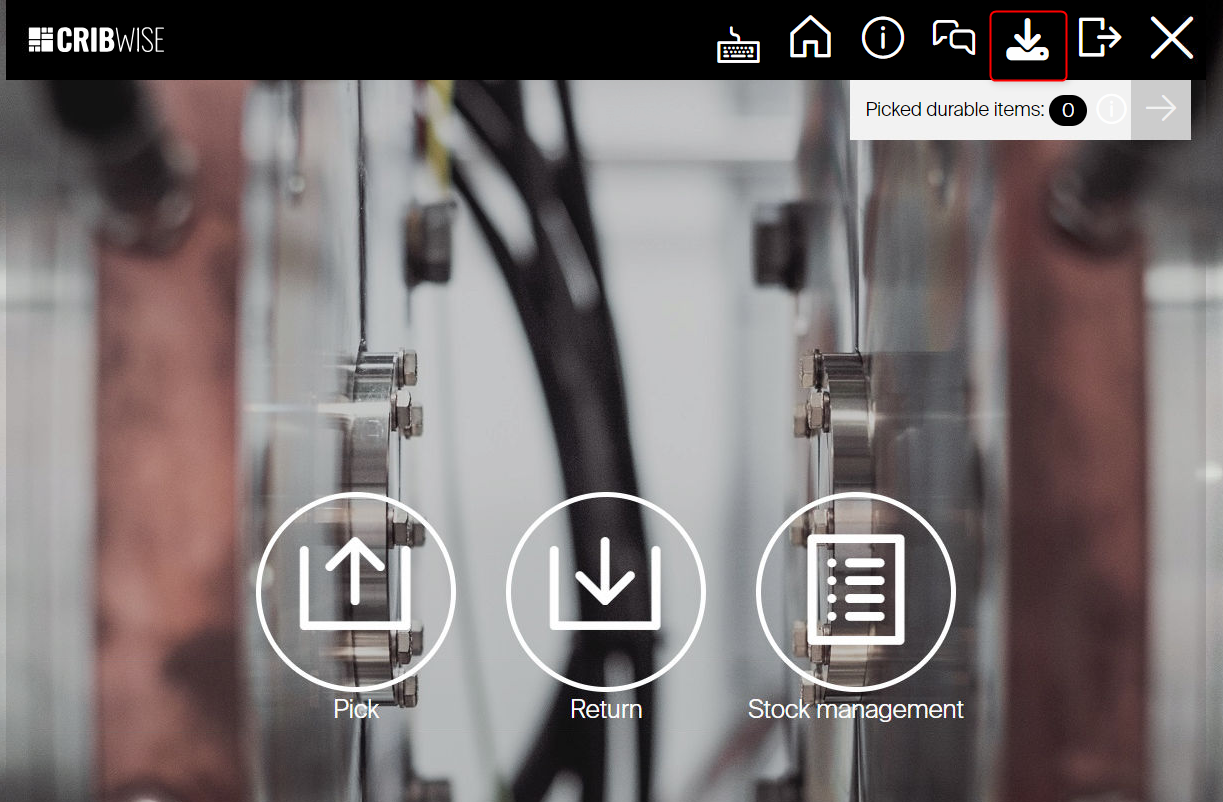
The update icon sits in the SFI top bar and appears when an update is available for the device.
Step 2 — Confirm the update
The SFI asks ‘Do you really want to start the application update?’ Select Yes.
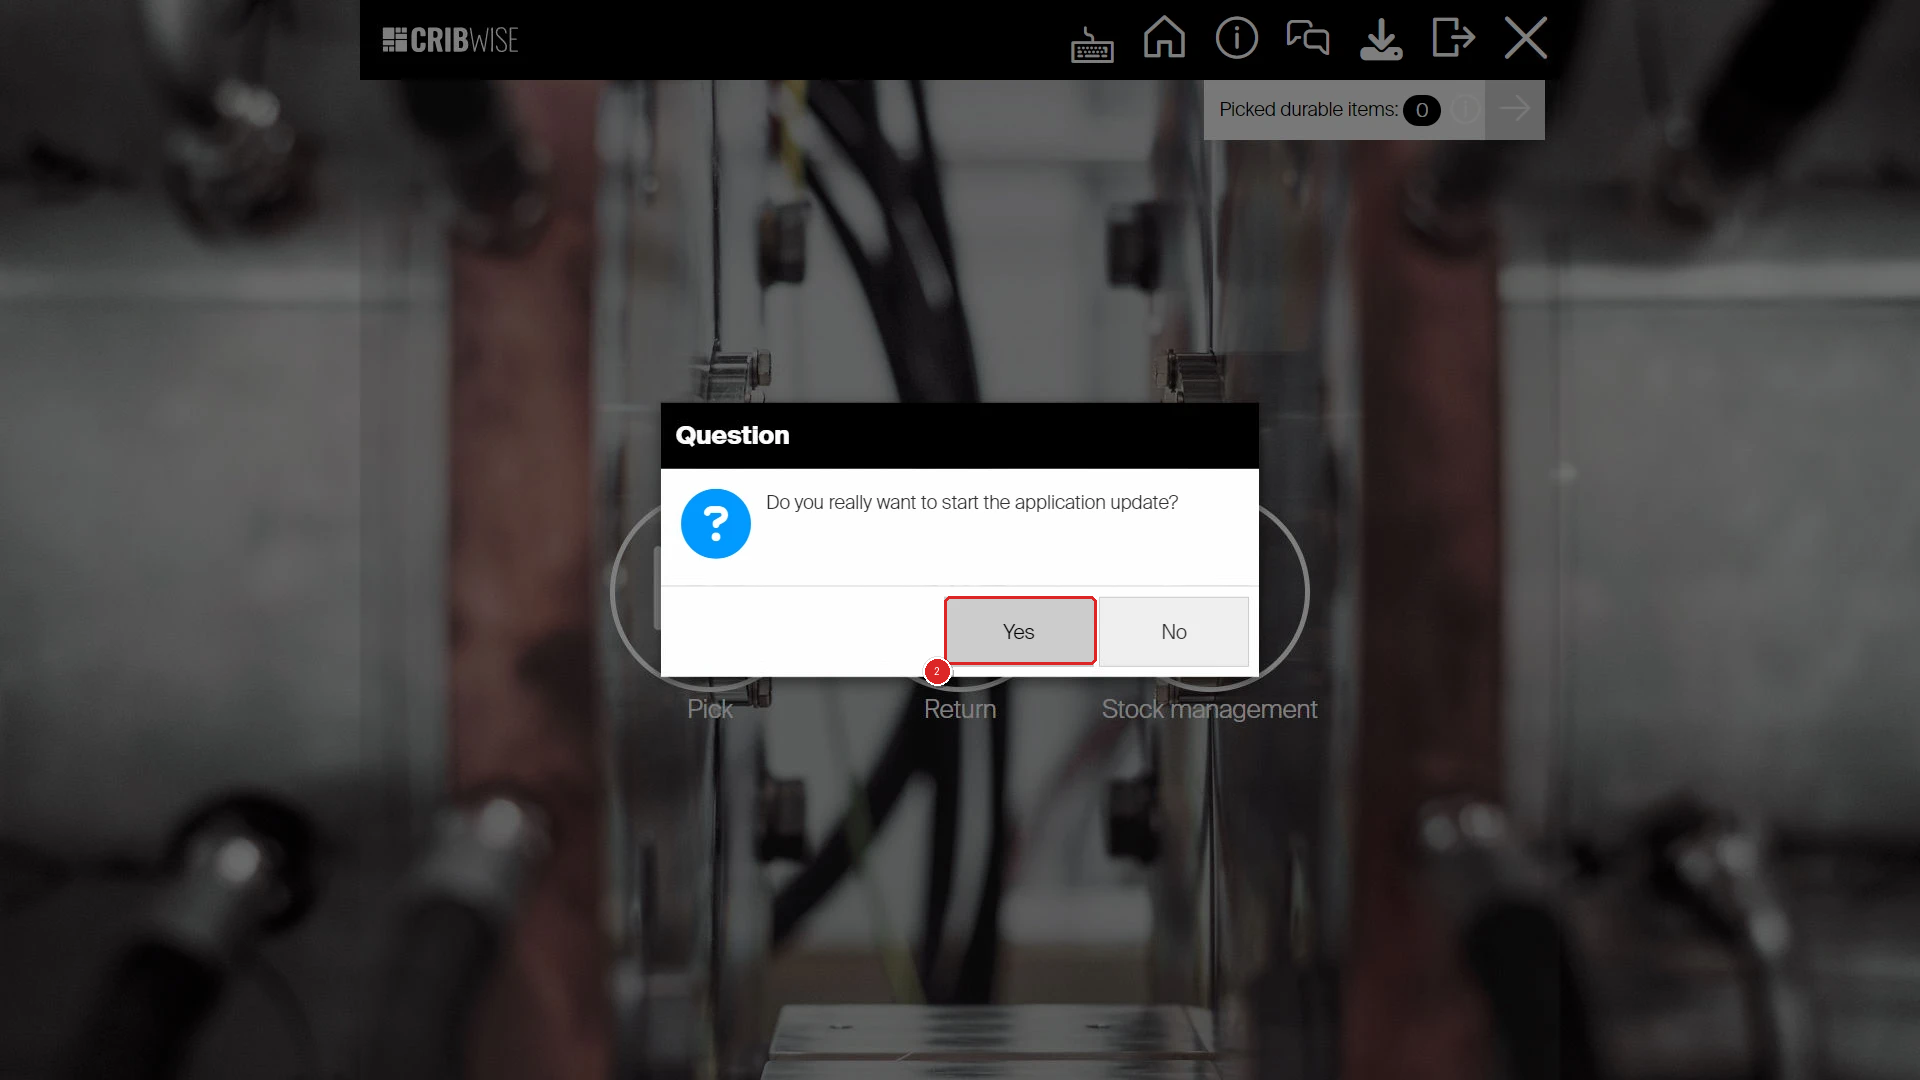
Selecting Yes starts the update immediately.
Step 3 — Wait for the update to finish
The SFI closes and shows its progress. It backs up the current state, downloads and validates the packages, and reports Done. when it has finished. Do not switch the computer off while this runs.
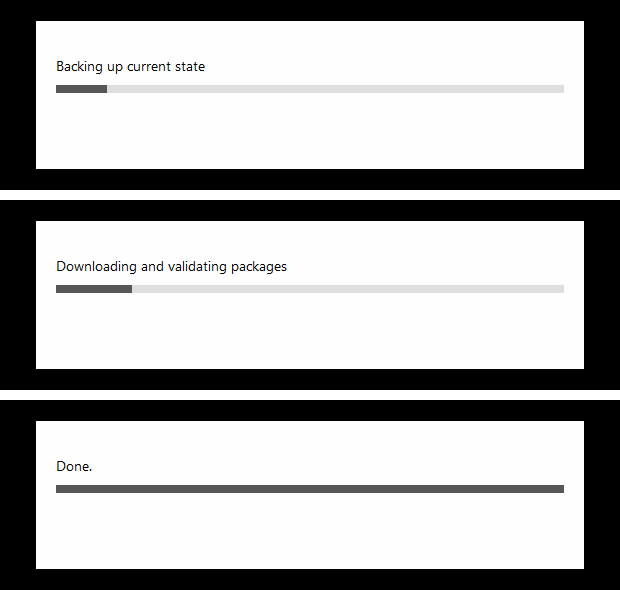
The three stages of the update: backup, download and validation, then Done.
Success: The SFI restarts by itself and shows Loading … while it starts on the new version. The login screen follows.

The SFI restarts on the new version without a manual restart of the computer.
Tip: Confirm the new version afterwards in the Admin Portal under Data management > Devices. Open the device and check Application version in the Device information section.
Method 2 — Run the latest installer in Windows
Use this method when the update icon is not shown in the SFI and you have the installer for the version you want.
Step 1 — Close the SFI user interface
Log in with an account that has the privilege to exit the application. Click the X in the top right corner.
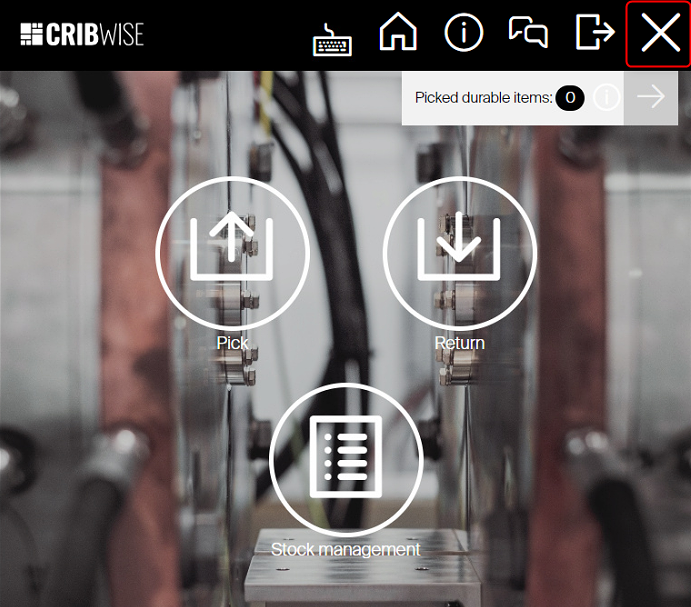
Step 2 — Shut down the SFI
In the Windows system tray, right-click the brand icon and select Exit.
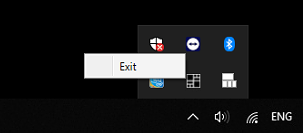
Shutting the SFI down completely.
Step 3 — Run the installer
Run the installer for the latest version on the device and follow the installation wizard. Ask your CRIBWISE contact or support for the installer if you do not have it.
Step 4 — Restart the computer
Restart the computer once the installer has finished.
Success: The SFI starts again on the new version.
Method 3 — Run the update from the Application Manager
Use this method when no installer is at hand but a newer version is published on the server for this device.
Step 1 — Close the SFI and shut it down
Repeat steps 1 and 2 of method 2: log in with an account that can exit the application, then right-click the brand icon in the system tray and select Exit.
Step 2 — Open the Application Manager
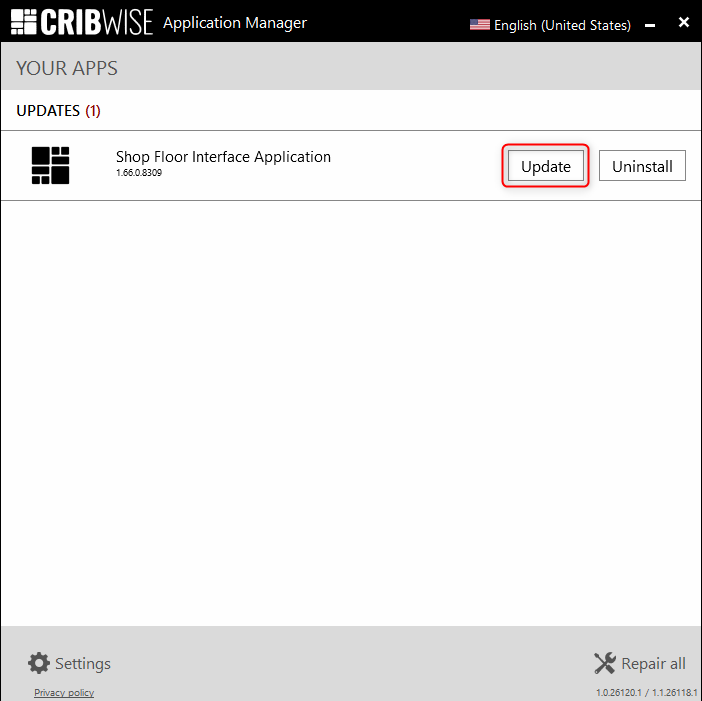
Type application manager in the Windows task bar search, or open it from the folder you installed it in.
Step 3 — Start the update
If an update is available on the server, the Application Manager shows Update. Select Update to start the process.
Step 4 — Restart the computer
Restart the computer once the update has finished.
Success: The SFI starts again on the new version.
Turn automatic update on or off
Automatic update is set per device in the Admin Portal. When it is on, the device updates itself at the time you set and no one has to run any of the three methods above.
Step 1 — Open the device
Go to Data management > Devices, select the device in the list and select View detail.
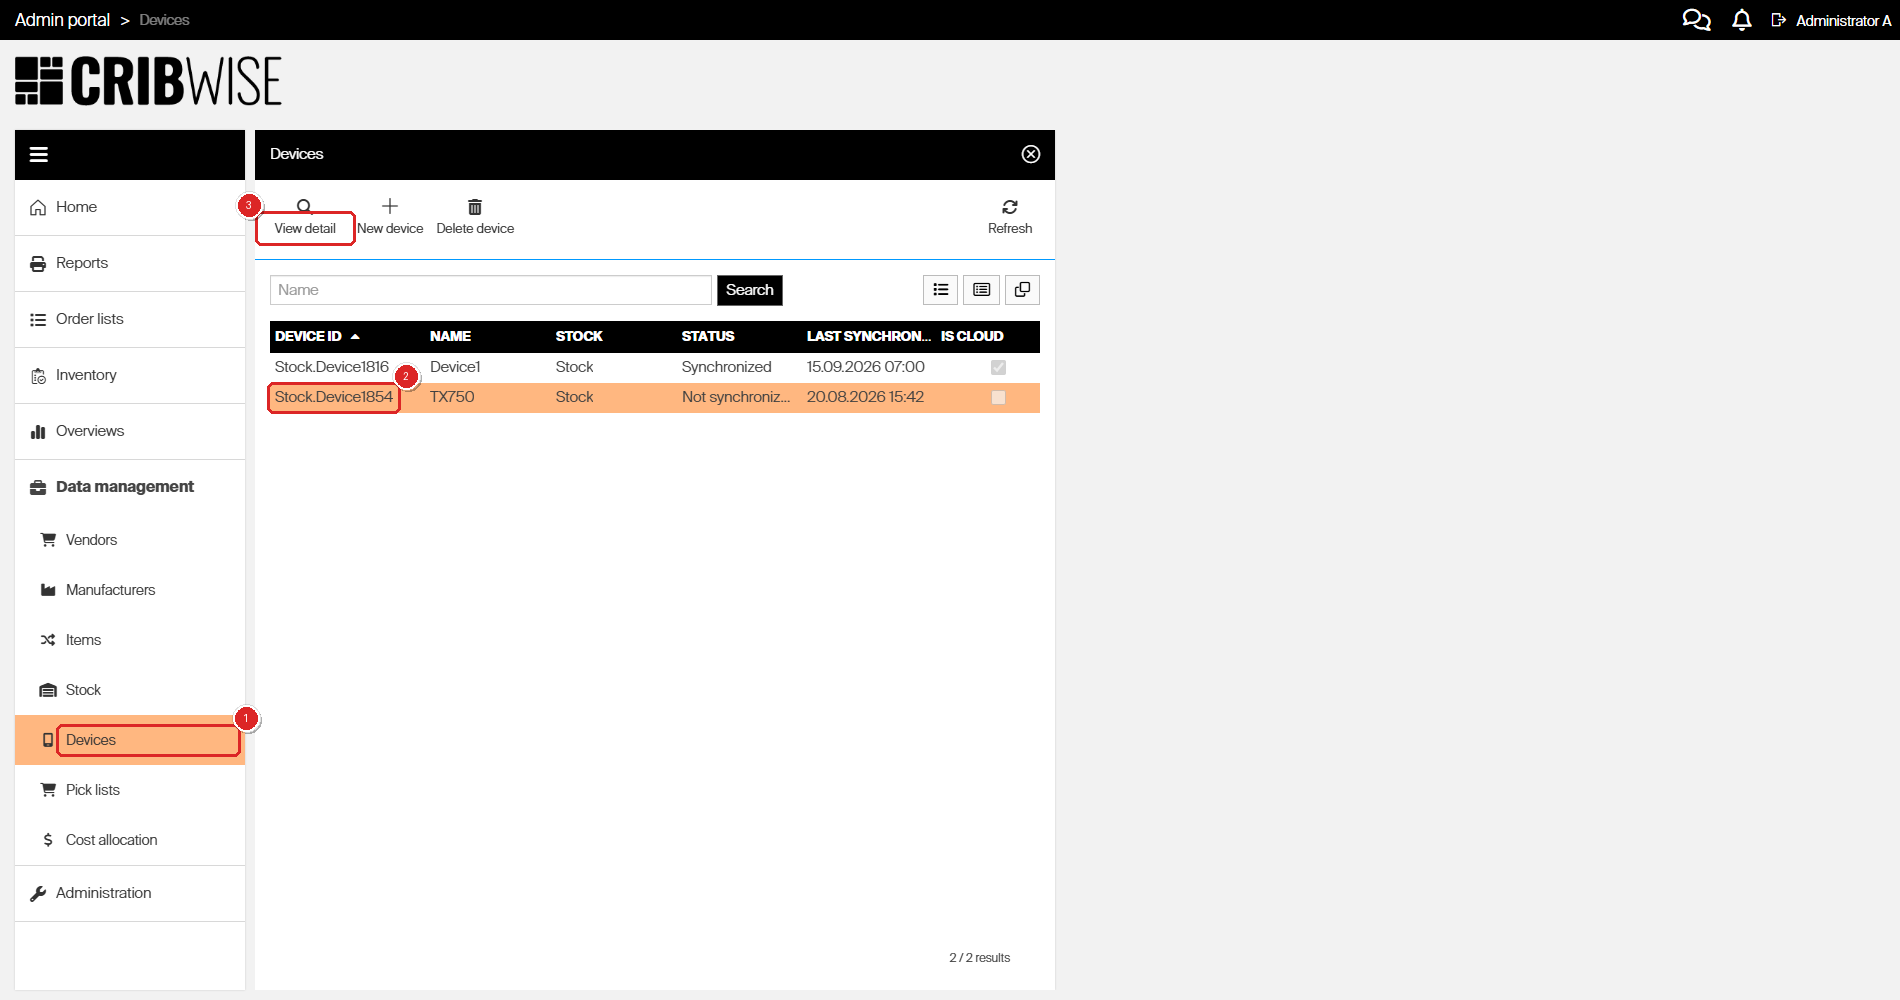
Data management > Devices lists every device, its status and when it last synchronized.
Step 2 — Set Auto update and save
On the General information tab, select Auto update and set Start update at to the hour and minute the device should update. The Timezone below is the device’s own time zone and is read-only. Select Save device.
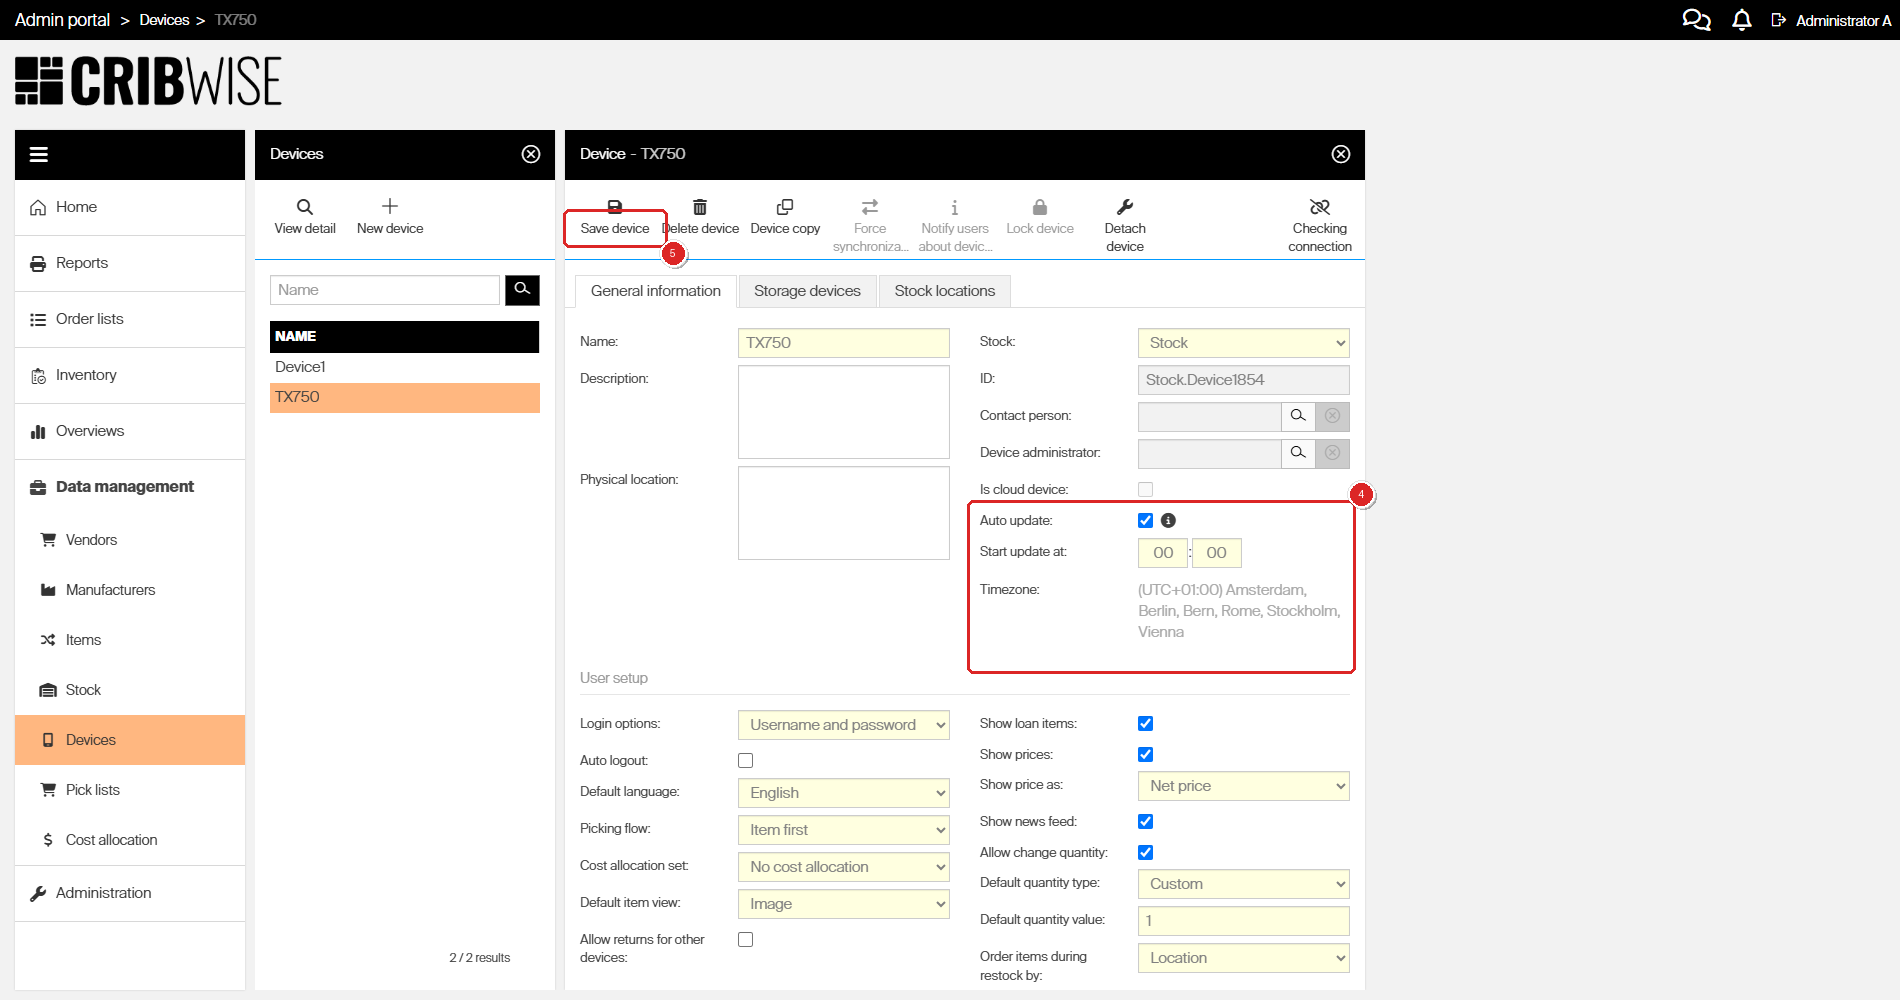
Auto update, Start update at and Timezone on the General information tab of a device.
Success: The device updates itself at the set time. Clear the Auto update checkbox and save again to switch it off.
Important: For automatic update to work, UAC must be disabled on the device and the SFI must run under an administrator account. This is the same requirement the Admin Portal shows in the information tooltip next to Auto update.
Note: The Auto update and Start update at fields are not shown when Is cloud device is selected on the device.
Troubleshooting
| Problem | Likely cause | Fix |
| No update icon in the SFI top bar. | No update is available for the device, or the device has not synchronized. | Check Status and Last synchronized in Data management > Devices. Use method 2 or method 3 instead. |
| The Application Manager shows Modify, not Update. | No update is available on the server for this device. | Wait for next release, or use method 2. |
| Auto update is selected but the device does not update. | UAC is enabled on the device, or the SFI does not run under an administrator account. | Disable UAC on the device and run the SFI under an administrator account. |
| The device has no Auto update field. | Is cloud device is selected for that device. | Update is not possible |
| You cannot log in to close the SFI. | No account with the exit privilege is available. | Contact your support partner |
| The SFI does not start after method 2 or 3. | The computer was not restarted. | Restart the computer. |
Related articles
- How to install on-premise – the installation this update applies to, and where the installer comes from.
- Getting started with Shop Floor Interface: layout and menus – the application being updated.
- How to log in to the Shop Floor Interface – the login screen you see after the update.
- CRIBWISE Technical and Organisational security Measures – auto update, device users and support access.