
What you can do
Take a single stock location out of use — a jammed drawer, a damaged bin — so nobody can pick from it or assign items to it, then put it back when the hardware is repaired.
Before you start
- You need Admin Portal access with permission to update stocks and devices.
- The location’s device must be locked before you can disable anything. Disable location stays greyed out on a device that is online and unlocked.
- Locking a device takes it away from the shop floor until you unlock it, and it only works while the device is online. Agree the timing first, and warn the people who work on it with Notify users about device lock. See Locking a device.
- Know which location you mean. A location is identified by its device and its location name, for example Device1 / A-01-01-01.
Warning: Disabling a location removes every item assignment on it. Re-enabling gives you an empty location back — the assignments are not restored, so you have to create them again. Check the Items assigned count before you start.
Note: The lock is needed whenever the device’s status is Synchronized or Not synchronized — a device that has merely gone offline still has to be locked. The exception is a device that no Shop Floor Interface installation has paired with yet, status Not installed, and a location inside a storage device that has not been released. See Device statuses.
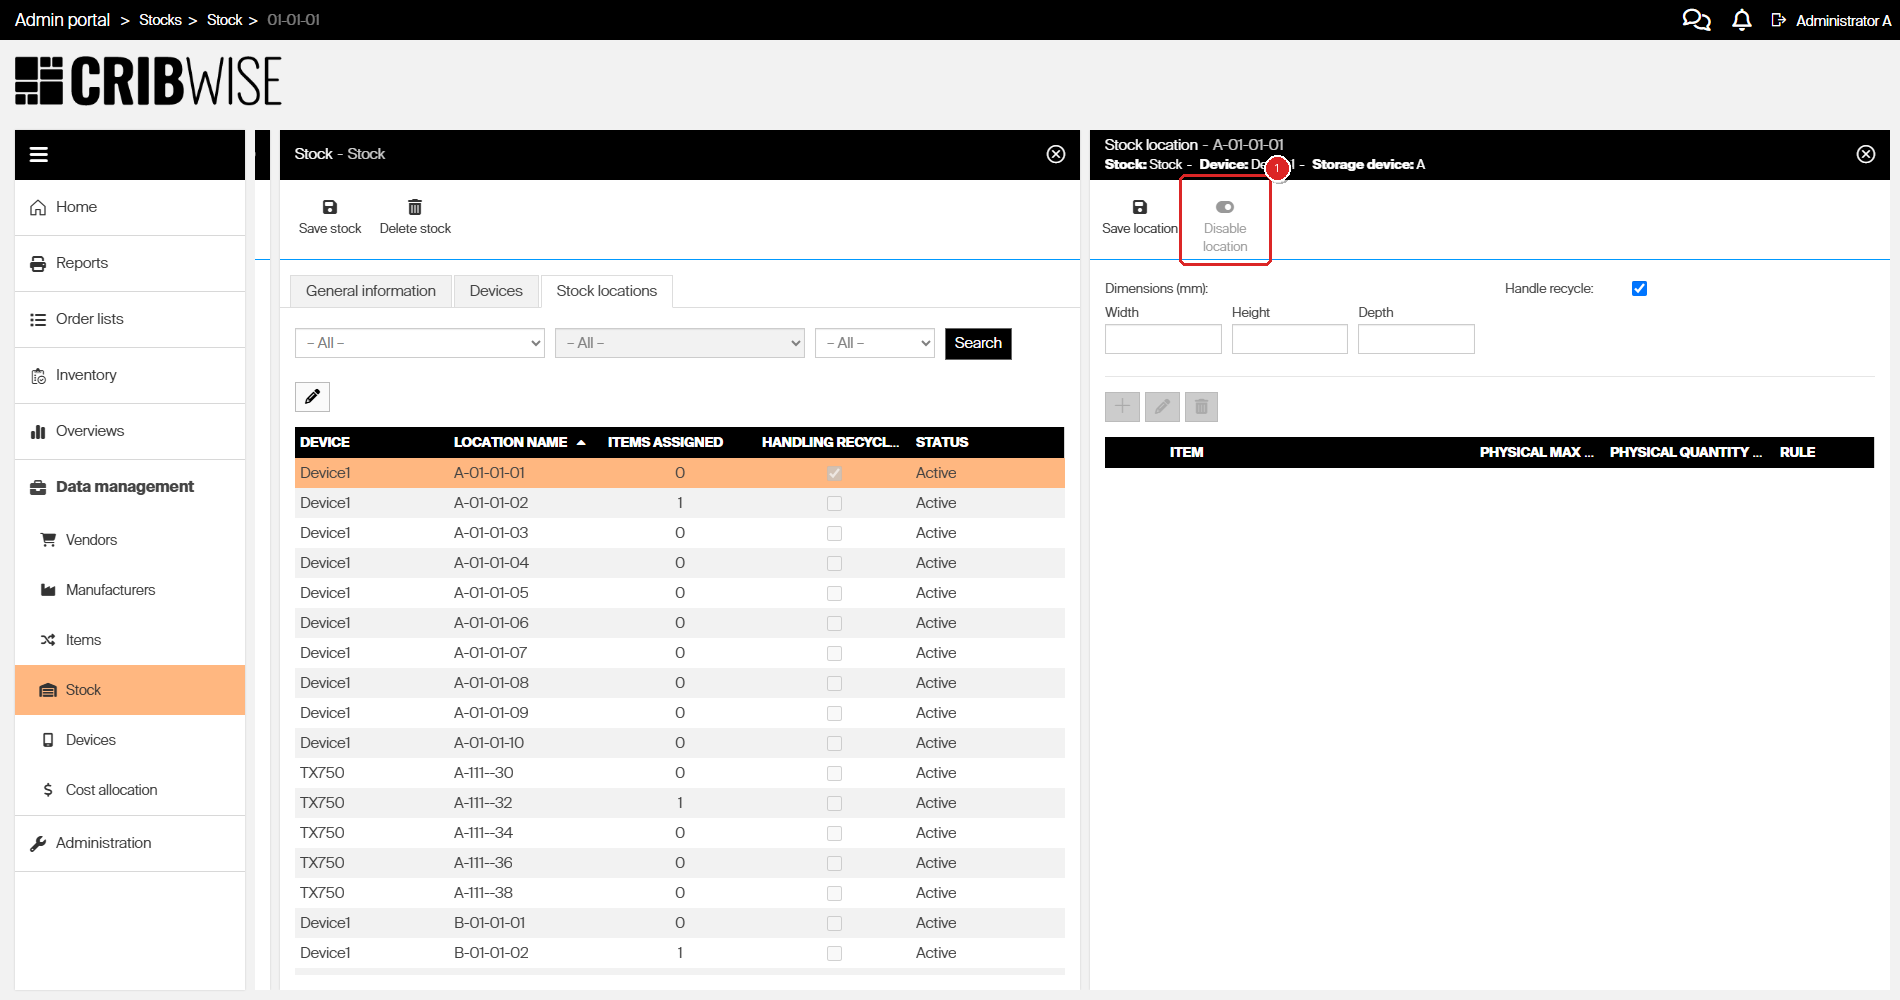
On an unlocked device, Disable location (1) is greyed out. Lock the device first.
Quick start
Experienced users — disable a location in 5 steps:
- Lock the device under Data management > Devices.
- Go to Data management > Stock and open the stock’s Stock locations tab.
- Double-click the location.
- Click Disable location and confirm with Yes.
- Unlock the device.
Need more detail? Follow the full steps below.
Steps
Step 1 — Lock the device
- Go to Data management > Devices.
- Select the device and click View detail.
- Click Notify users about device lock to warn anyone working at the device.
- Click Lock device.
The status becomes Waiting for lock and a synchronization is requested. Once that synchronization finishes the status is Locked, the Shop Floor Interface is closed to operators, and the button reads Unlock device. Wait for Locked before you go on.
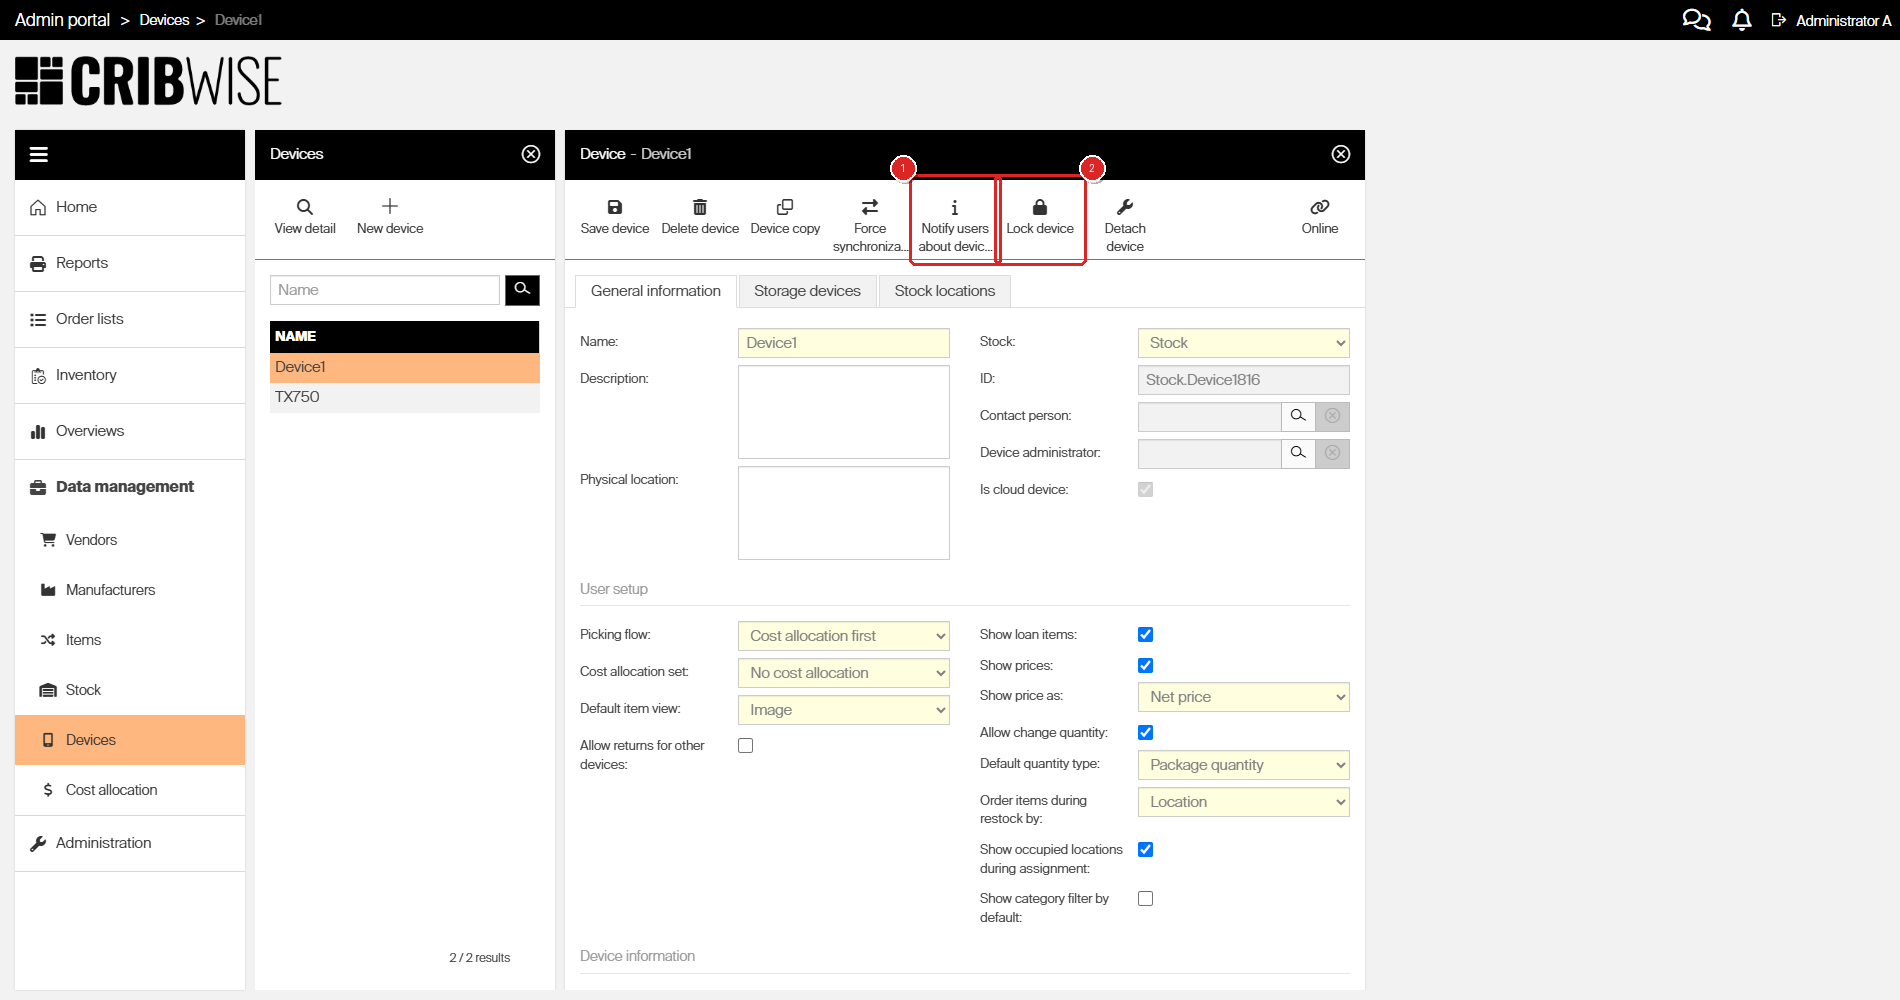
Warn the shop floor with Notify users about device lock (1), then click Lock device (2).
Step 2 — Open the stock location
- Go to Data management > Stock.
- Select the stock and click View detail.
- Open the Stock locations tab.
- Double-click the location you want to disable.
The location opens beside the list. Its header names the location, its stock, its device and its storage device — check these before you go on.
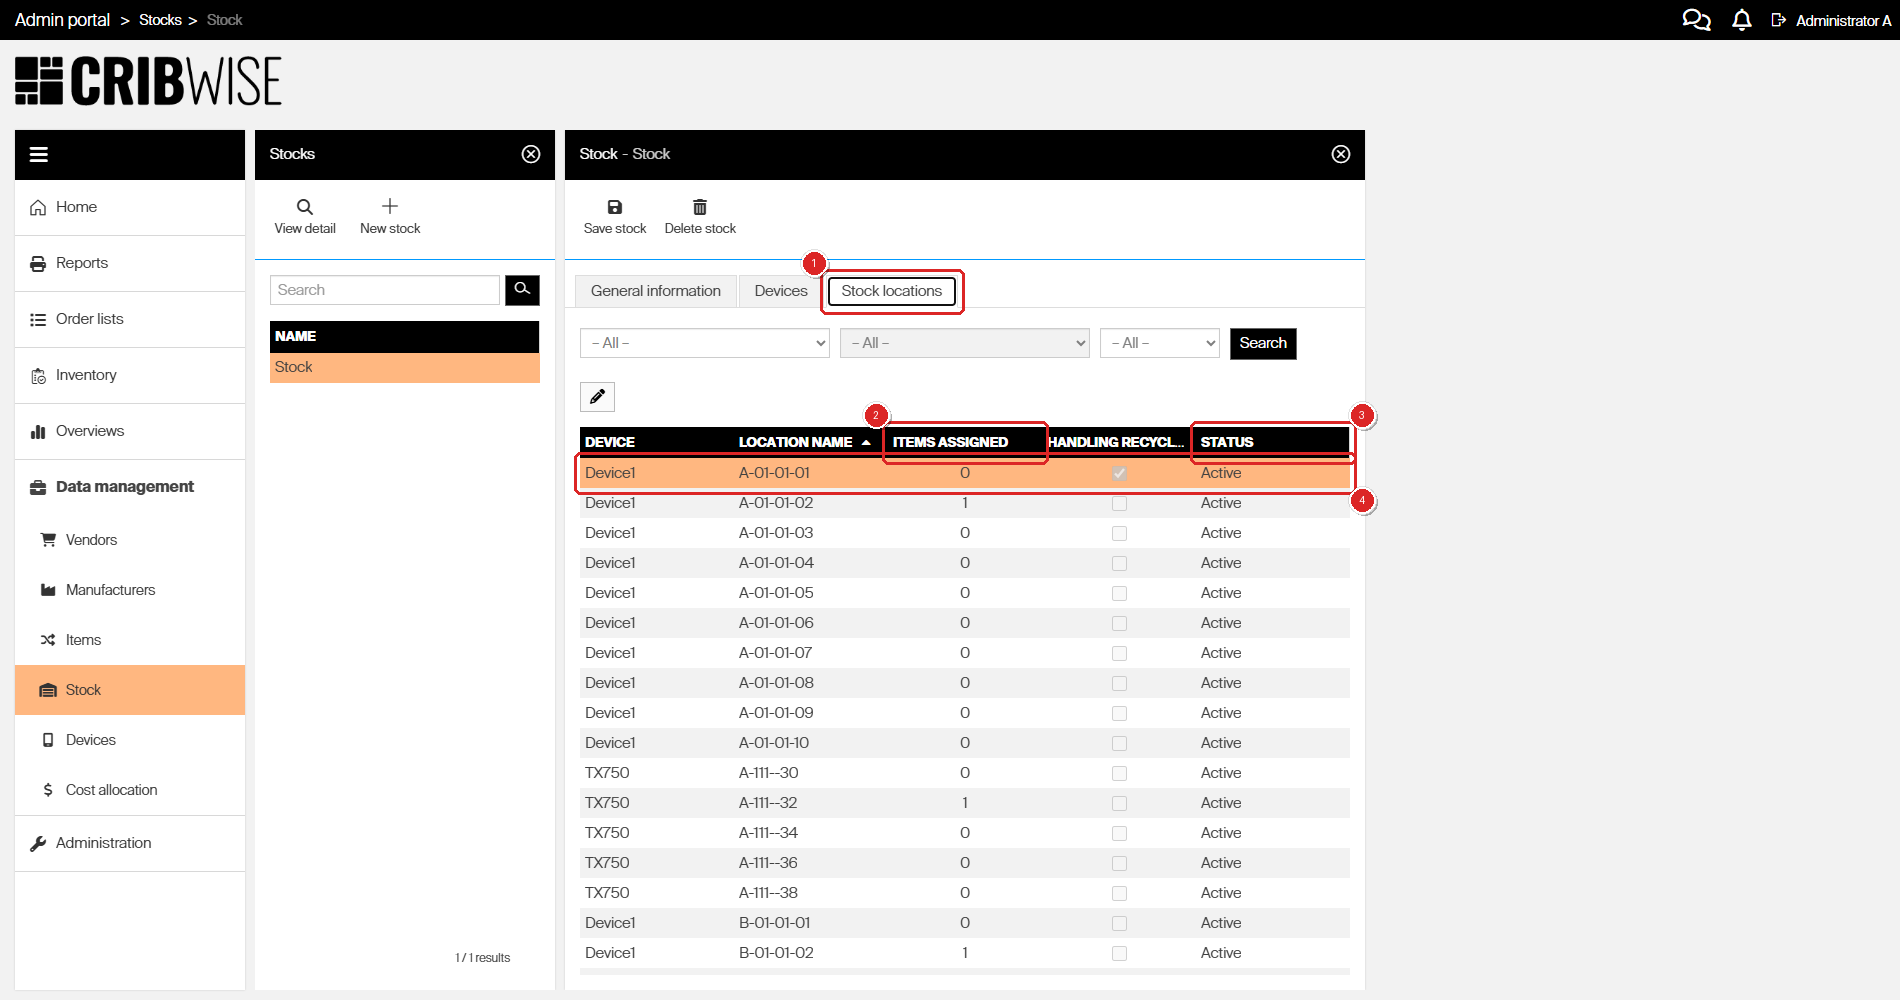
Open the Stock locations tab (1). Items assigned (2) is how many assignments a disable will remove, and Status (3) shows Active or Disabled. Double-click the location (4).
| Column | What it tells you |
|---|---|
| Device | The device the location belongs to. This is the device you have to lock. |
| Location name | The location’s address inside the storage device, for example A-01-01-01. |
| Items assigned | How many item assignments disabling will remove. 0 means nothing is lost. |
| Handling recycle | Ticked when returned items marked for recycling are routed here. |
| Status | Active or Disabled. |
Use the three dropdowns and Search above the grid to narrow a long list.
Step 3 — Disable the location
- Click Disable location in the option bar.
- Read the warning — it names the location and tells you the assignments will go.
- Click Yes.
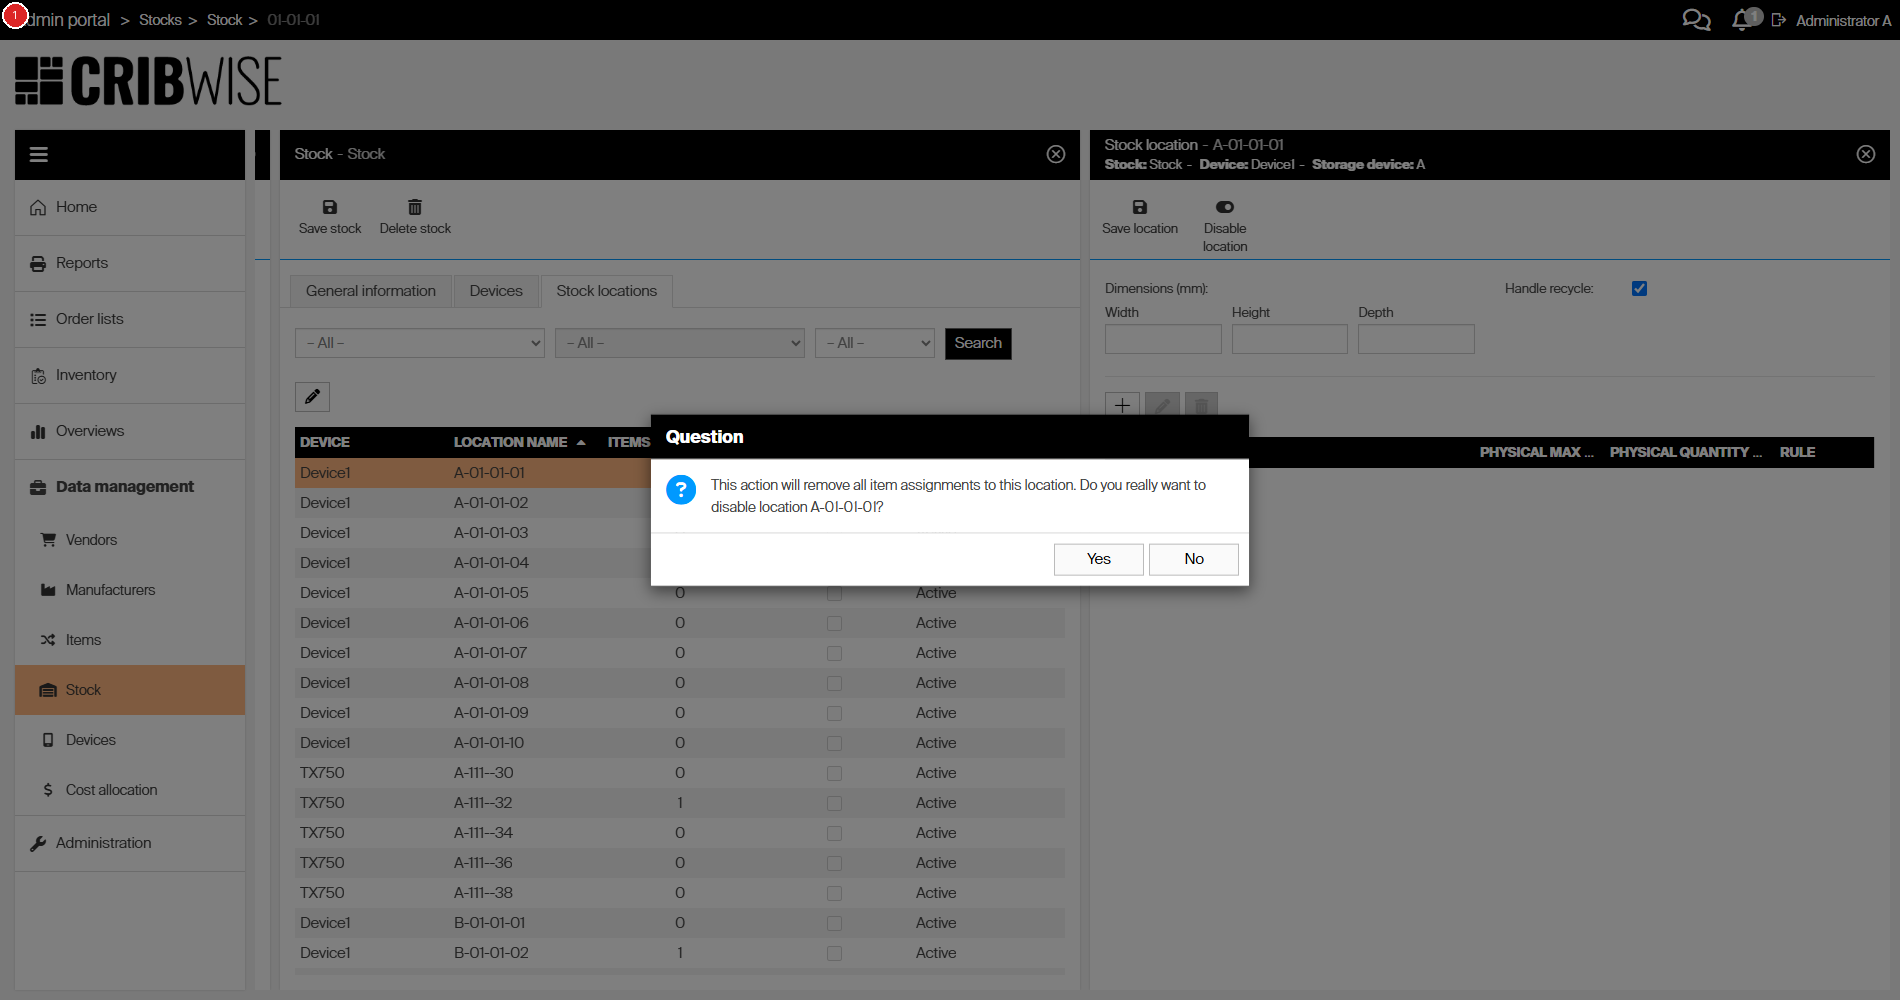
The confirmation (1) names the location and spells out that the item assignments will be removed.
Step 4 — Check the result
The option bar now offers Enable location instead of Disable location, and the buttons for adding, editing and removing assignments are greyed out. In the list, the location’s Status reads Disabled and its Items assigned count has dropped to 0.
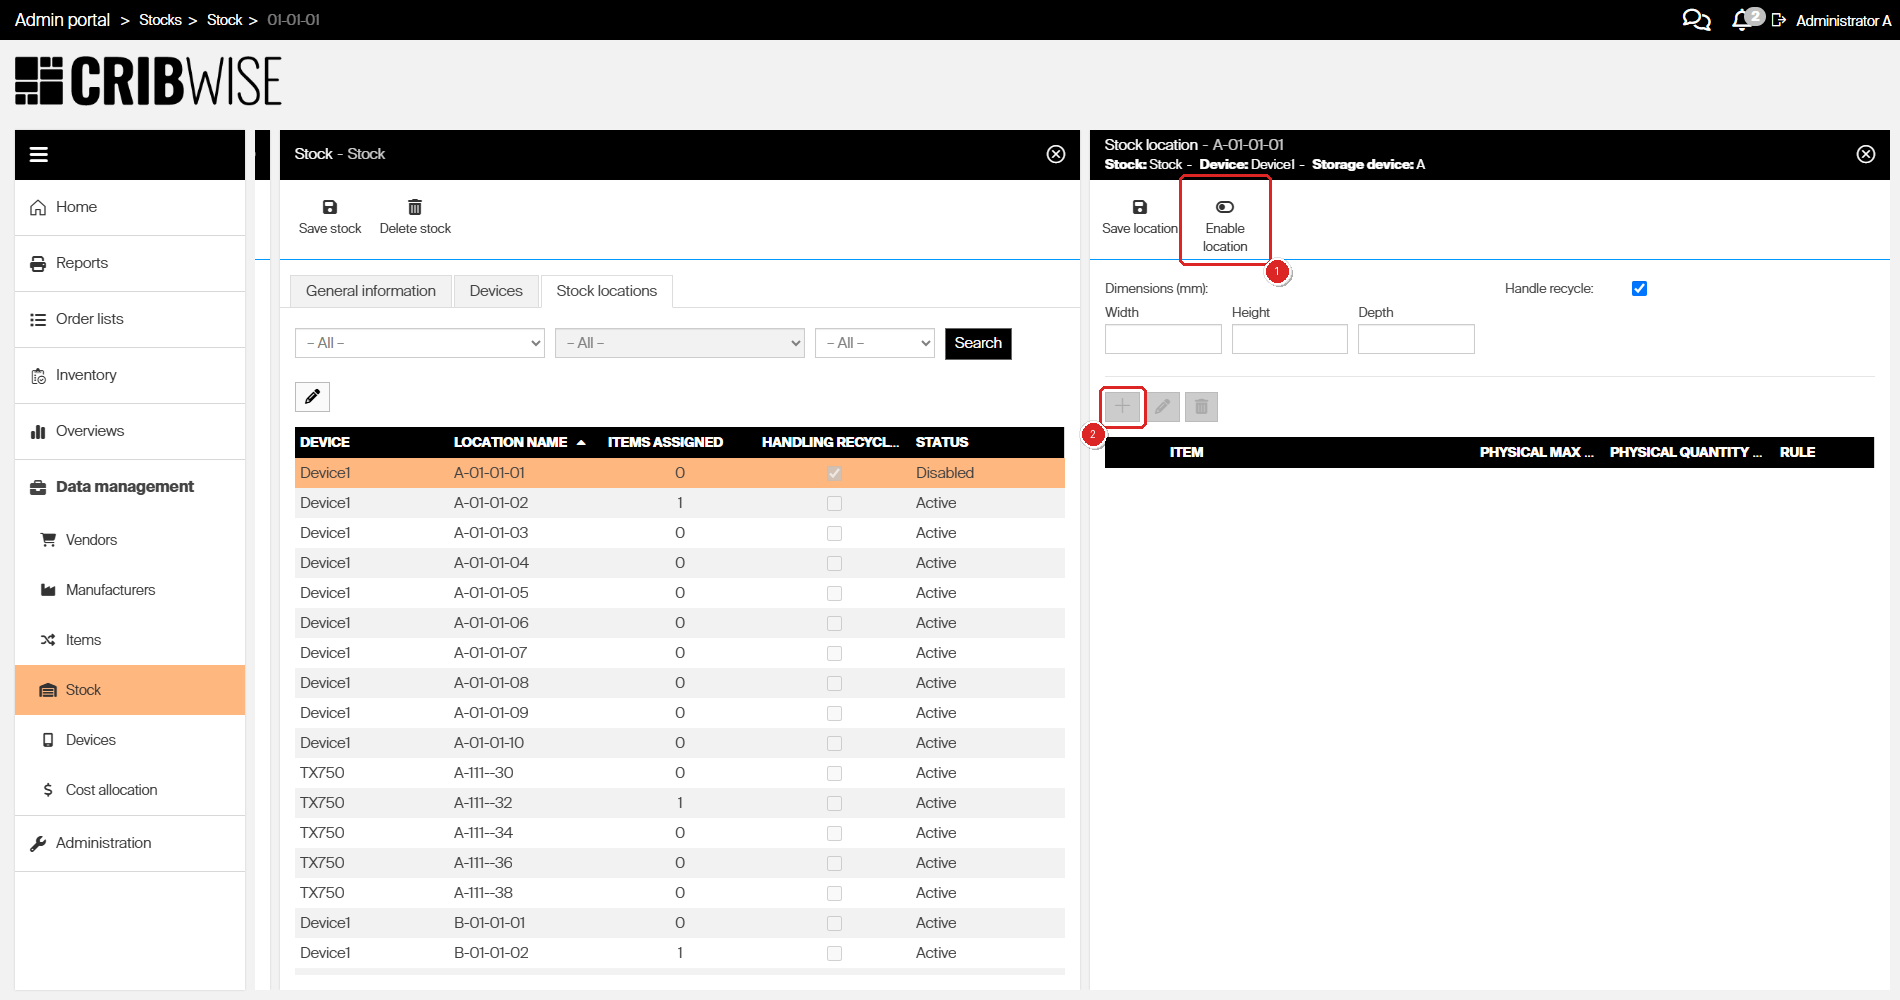
The option bar now offers Enable location (1), the assignment buttons are greyed out (2), and the list shows Disabled.
| Behaviour | Active | Disabled |
|---|---|---|
| Existing item assignments | Kept | All removed |
| Creating a new assignment | Allowed | Blocked, from the location and from the item detail |
| Offered as free space in Shop Floor Interface flows | Yes | No |
| Shown in the Shop Floor Interface location list | Normally | Marked as disabled |
Step 5 — Re-enable the location
Once the hardware is fixed, put the location back into production.
- Check the device’s status is still Locked. If it is not, lock it again and wait for the lock to take effect.
- Open the location again from the stock’s Stock locations tab.
- Click Enable location.
The location’s Status returns to Active and assignments can be created again.
Step 6 — Unlock the device
- Go back to Data management > Devices and open the device.
- Click Unlock device.
The status becomes Waiting for unlock, then Synchronized once the next synchronization completes.
Success: On the Stock locations tab the location reads Active again, and the device’s status is back to Synchronized. Re-create any item assignments the disable removed.
Next steps
- Re-create the assignments — a re-enabled location comes back empty. See How to edit item assignments (Shop Floor Interface).
- Check the device synchronized — the shop floor only sees the change after the device syncs. See Device statuses.
- Retire the hardware instead — if the whole shelf or drawer is gone rather than one location, change the storage device. See How to configure storage devices.
Troubleshooting
| Problem | Likely cause | Fix |
|---|---|---|
| Disable location is greyed out | The device is online and not locked | Lock the device under Data management > Devices, then reopen the location. |
| Enable location is greyed out | The device is no longer locked. A lock only takes effect once a synchronization completes, and a later one can clear it | Open the device detail and check the status is Locked, not Waiting for lock or Synchronized. Lock it again if needed, then reopen the location. |
| The assigned items are gone after re-enabling | This is by design — disabling removes the assignments and enabling does not bring them back | Create the assignments again on the location, or from the item detail. |
| Lock device is greyed out | The device is offline, so the Admin Portal cannot reach it | A device can only be locked while it is online. Check the connection indicator on the device detail — it reads Online, Offline or Checking connection. |
| The Shop Floor Interface still offers the location | The device has not synchronized since the change | Wait for the next synchronization, or use Force synchronization on the device detail — available only while the device is online. See Device actions. |
| You cannot find the location in the list | The list covers every device in the stock and can be long | Use the dropdown filters and Search above the grid, or sort by Location name. |
Related articles
- How to create and manage devices — locking, unlocking, device statuses and synchronization.
- How to configure storage devices — the shelves, cabinets and modules the locations are generated from.
- Understanding stock structure: stocks, devices, and locations — how a location fits under a stock and a device.
- How to create and manage stocks — the stock whose Stock locations tab you work in.
- How to manage stock locations (Shop Floor Interface) — the location list as the shop floor sees it.
- How to edit item assignments (Shop Floor Interface) — re-creating the assignments a disable removed.