
What you can do
Permanently remove a user from CRIBWISE so they can no longer sign in to the Admin Portal or the Shop Floor Interface. Use this when someone leaves your organisation or an account was created by mistake.
Warning: Deleting a user is permanent. There is no undo and no recycle bin in the Admin Portal. If you remove the wrong account, you have to create it again from scratch.
Before you start
- You need an account whose user group is allowed to delete users. Without that permission the Delete user button stays unavailable.
- Know the user’s login, not just their name. The confirmation dialog identifies the account by login, which is how you verify you are deleting the right person.
- Decide whether the person may come back. CRIBWISE has no “deactivate” or “disable” switch on a user — the only options are to keep the account or delete it.
Note: If the person may return, or you simply want to block access without deleting the account, move them to a user group that has neither Admin portal users nor Shop floor interface users enabled instead of deleting them. [HYPOTHESIS] This alternative follows from the group settings described in How to create and configure a user group, but the resulting login behaviour was not tested for this article.
Quick start
Experienced administrators remove a user in 4 steps:
- Go to Administration > User management.
- Select the user’s row in the list.
- Click Delete user.
- Click Yes to confirm.
Need more detail? Follow the full steps below.
Steps
Step 1 – Open user management
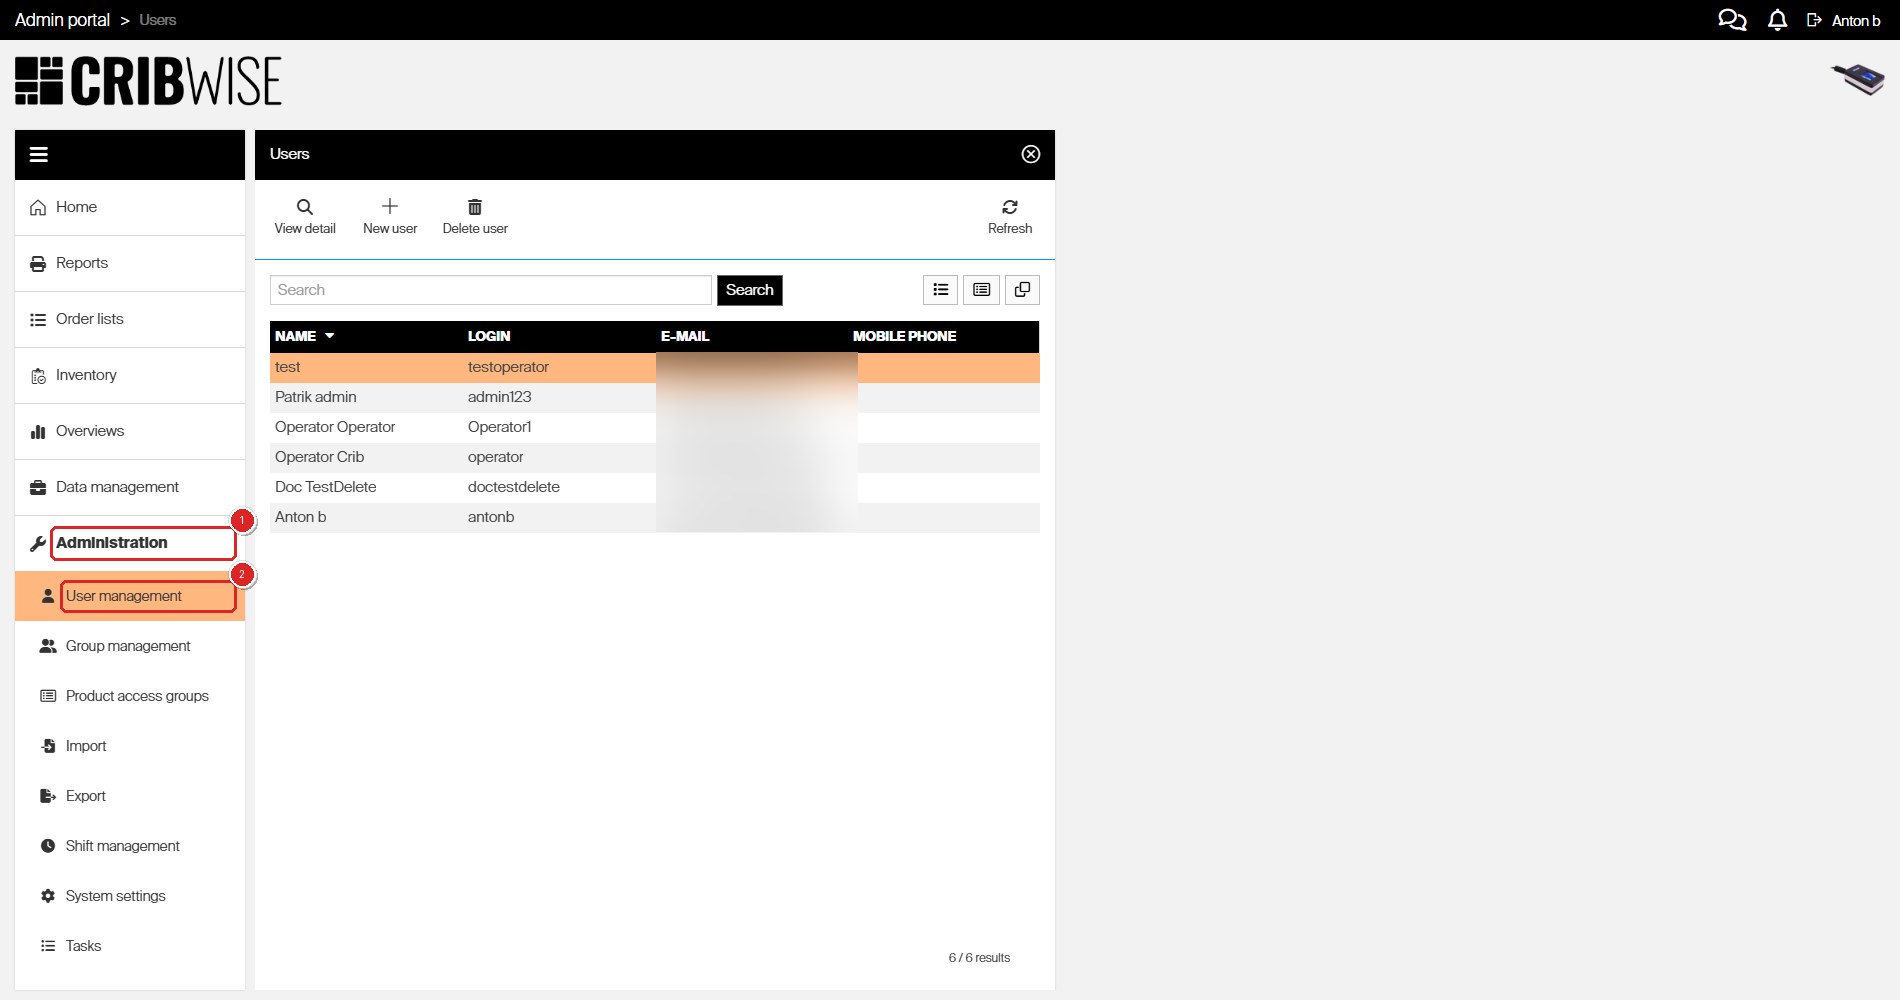
- In the left sidebar, click Administration.
- Click User management.
The Users list opens and shows every user you have access to, with their name, login, e-mail, and mobile phone.
Step 2 – Find and select the user
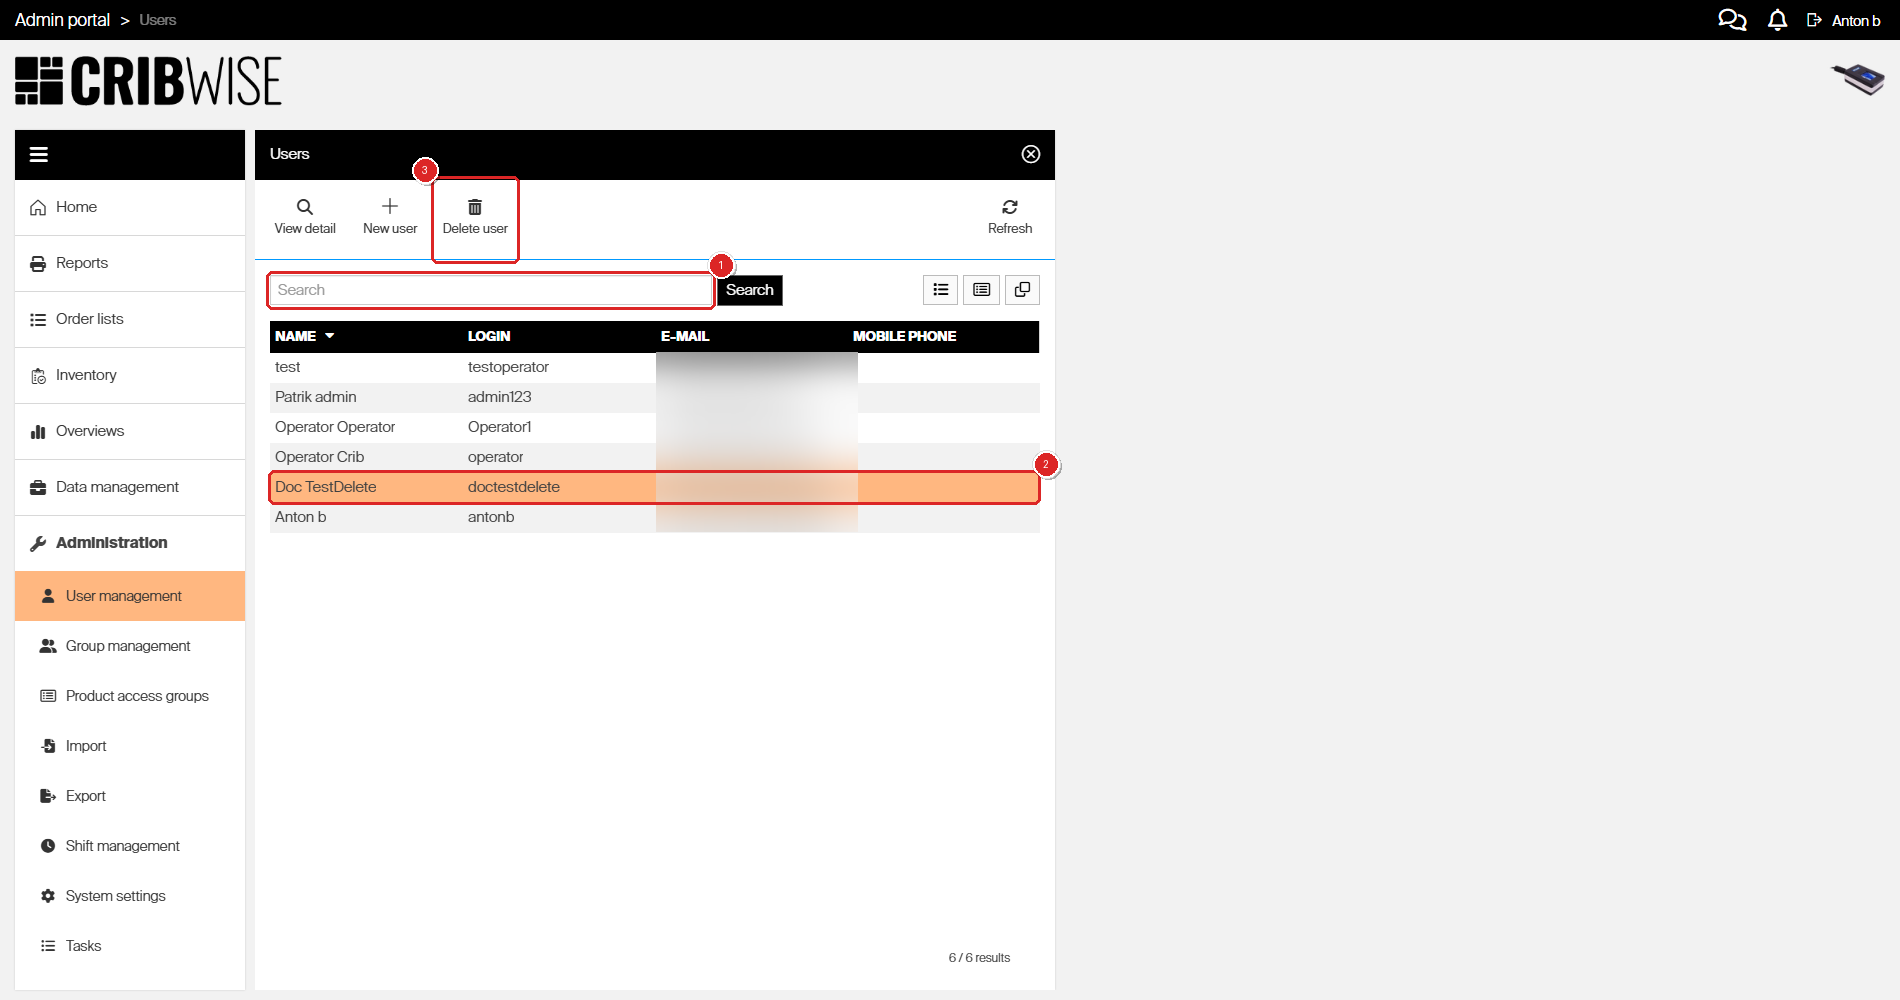
- Type the user’s name or login in the Search box and click Search.
- Click the user’s row once to select it. The selected row is highlighted.
Check the LOGIN column before you continue. Two people can share a display name, but logins are unique.
Tip: Search on the login rather than the display name. It is the value the confirmation dialog shows in the next step, so matching on it removes any doubt about which account you are deleting.
Step 3 – Click Delete user
Click Delete user in the toolbar above the list.
The button becomes available only once a row is selected. If it is greyed out, go back to Step 2 and select the user.
Step 4 – Confirm the deletion
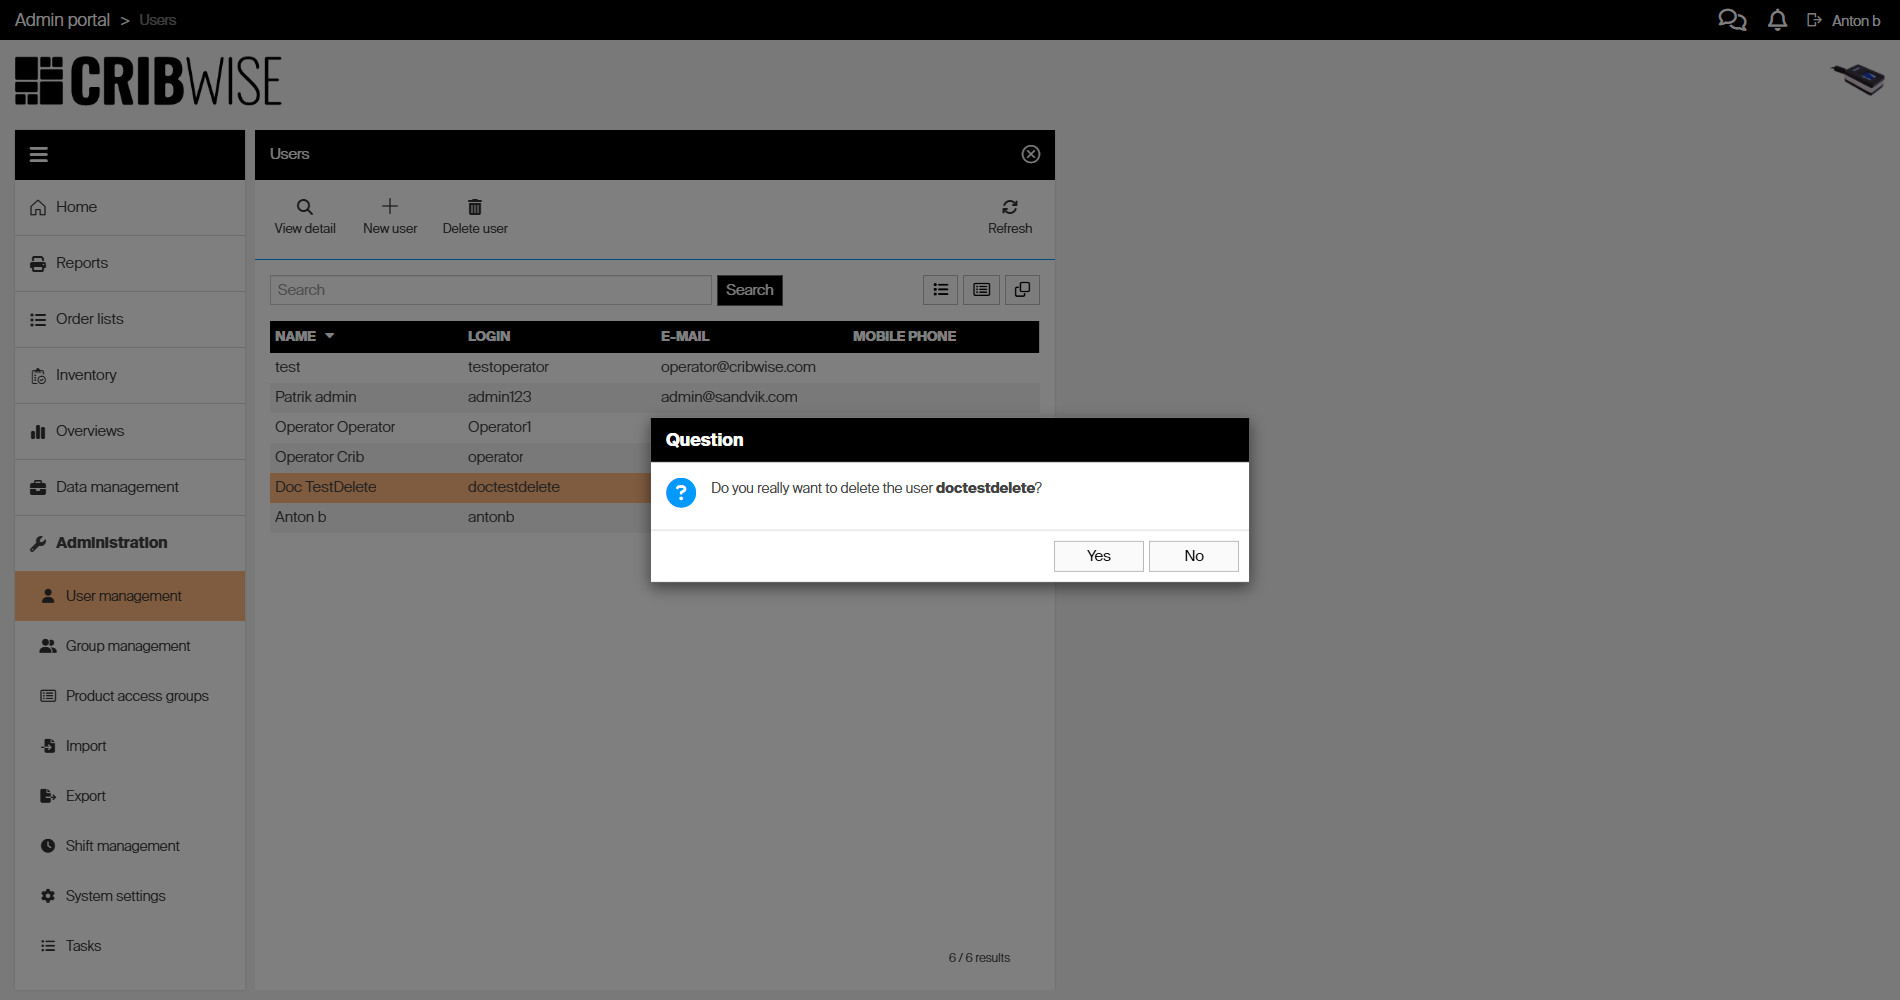
A confirmation dialog asks Do you really want to delete the user login?
- Check that the login in the dialog is the account you intend to remove.
- Click Yes to delete the user, or No to cancel.
Note: CRIBWISE does not stop you from selecting your own account. The dialog looks exactly the same when you target the account you are signed in with, so read the login carefully before you click Yes.
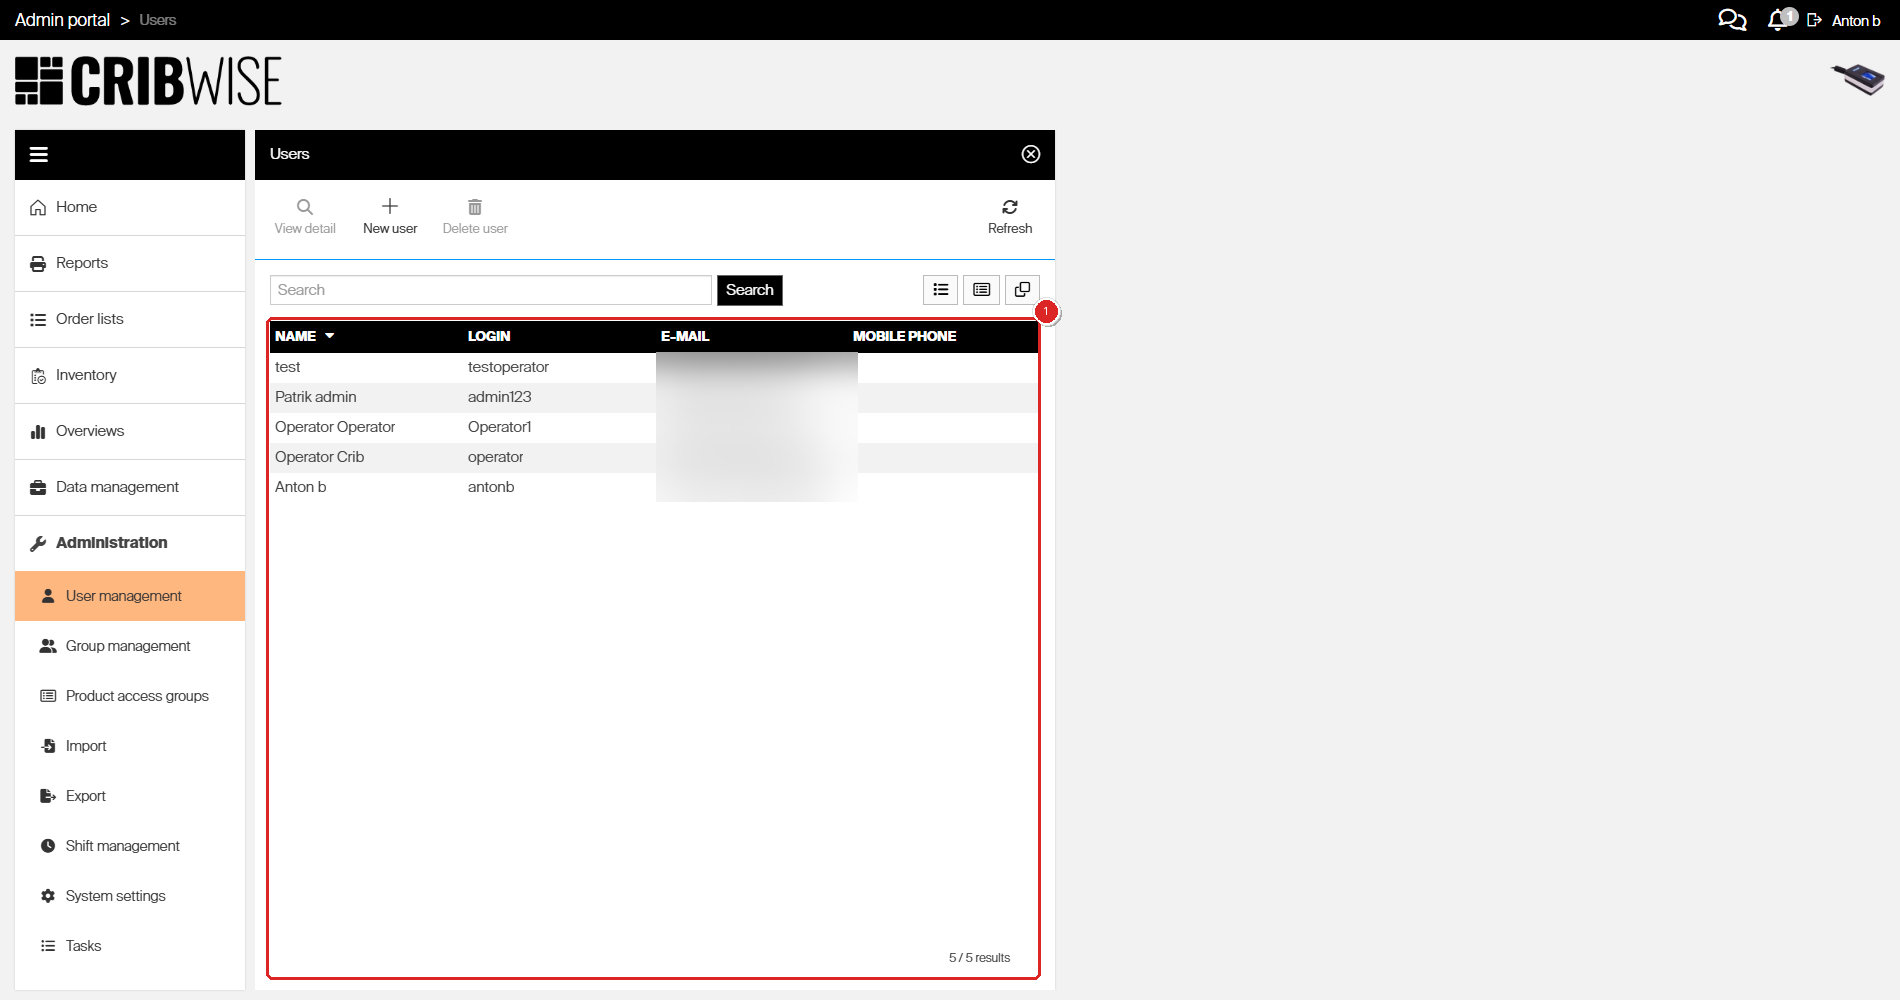
Success: The user disappears from the Users list straight away and the result counter at the bottom right drops by one. No confirmation message is shown — the updated list is the confirmation. The person can no longer sign in to the Admin Portal or the Shop Floor Interface.
Remove a user from the user detail page
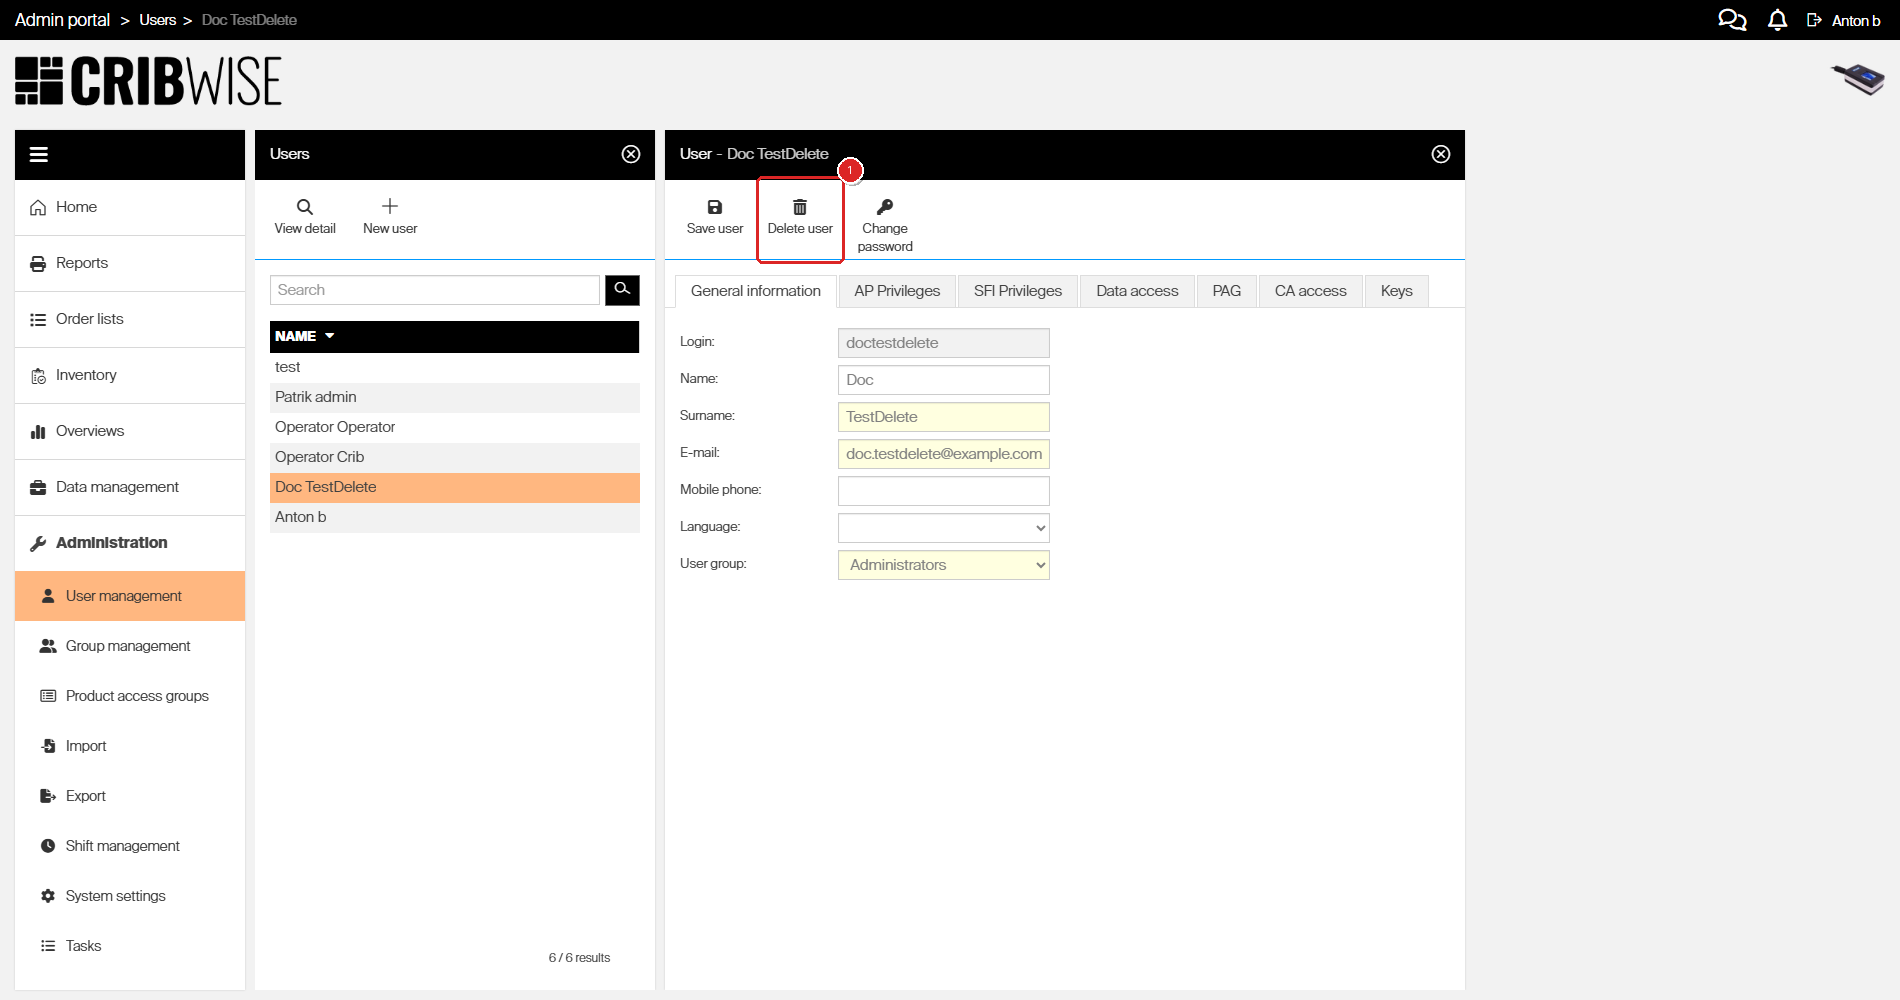
If you already have the user’s detail page open — for example because you were checking their group or privileges first — you do not need to go back to the list. The same Delete user button sits in the toolbar of the user detail page, and it opens the same confirmation dialog.
- Open the user by double-clicking their row, or by selecting the row and clicking View detail.
- Check the Login field on the General information tab.
- Click Delete user in the toolbar.
- Click Yes to confirm.
Next steps
After removing a user:
- Check the user’s group — if the group existed only for that person, remove it too. See How to create and configure a user group.
- Reassign their responsibilities — if they were the only administrator, create a replacement. See How to add an administrator user.
- Collect any login keys — RFID or Coges keys issued to the person are no longer tied to an account and can be reused for someone else.
Troubleshooting
| Problem | Likely cause | Fix |
|---|---|---|
| Delete user is greyed out | No user row is selected | Click the user’s row in the list first, then click Delete user |
| Delete user stays unavailable even with a row selected | Your user group does not grant delete permission on users | Ask an administrator to grant the permission, or have them perform the deletion. See the Admin Portal permissions reference |
| The user is not in the list | The display name differs from the login, or your group’s data access hides that user’s group | Search on the login instead of the name; if it still does not appear, ask an administrator to check the data access settings on your user group |
| You deleted the wrong user | The confirmation was accepted for the wrong login | There is no undo — create the account again with How to create and manage users, then reassign its group and privileges |
| The user still appears after clicking Yes | The list has not been reloaded | Click Refresh above the list to reload it from the server |
Related articles
- How to create and manage users — add a user, edit their details, and manage login keys.
- How to create and configure a user group — control what a group of users can see and do.
- How to reset a user’s password — restore access instead of removing the account.
- How to add an administrator user — replace an administrator you removed.
- Admin Portal permissions reference — every Admin Portal privilege, including the delete permissions.