
What you can do
Work with lift and paternoster machines in the SFI: pick, return and inventory items tray by tray, and manage the trays themselves – layouts, locations, assignments and, on a Megamat RS, the number of shelves.
These machines behave differently from other vending machines, both for daily operations and for managing locations.
Supported machines
- KARDEX Megamat RS
- KARDEX Shuttle XP
- Modula Lift
- Weland Compact
- Hänel Lean-Lift
- Hänel Multi-Space
Everything below applies to all of them. Where behaviour is specific to one type, it is marked.
Important: A user with permission to assign items will also have the permission to create, edit, and remove locations. This is an unique feature of working with lifts.
Before you start
- Managing locations needs the Setup locations privilege. Without it – or without a lift machine – the option is not shown.
- Know how you want the tray laid out: a regular grid, or freely placed boxes. The two modes cannot be combined.
Item manipulation operations
Every operation that handles items – pick, return, inventory – runs like this:
- The tray holding the item is fetched and presented to the operator, with visual guidance to the location where the machine supports it – a laser pointer, a position on an LED screen.
- The machine waits for the operator to confirm that the item has been processed.
- If another location on the same tray is next, guidance moves there and waits for confirmation again.
- If the next location is on another tray, the current tray is disposed and the other one presented.
- When no location is left, the last tray goes back into the machine.
Note: Locations are always ordered by tray, so everything on a tray is processed before it is disposed.
How the operator confirms
- With the button on the SFI screen (1).
- KARDEX only: with the button on the Kardex control panel (2 in the image).
- Weland Compact only: with the control panel, the pedal, or the confirmation buttons in the machine opening.
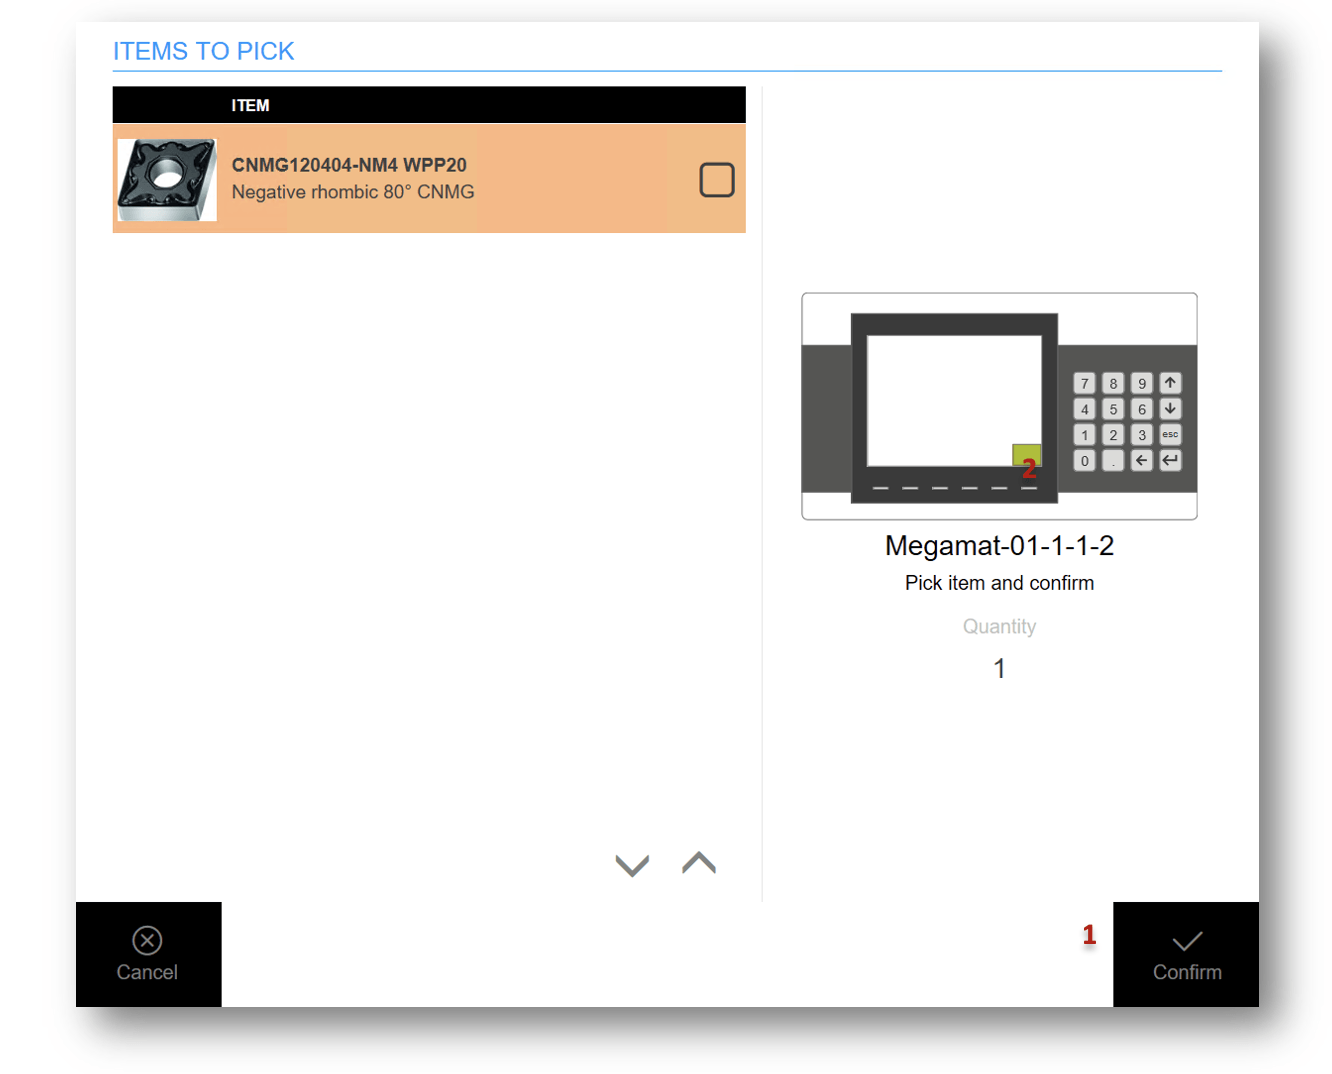
Confirming that a location has been processed.
Some operations need input on the SFI itself, such as a serial number or an inventory count. The machine control panel then shows a text asking for that input, and confirmation on the panel is ignored – follow the SFI instructions.
Note: Pressing cancel on the control panel cancels the current operation, exactly as cancelling on the SFI does.
Management of trays
Every machine arrives with a defined number of trays, and the location structure in each tray is yours to define. Open Manage KARDEX/Modula/Weland/Hänel locations in Stock management, and select the storage device where there are several.
The list of trays shows:
- Tray name (1) – changeable in the Admin Portal or in the next step on the SFI, so it can say what the tray holds.
- Locations and assignments (2) – how many locations exist and how many have items assigned, with a bar on the left.
- Coverage (3) – how much of the tray is covered by locations, which tells you whether another one fits. Trays built in grid mode are always fully covered. The bar sits on the right.
- Tray layout (4) – KARDEX Megamat RS only, showing whether the tray has several horizontal levels. Location count and coverage always cover all levels.
Select a tray and press Manage tray (5) to open it.
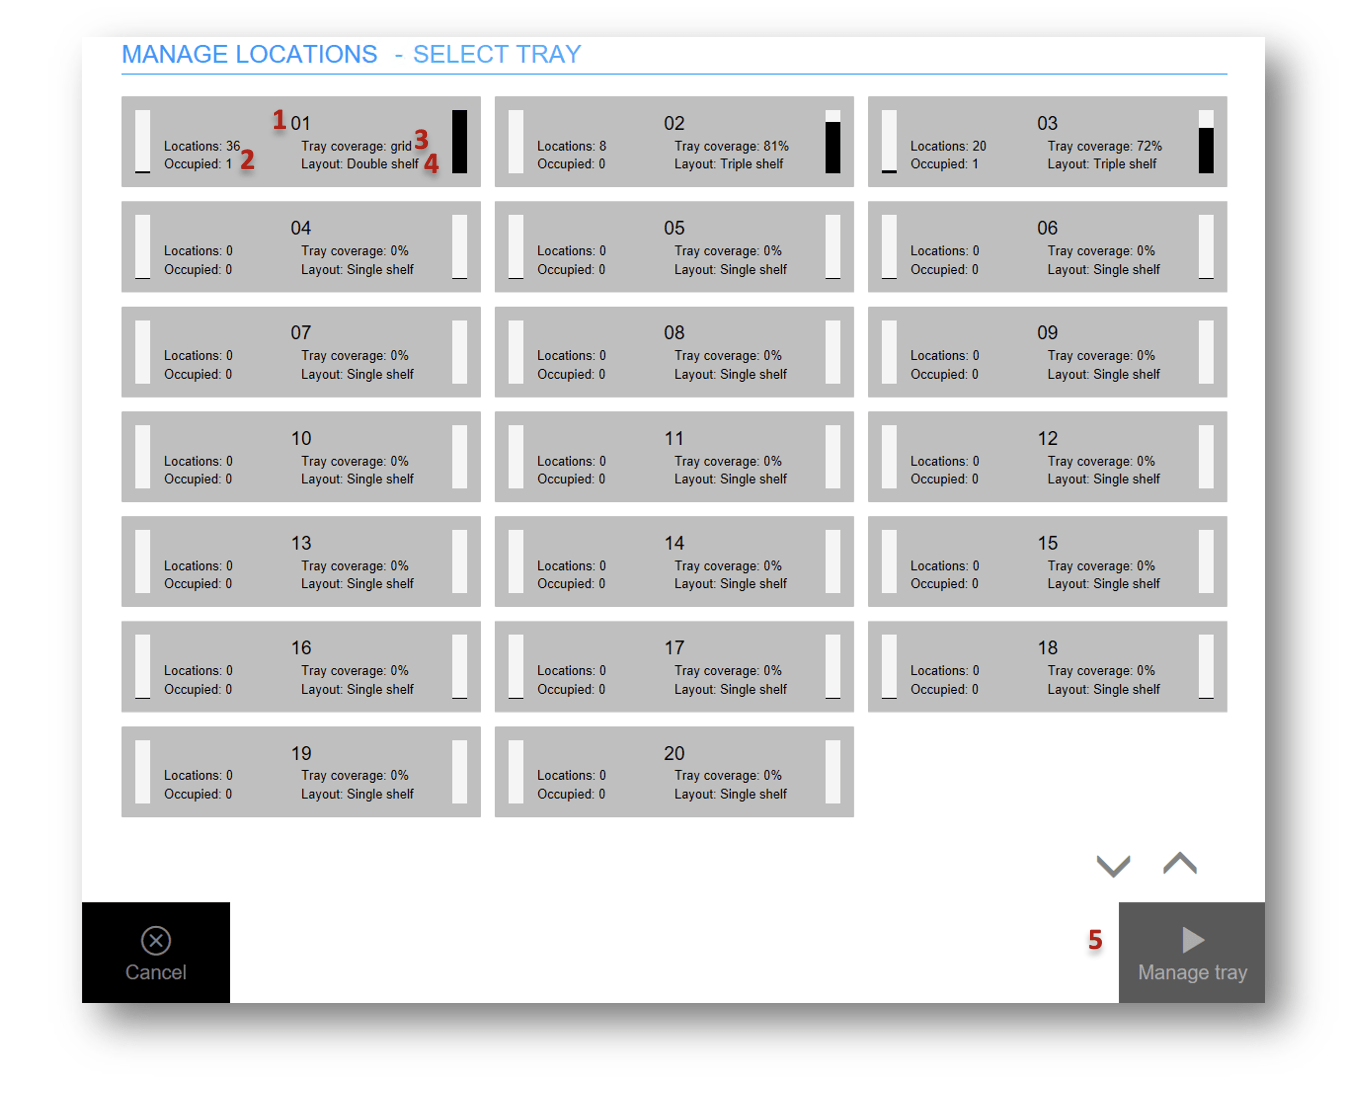
The tray list.
View the tray layout
The tray layout shows every location on the tray, with assigned locations in a different colour.
Where a location is a box divided into smaller locations, the layout can show that too: the box – the base location – has a white border, and each separator inside it is a black line. In the example, locations 1-1 to 1-4 are sub locations of location 1, while locations 2 and 3 have no separators.
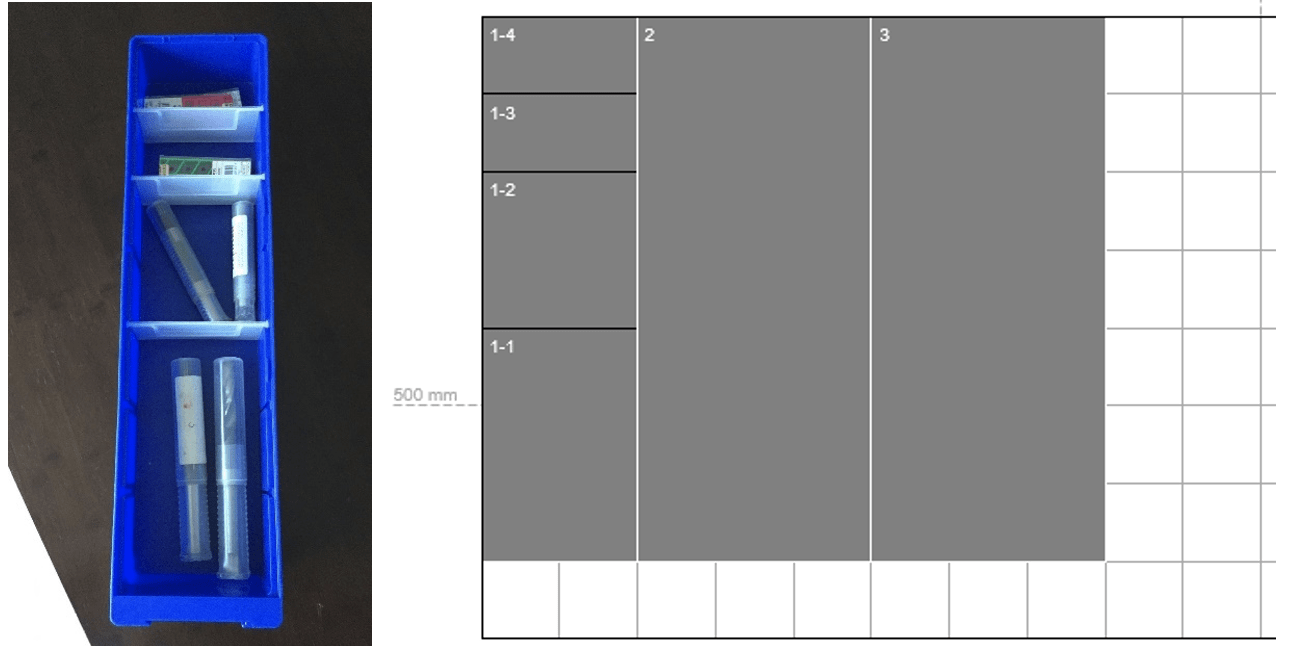
Base location, separators and sub locations.
From here you can:
- Select a location (1) to work with its assignments.
- Press Fetch tray (2) to bring the tray to the opening. Fetching takes a few seconds.
- Press Rename tray (3) to give it a custom name.
- Press Edit locations (4) to change the structure and layout.
- KARDEX Megamat RS only: switch between shelves (5) where a tray has several levels.
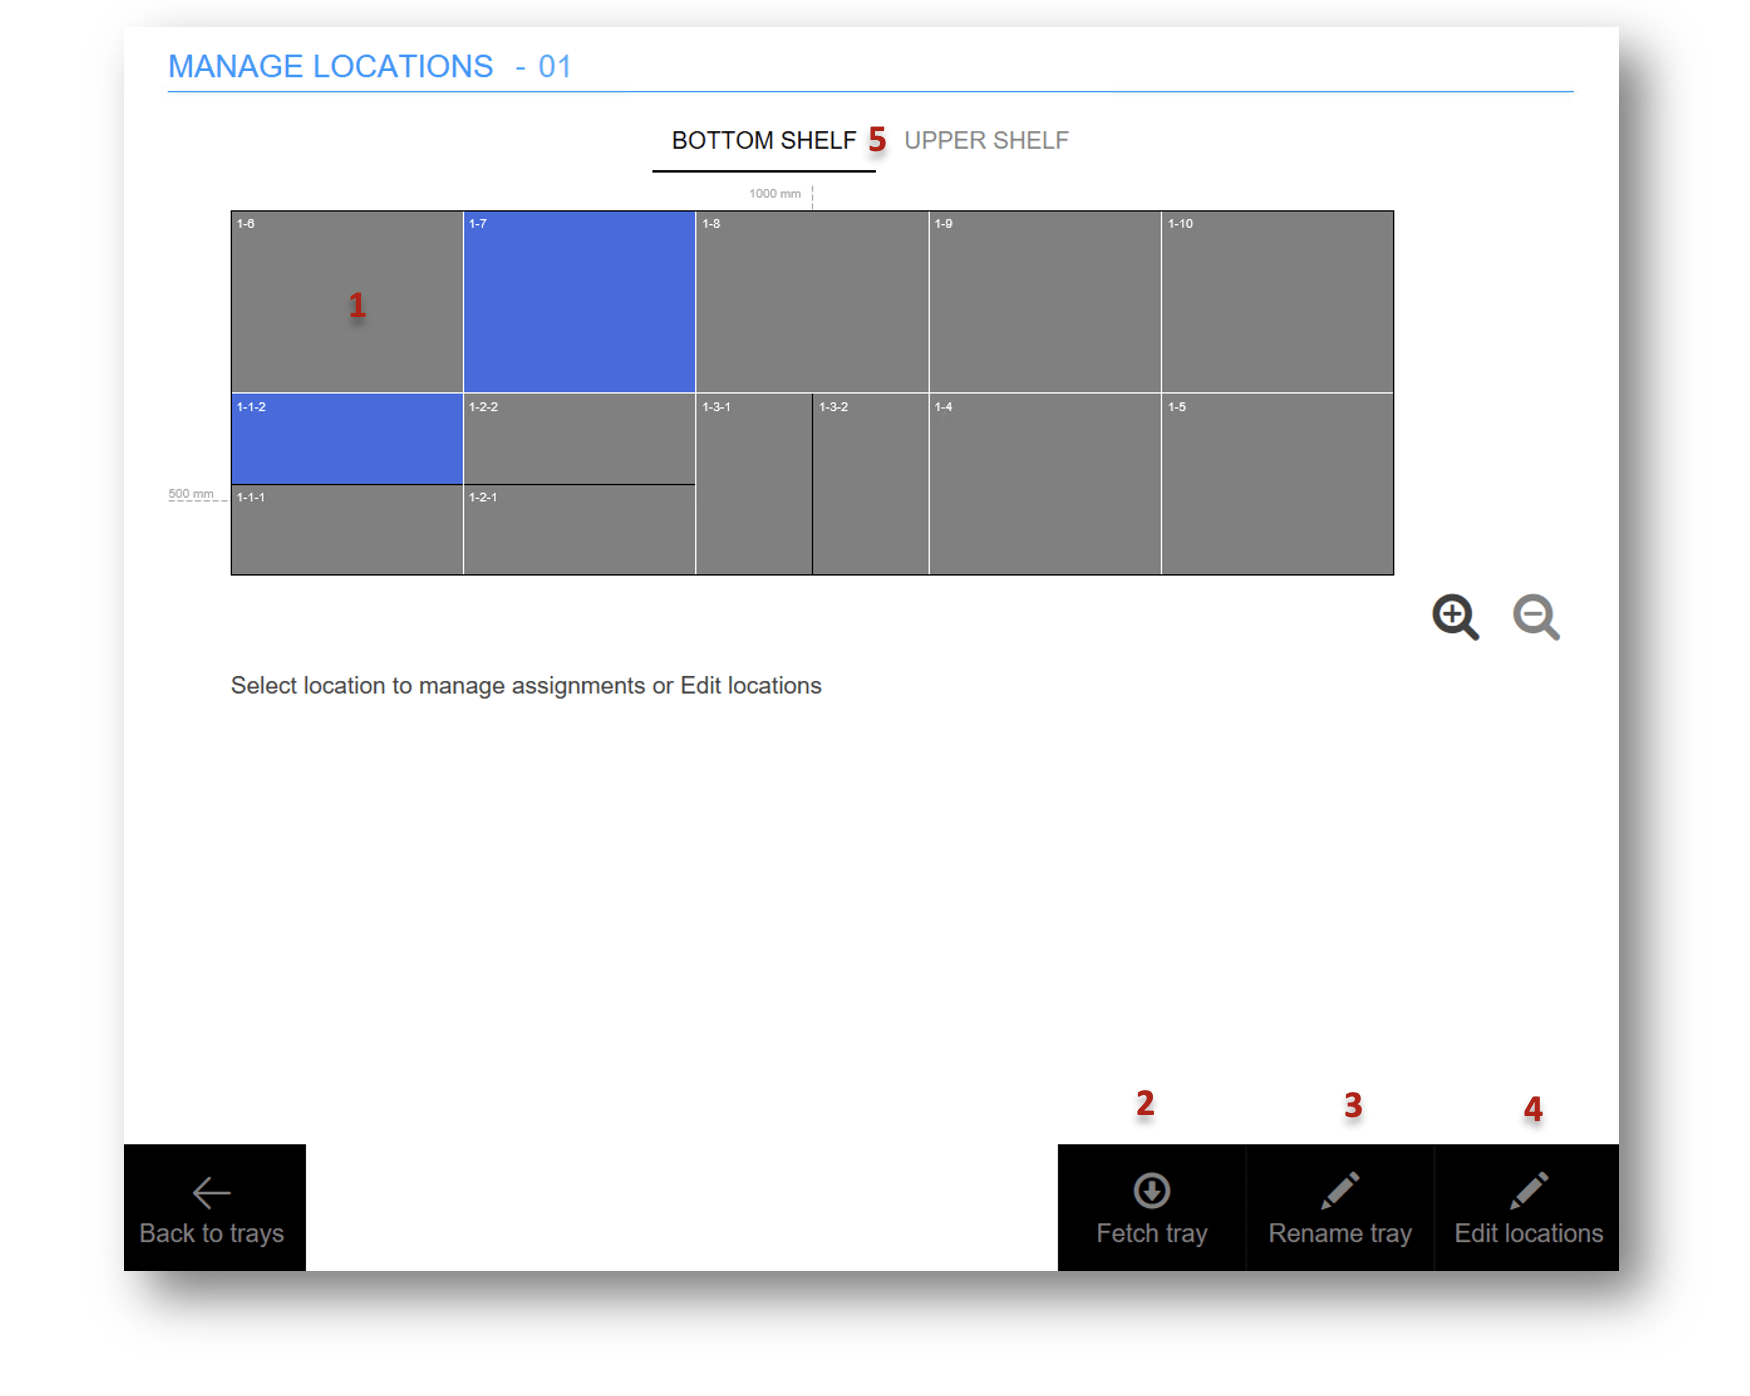
Working with one tray.
Assignments on a location
Assign an item
Selecting a location shows every item assigned there. Press Assign item (1) to add one, then select the item and the assignment options – see How to assign an item to a location (Shop Floor Interface).
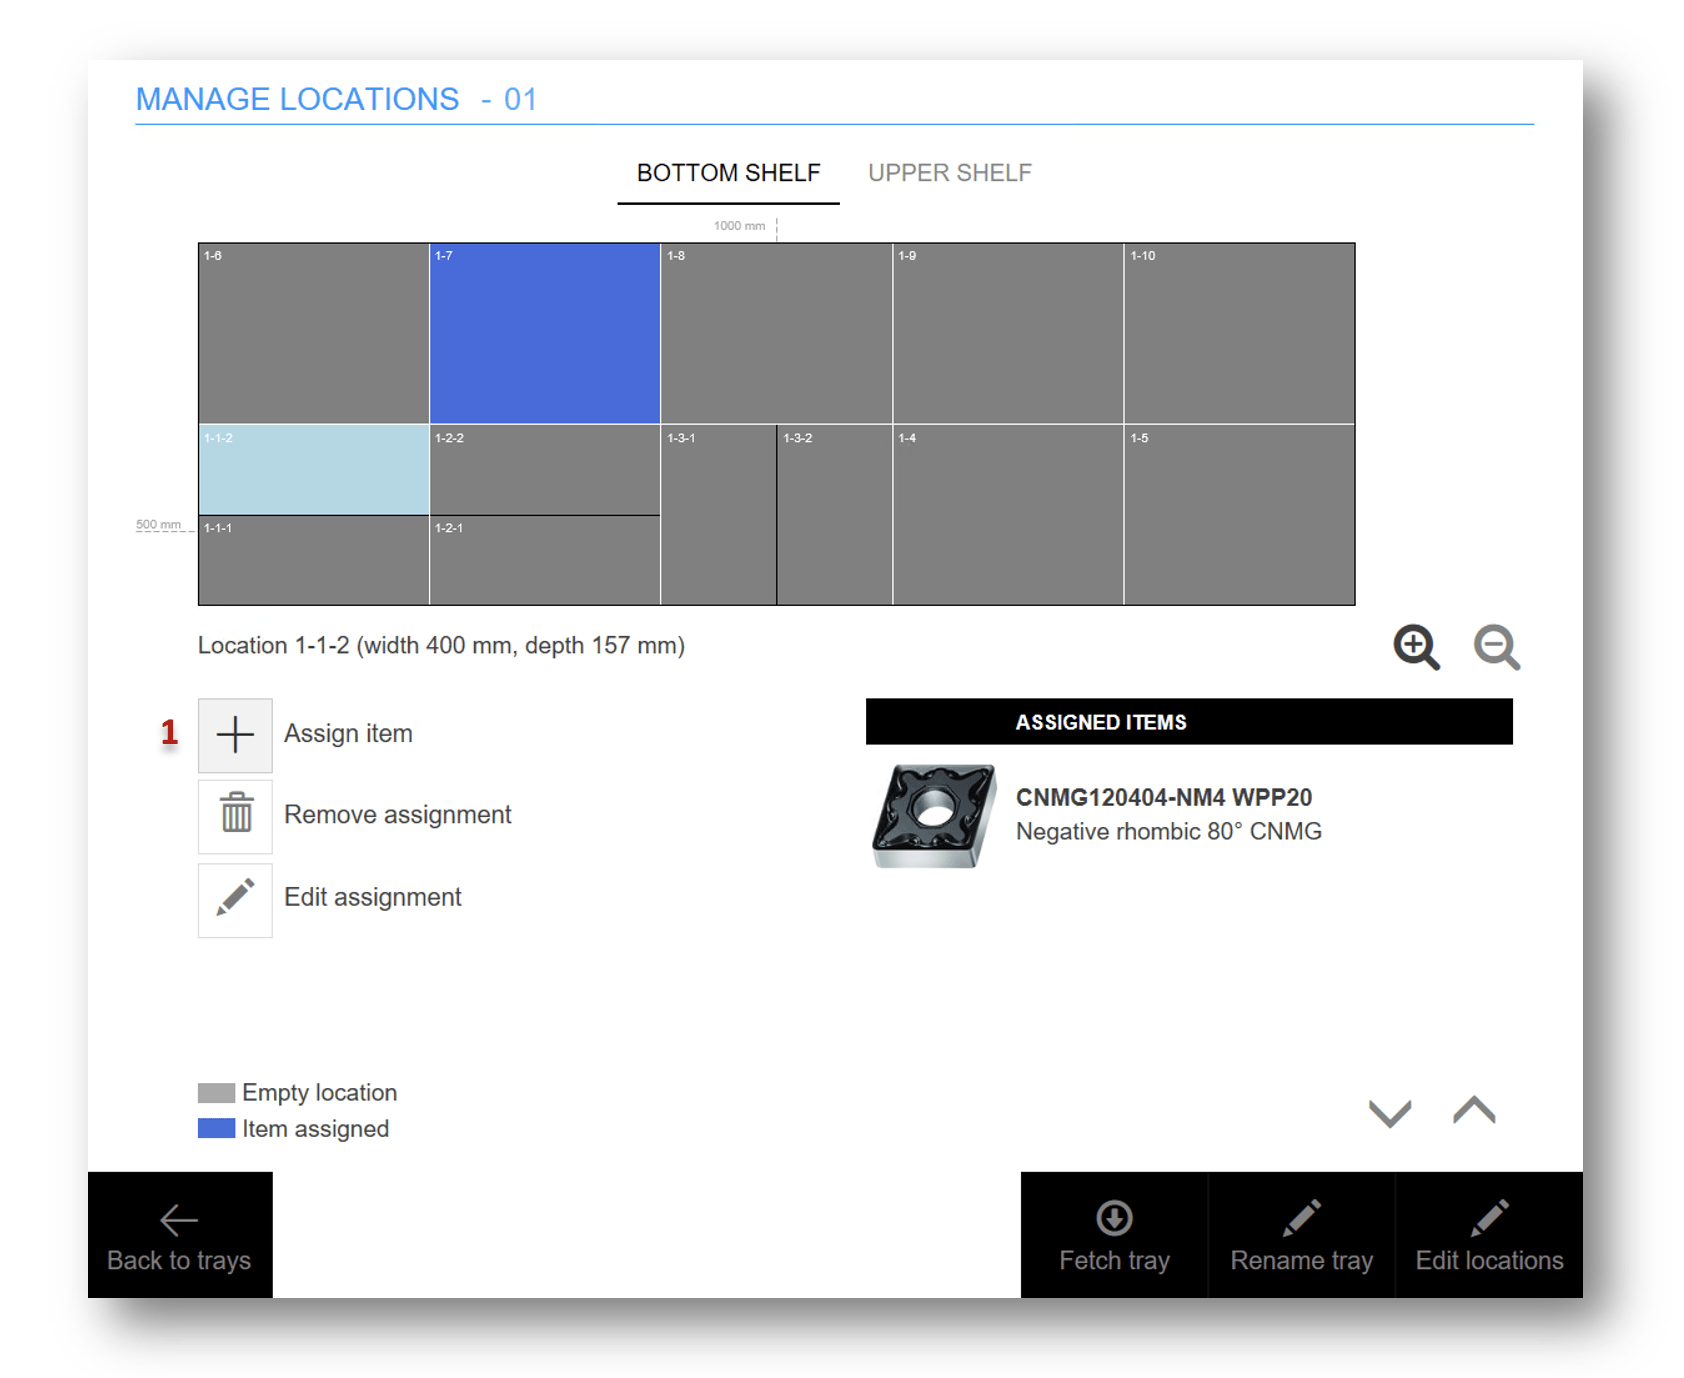
Assigning an item from the tray view.
If physical quantity is placed during the assignment, the tray is fetched so you can put the items in – unless it is already at the opening. Confirm the placement on the SFI (1) or on the control panel.
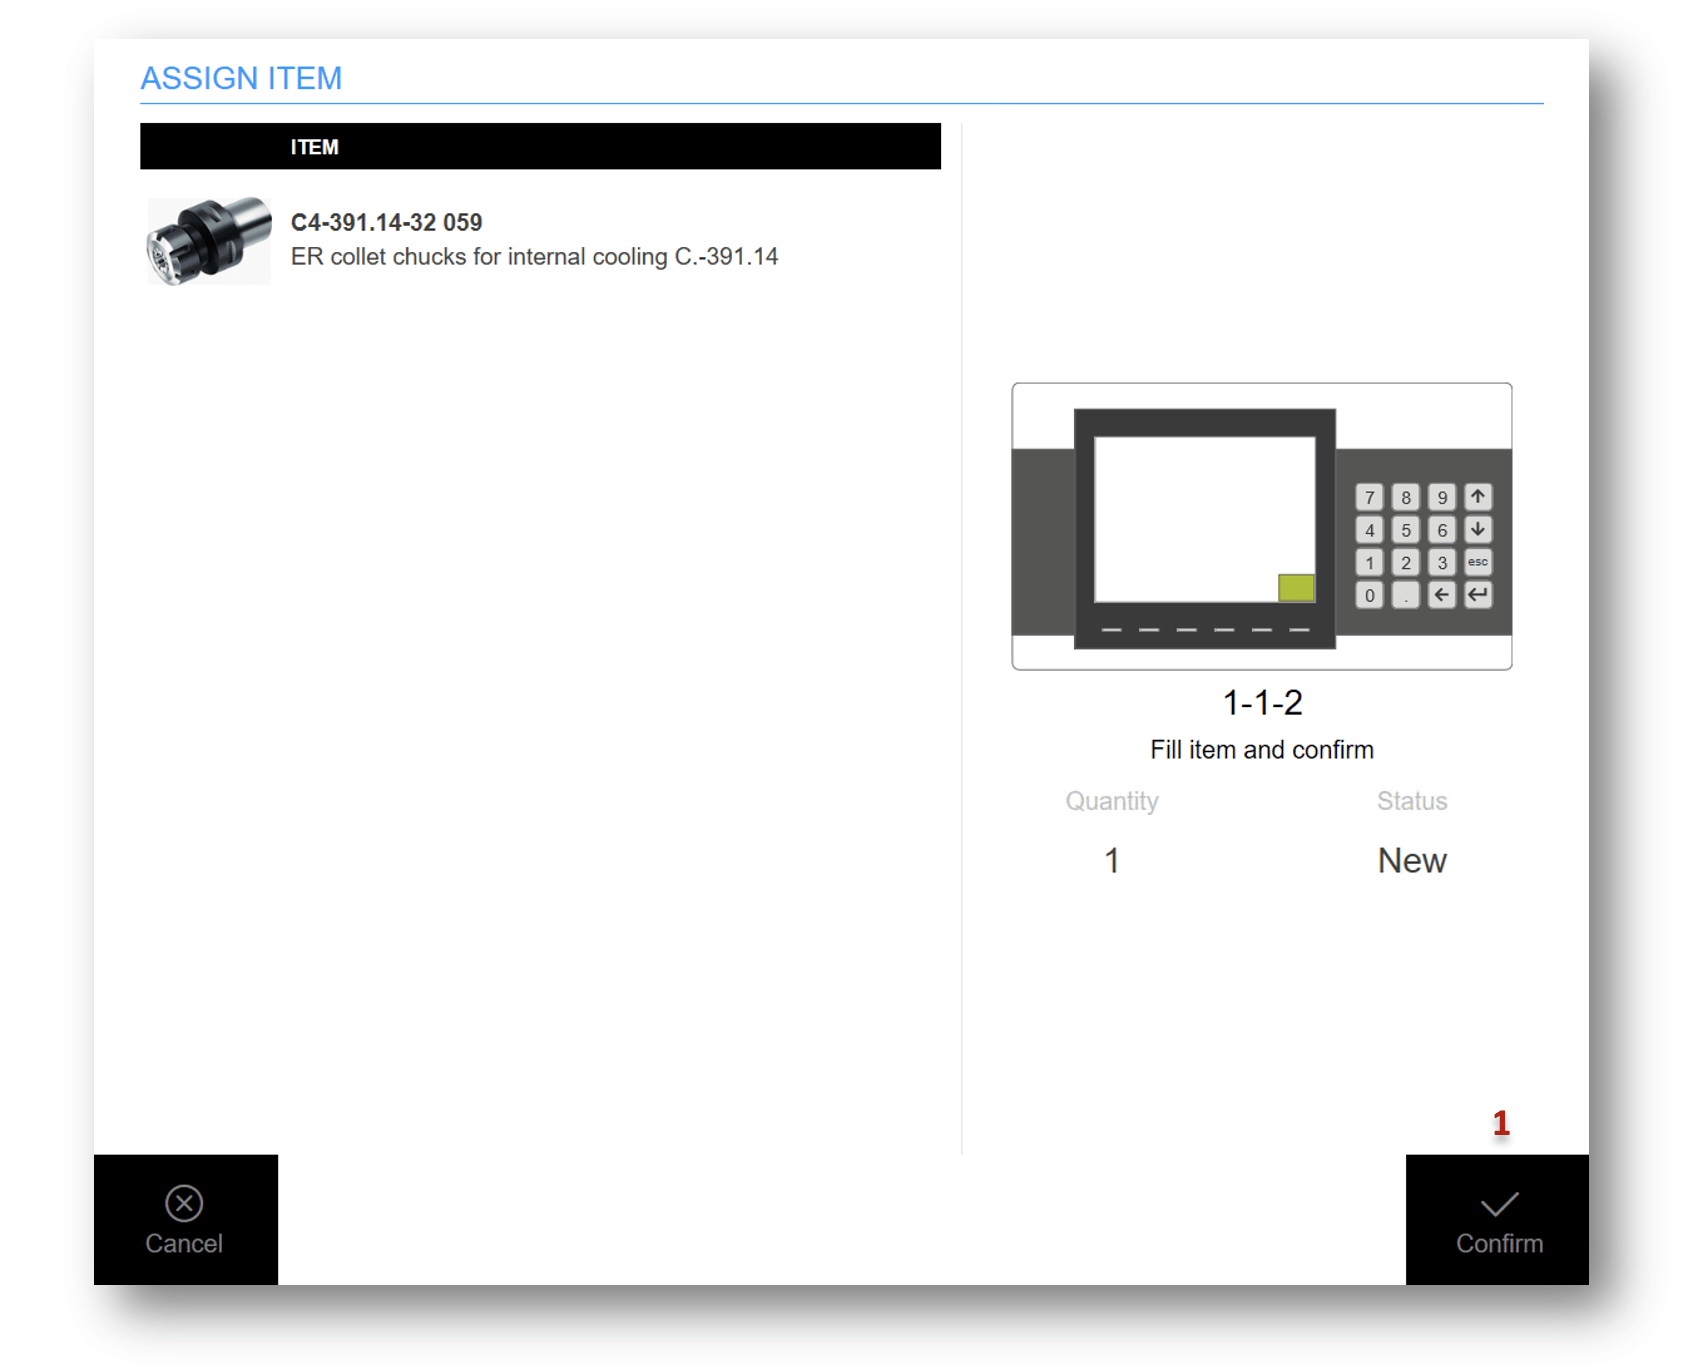
Confirming the placement.
Remove an item
Select the item in the list of assigned items (1) and press Remove assignment (2). If physical quantity has to come out, the tray is fetched. Confirm on the SFI or on the control panel once it is removed.
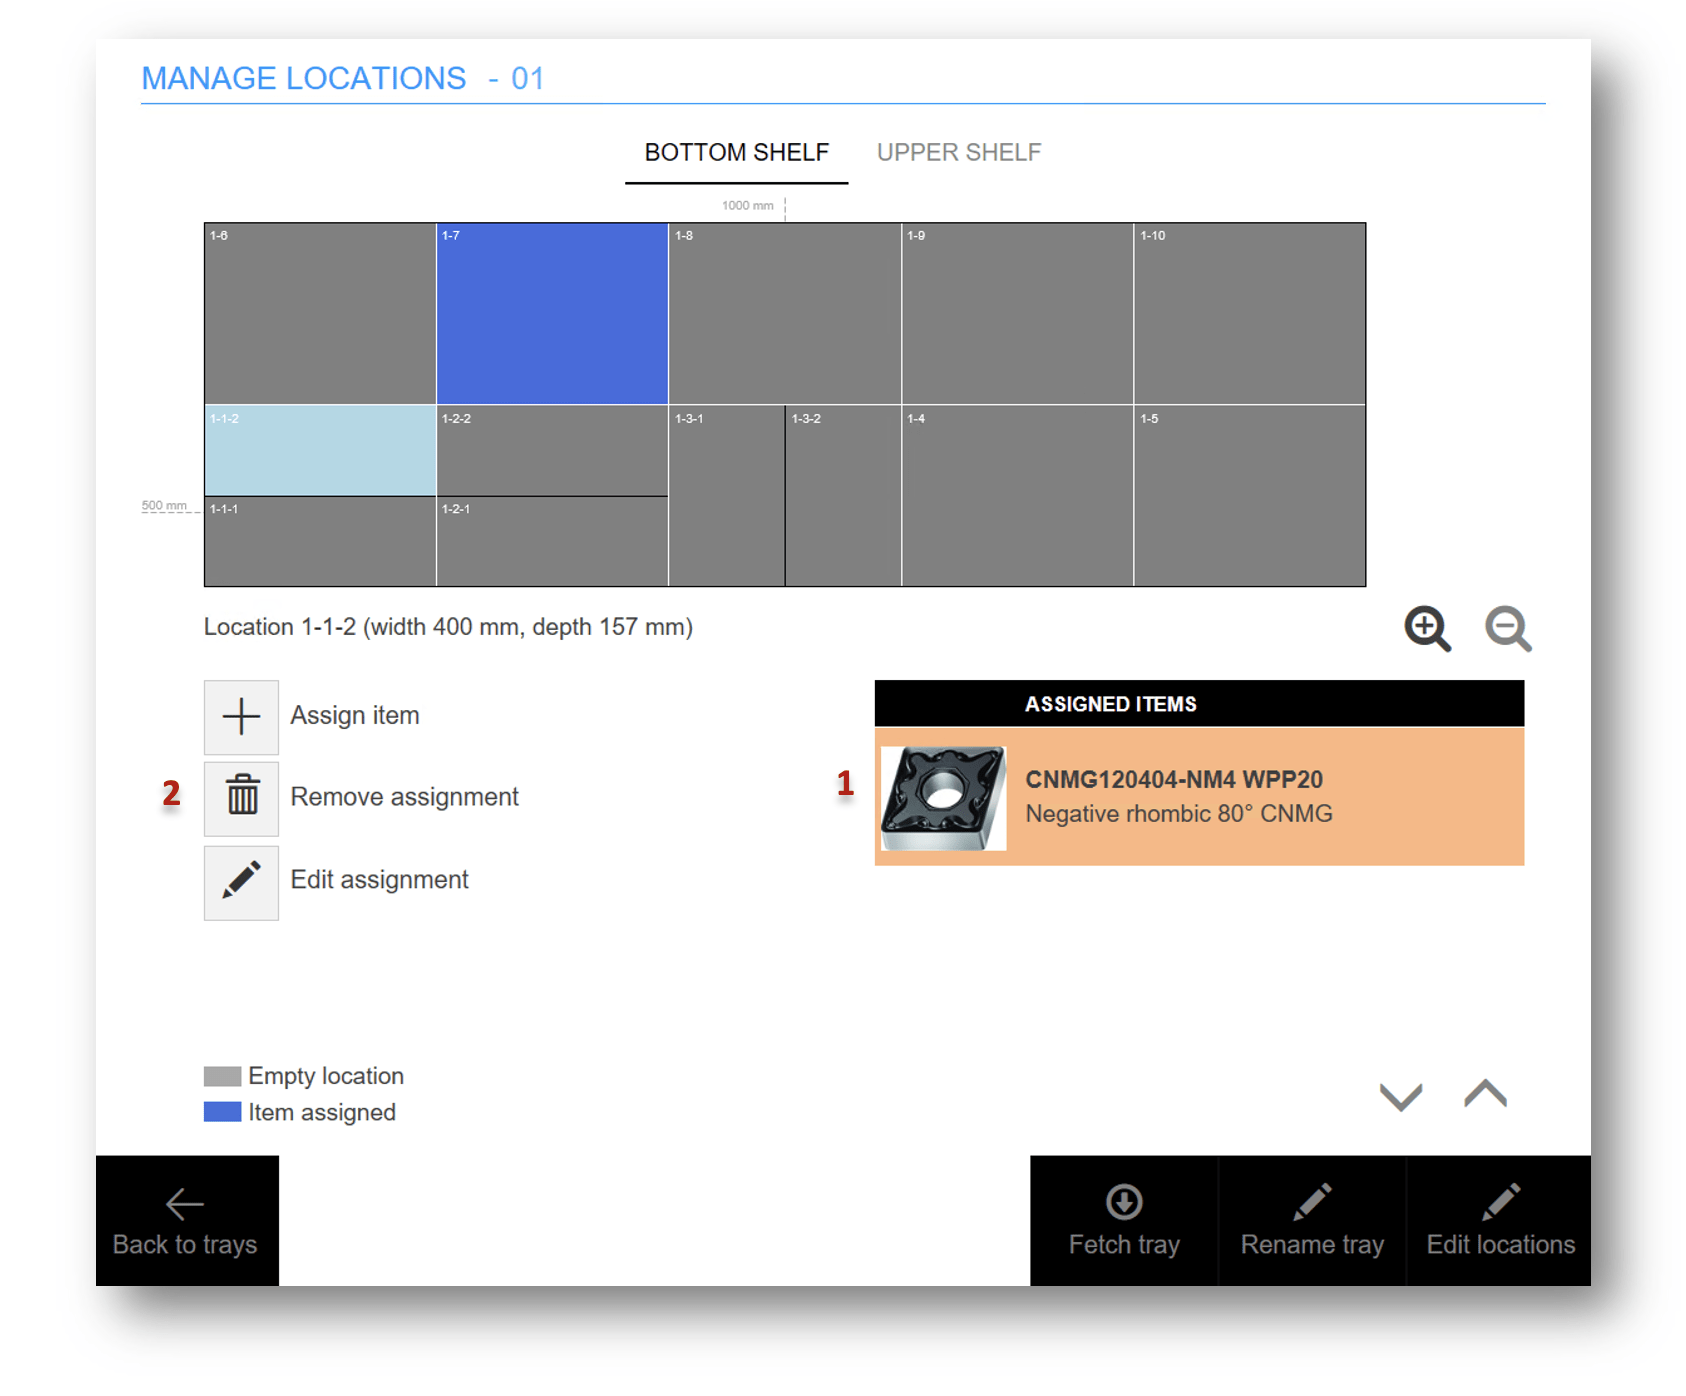
Removing an assignment.
Edit assignment options
Select the item (1), press Edit assignment (2), change the settings and press Save to return to tray management.
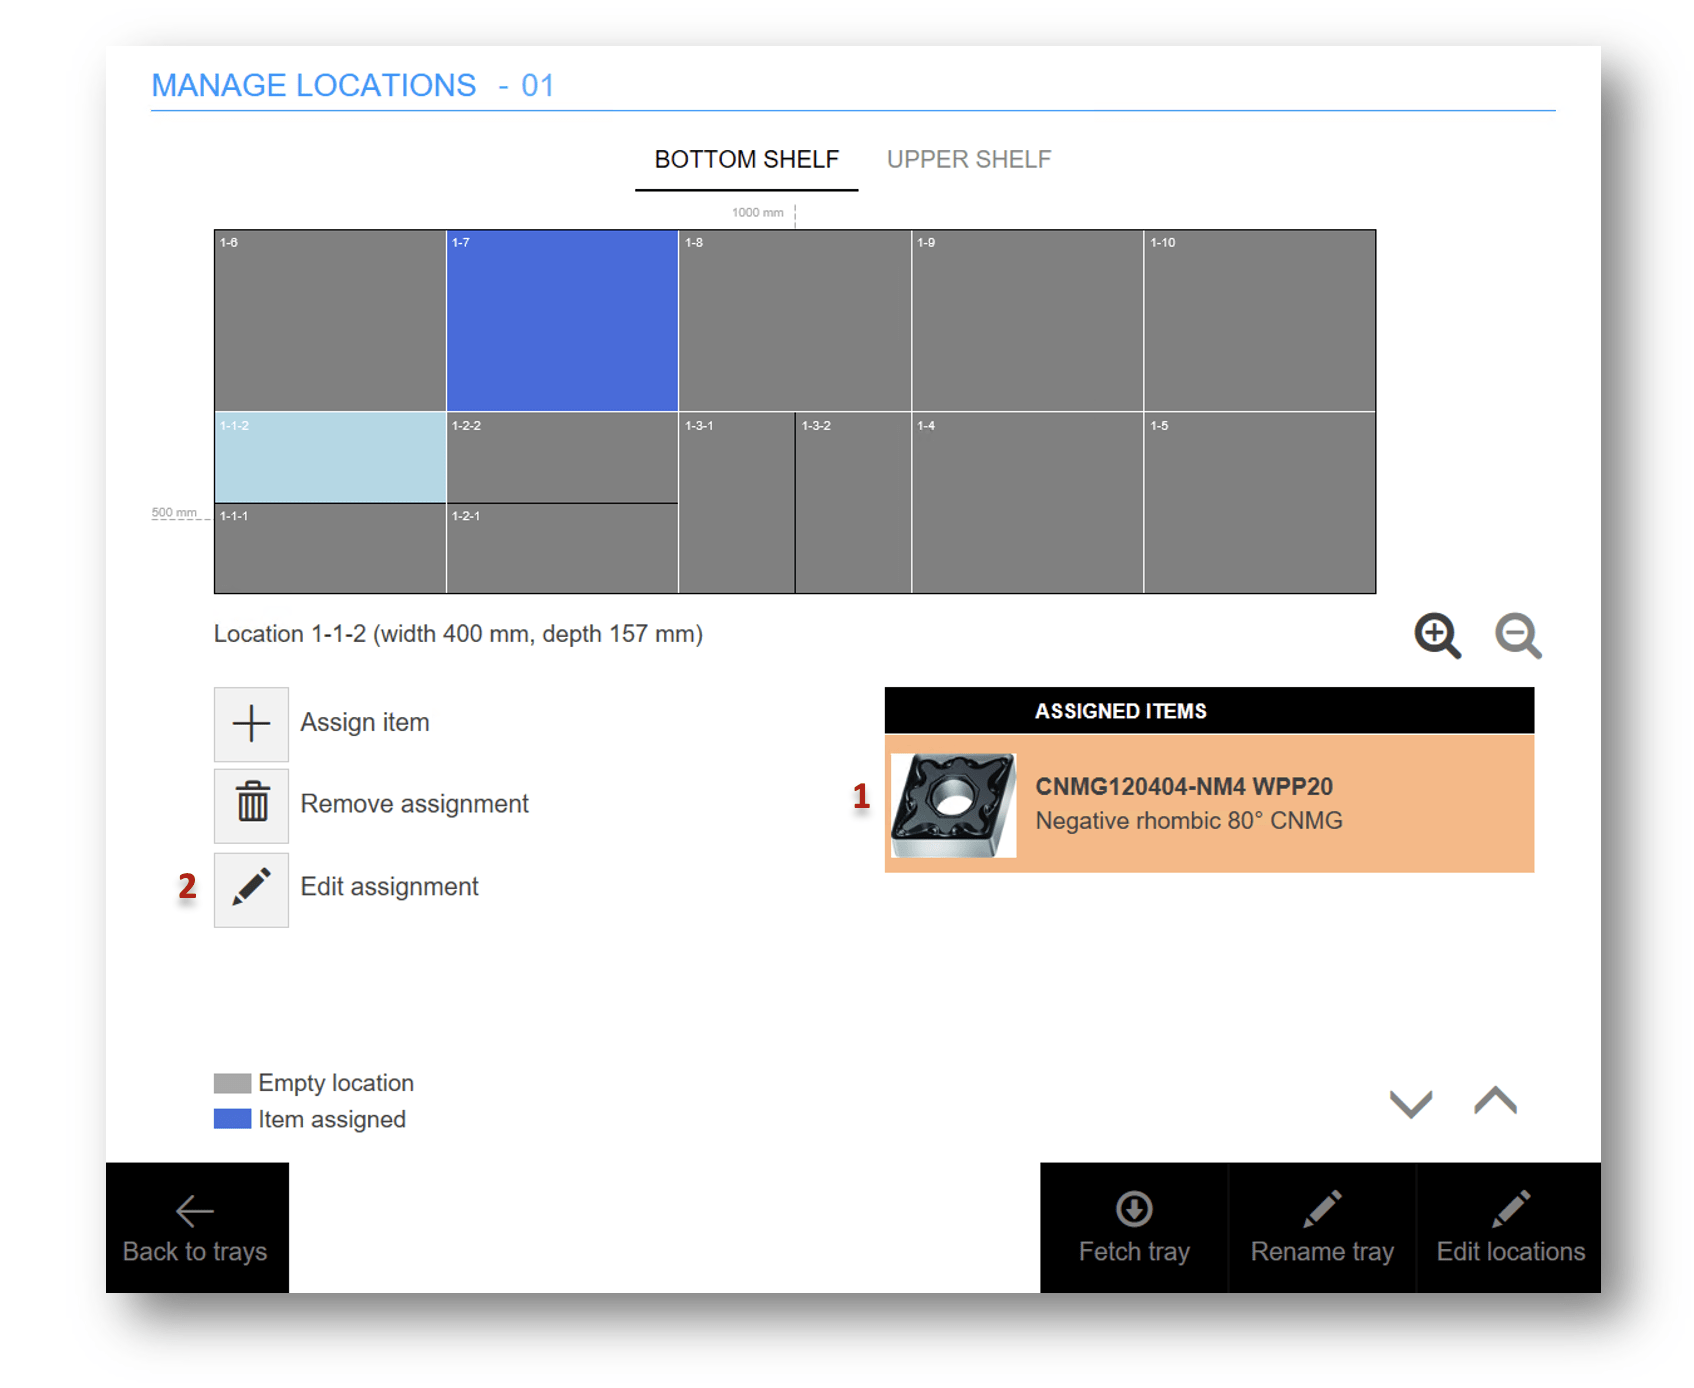
Editing the assignment settings.
Edit locations
Locations in a tray – and in each shelf of a Megamat RS – are created in one of two modes.
| Grid mode | Custom mode | |
| How locations are made | The whole tray is covered by a grid of rows and columns, which can then be split or merged. | Locations are placed freely, each with its own size. |
| Best for | Regular layouts – it is the fastest to create. | Irregular layouts, or boxes placed freely on a tray. |
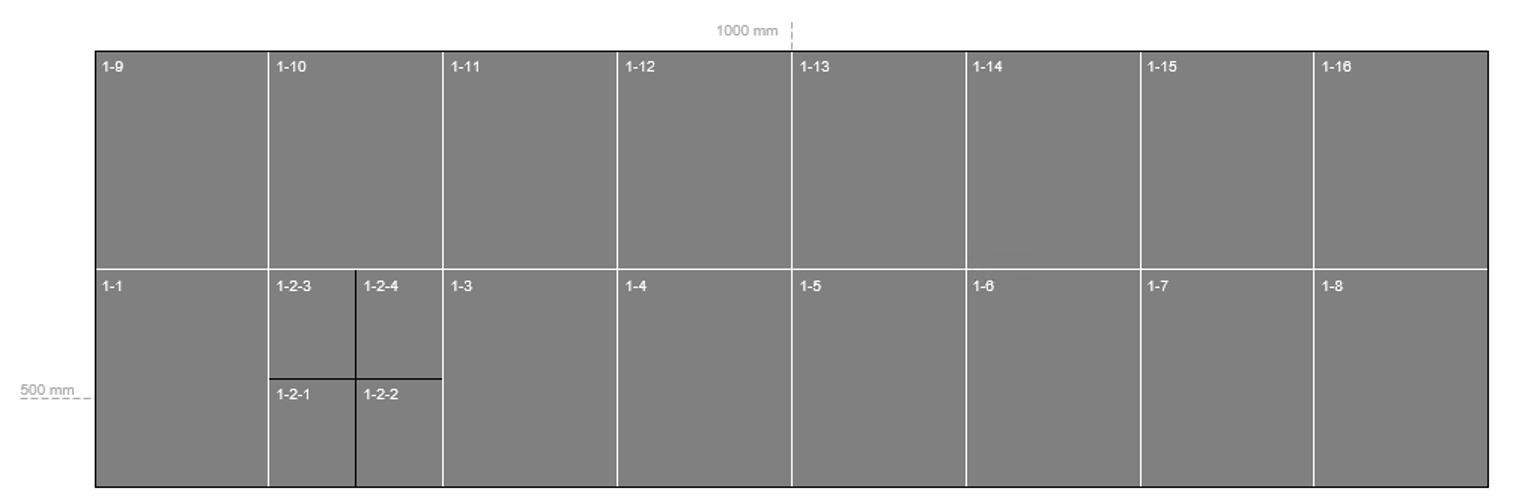
Grid mode.
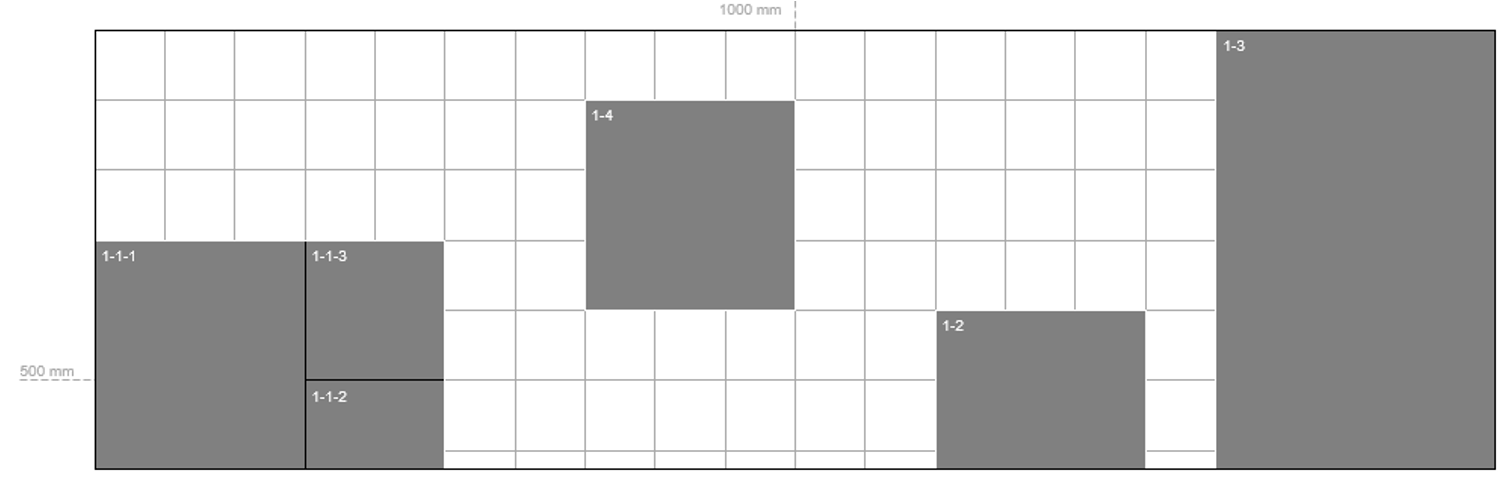
Custom mode.
Important: The two modes cannot be combined. To switch, every location on the tray must be removed first.
Open a tray and select Edit locations (1) to enter edit mode. It opens automatically for a tray that has no locations.
Important: Changes to the layout are applied only when saved – nothing is lost or updated before that.
Warning: Removing a location that has items assigned removes those assignments when the changes are saved. Any physical quantity in it generates a withdraw transaction.
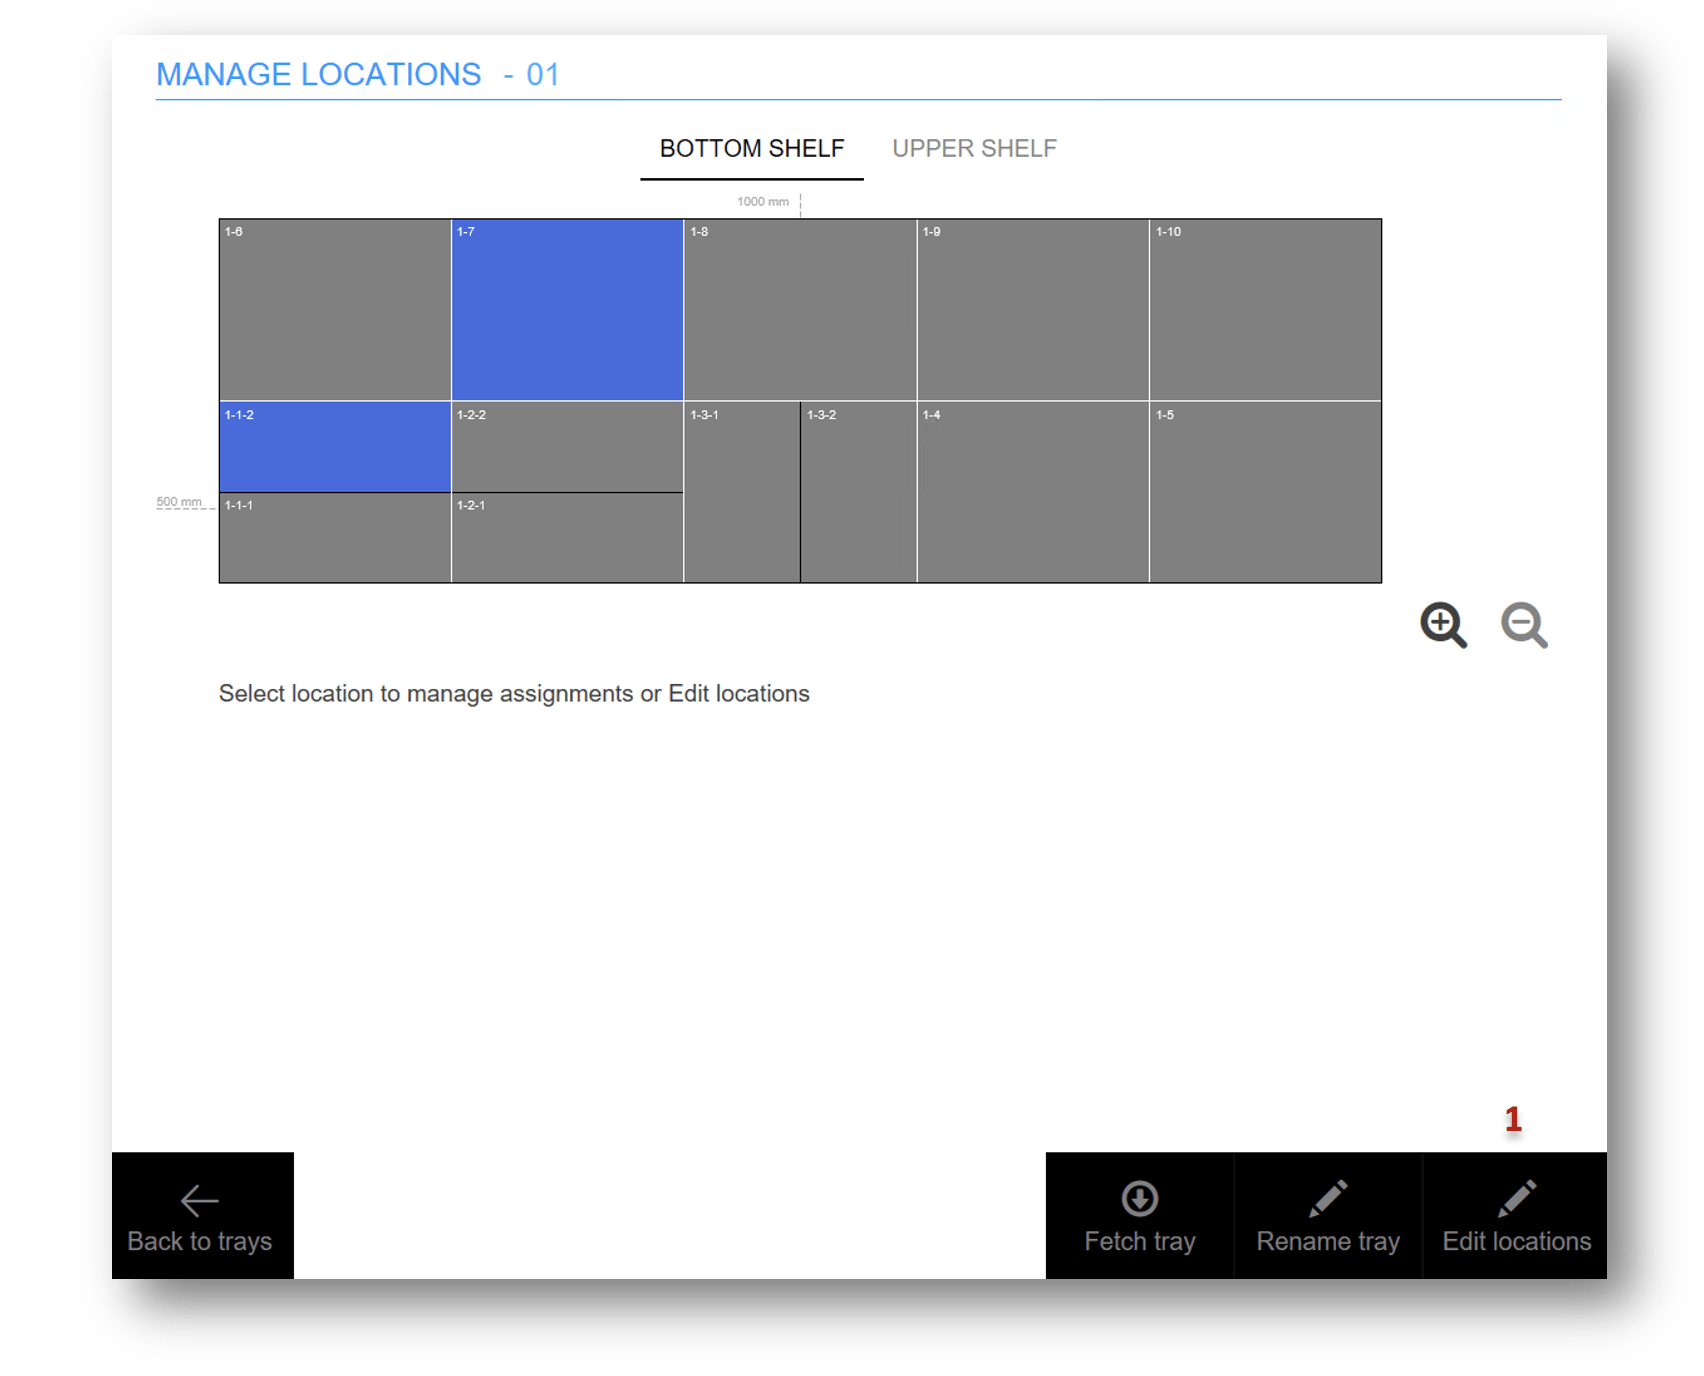
Entering location edit mode.
Grid mode
- On an empty tray, select Create grid of location (1).
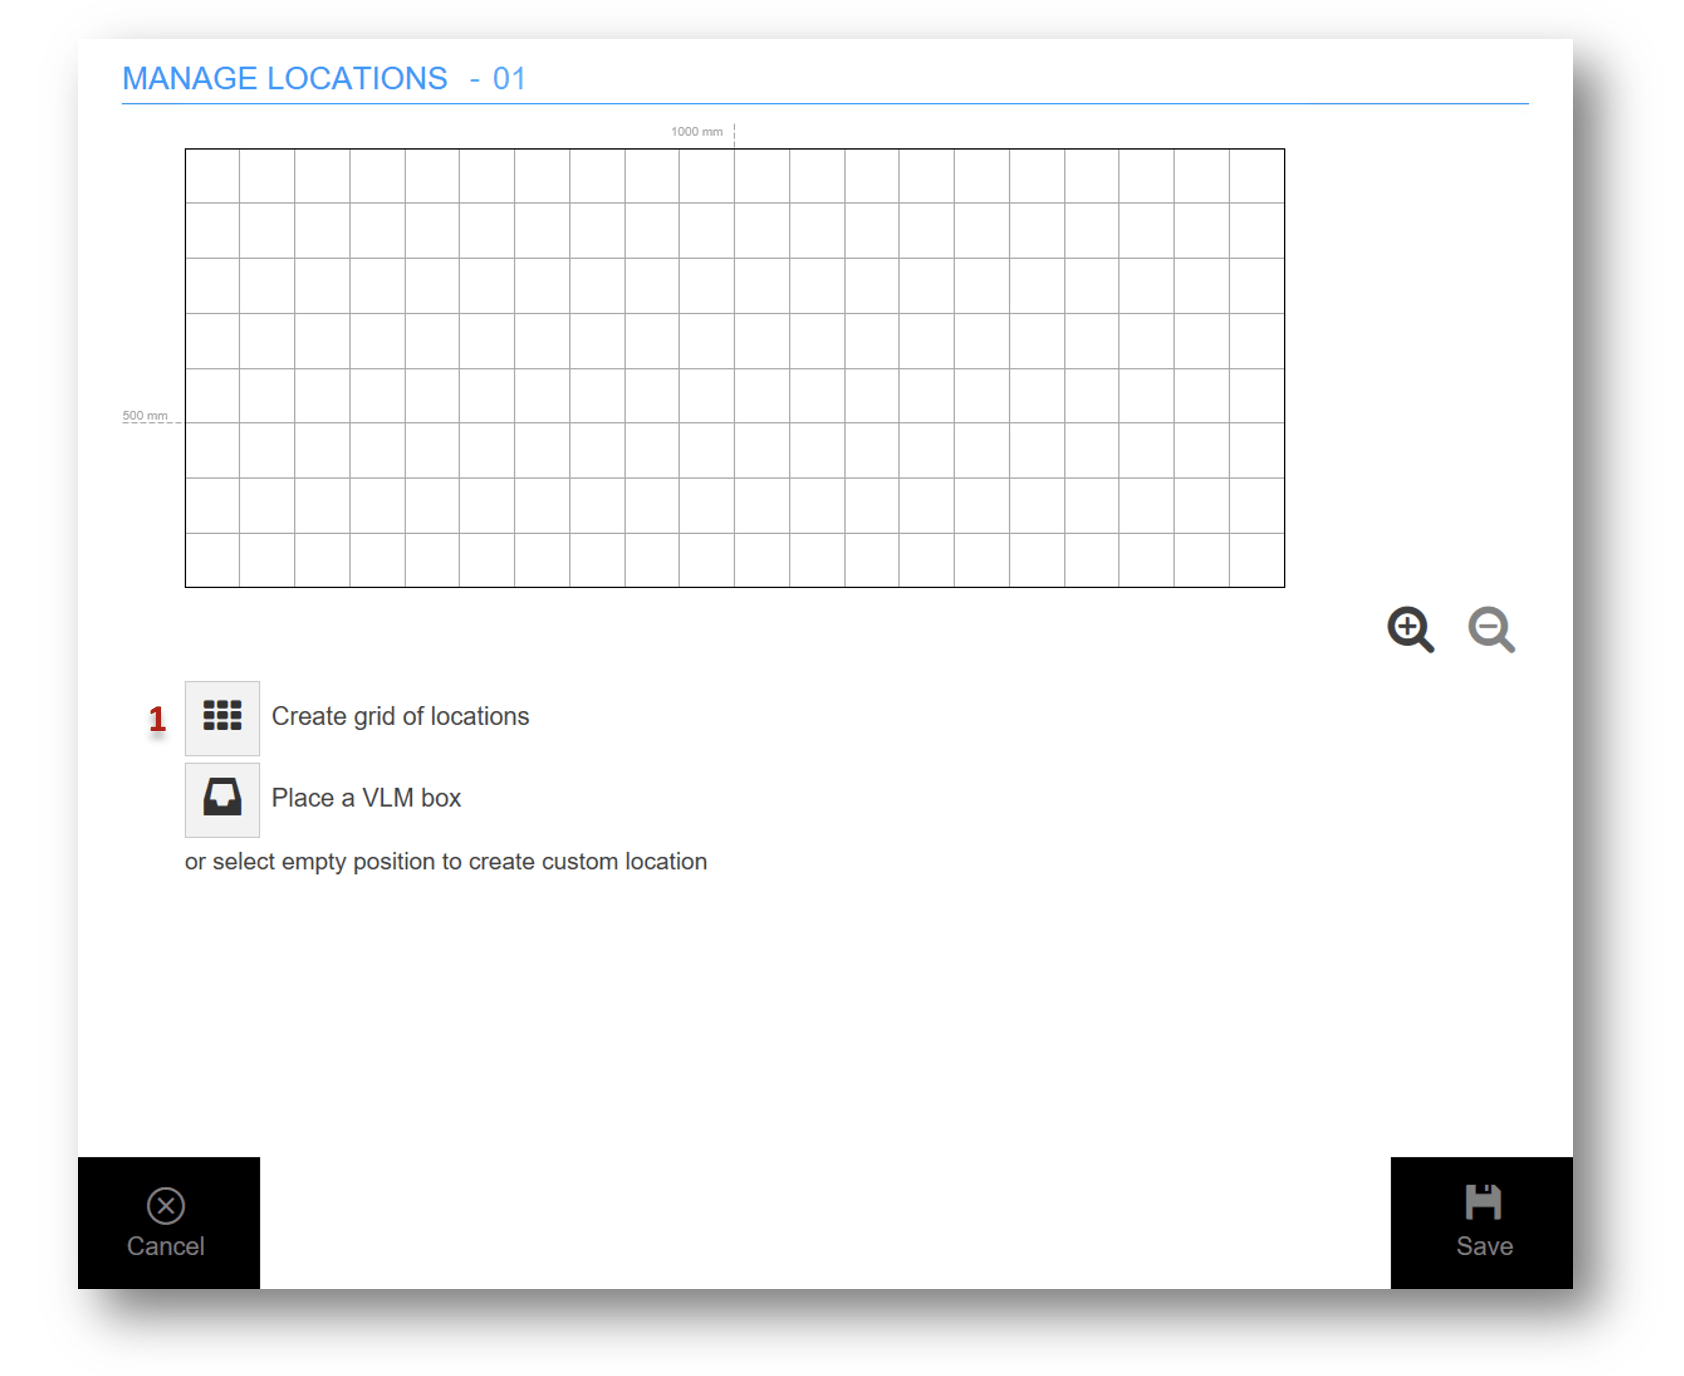
Starting a grid.
- Enter the number of rows and columns, and confirm. The maximum is calculated so the device grid size is not exceeded in width or depth – 50 mm or 25 mm, depending on the storage device settings.
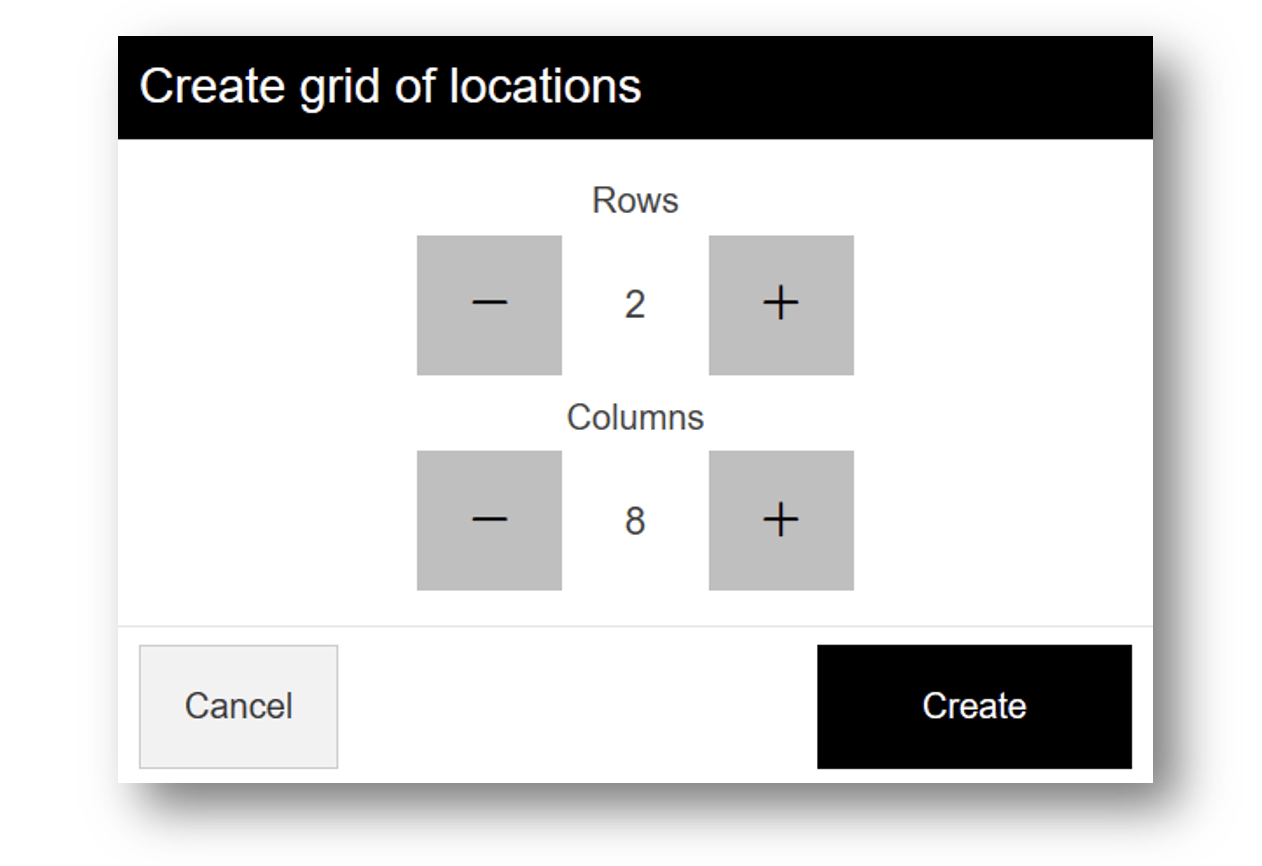
Defining the grid.
- The created locations appear in the tray layout but are not saved yet. Press Save (1) to create them, Clear locations (2) to remove them all from the layout, or Cancel (3) to leave without saving.
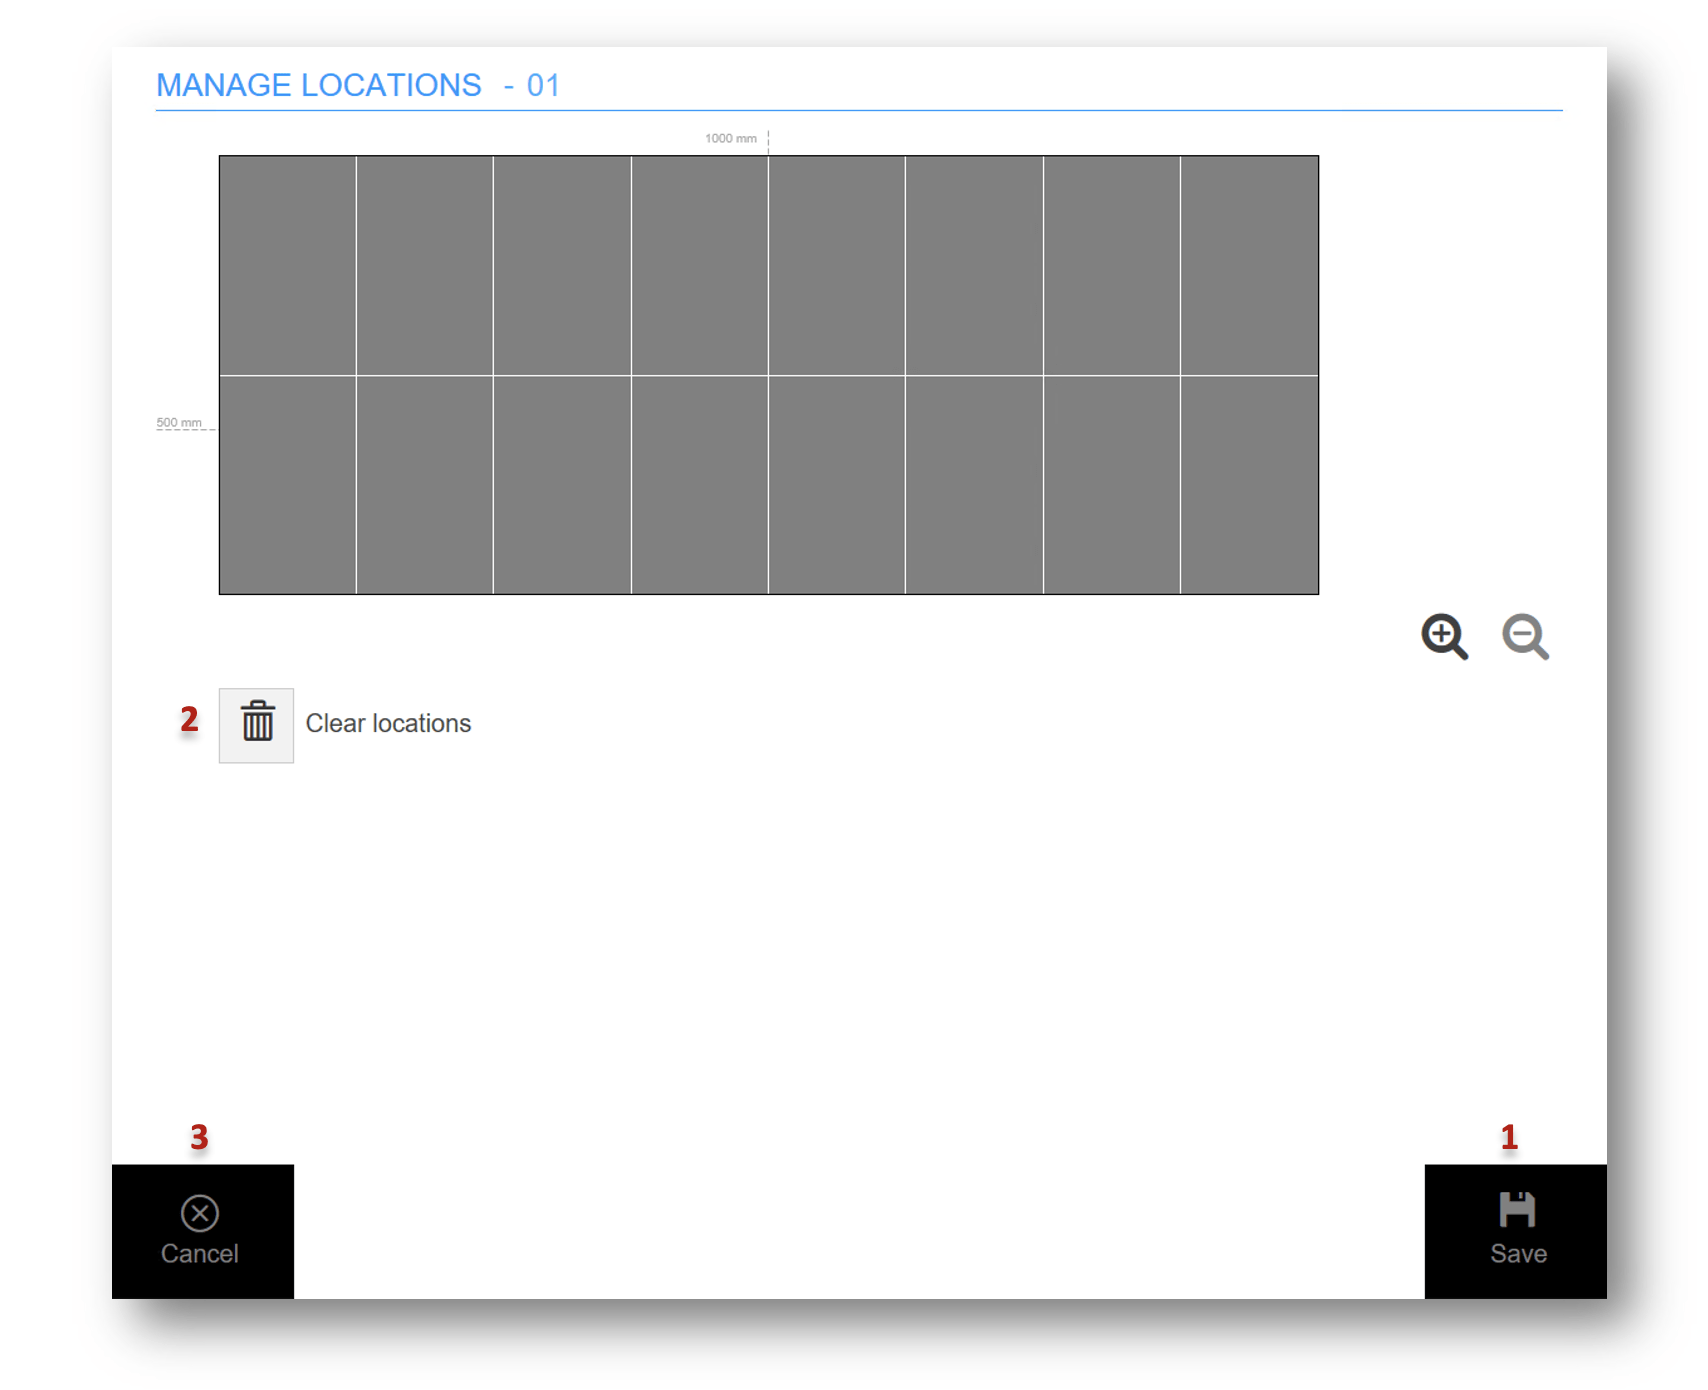
Nothing exists until you save.
To refine the layout, select a location and then:
- Split location – split it further into rows and columns. Splitting with separators gives one location divided visually into smaller ones, for a box with compartments.
- Merge with right location – available when the location to the right has the same depth.
- Merge with down location – available when the location below has the same width.
Note: A base location and a location created with separators cannot be merged.
Custom mode
- Select any empty position on the tray layout (1).
- Use the navigation buttons (2) to move the selection and set its size. The minimum size is the device grid size – 50 mm or 25 mm.
- Confirm the new location (3).
- Press Save (4) to apply, or continue defining locations and save afterwards.
Important: Custom locations cannot be created on a tray that already holds grid-mode locations.
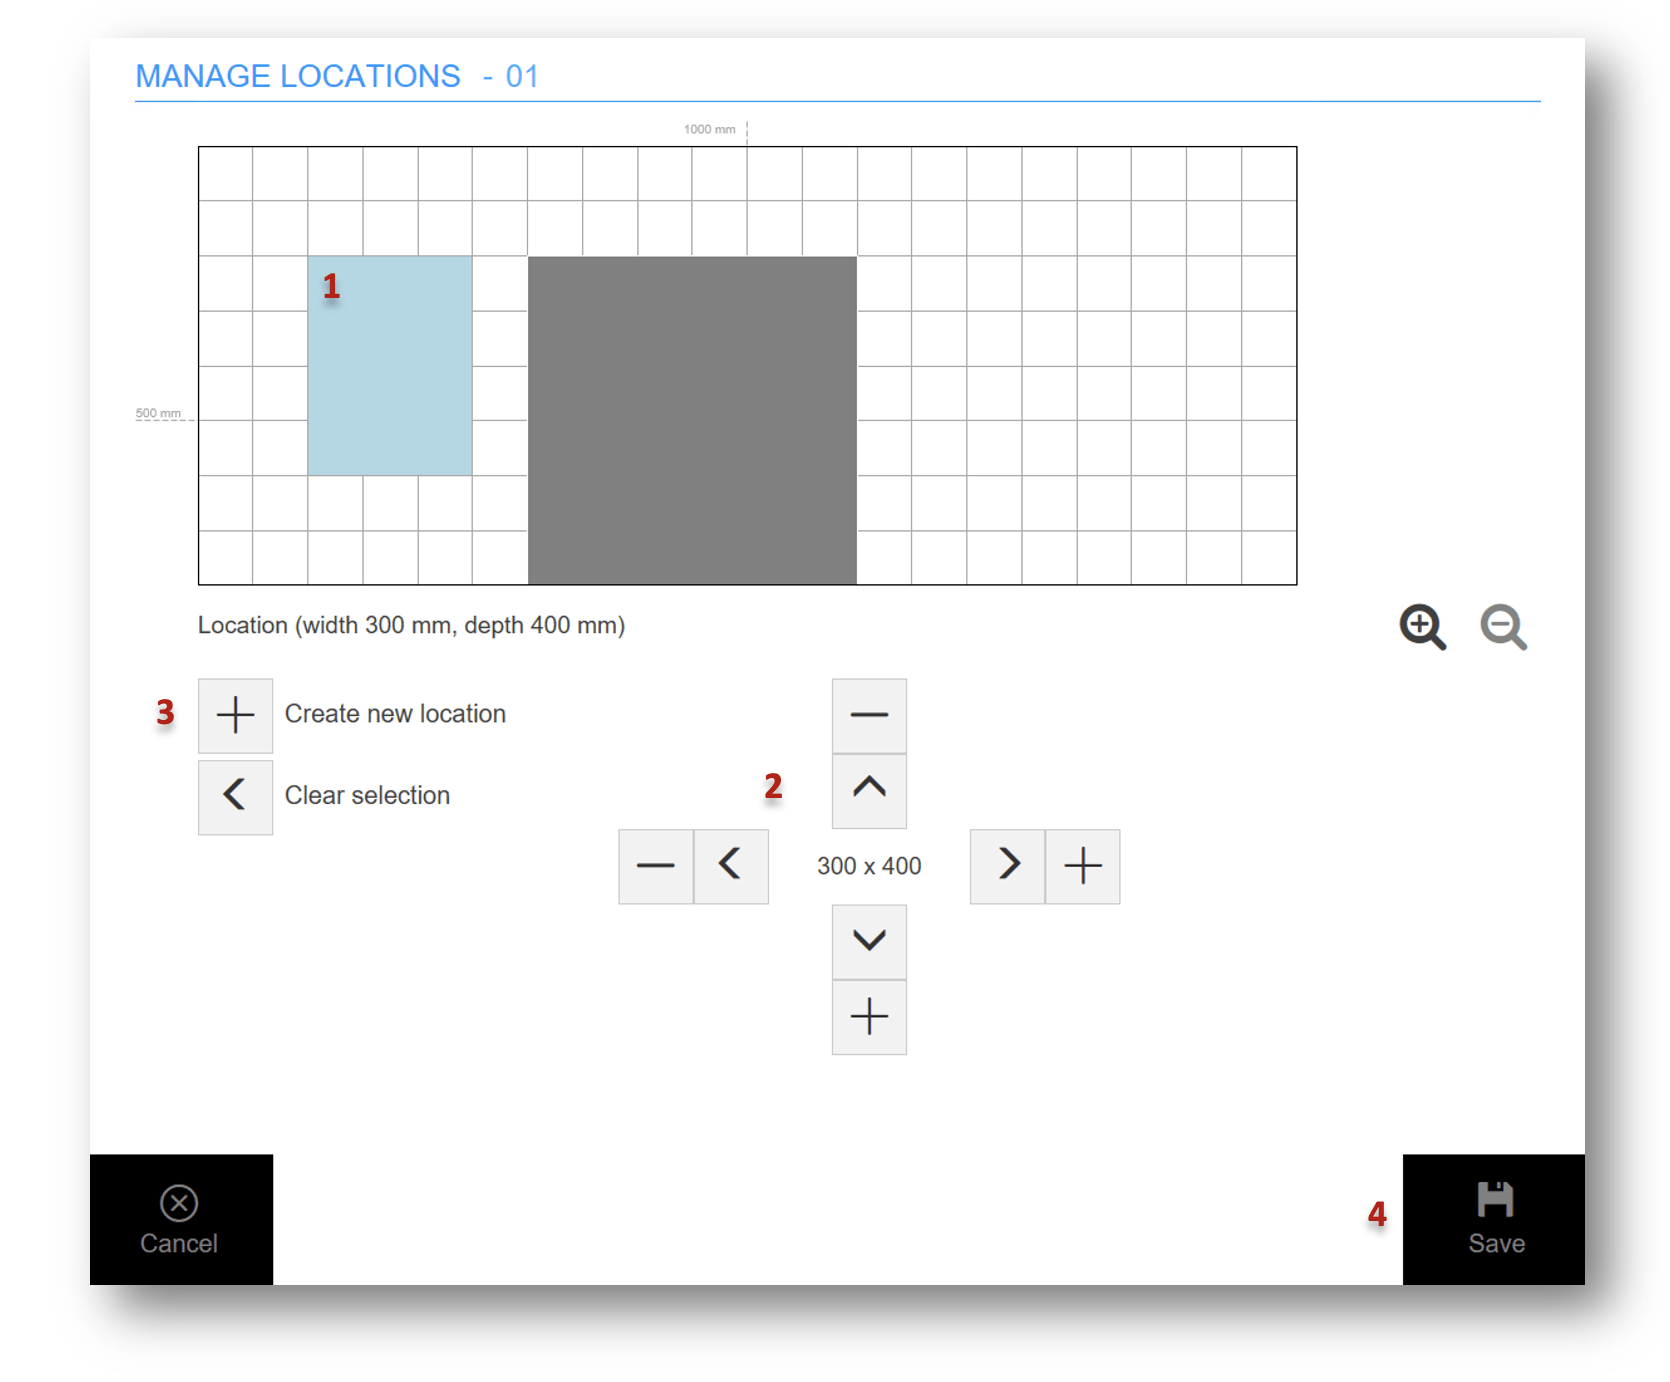
Placing a location freely.
Once a location is placed, select empty space for the next one, or select an existing location to manage its separators (1) or remove it (2).
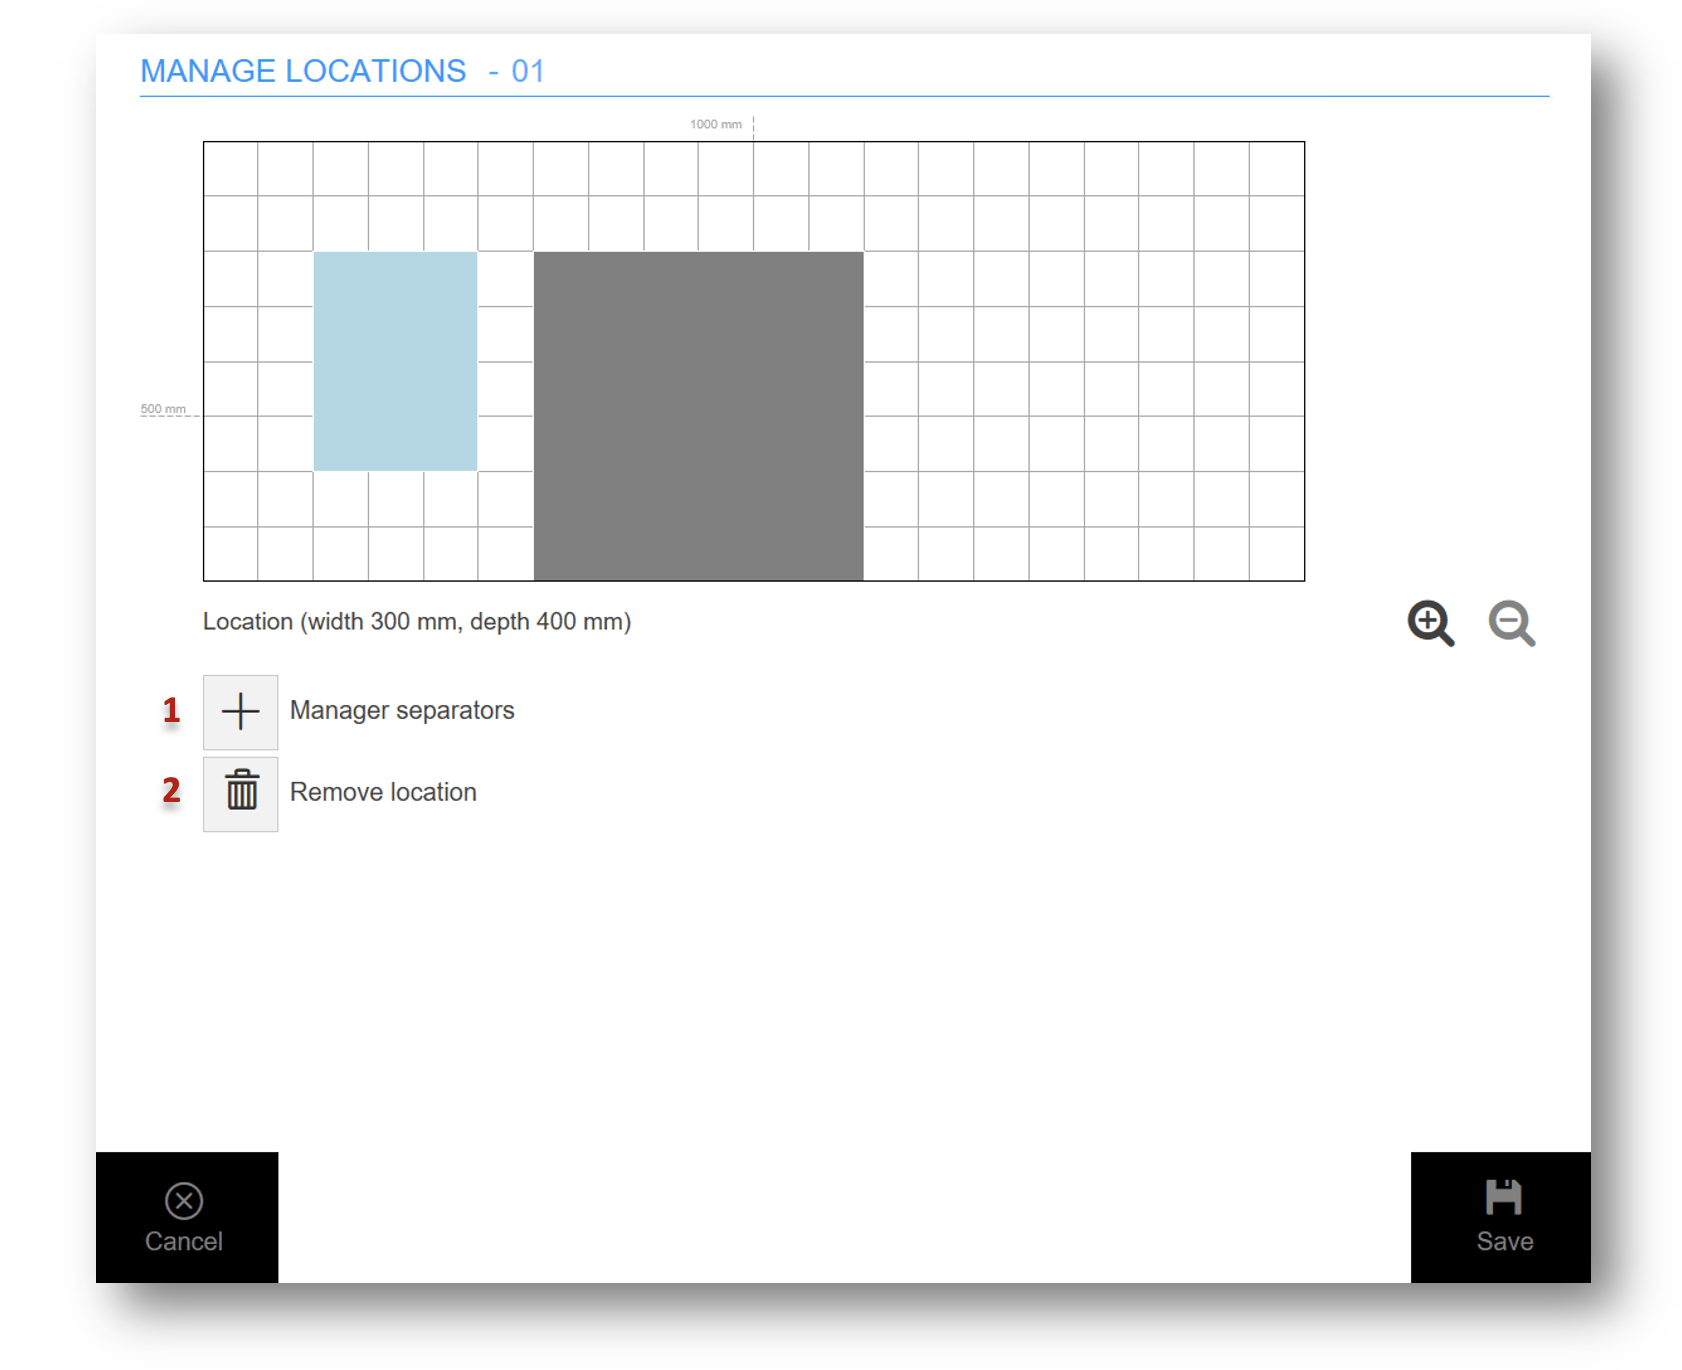
Working with an existing custom location.
Managing separators works like defining a base location, limited to the area of that base location. When finished, return to the tray (1) to continue, or press save (2) to apply everything and go back to assignment management.
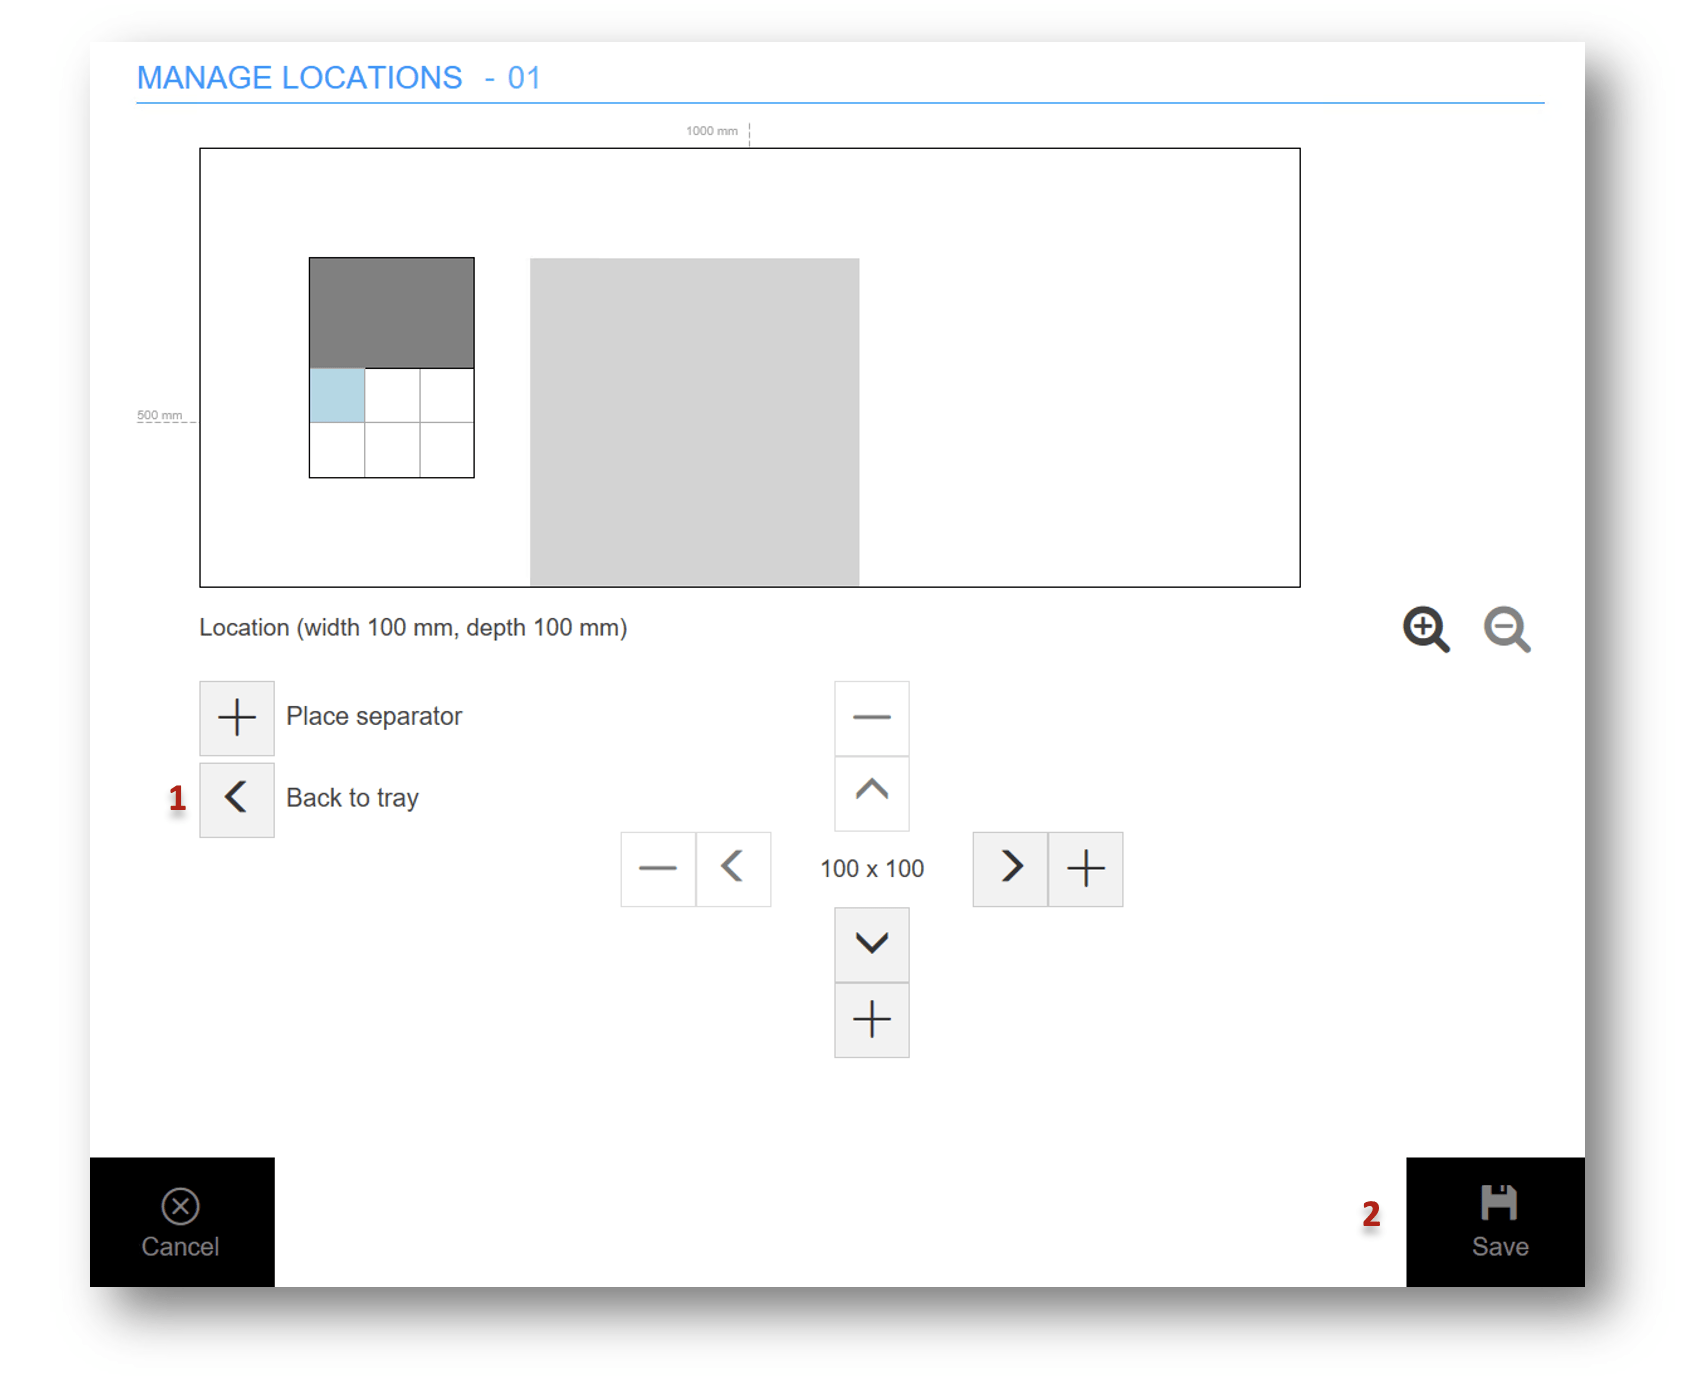
Splitting a box into sub locations.
VLM boxes
KARDEX Shuttle XP only. On an empty tray, or one laid out in custom mode, a VLM box can be placed (1). It creates a location of 800 mm × 600 mm – the box is available as a Kardex Shuttle XP accessory – and its position on the tray is determined automatically. The option is disabled when no VLM box fits.
A placed VLM box behaves like any custom-mode location and can be split into smaller locations with separators.
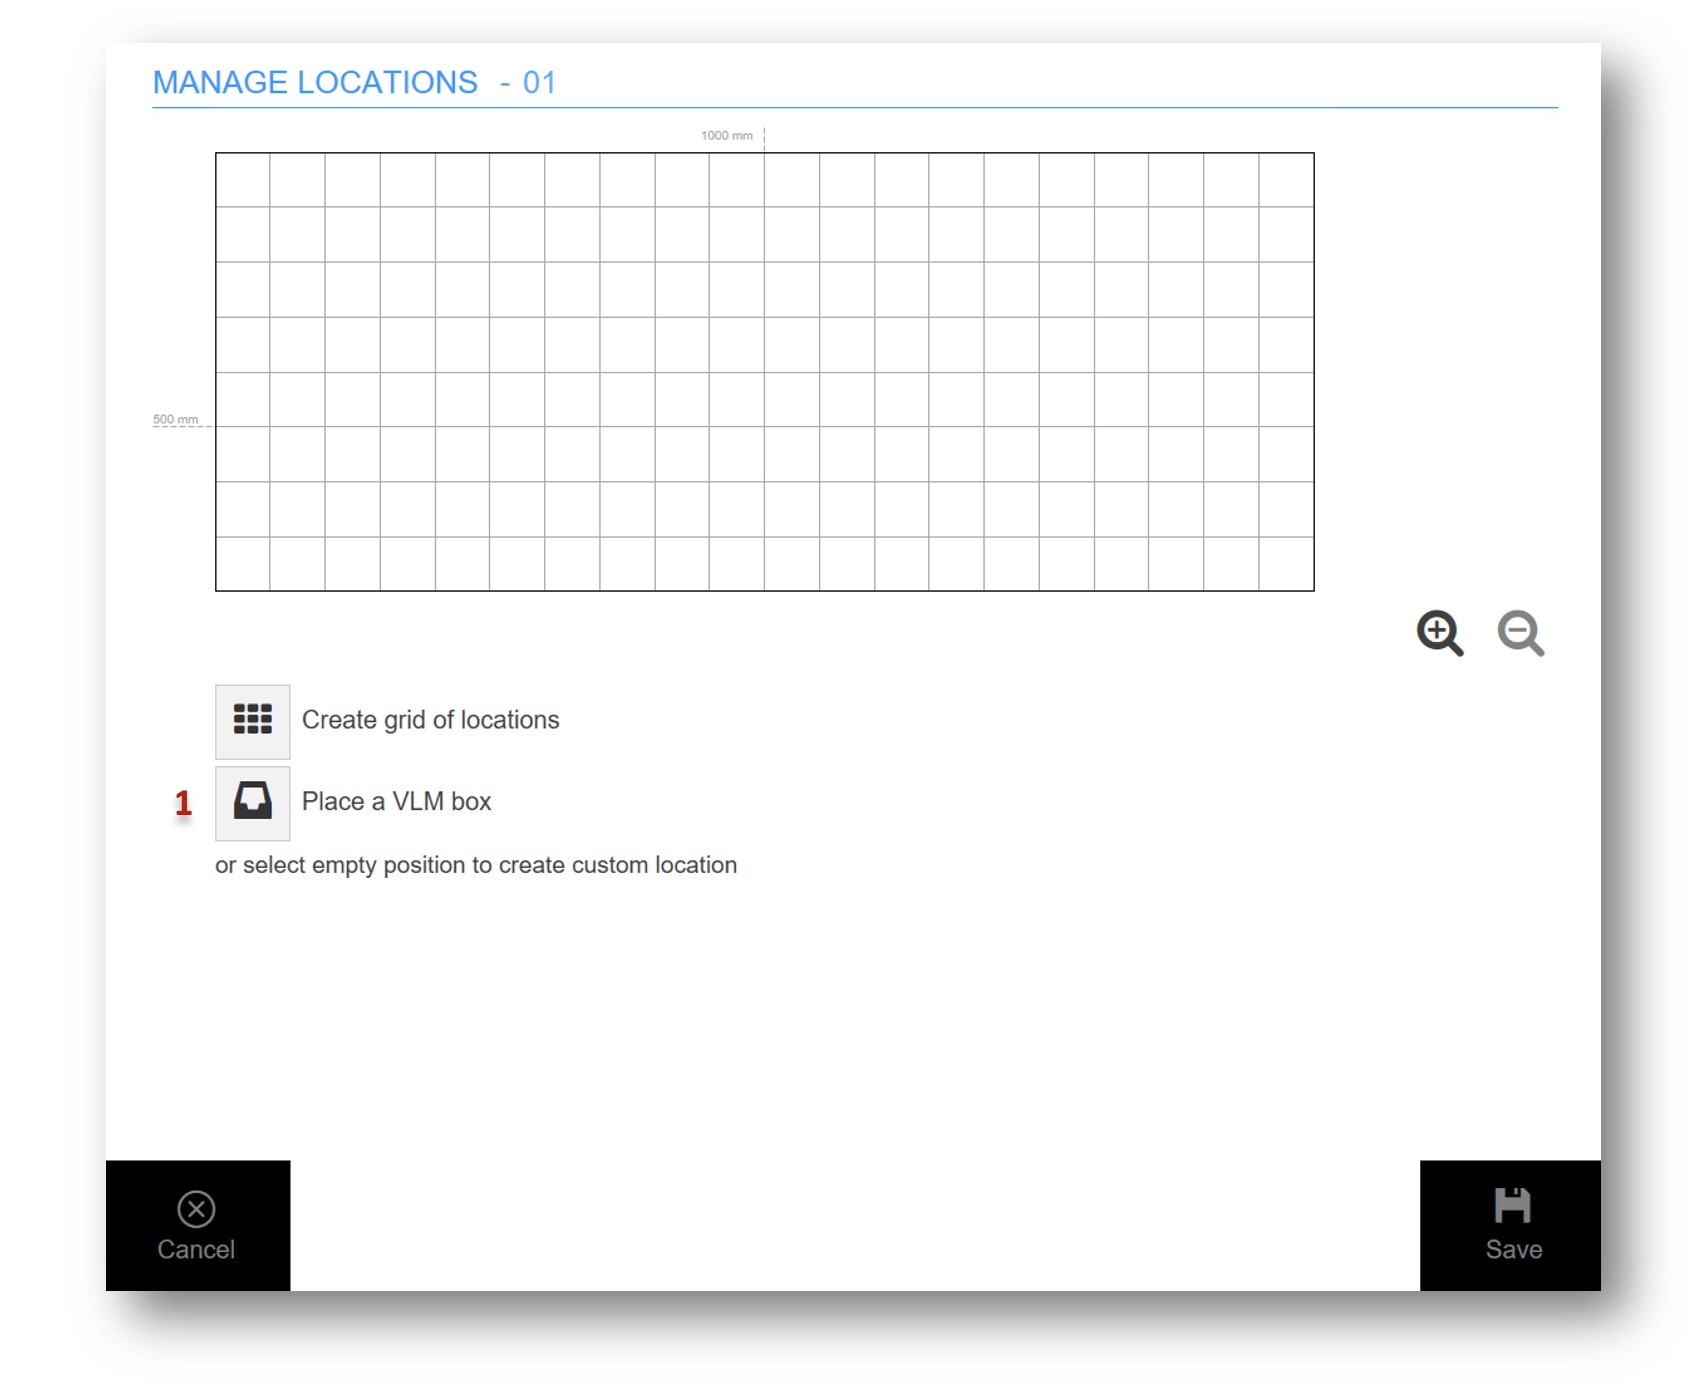
A VLM box on the tray.
Set the type of tray
KARDEX Megamat RS only. The tray type sets how many shelves a tray has. By default every tray has one. To change it to two or three, enter location edit mode and press Set tray layout (1).
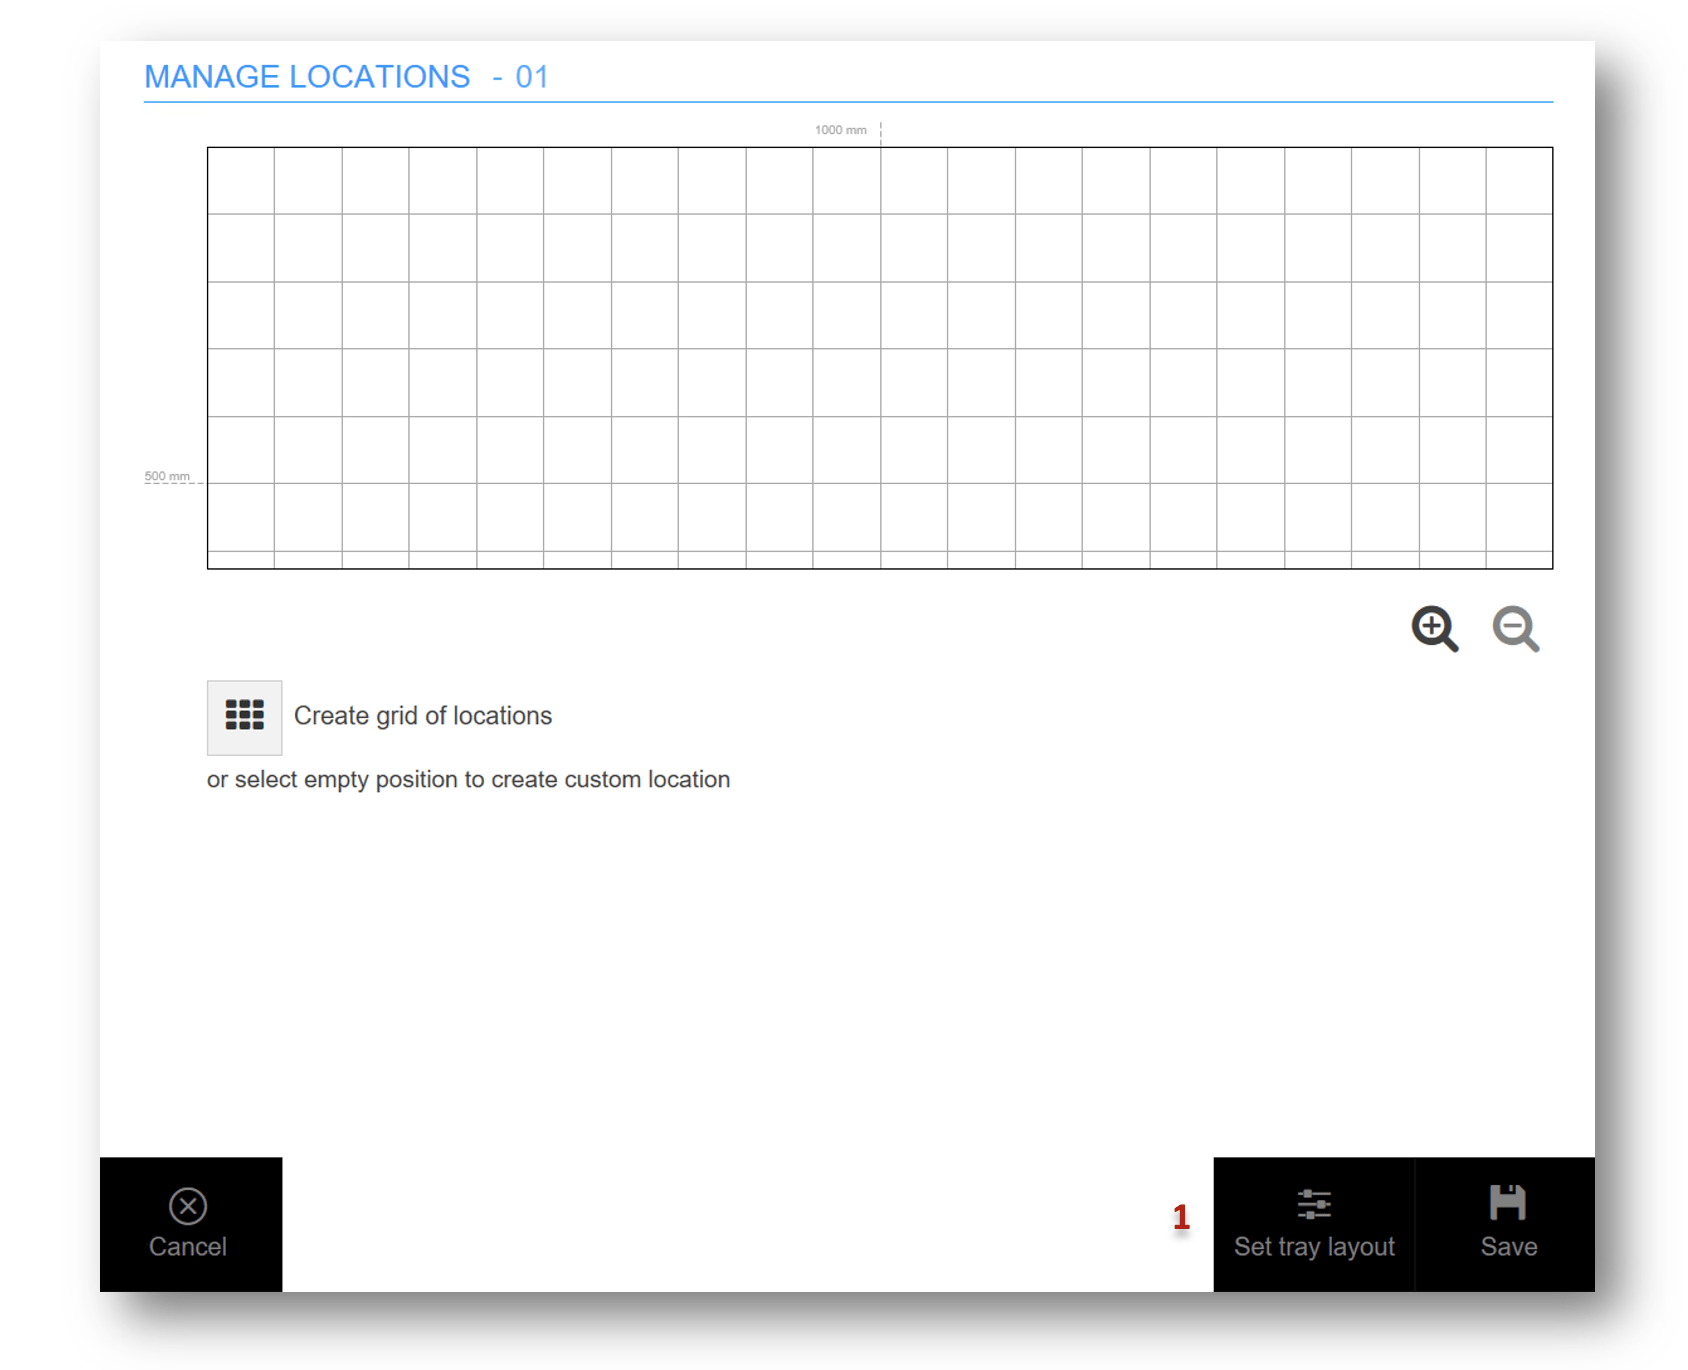
Changing the number of shelves.
Select the layout (1) and confirm (2).
Warning: Changing the layout removes every location and assignment on the tray. Unlike other layout changes, this one is applied immediately and cannot be undone.
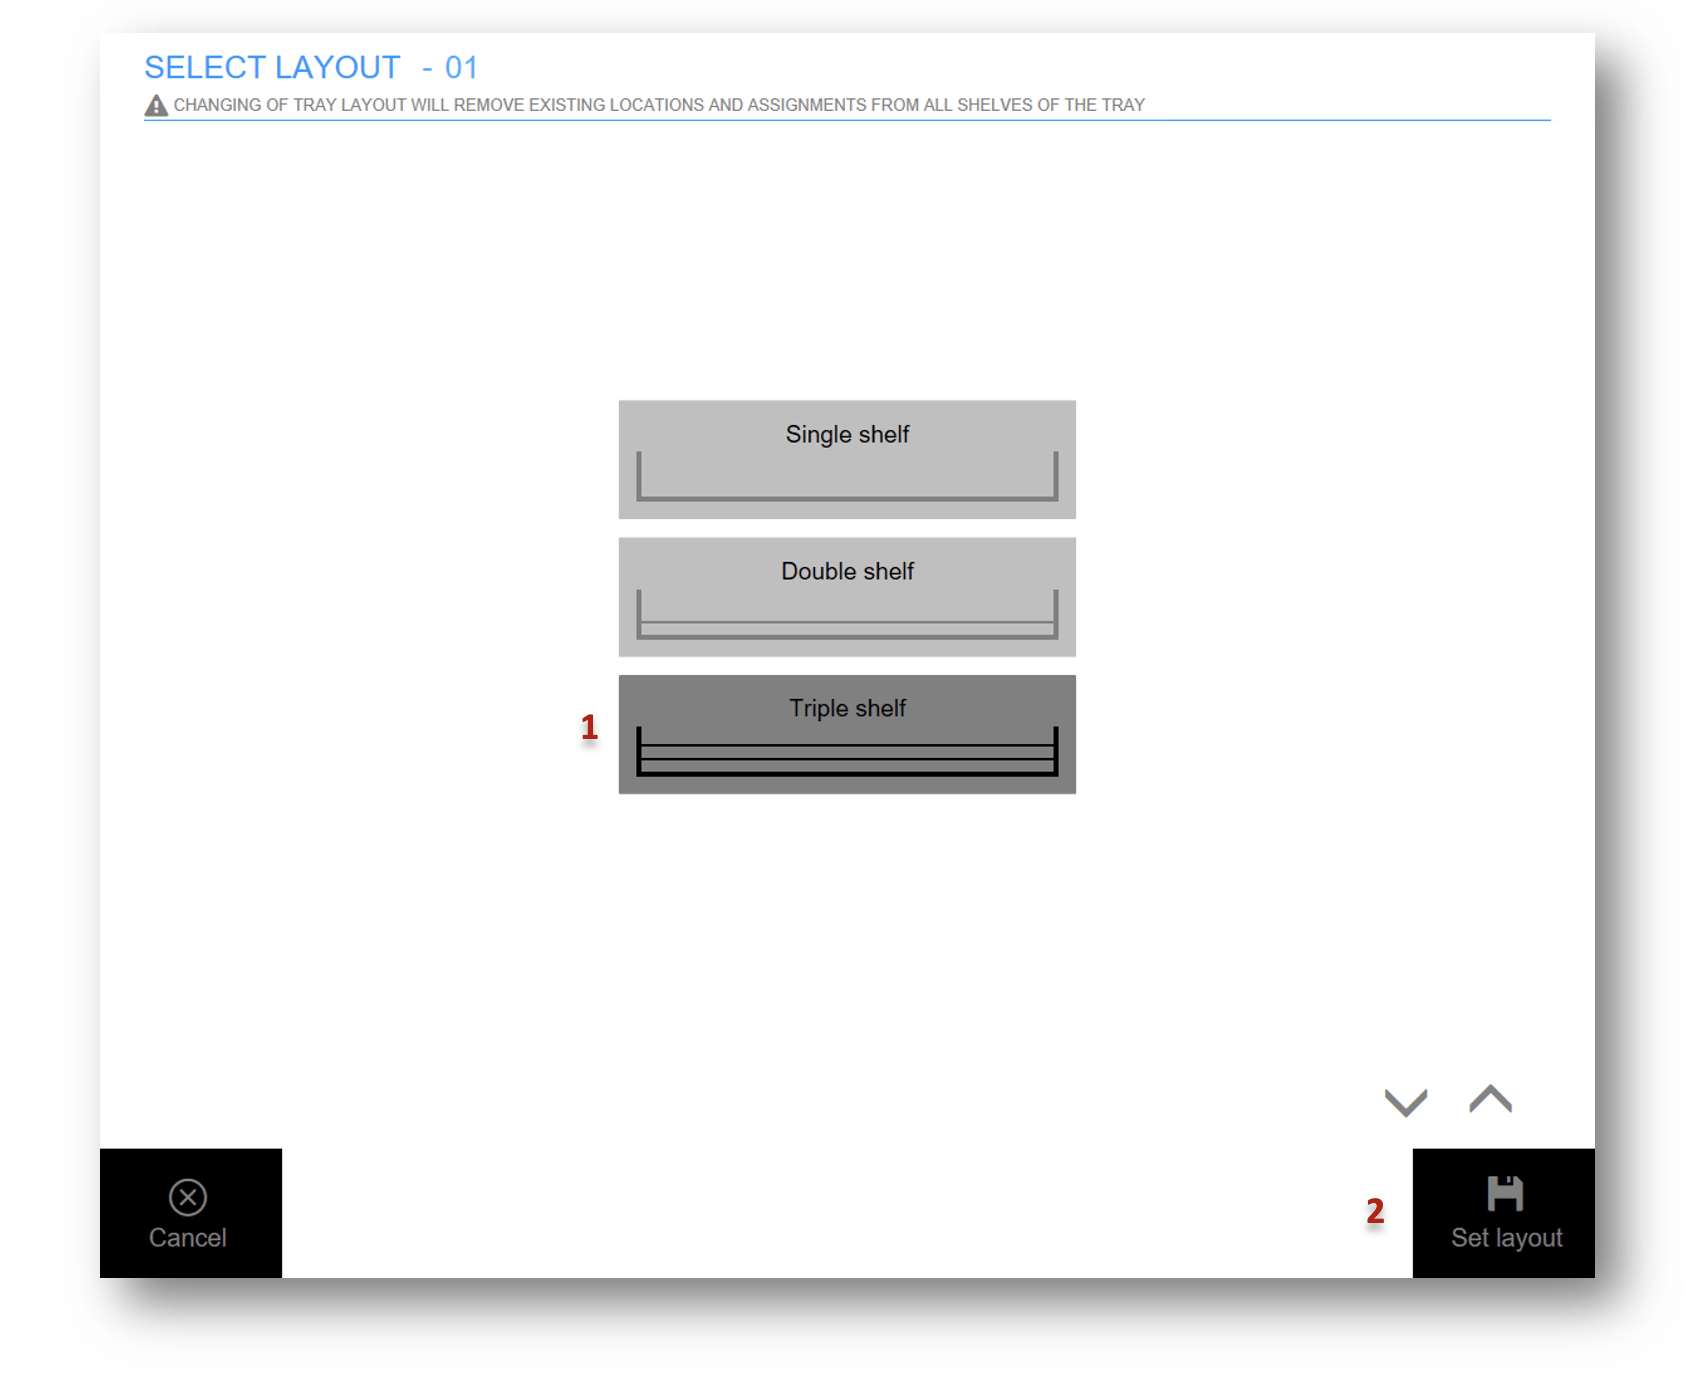
Confirming the new tray layout.
With more than one shelf, a shelf selection (1) appears in both assignment management and location edit mode.
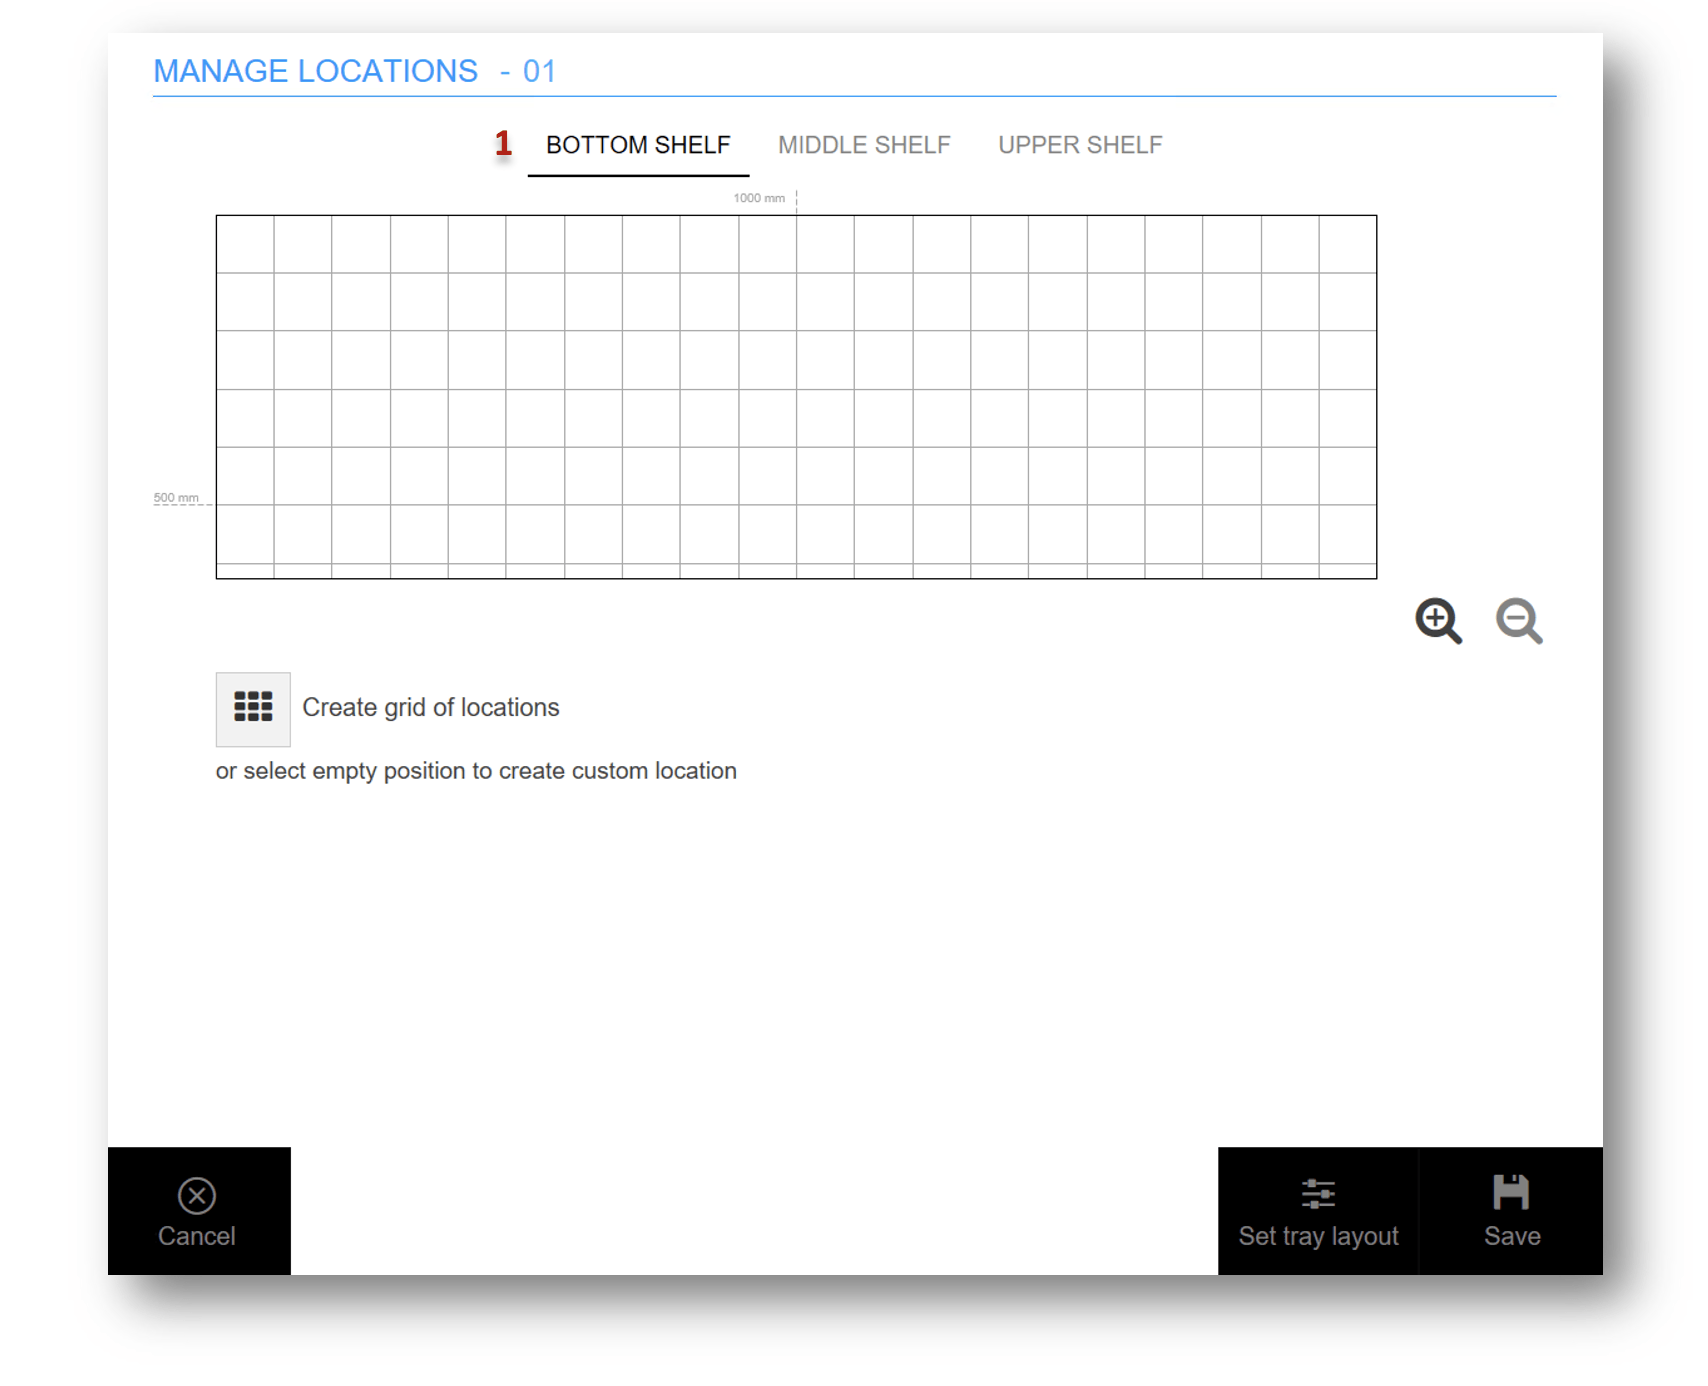
Switching between shelves.
Troubleshooting
| Problem | Likely cause | Fix |
| The option to manage lift locations is missing. | No lift machine exists, or the user lacks the Setup locations privilege. | Grant the privilege, or use a user that has it. |
| Confirming on the machine control panel does nothing. | The operation needs input on the SFI, such as a serial number. | Follow the instruction shown on the SFI. |
| A custom location cannot be created. | The tray already holds grid-mode locations. | Remove every location on the tray, then use custom mode. |
| Two locations cannot be merged. | They differ in depth or width, or one was created with separators. | Merge only equal-sized neighbours, and not across separators. |
| A tray lost all its locations. | The tray layout was changed on a Megamat RS. | Expected – that change is immediate and irreversible. Rebuild the locations. |
Related articles
- Kardex Shuttle and Megamat – storage device setup – prerequisites for Kardex units.
- Modula Lift and Slim – storage device setup – prerequisites for Modula units.
- Hänel Lean-Lift, Multi-Space – storage device setup – prerequisites and operation modes for Hänel units.
- Weland Compact Store – device controller setup – prerequisites for Weland units.
- How to configure storage devices – the grid size and tray settings behind these layouts.