
Import data lets you add, update, or remove records in bulk by uploading a filled-in Excel template. Use it to load vendors, items, stock structure, cost allocation, users, and many other entities in one operation instead of editing them one by one. Only templates generated by the export function can be imported — if the column structure is changed or the file is created manually, the import cannot be performed.
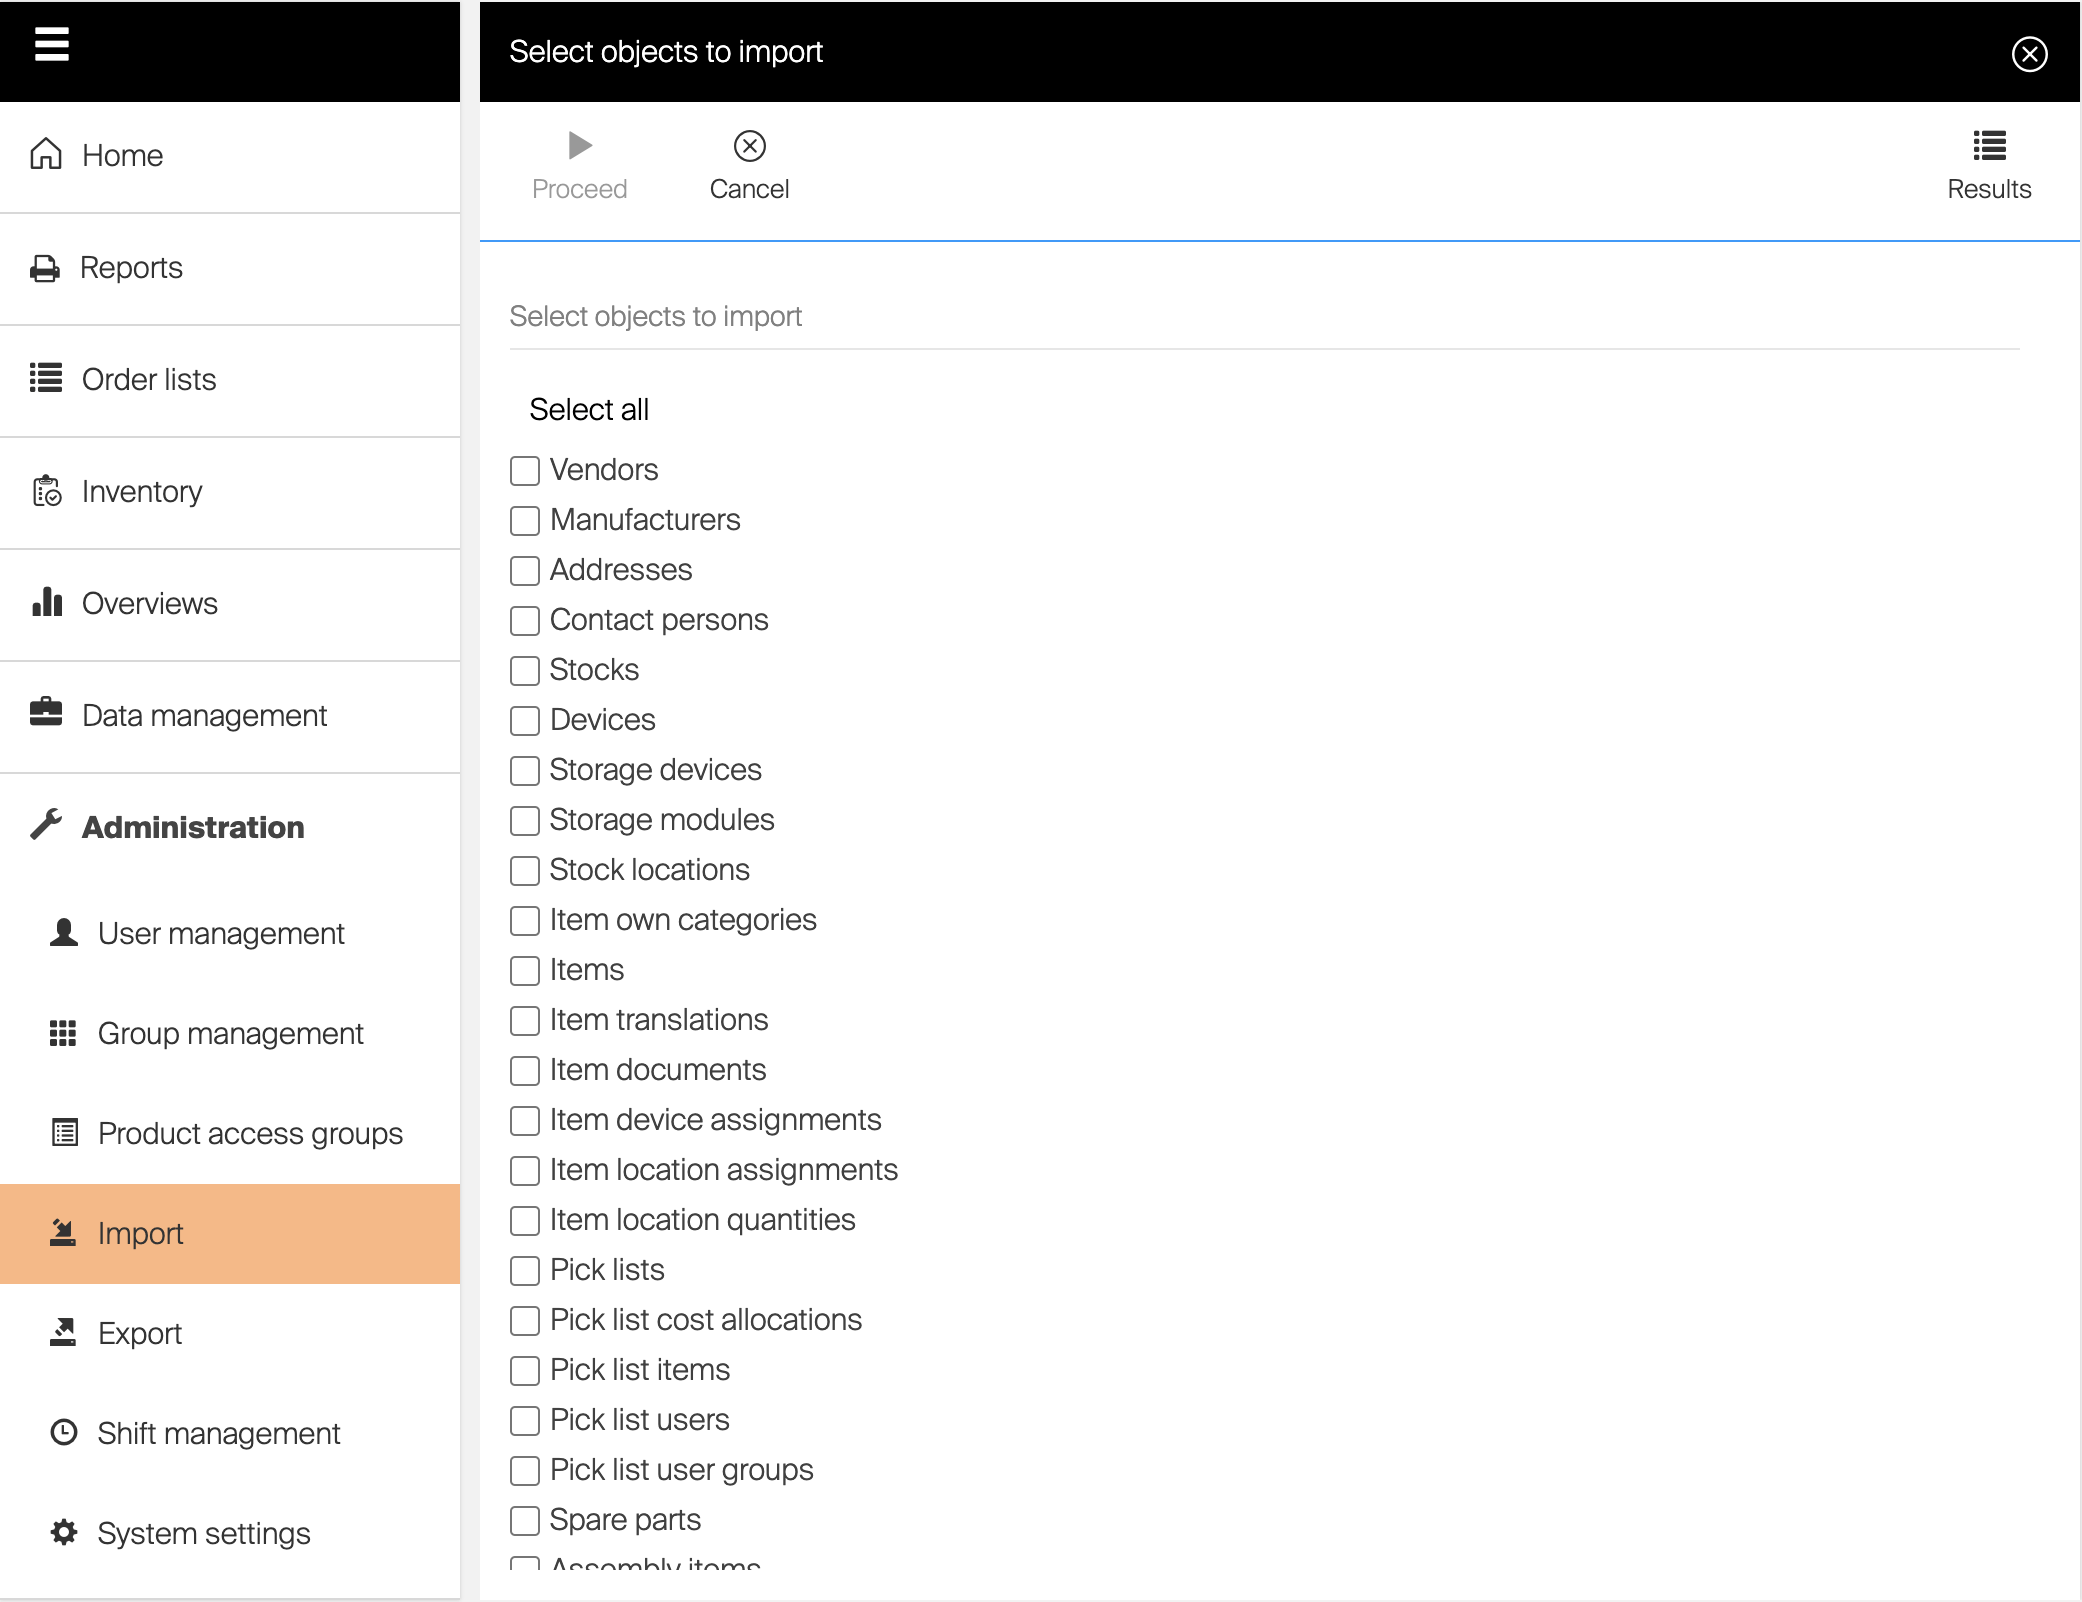
The Import data screen in the Admin Portal.
Before you start
- You need access to the Administration menu in the Admin Portal.
- Generate the import template first by running an export for the same entities. Only export-generated templates can be imported. Note that all columns need to be exported and imported.
- Decide whether you are adding, updating, or deleting records, and have the filled-in Excel file ready.
Each record is identified by its ID in the first column. How you fill that row decides what the import does:
| Goal | How to fill the row |
|---|---|
| Create a new record | Leave the ID empty — it is filled in automatically during import. |
| Update an existing record | Keep the ID unchanged. |
| Delete a record | Set the Is deleted column to TRUE. |
Note: Hierarchies (item own categories, cost allocation hierarchies and restrictions) have no ID column — records are matched on their business information instead. See Import hierarchy relations.
Quick start
Experienced users import in 5 steps:
- Open Administration > Import.
- Select the objects (entities) to import.
- Upload the filled-in Excel template (and a ZIP of images or documents if needed).
- Preview the summary of new, updated, and deleted records.
- Proceed to apply the changes, then open View detail to review the result.
Need more detail? Follow the full steps below.
Steps
Step 1 – Open the import wizard
- In the Admin Portal, open the Administration menu.
- Select Import.
The Select objects to import screen opens.
Step 2 – Select the objects to import
- Tick each entity you want to import (for example Items, Vendors, or Stock locations), or click Select all.
- Click Proceed.
Any entity that exists in the file but is left unticked here is omitted during import.
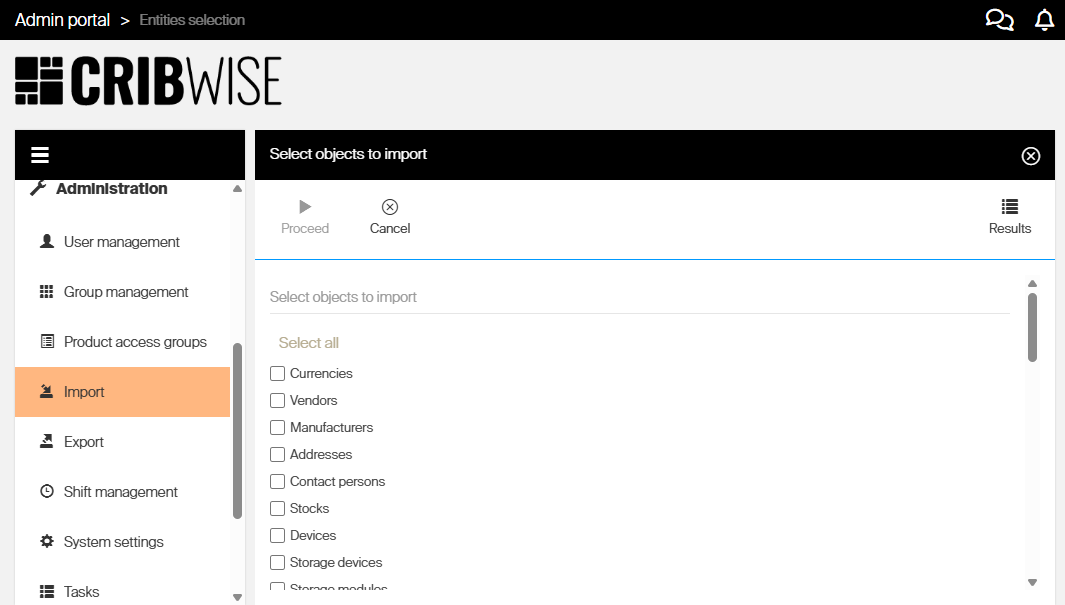
The Select objects to import screen. Tick the entities to load, or use Select all, then click Proceed.
Step 3 – Upload the import file
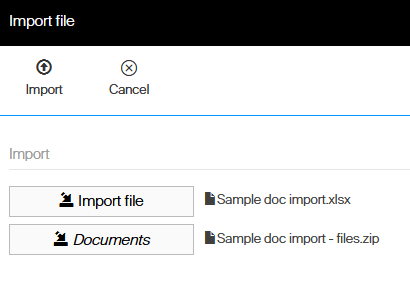
- Click Import file and choose your filled-in Excel template. Basic file information is shown — confirm it to load the file.
- If you selected entities that contain images or documents (item internal documents, cost allocation thumbnails, or the customer logo), also select the ZIP archive that holds those files. Each file is matched to the template by its file name.
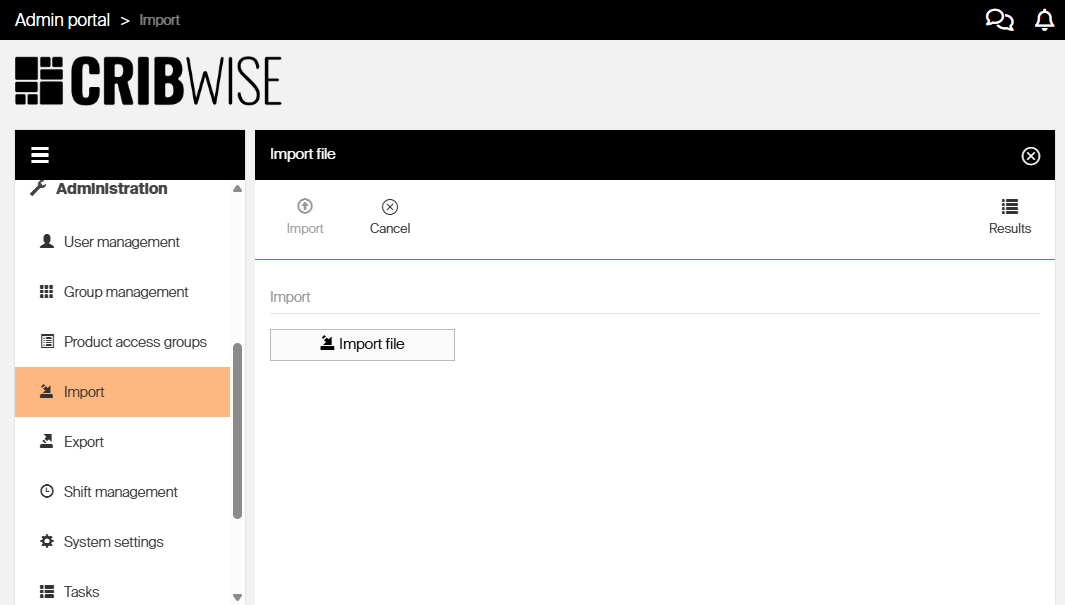
The Import file step. Click Import file to upload the Excel template (and a ZIP archive when importing images or documents).
Step 4 – Preview the import
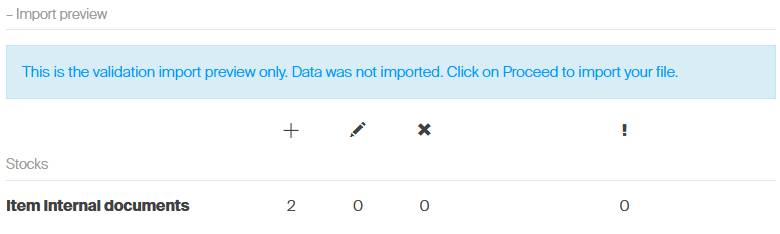
The system loads the file and shows a summary with the total count of records in each state:
| Count | Which rows it covers |
|---|---|
| Created | Rows with an empty ID |
| Updated | Rows with an existing ID |
| Deleted | Rows where Is deleted is set to TRUE |
Important: The preview only checks syntax — data types, missing mandatory values, and updates to non-existing records. It does not run full business validation (such as references between items, or field content that depends on another field). If problems are found, the number of invalid rows is shown; download those rows as an Excel file with each problem marked in the related cell, fix them, and upload the file again.
Step 5 – Proceed and review the result
- If the summary looks correct, click Proceed to update the database.
- Wait for the import to finish. Depending on data volume and server load this can take a few minutes; an information toast appears when it is done.
- Click View detail to open the import summary, showing totals for new, updated, removed, and erroneous records.
Success: The import detail shows your records as created, updated, or removed with no errors. Any invalid rows can be downloaded, fixed, and re-imported. The original file is stored with each finished import and can be downloaded from the import results screen or the import detail.
Tip: Open Results at any time to see past imports. The import result list automatically clears records older than six months.
How records reference each other
When a record on one sheet refers to a record on another (for example a device’s relation to a stock), the reference uses the target’s unique business information (such as the stock name), not its ID. In some cases more than one reference is needed to be unique — assigning an item to a location, for example, needs the device, storage device, storage module (if any), and location name.
This table shows how each sheet connects to others:
| Sheet | References | Referenced by |
|---|---|---|
| Currency | — | |
| OrderTemplate | — | |
| Vendor | Manufacturer; OrderTemplate; OrderTemplate (cons.); Currency / System settings | Manufacturer name; Order template name; Order template name; Currency name (vendor-specific or system default) |
| Manufacturer | — | |
| Address | Vendor | Vendor name |
| ContactPerson | Vendor | Vendor name |
| Stock | Stock | Stock name |
| Device | Stock; User (Device admin); User (Contact person) | Stock name; Login; Login |
| Storage device | Device | Device name |
| Storage module | Storage device | Device name + Storage device name |
| Stock location | Storage device; Storage module | Device name + Storage device name; Device name + Storage module name |
| Item | Category; Alternative Item; Vendor; Manufacturer; Service vendor | Category with relations; Item ID; Vendor name; Manufacturer name; Vendor name |
| Item translation | Item | Item ID |
| Item internal document | Item | Item ID |
| Item external document | Item | Item ID |
| Item device assignment | Item; Device | Item ID; Device name |
| Item location assignment | Item; Stock location | Item ID; Device name + Storage device name + Storage module name + location name |
| Item location quantities | Item; Stock location | Item ID; Device name + Storage device name + Storage module name + location name |
| Pick list | Device | Device ID |
| Pick list cost allocation | Pick list; CA value; CA set | Pick list ID; CA level type name + CA value; CA set ID |
| Pick list items | Pick list; Item | Pick list ID; Item ID |
| Pick list users | Pick list; User | Pick list ID; Login |
| Pick list user groups | Pick list; User group | Pick list ID; User group name |
| Spare part relation | Item; Item (Spare part) | Item ID; Item ID |
| Assembly items | Assembly; Assembly item | Item ID; Item ID |
| Serialized item instances | Item; Stock location | Item ID; Device name + Storage device name + Storage module name + location name |
| CA custom level type | — | |
| CA level | CA level type; CA set | CA level type name; CA set ID |
| CA definition | CA level; CA set | CA level type name; CA set ID |
| CA hierarchy | CA definition; CA set | CA definition value with relations; CA set ID |
| CA item restriction | CA hierarchy; CA set; Item | CA definition value with relations; CA set ID; Item ID |
| CA user restriction | CA hierarchy; CA set; User | CA definition value with relations; CA set ID; Login |
| CA user group restriction | CA hierarchy; CA set; User group | CA definition value with relations; CA set ID; User group name |
| Item notification | Item | Item ID |
| CA level thumbnail | CA level | CA level type name |
| CA definition thumbnail | CA definition | CA level type name + CA definition value |
| PAG included items | Product access group; Item | PAG name; Item ID |
| PAG excluded items | Product access group; Item | PAG name; Item ID |
| PAG quantity restrictions | Product access group; Item | PAG name; Item ID |
| User group | — | |
| User | User group | User group name |
| User key | User | Login |
| Settings | User (Device admin) | Login |
| Customer settings | — |
Order templates cannot be imported through this flow. Import them from the Purchase area of System settings instead.
Import images and documents
When you import images or other documents (item internal documents, cost allocation thumbnails, or the customer logo), provide two files: the Excel template and a ZIP archive containing the referenced files.
- In the import template, create or update the reference to each file. A file reference always uses the type FILE in the column header; enter the file name including its extension.

- Place all referenced files into a ZIP archive, making sure each file name matches the reference in the template.
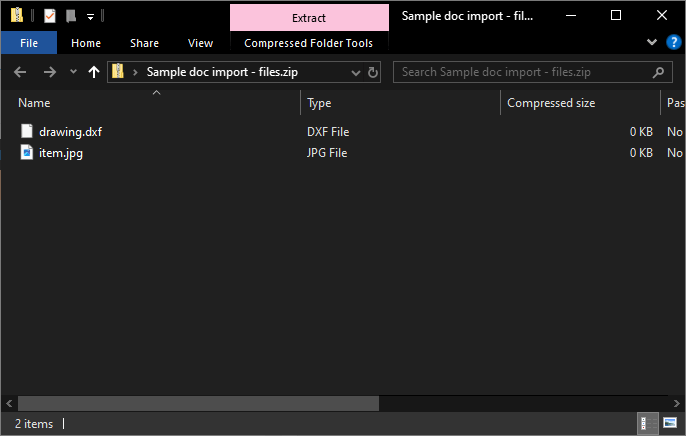
- In the Admin Portal, start the import and select the entities to import. If an entity that references external files is selected, an option to upload the ZIP archive appears. Select both the import template and the ZIP archive.
- Start the import to apply the changes.
The following entities reference binary files:
| Entity | Notes |
|---|---|
| Item internal documents | — |
| Cost allocation step thumbnails | Exported together with the cost allocation step |
| Cost allocation definition thumbnails | Exported together with the cost allocation definition |
| Customer logo | — |
When importing item images (an item internal document of type Image), the system must recognize the file as an image. The most common image file types are supported and the image size is not limited. A single item cannot have more than one internal document of type Image or type Drawing.
Import hierarchy relations
The import can create hierarchy relations for some entities and create references to them. This is an easy way to set up and update item categories, cost allocation hierarchies, and cost allocation hierarchy restrictions.
Set up a hierarchy
For item own categories and cost allocation hierarchies, rows have no ID column. Define the hierarchy starting with the root value in the first column (next to the Is deleted column), with each following column holding a child value. A value can appear more than once in the file.

The file above produces the following category structure after import:

Marking a row as deleted removes the specified branch from the system, including all child entities:
| Is deleted | Category tree columns | Result |
|---|---|---|
| TRUE | Turning | Removes Turning and all its child categories (Turning holders and Turning tools). |
| TRUE | Turning → Turning holders | Removes only Turning holders. Turning tools remains. |
Note: When setting up a cost allocation hierarchy, the specified CA values must already exist for the hierarchy steps of the given order.
Set up a relation to a hierarchy
Some entities can be assigned to a specific place in a hierarchy — items to a category, or restrictions to a cost allocation hierarchy. Specify the path starting with the root in the first dedicated column and child nodes in the following columns. For example, a row with Item ID = Item1, Own category = Turning, next column = Turning holders assigns Item1 to Turning → Turning holders.
Change physical quantities by import
You can update physical quantities in devices through the import. Which sheet you export depends on whether the item is serialized:
| Item type | Sheet to export | What to change |
|---|---|---|
| Non-serialized | Item location quantities | Edit the Physical quantity column. |
| Serialized | Serialized items | Serialized items are not listed on the quantities sheet. Update the location (device, storage device, module, and location name) of a specific serial number to add or remove it. |
Either way, the change is tracked as a transaction — a Placement transaction when the quantity increases and a Withdraw transaction when it decreases.
Important: You cannot change physical quantities via Excel import while the device is running. See avoiding synchronization conflicts for details.
Next steps
- Verify the imported records — open the relevant Data management list (for example Items or Vendors) and confirm the new or updated records appear.
- Export a backup — run an export after large changes so you have a clean template for the next import.
Troubleshooting
| Problem | Likely cause | Fix |
|---|---|---|
| Import cannot be performed | The file was created manually or its column structure was changed | Generate a fresh template with the export function and fill that in without altering the columns. |
| Records are duplicated instead of updated | The ID column was left empty for existing records | Keep the original ID for each existing record; only leave the ID empty for genuinely new records. |
| Preview reports invalid rows | Wrong data types, missing mandatory values, or updating a record that does not exist | Download the marked rows, fix the highlighted cells, and re-upload the corrected file. |
| Images or documents are not imported | The ZIP archive was not provided, or file names do not match the template references | Add the ZIP archive and make sure each file name (with extension) matches the reference in the template. |
| An entity in the file was skipped | Its checkbox was not selected on the Select objects to import screen | Restart the import and tick every entity you want to load, or use Select all. |
| Physical quantity import is blocked | The device is running, so quantities cannot be changed via Excel | Stop the device first, then import — see avoiding synchronization conflicts. |
Related articles
- How to export data from the system — generate the Excel template you fill in before importing.
- How to import items from a catalog — add items directly from supplier catalogs instead of a template.
- How to create pick lists with the export/import function — use export/import to build pick lists in bulk.
- How to create and manage cost allocation sets — set up the cost allocation data you can import as hierarchies.
- All system settings quick reference — where to import order templates and configure system-wide options.