
Serialized items – a series of 6 articles. Read them in this order:
- Understanding the concept
- Setup
- Picking
- Returning
- Service (this article)
- Tracking
What you can do
Send a serialized instance that is For service to service and bring it back into stock. You pick it for service on the Shop Floor Interface, the workshop or the vendor does the work, and you restock it when it comes back. Its status goes from For service to In service to Refurbished.
The example is item 5924287, Cartridge for CoroBore® XL, used throughout this series, with serial number CB-26-001. Its service rule sends it for service after two uses. The service is done in-house by Demo Service Centre, so it goes to a service list.
Before you start
- A serialized instance with the status For service. How it gets there is described below.
- Service switched on on the item’s Supplier tab in the Admin Portal, with a Service vendor and a rule. This example uses Number of times used = 2 and an internal vendor.
- A Shop Floor Interface login with Stock management, for picking for service and restocking.
Important: The service vendor decides the route. An internal vendor puts the item on a service list as soon as it is due. An external vendor needs a service order first, created by hand or by a service script.
How an instance becomes For service
- The pick limit is reached. With Number of times used, the return that uses up the last pick sets the instance to For service. In this example that is its second return, see Serialized items: Returning.
- Return > For service. Anyone allowed to return for service can send an instance early, before its limit or its target service date. The instance is locked until it is picked for service.
- Target service date. Set a date on the instance detail in the Admin Portal. Once the date has passed, the task Lock serialized instances sets the instance to For service the next time it runs. You can run it yourself under Administration > Tasks. A return does not apply the date: the instance keeps the condition it is returned with until the task runs.
- Time rules. Time interval and Time after first use on the item set a date as well. The task Lock serialized instances sets the instance to For service once that date has passed.
Whichever rule is met first wins. An instance that is For service stays in its location but can no longer be picked. See Serialized items: Tracking for every field of the instance detail.
Quick start
Experienced users – service an instance in 3 steps:
- Check that the instance is For service.
- Open Stock management > Pick for service, select the service list and pick the serial number. It turns In service.
- Restock it from the service list when it comes back. It is Refurbished and back in stock.
Need more detail? Follow the full steps below.
The statuses you will see
| Stage | Instance status | Location | Remaining number of picks |
|---|---|---|---|
| Due for service | For service | Its stock location | – |
| Picked for service | In service | The service list | – |
| Restocked from service | Refurbished | Its stock location | Back to 2 |
Steps
Step 1 — Check that the instance is For service
In the Admin Portal, open the item, go to its Serialized item tab and double-click the serial number.
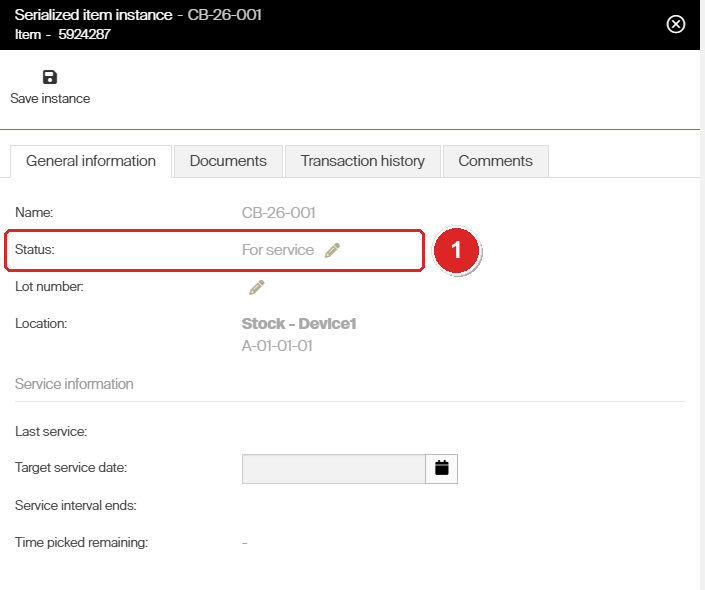
After the second return the status reads For service (1).
The serialized item overview in Serialized items: Tracking shows the same status for every serial number at once.
Step 2 — Pick it for service
Sign in with an account that has Stock management.
- Select Stock management, then Pick for service.
- Select the service list.
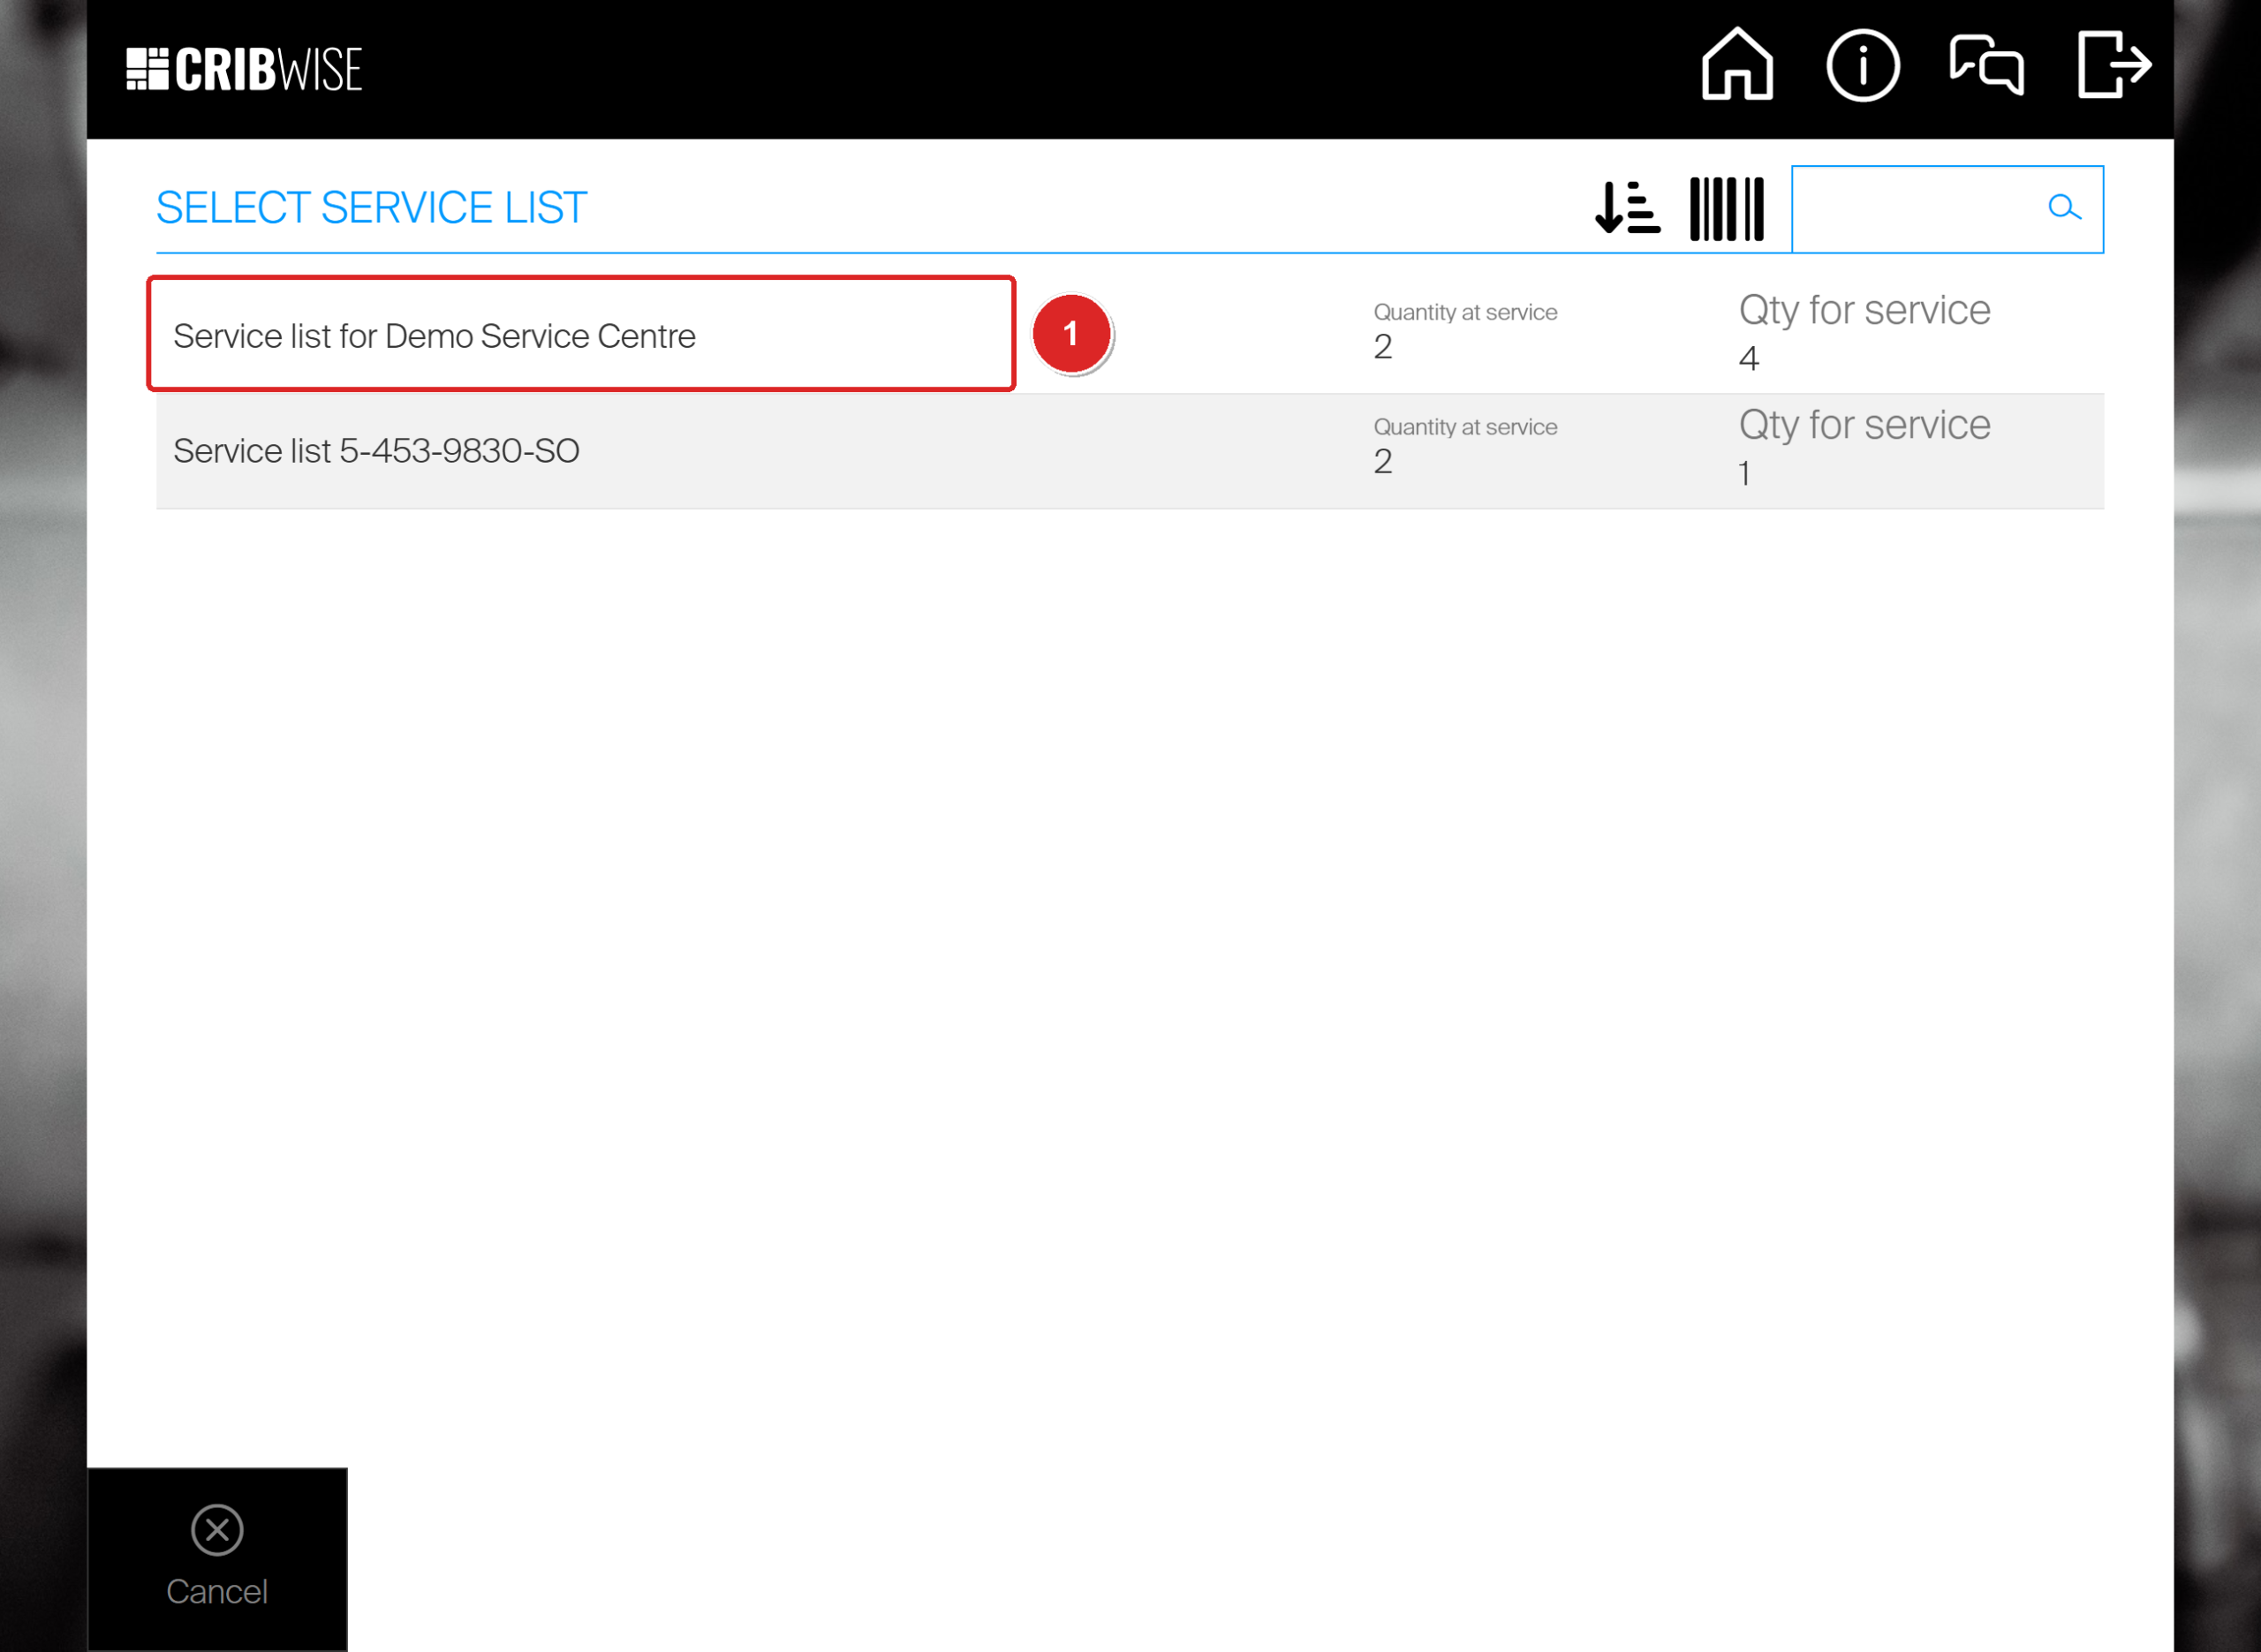
Each list shows Quantity at service and Qty for service. Select the list of your service vendor (1). A service order for an external vendor appears in the same list.
- Tick the item and set Quantity to pick.
- Select Confirm.
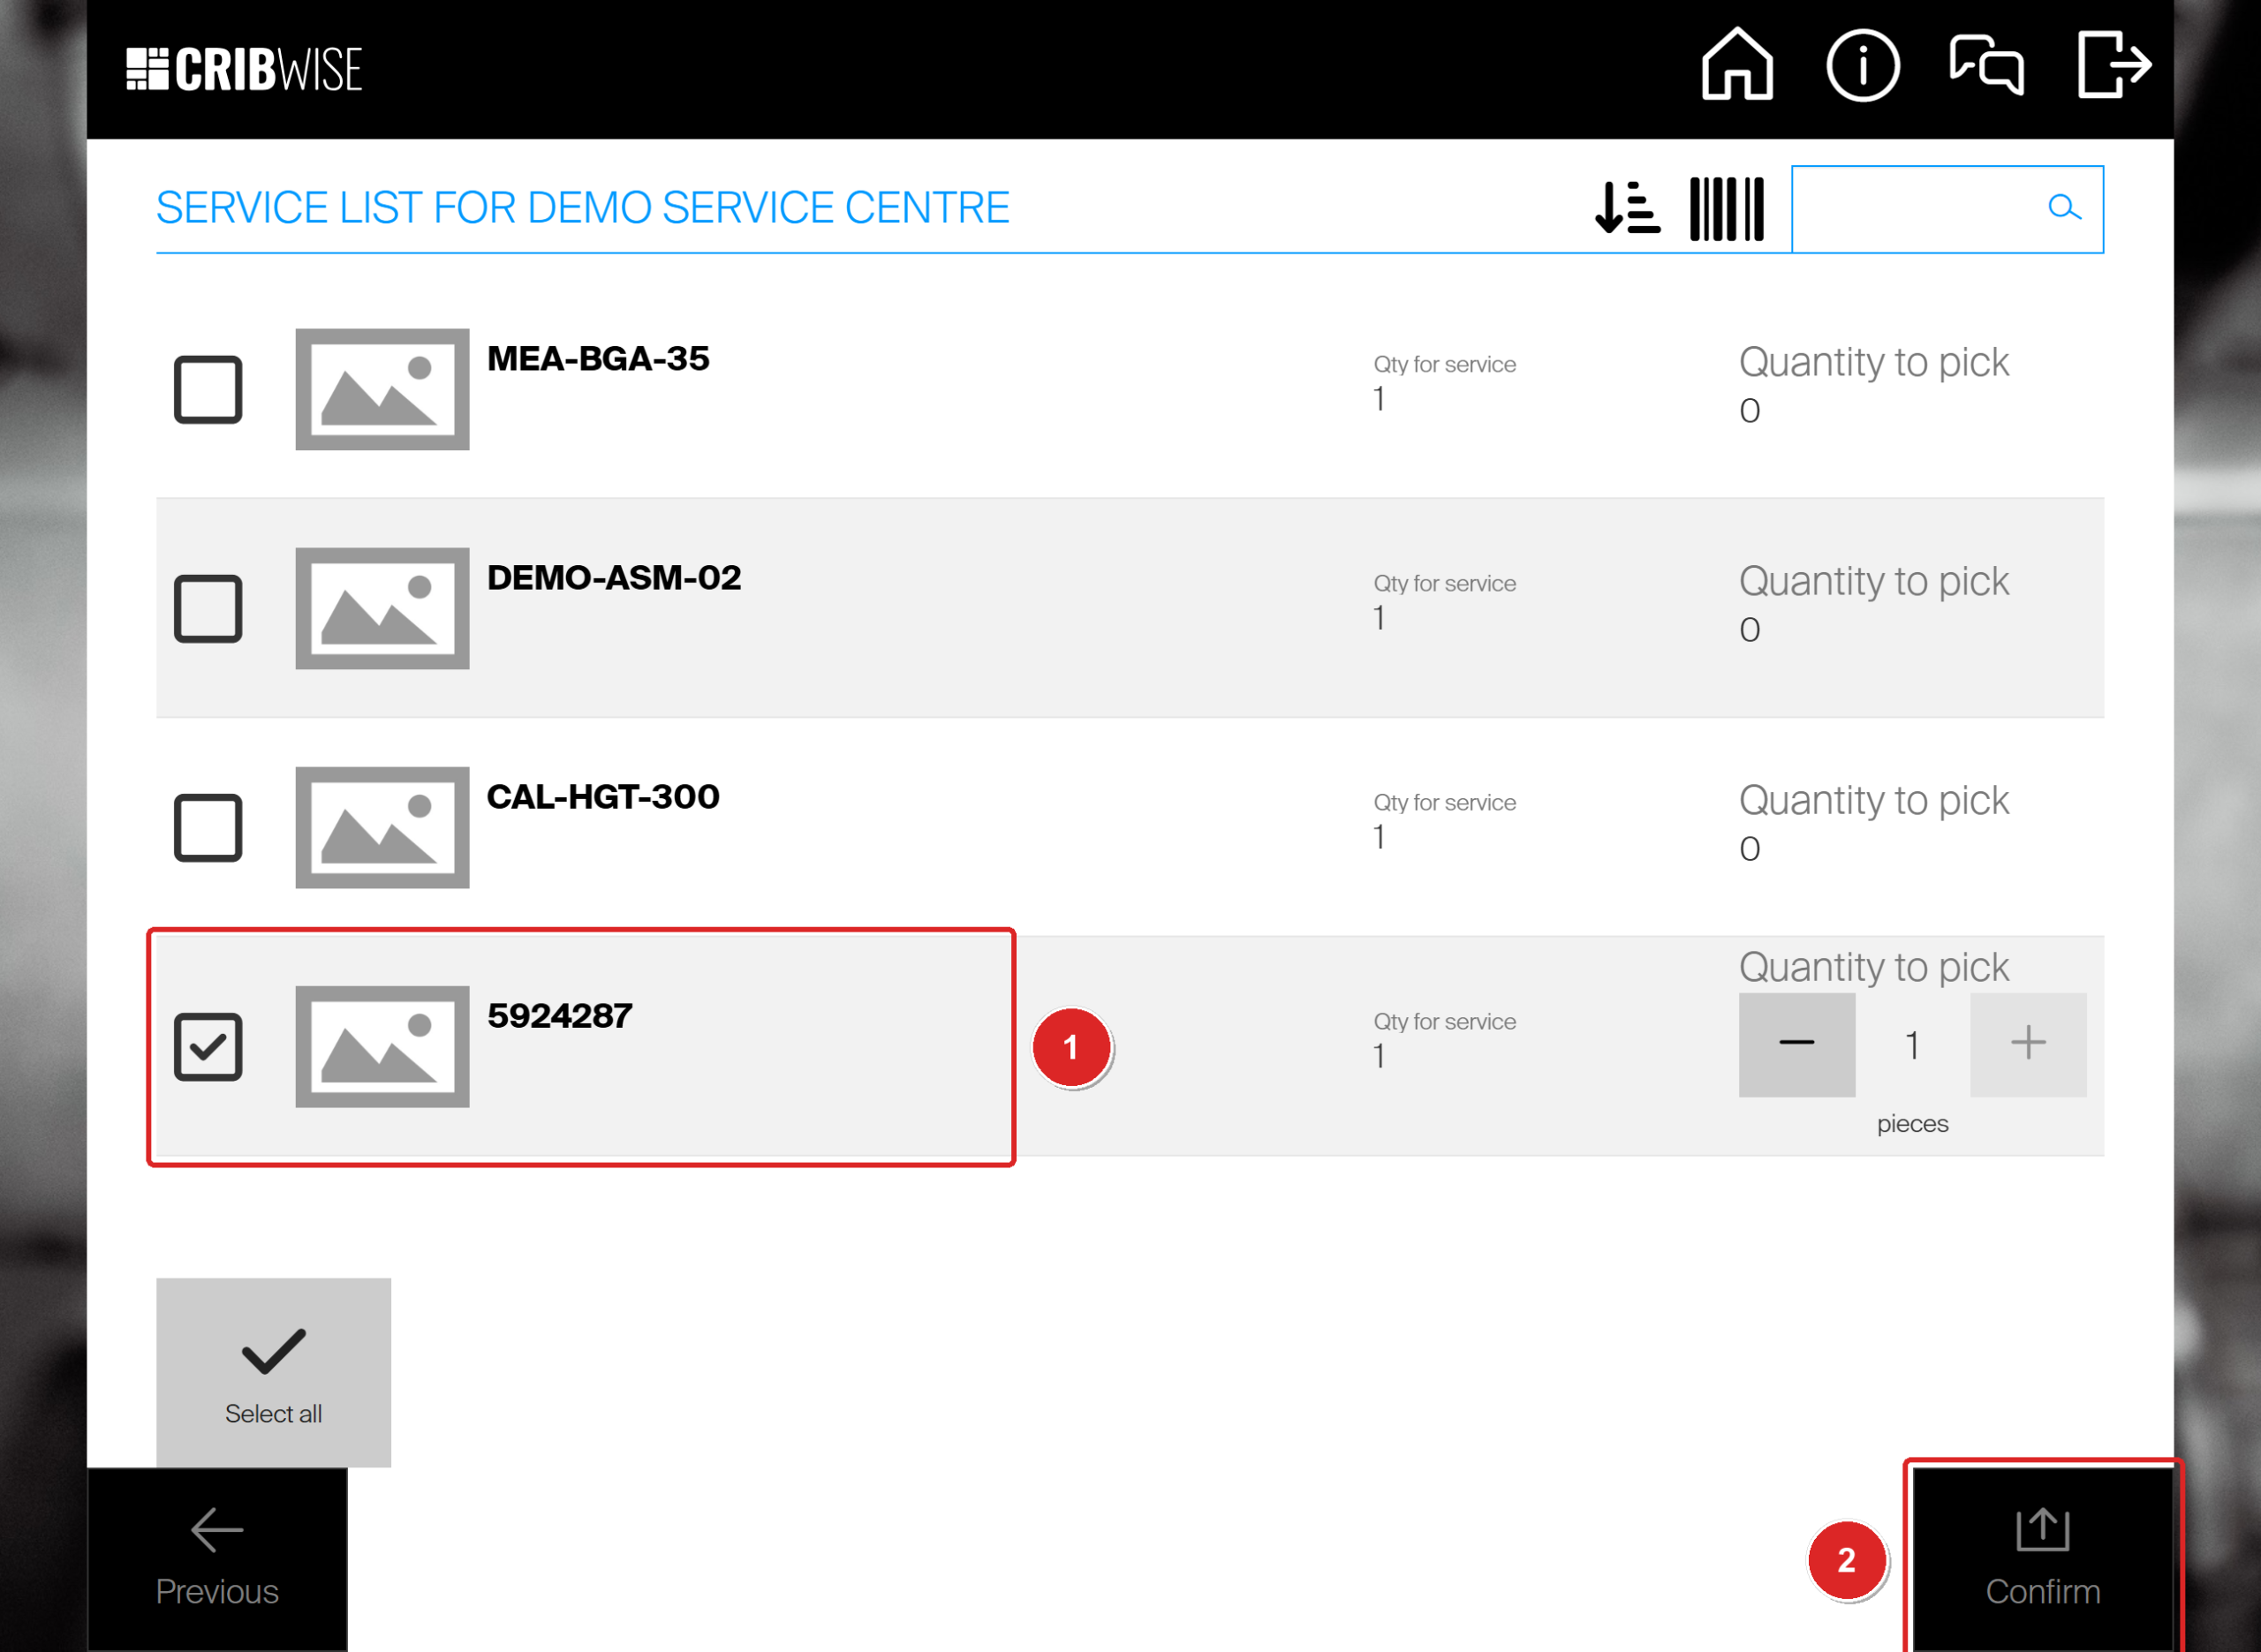
Tick the item and set the quantity (1), then Confirm (2).
- Tick the row on Items to pick.
- In the serial number dialog, make sure only your serial number is ticked.
- Select Confirm, then Picking finished and Close.
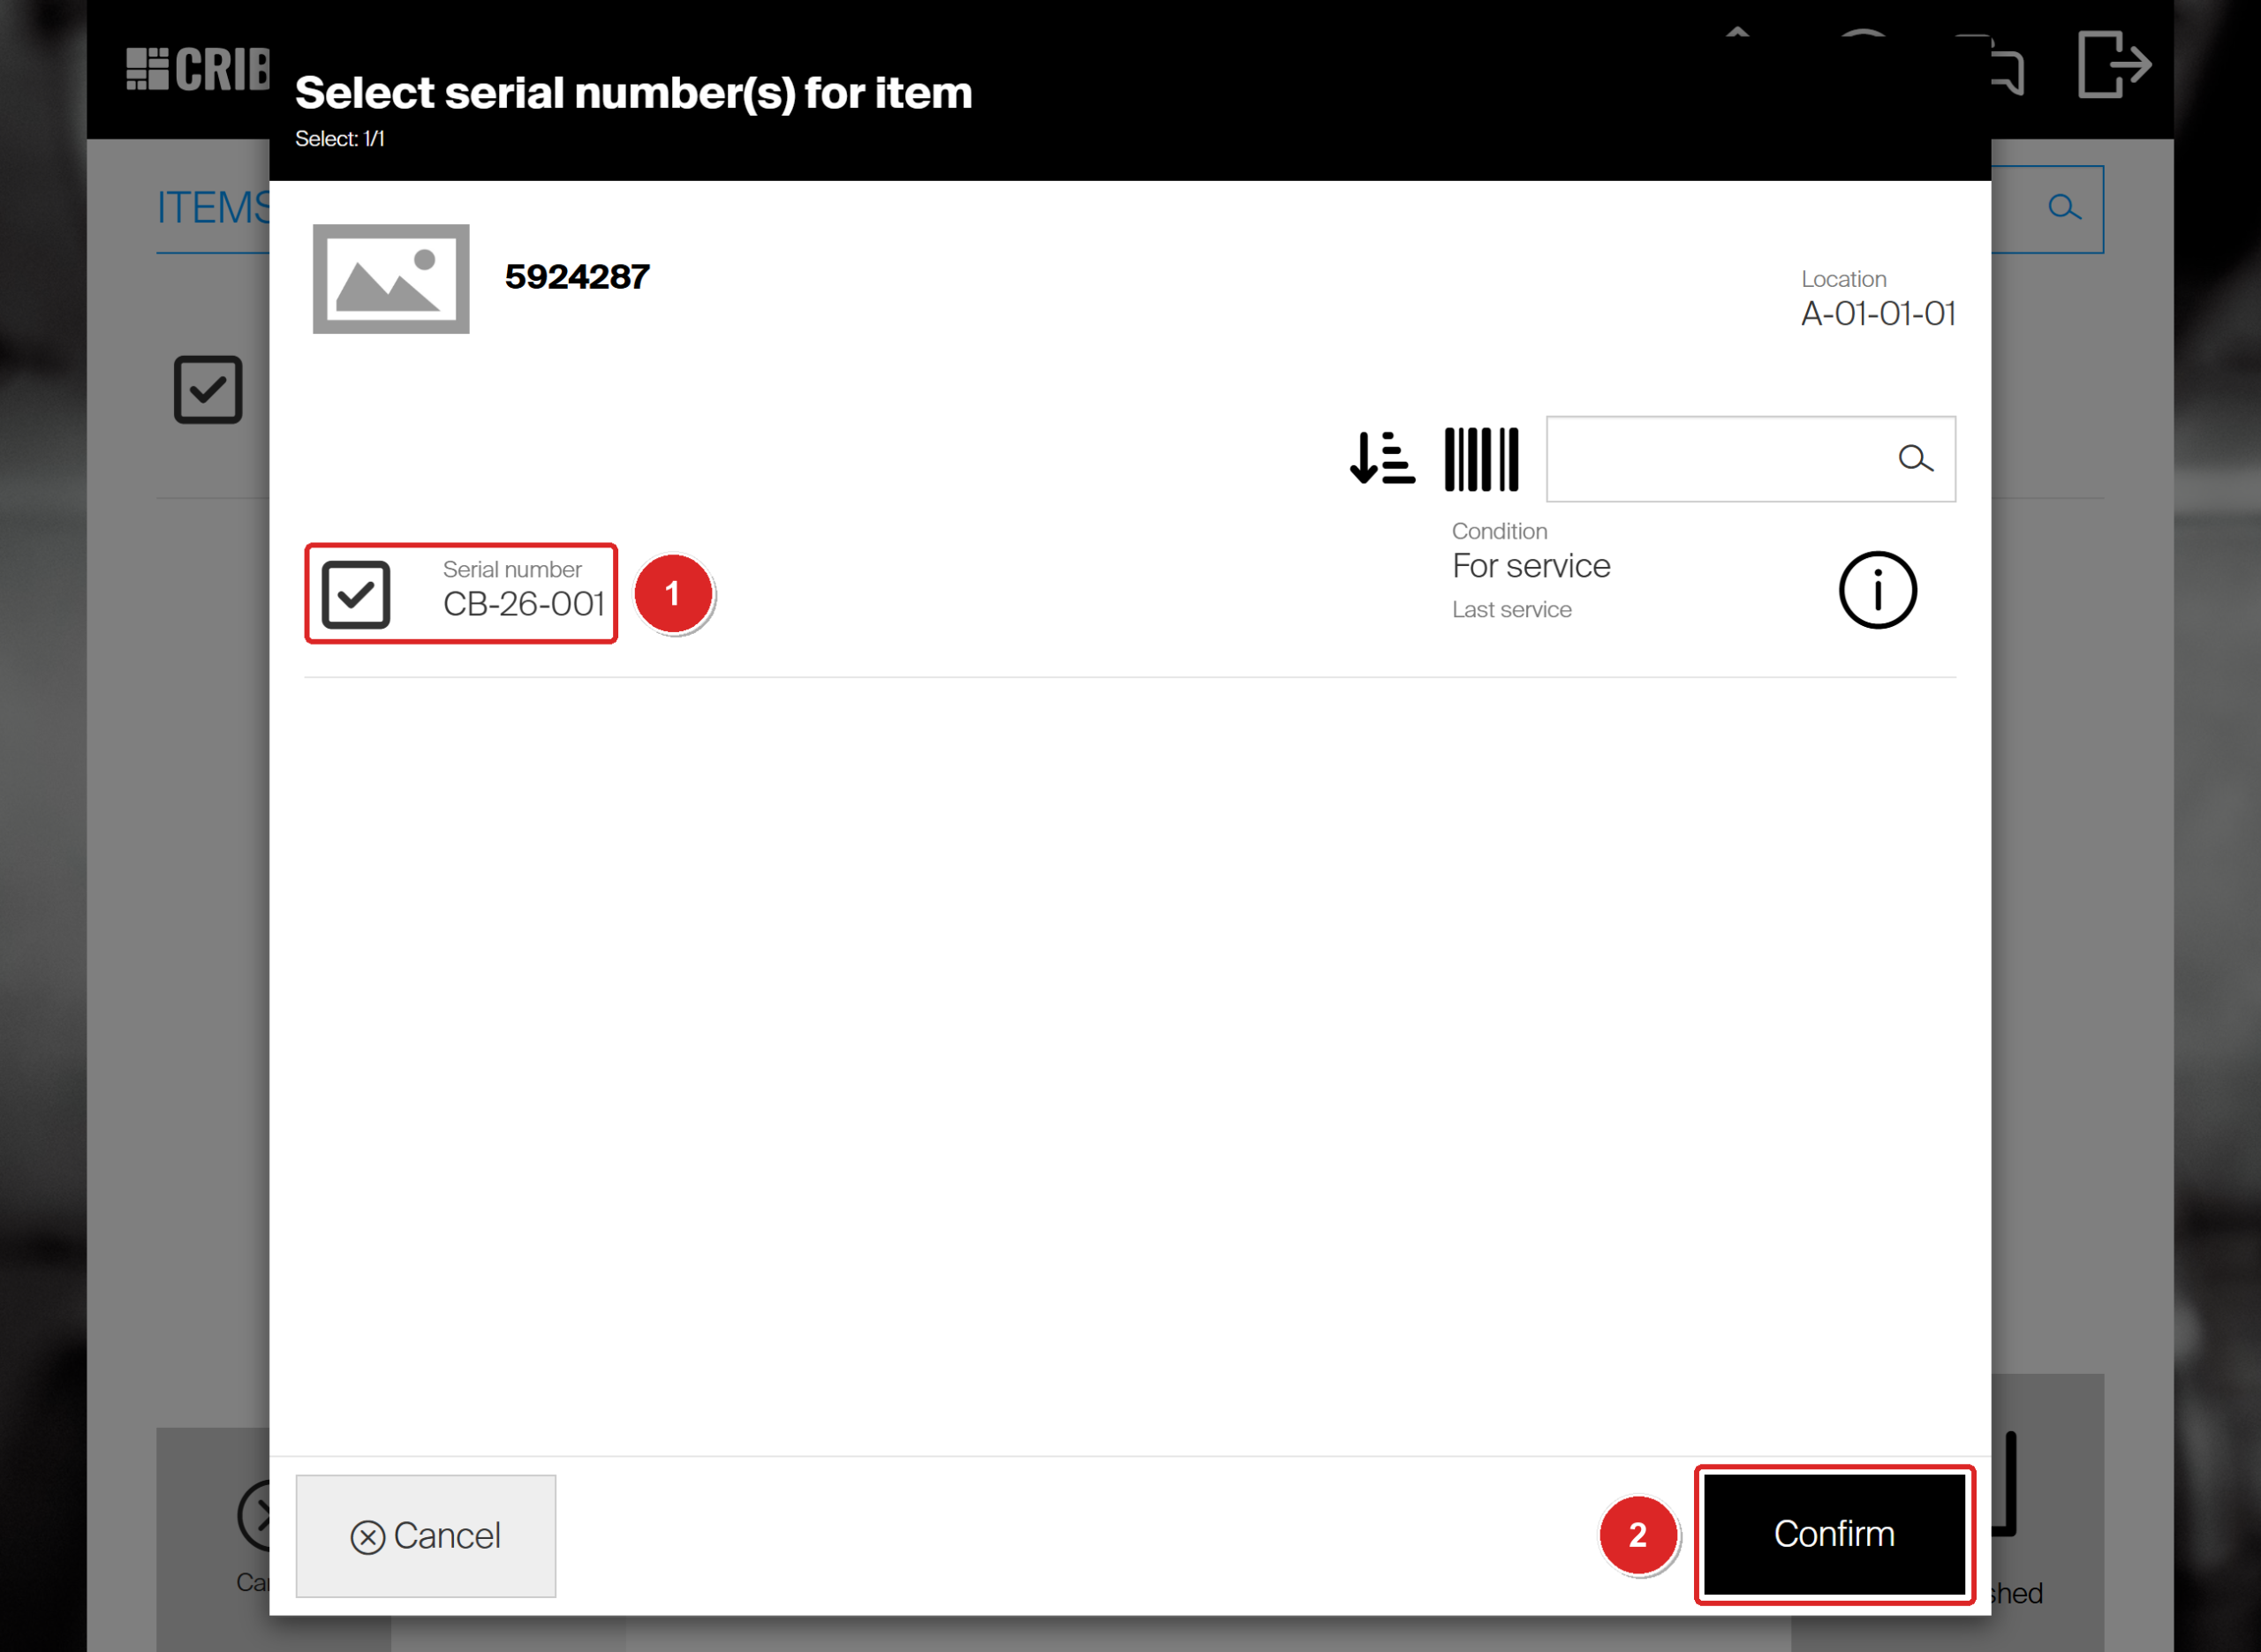
The serial numbers of the item that wait for service are listed and ticked. Make sure only the one you send is ticked (1), then Confirm (2).
The instance is now In service. Its location is the service list, not a stock location.
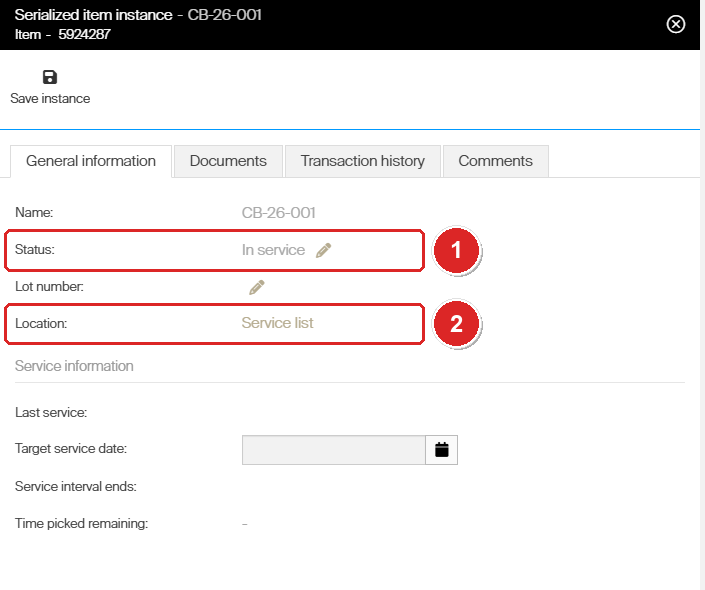
In service (1), located on the service list (2) while the workshop has it.
Step 3 — Restock it from service
- Select Stock management, then Restock.
- Select the service list, then the item.
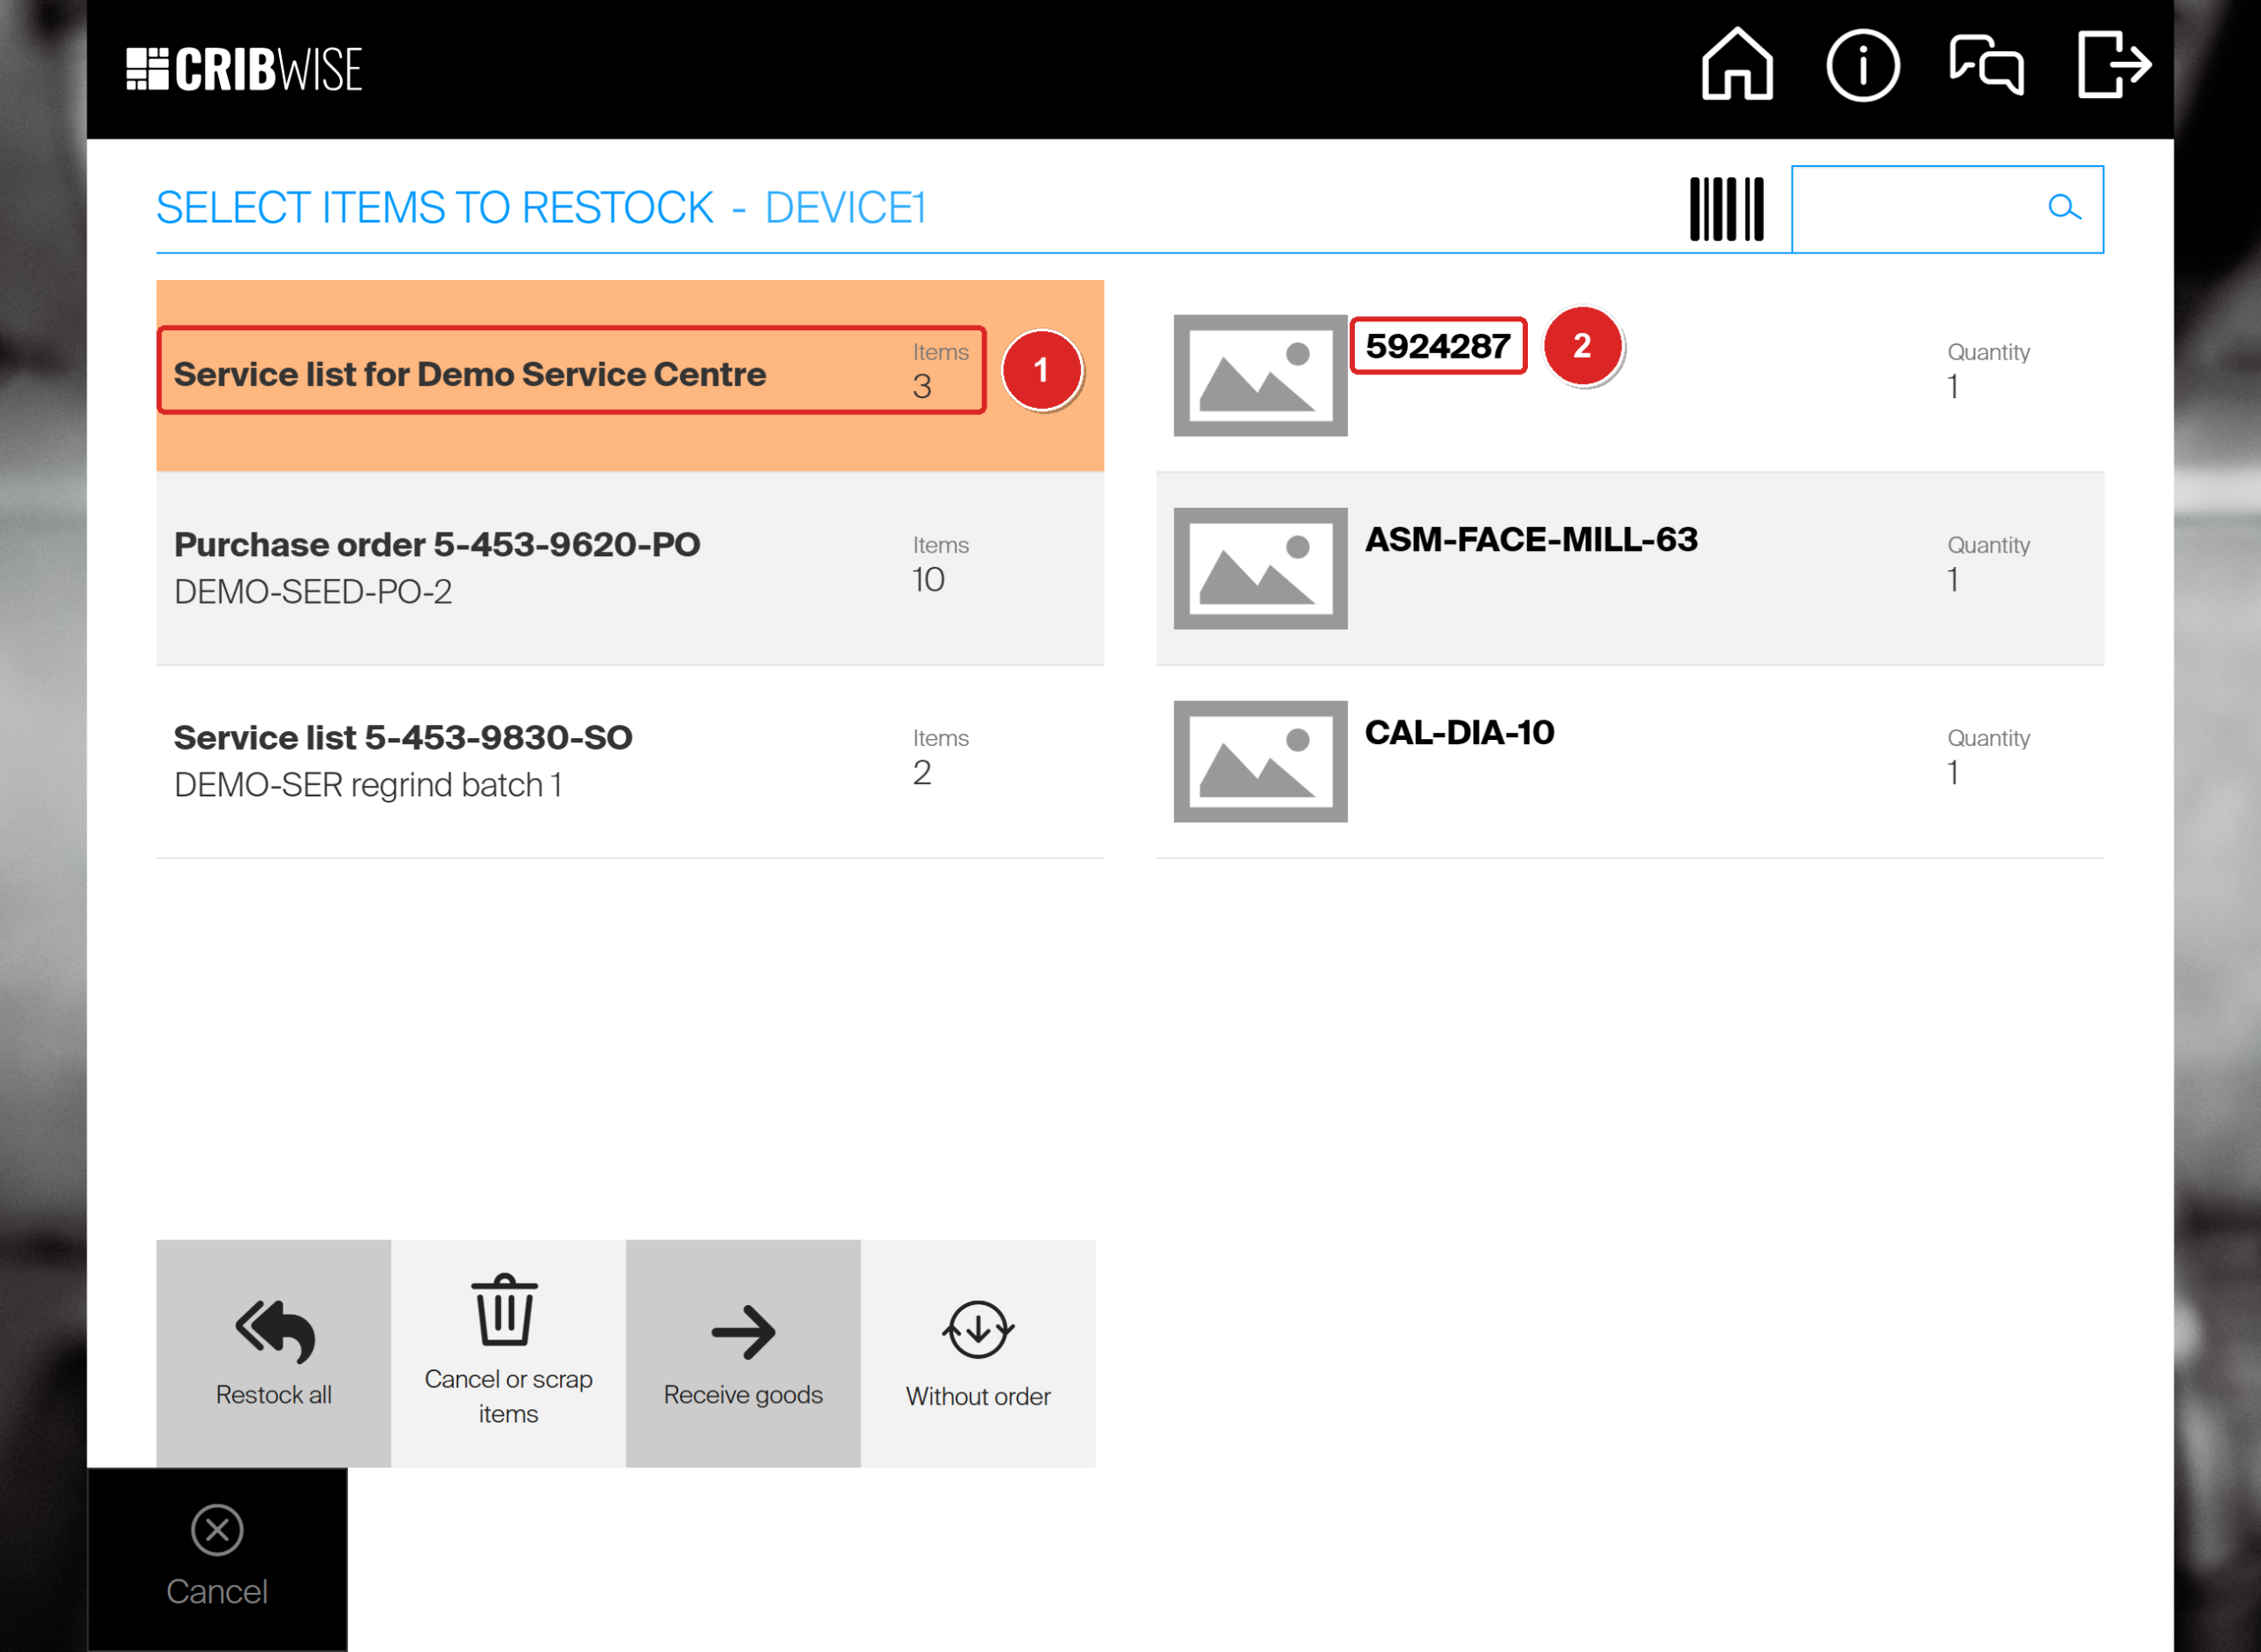
The service list (1) and the item that came back (2).
- Select Confirm on the quantity screen.
- Put the item in the location shown and tick its row. The serial number is already selected.
- Select Confirm, then Restock finished and Finish.
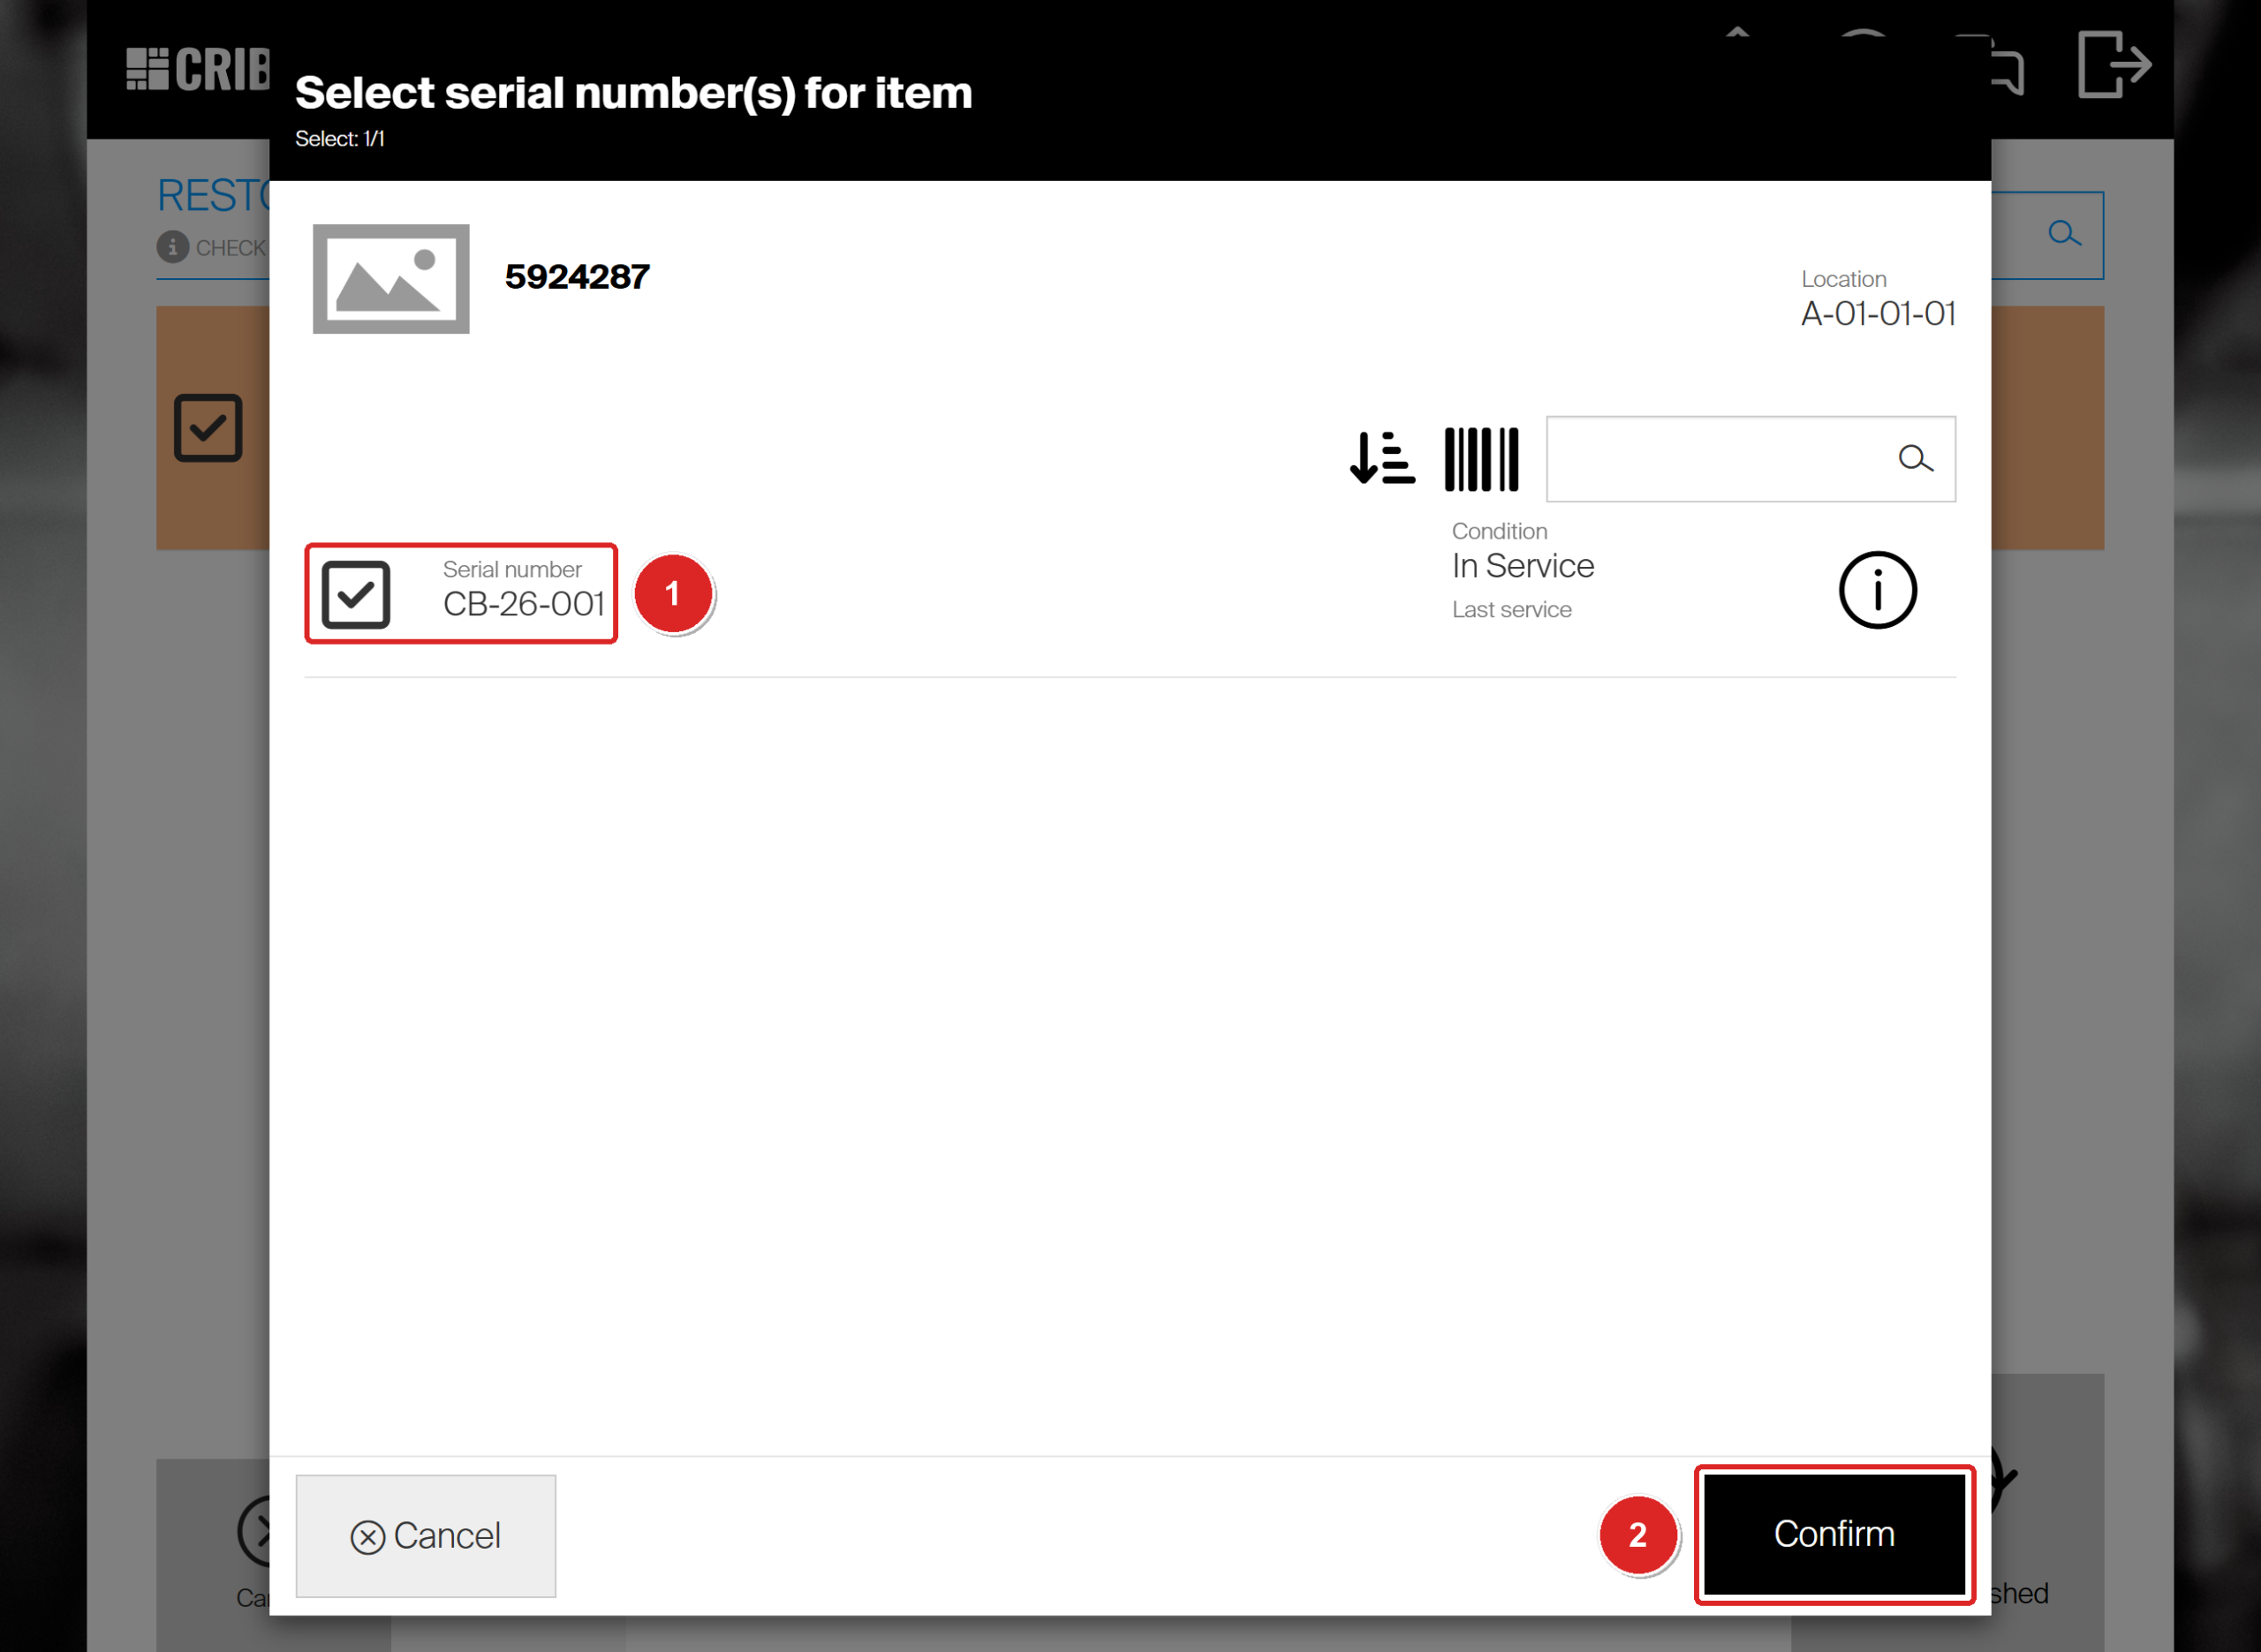
The serial number is preselected (1). Do not tap it, or you deselect it. Select Confirm (2).
Success: The instance is Refurbished, back in its stock location, and Last service shows the restock date. Its pick counter starts again, so it can be picked twice before its next service.
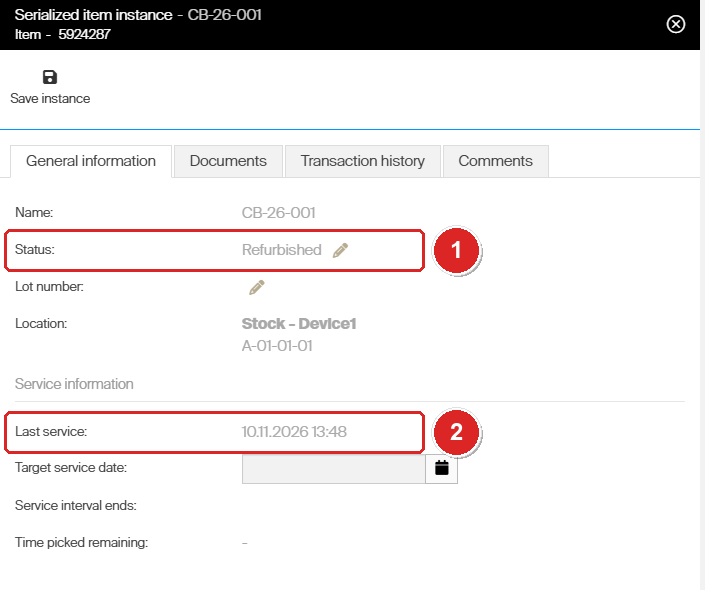
Refurbished (1) with the date of the last service (2).
The condition after restock comes from Restock from service as on the item’s Supplier tab. This item uses Refurbished. Used and New are the other choices.
Troubleshooting
| Problem | Cause | Fix |
|---|---|---|
| The serial number is not offered on Pick. | It is For service or In service. | Finish the service and restock it first. |
| Pick for service does not list the item. | Service is not ticked on the item, or the vendor is external and no service order exists yet. | Tick Service on the Supplier tab. For an external vendor, create a service order or let a service script do it. |
| A passed target service date did not change the status. | The date is applied by the task Lock serialized instances, not at the moment it passes. A return does not apply it either. A date that is not later than the instance’s Last service is ignored. | Wait for the task, or run it under Administration > Tasks. |
| Restock saves nothing. | The preselected serial number was tapped and is now deselected. | Tick it again before Confirm. |
Related articles
- Understanding the service flow: from pick to restock — the same journey for every service item.
- Understanding service lists — the internal route used in this example.
- Understanding service order scripts — the external route, with automatic service orders.