Read time: ~3 minutes
Applies to: Shop Floor Interface
What you can do
Pick a serialized item from a storage device on the Shop Floor Interface (SFI). When you pick a serialized (durable) item, the system asks you to select a specific serial number so that each individual unit is tracked throughout its lifecycle.
Before you start
- You need a user account with permission to pick items.
- You need access to the Shop Floor Interface on a device connected to your storage.
- The item must be configured as Serialized in the Admin Portal by your administrator.
- Each serialized item has to be assigned to the device and have a unique serial number. You will choose a specific unit when you pick it.
Quick start
Experienced users — pick a serialized item in 6 steps:
- Tap Pick on the main menu.
- Tap the serialized item you want to pick.
- Set the quantity and tap Pick.
- Tap the checkbox next to the item to start collecting.
- Select the serial number and tap Confirm.
- Tap Picking finished.
Need more detail? Follow the full steps below.
Steps
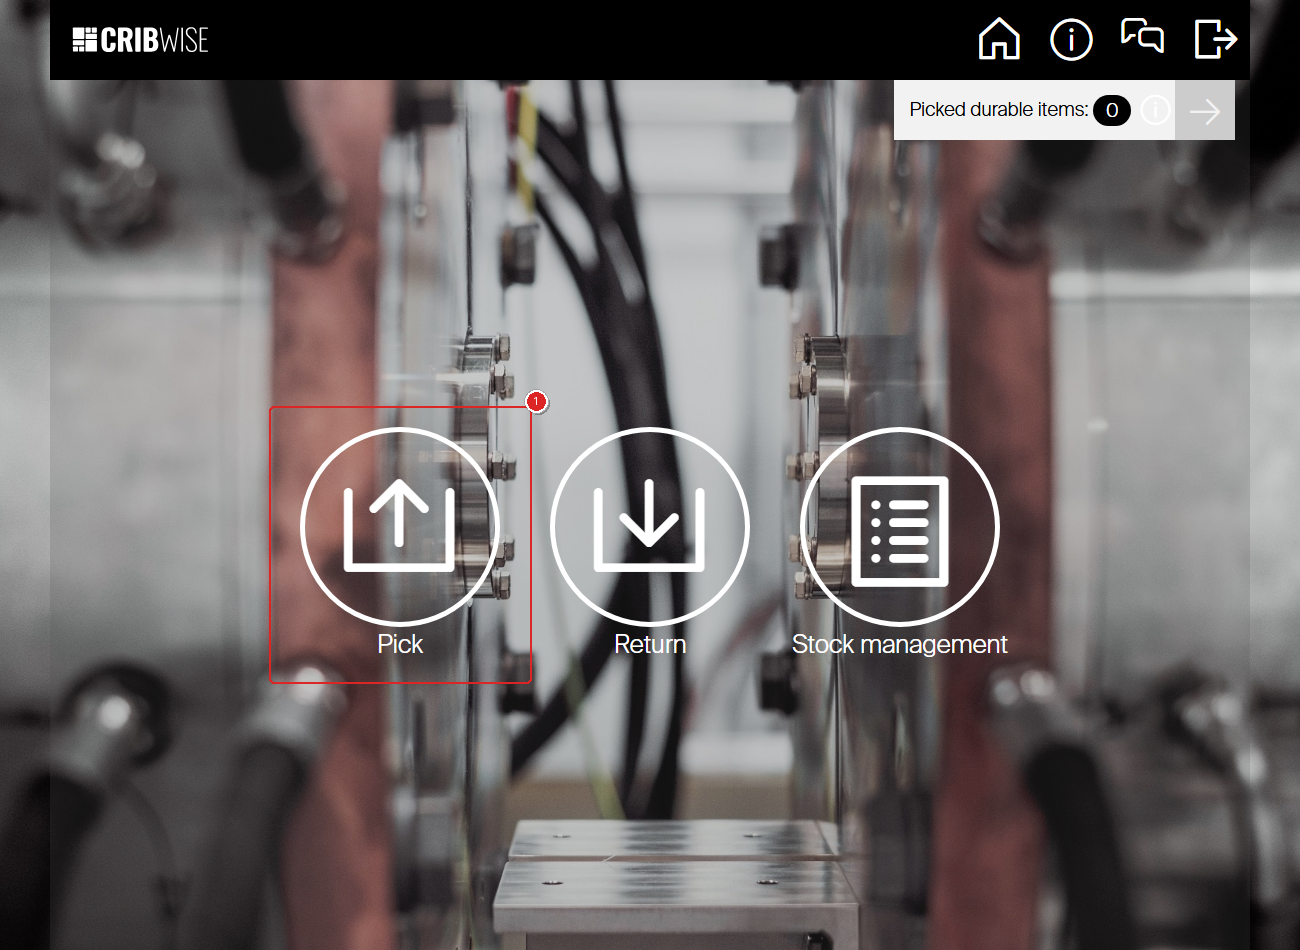
Step 1 — Tap Pick on the main menu
After you log in, the SFI shows the main menu for your device. Tap Pick to start picking an item.
Step 2 — Select the serialized item
The item list shows all items available in this device. Each item displays its item ID, description, and available quantity.
Tap the serialized item you want to pick.
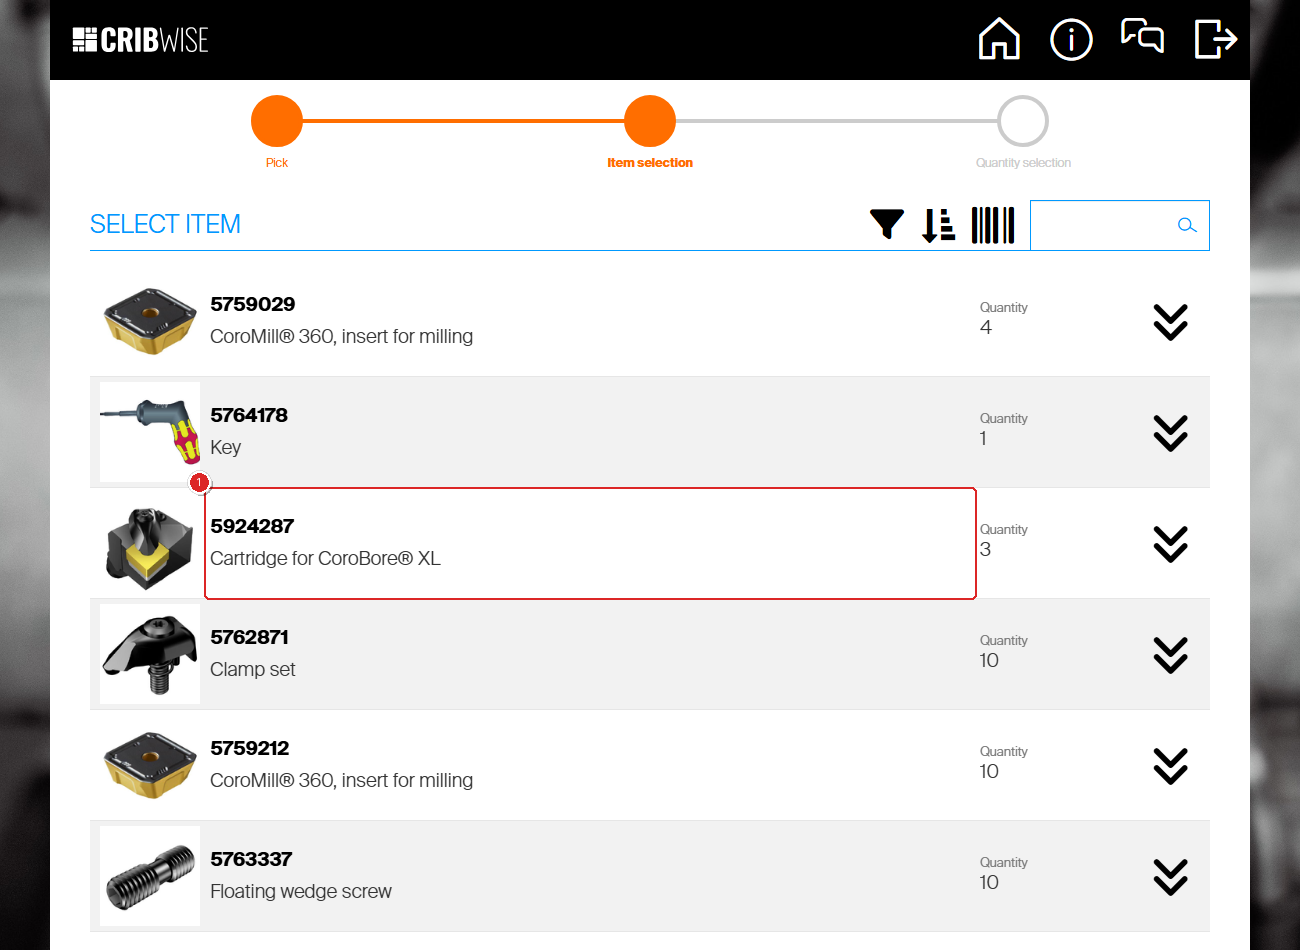
Tip: Serialized items look the same as other items in this list. The serial number selection appears later in the flow.
Step 3 — Choose the quantity and tap Pick
The quantity screen shows the selected item with its image, ID, description, and available quantity.
- Use the + and − buttons to set the quantity you need.
- Tap Pick to confirm.
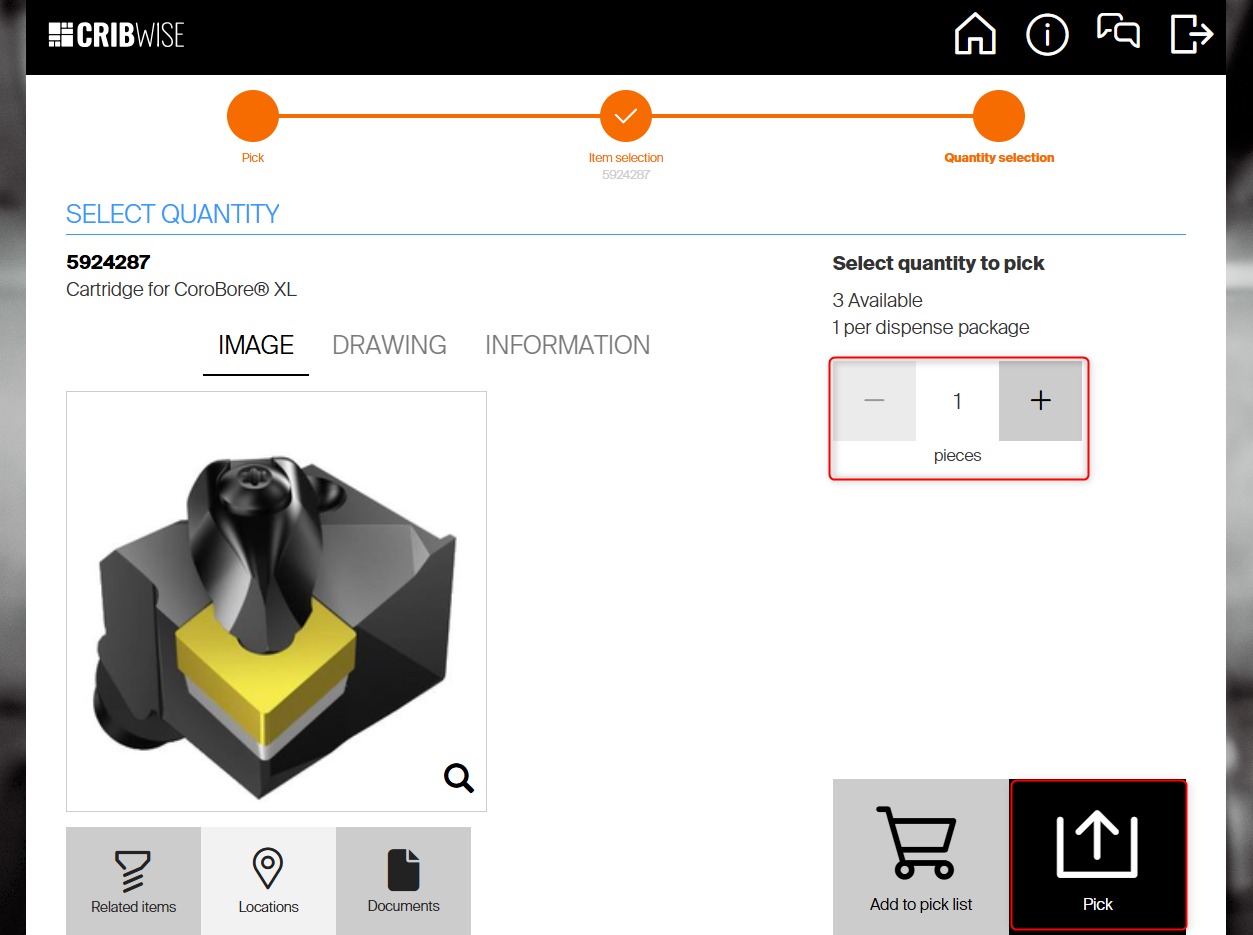
Tip: Tap Add to pick list instead if you want to pick multiple items in one go before collecting them.
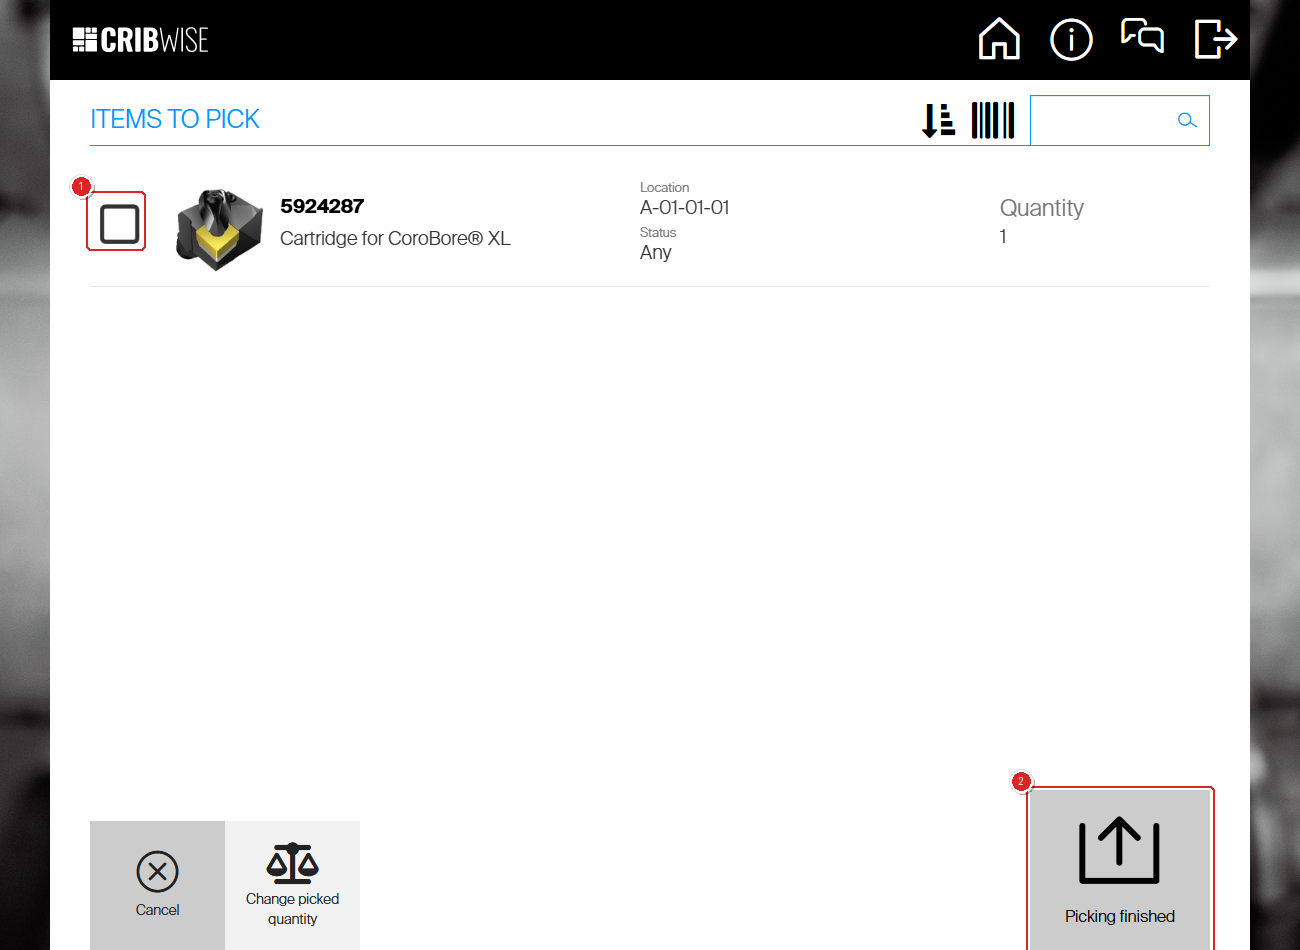
Step 4 — Tap the checkbox to start collecting the item
The “Items to pick” screen shows the item with its storage location and quantity. Tap the checkbox next to the item to indicate you are collecting it.
Because this is a serialized item, a serial number selection dialog opens automatically.
Step 5 — Select a serial number and confirm
The serial number dialog shows all available serial numbers for this item at this location. Each serial number shows its condition (for example, New, used, or refurbished).
- Tap the serial number you want to pick. A checkmark appears next to it.
- Tap Confirm.
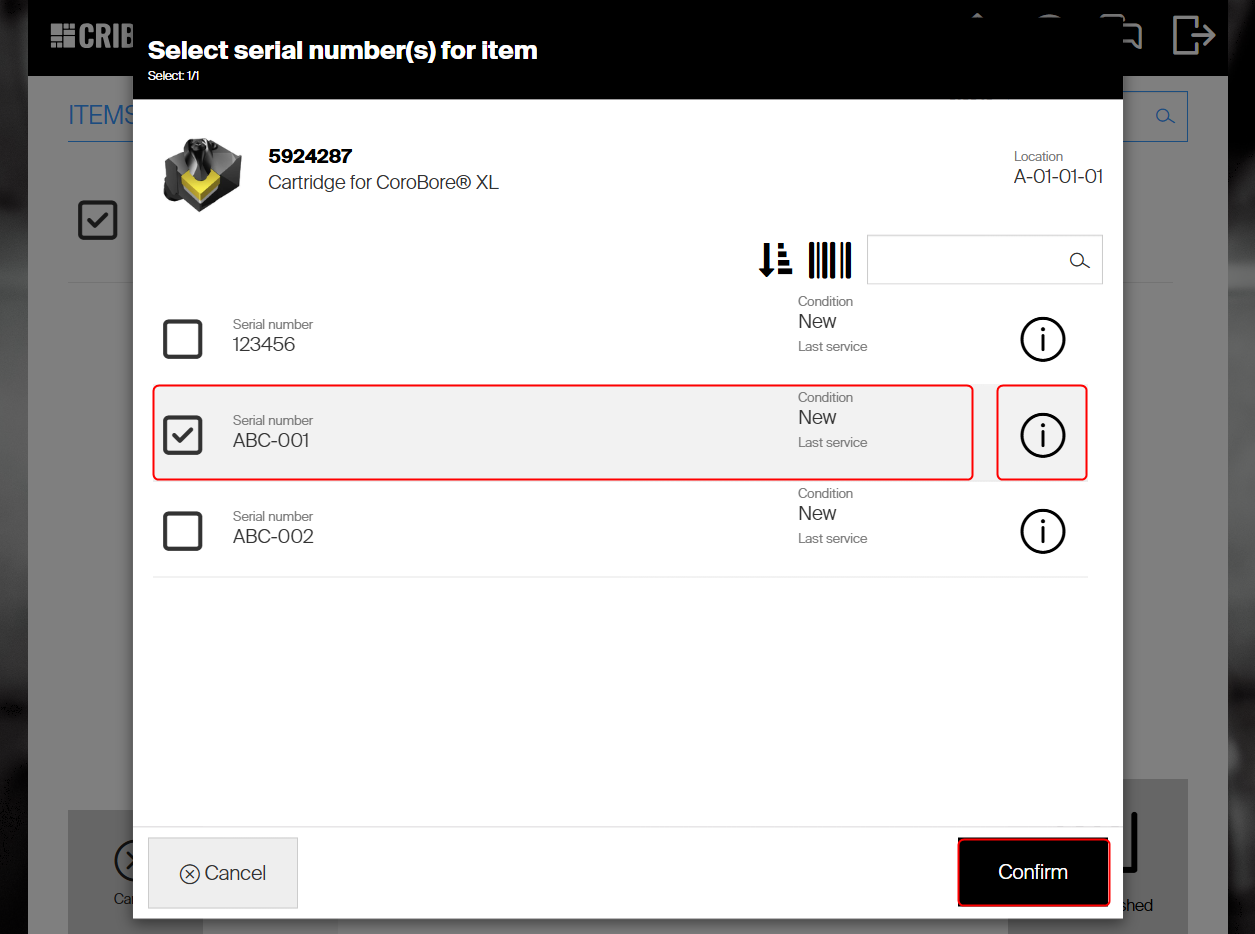
Select the specific serial number you want to pick, then tap Confirm.
Tip: Tap the information button on the right side of the item to view additional information such as loan time and calibration due date.
Step 6 — Tap Picking finished
After confirming the serial number, you return to the “Items to pick” screen. The checkbox is now checked, confirming the item and serial number are registered.
Tap Picking finished to complete the pick.

Success: The pick is complete. The serialized item is now checked out under your name with the specific serial number you selected. You return to the main menu.
Troubleshooting
| Problem | Likely cause | Fix |
|---|---|---|
| No serial number dialog appears | The item is not configured as serialized in the Admin Portal. | Ask your administrator to enable the Serialized checkbox on the item. |
| The serial number I need is not in the list | That serial number is already picked by another user, or it does not exist yet. | Check with your administrator. They can create additional serial numbers or check who has the unit checked out. |
| Cannot select enough serial numbers | There are fewer available serial numbers than the quantity you requested. | Reduce the pick quantity, or ask your administrator to create more serial numbers. |
| “Picked durable items” notification appears | You have durable items checked out that may be due for return. | Tap the notification to review. This does not block picking. |