Read time: ~3 minutes
Applies to: Admin Portal
What you can do
Create and manage shifts in the Admin Portal so product access groups can limit how much each user picks per period. A shift is a named time window with a start and end time.
Before you start
- You need access to the Administration menu in the Admin Portal.
- Decide the shift name and its start and end times before you begin.
Quick start
Experienced users add a shift in 4 steps:
- Open Administration > Shift management.
- Click New shift.
- Enter a name and the From and To times.
- Click Save shift.
Need more detail? Follow the full steps below.
Steps
Step 1 – Open shift management
- In the main menu, select Administration.
- Select Shift management.
The Shifts list opens, showing every existing shift with its Name, From, and To times.
Step 2 – Create a new shift
In the Shifts toolbar, click New shift. A Shift detail panel opens on the right.
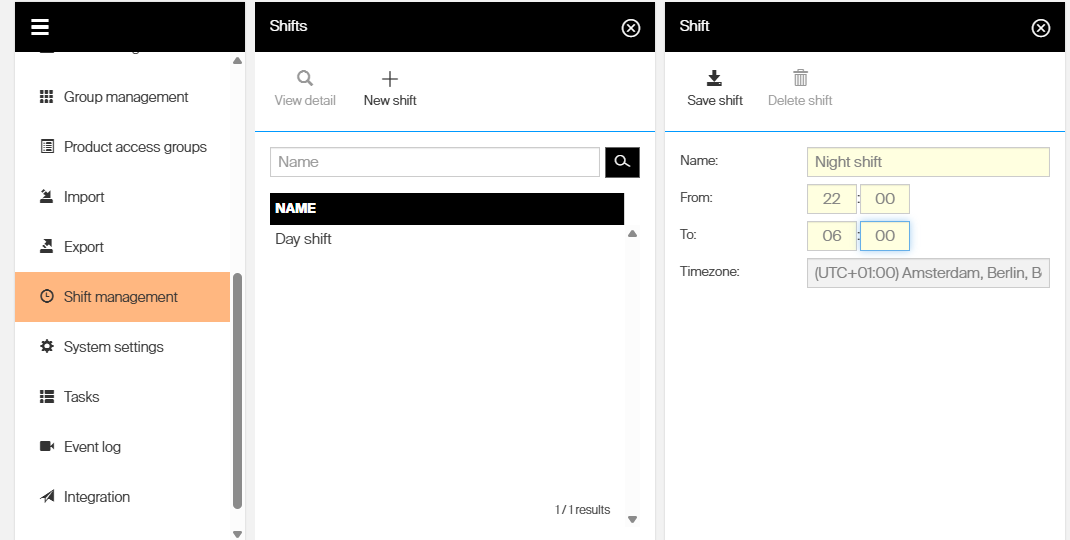
The New shift panel, with the Name, From, To, and Timezone fields.
Step 3 – Set the name and times
Fill in the shift details:
| Field | Required | What to enter |
|---|---|---|
| Name | Yes | A label that identifies the shift, for example Day shift. |
| From | Yes | The shift start time, in hours (HH) and minutes (MM). |
| To | Yes | The shift end time, in hours (HH) and minutes (MM). |
| Timezone | – | Read-only. Set from the system configuration and shown for reference. |
Note: The new shift’s window must not overlap any existing shift. If it does, the shift cannot be saved.
Step 4 – Save the shift
Click Save shift.
Success: A confirmation message appears, and the new shift is listed in the Shifts list with its name and time range.
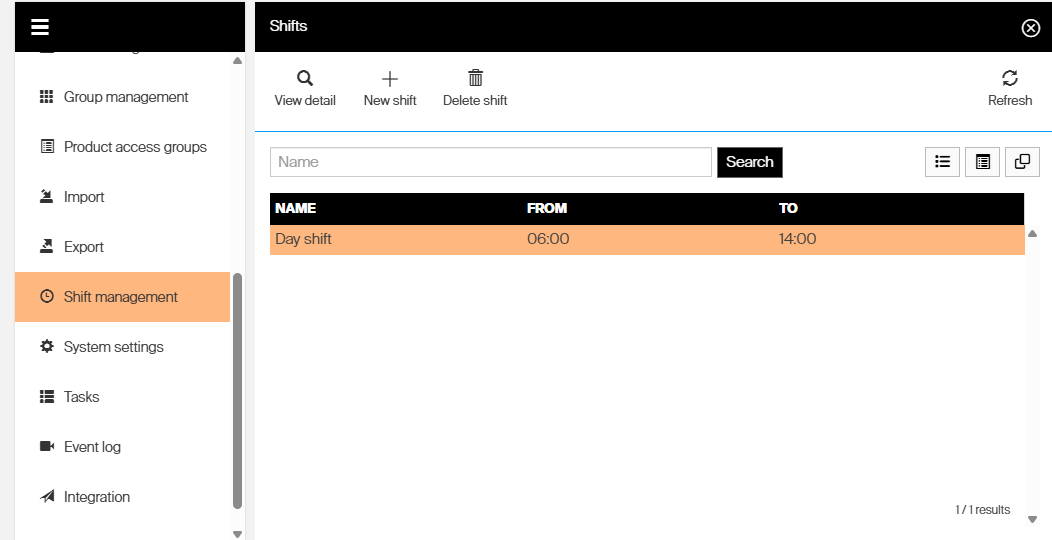
The saved shift appears in the Shifts list with its From and To times.
Next steps
- Apply the shift to a restriction – use the shift to limit pick quantity or value per period in How to restrict item access with Product Access Groups (PAG).
- Add more shifts – repeat the steps for each non-overlapping period you need (for example, a day and a night shift).
Troubleshooting
| Problem | Likely cause | Fix |
|---|---|---|
| Save shift is disabled | Name, From, or To is empty | Complete all three fields – the button enables once the shift is valid. |
| The shift will not save | Its time window overlaps an existing shift | Adjust the From and To times so the period does not overlap another shift. |
| Shift management is missing from the menu | Your account lacks Administration access | Ask an administrator to grant the required permission. |
| The Timezone field cannot be changed | Timezone is set at the system level | This is expected. Change it in System settings reference if needed. |