Read time: ~4 minutes
Applies to: Shop Floor Interface
Note: Images and descriptions are based on an open storage device. A physical device will open the location instead of asking for checkmark confirmation.
What you can do
Return a picked item to its storage location using the Shop Floor Interface (SFI). When you return an item in “New” condition, it goes back into available stock as a full-quality item ready for the next user.
Before you start
- You need a user account with permission to return items.
- You need access to the Shop Floor Interface on a device connected to your storage.
- You must have at least one item currently picked (checked out) to your account.
Note: The return flow displays all picked items done by anyone. To view only your picked items, tap “Show mine”. Please note that consumable items may have a limited return window depending on their set timespan.
Quick start
Experienced users — return an item as new in 5 steps:
- Tap Return on the main menu.
- Tap New on the condition selection screen.
- Tap the item you want to return.
- Tap Add to return list, then Finish.
- Tap Return items, place the item in the location shown, and tap Returning finished.
Need more detail? Follow the full steps below.
Steps
Step 1 — Tap Return on the main menu
After you log in, the SFI shows the main menu for your device. Tap Return to start returning an item.
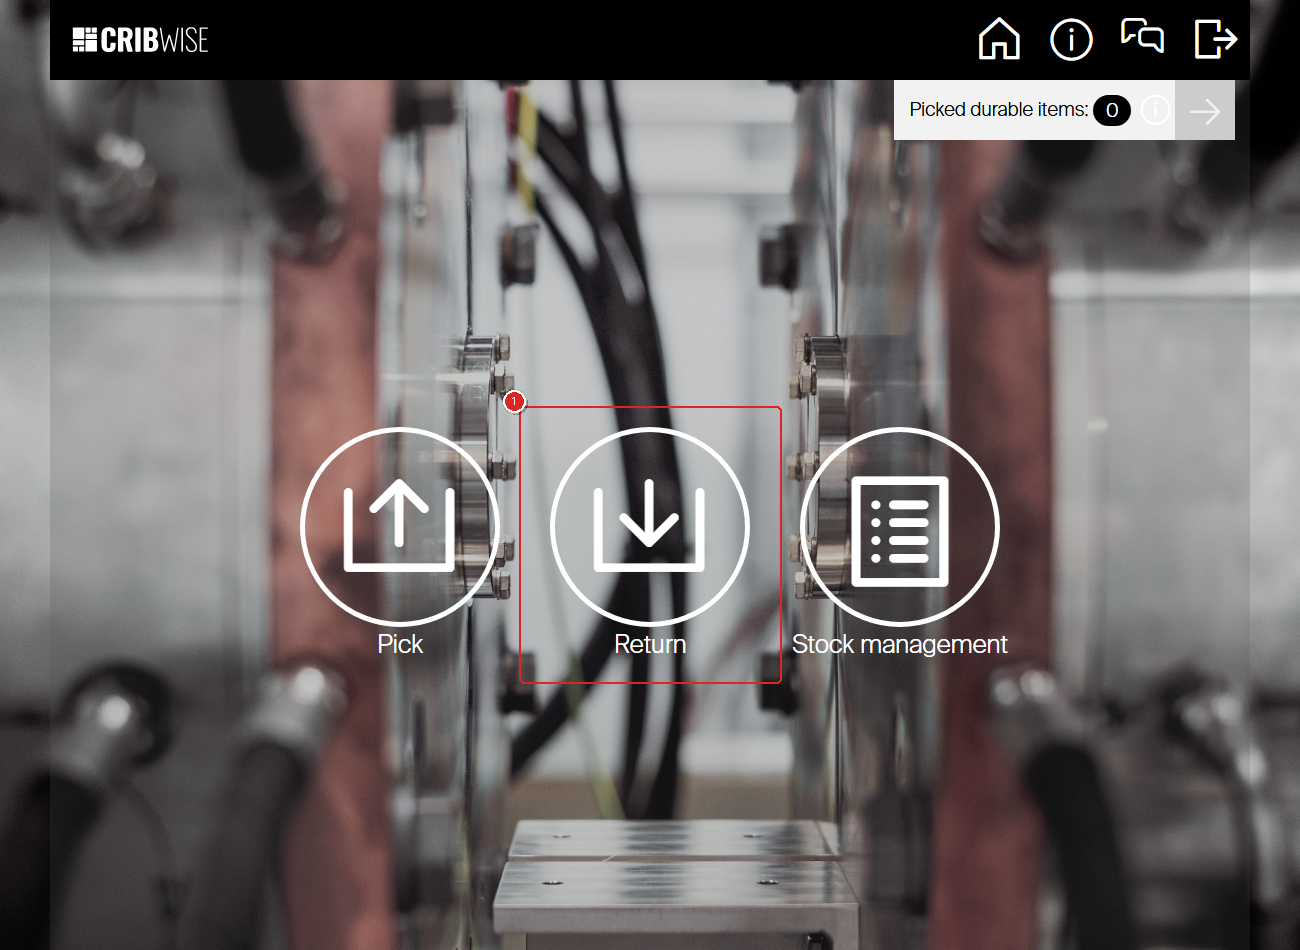
The main menu. Tap Return (1) to begin.
Step 2 — Select the item condition
The condition selection screen shows four options that describe the state of the item you are returning:
| Condition | When to use |
|---|---|
| New | The item is unused or in full working condition. It goes back to available stock. |
| Used | The item has been used but is still functional. It may need inspection or regrinding. |
| For service | The item needs service (regrinding, calibration, or repair) before it can be used again. |
| Scrap | The item is damaged or worn out beyond use. It is removed from stock. |
Tap New to return the item in new condition.
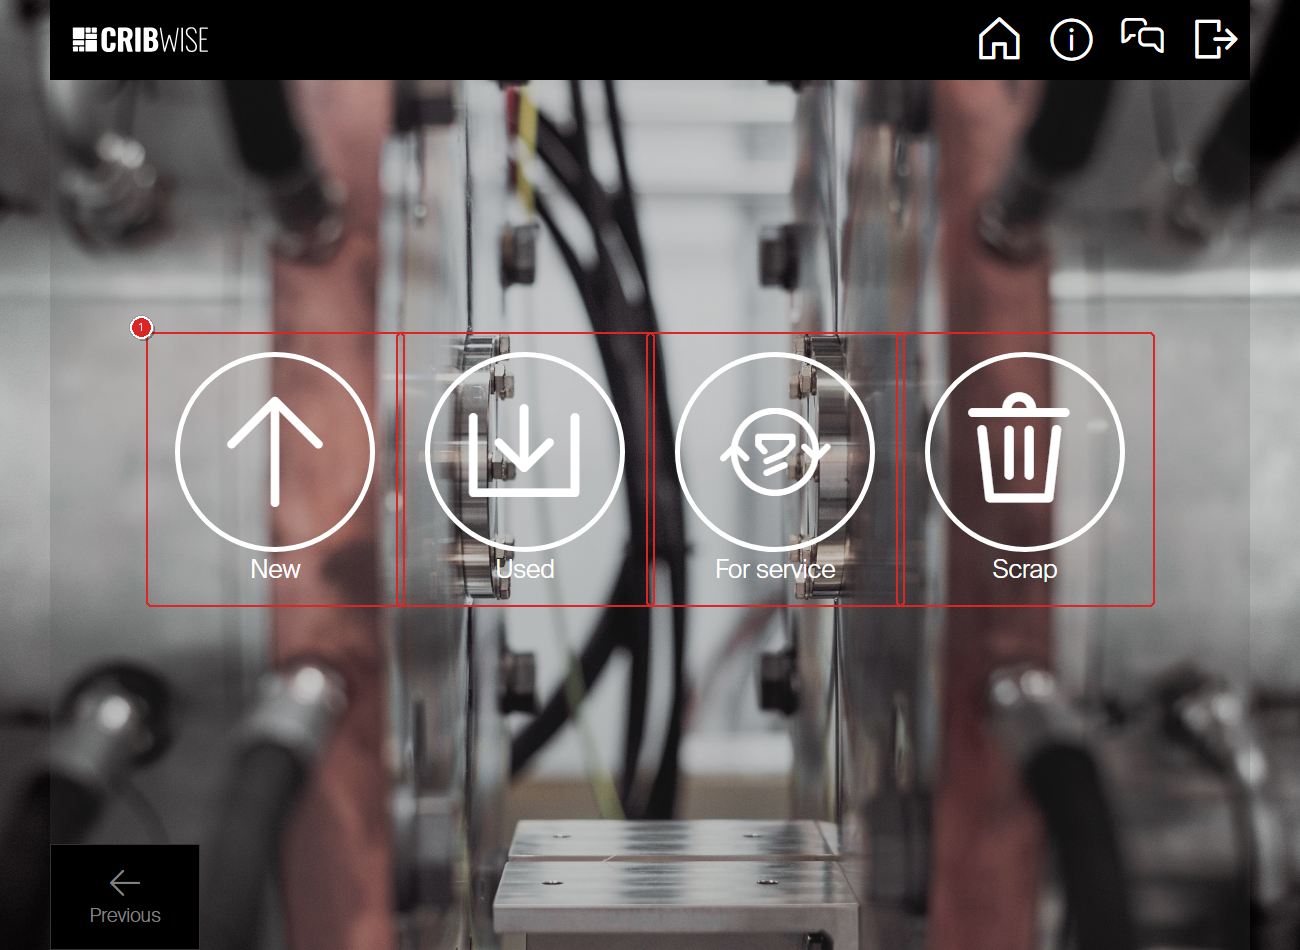
Tap New (1) to return the item in new condition. The other options handle used, service, or scrapped items.
Note: The return options are different depending on user group or user settings.
Step 3 — Select the item to return
The item list shows all items you currently have picked. Each item displays its item ID, description, cost allocation, and the date it was picked.
Tap the item you want to return.
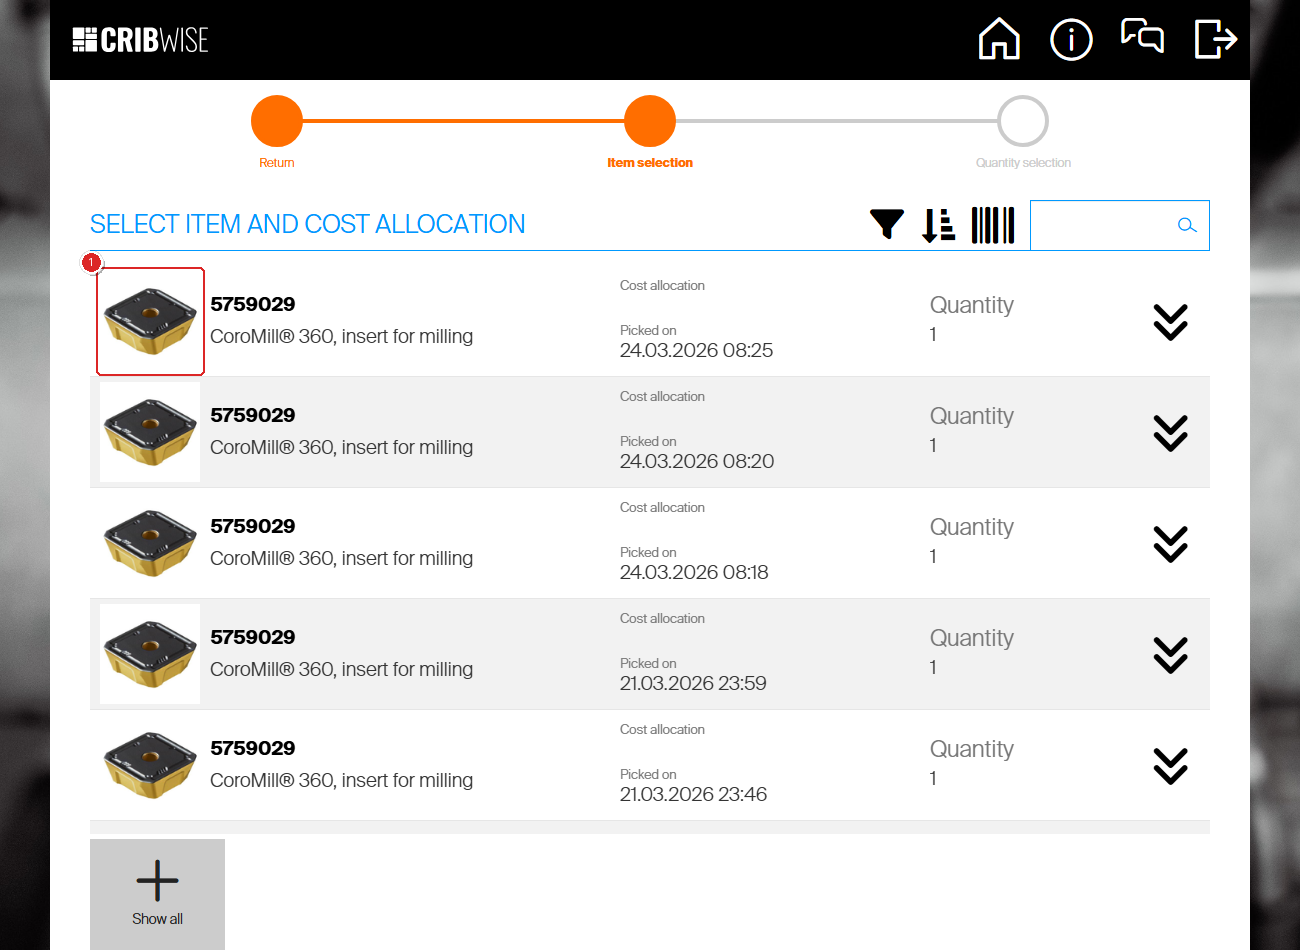
Tap an item (1) to select it for return. Use Show mine to filter items picked by you.
Tip: If you have picked the same item multiple times, each pick appears as a separate row with its own date and cost allocation. Select the specific pick you want to return.
Step 4 — Confirm the quantity and add to return list
The quantity screen shows the selected item with its details and the quantity you picked. The default quantity is the full amount you picked.
- Review the quantity. Use the + and − buttons if you want to return a partial quantity.
- Tap Add to return list to queue this item for return.
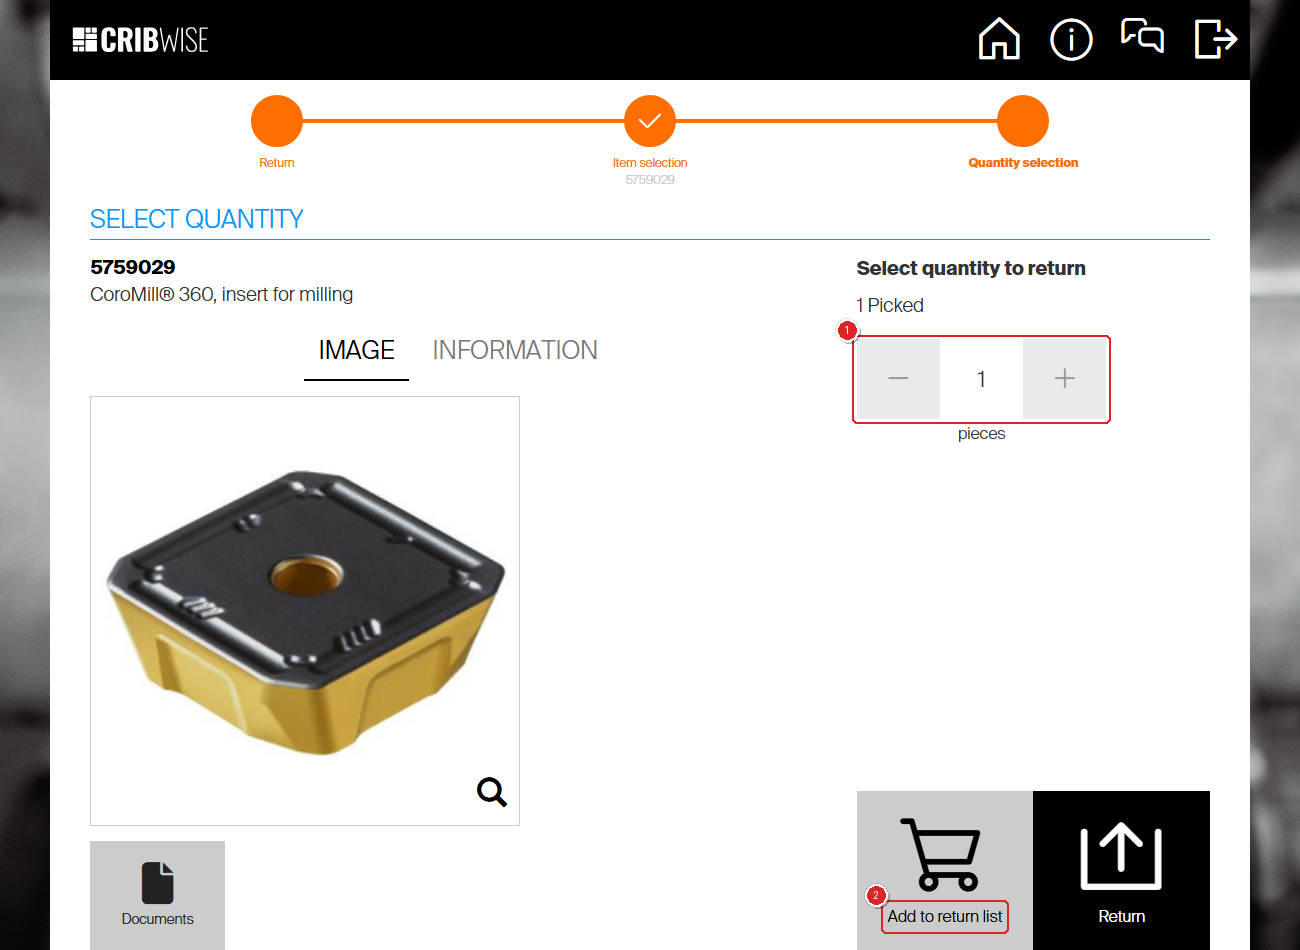
Check the quantity (1) and tap Add to return list (2). To return more items in the same session, select another item. When done, tap Finish.
Note: If you want to return additional items in the same session, you will be taken back to the item list. Select the next item and repeat. Tap Finish when all items are added.
After adding all items, tap Finish to review the return list.
Step 5 — Review and confirm the return
The return list summary shows all items you are about to return, including the item ID, description, cost allocation, and quantity.
Tap Return items to proceed.
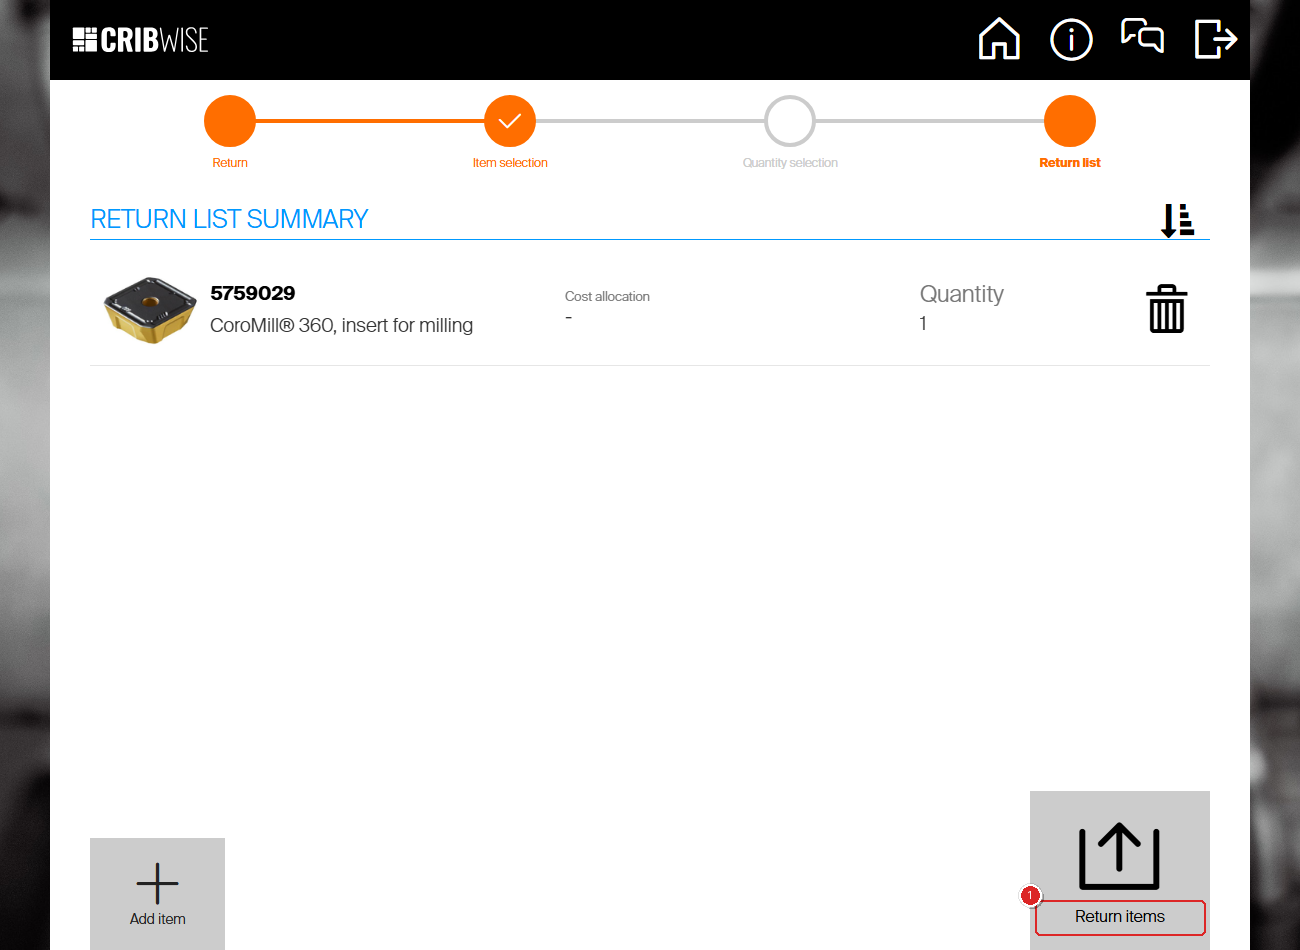
Review the return list and tap Return items (1) to confirm.
Step 6 — Place the item in the location shown
The “Items to return” screen shows you exactly where to place each item. It displays the item ID, storage location (for example, A-01-01-04), and quantity.
- Go to the location shown and place the item back.
- Tap Returning finished when the item is in place.
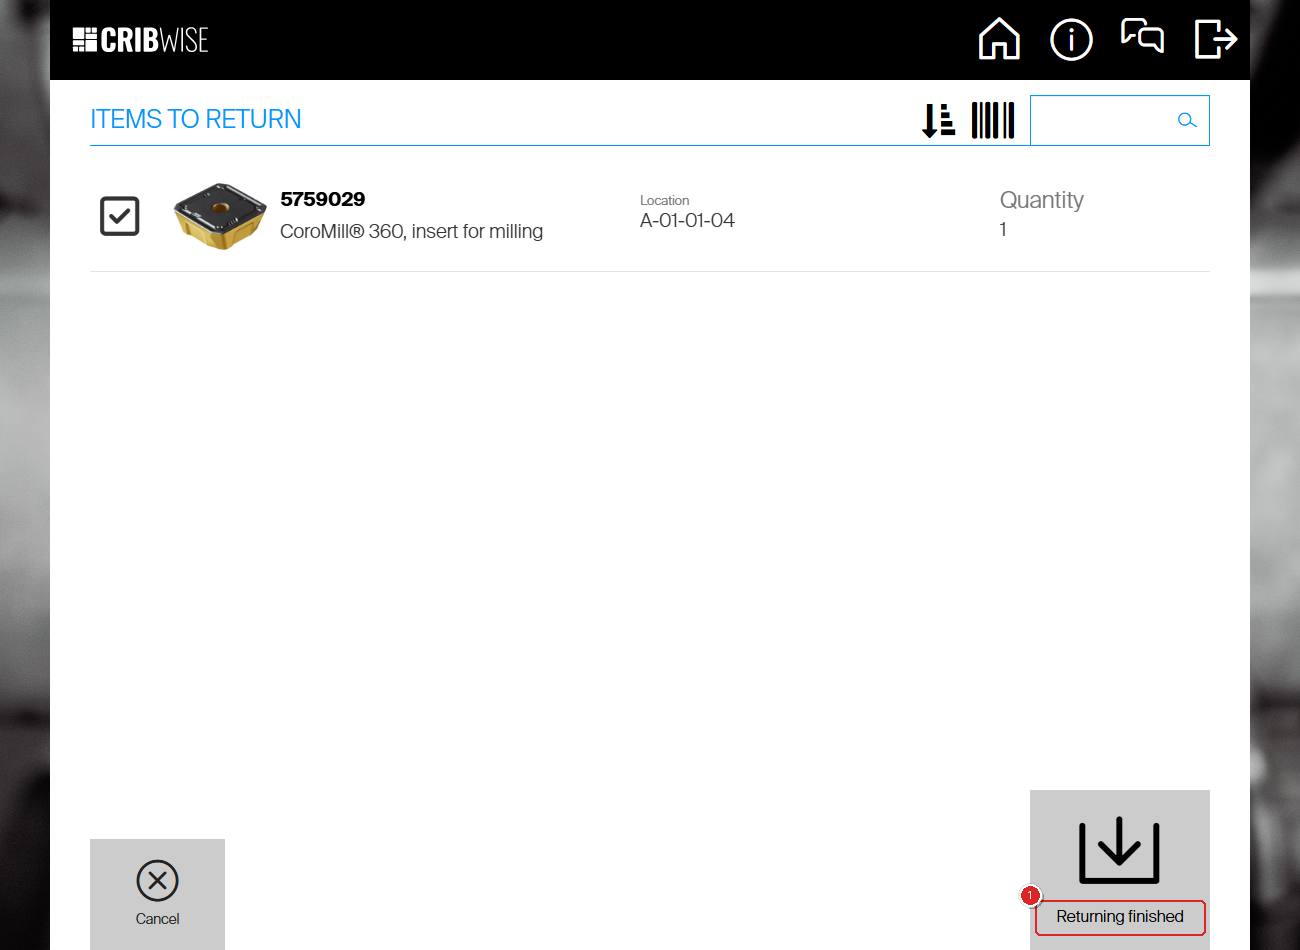
Place the item in the location shown, then tap Returning finished (1).
Note: If your storage device is a vending cabinet, the correct drawer or door opens automatically whenever possible.
Step 7 — Review the summary
The return summary confirms what you returned, to which location, and the quantity.
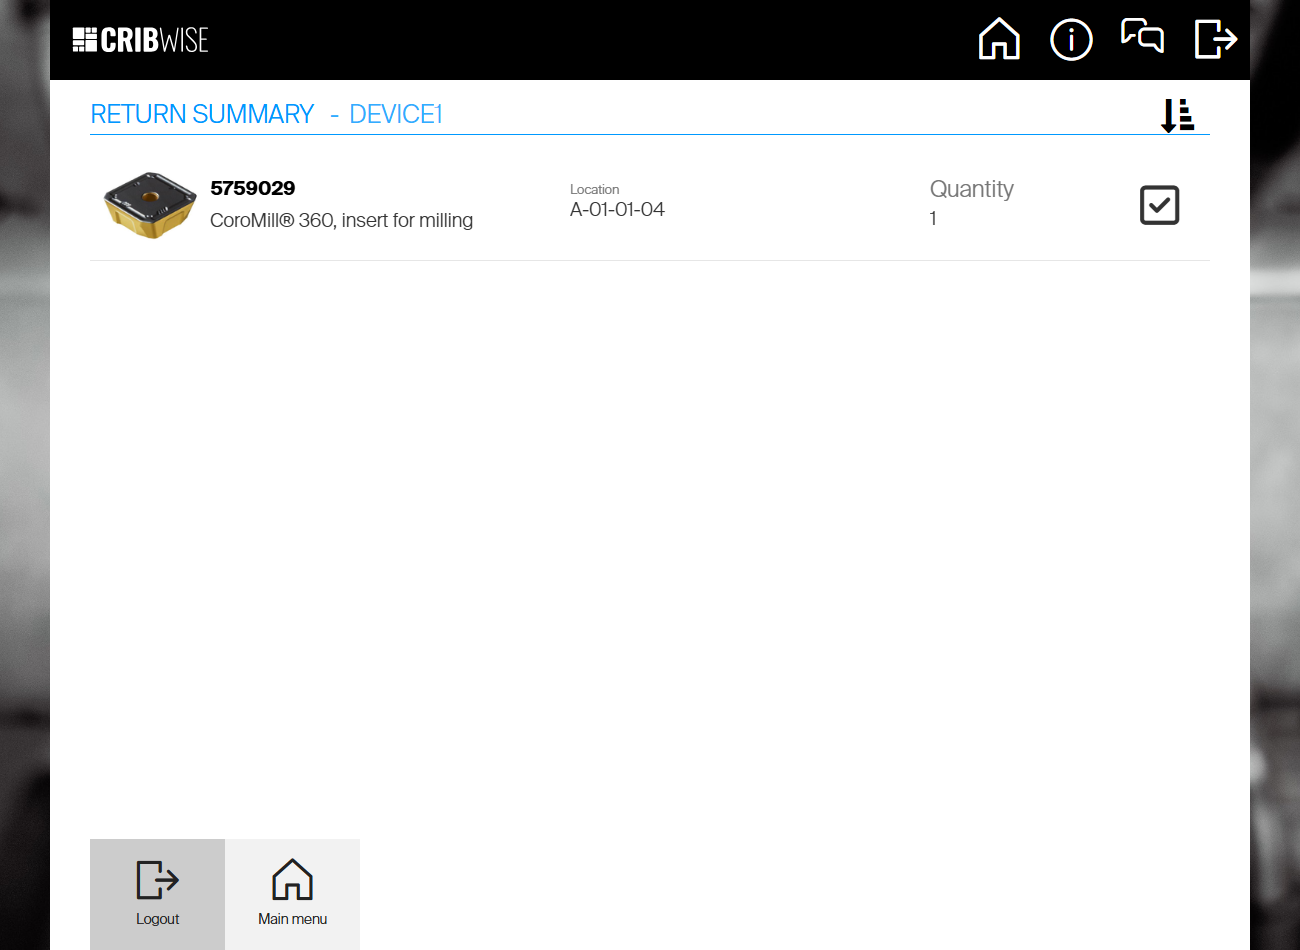
The return summary. Your item has been returned successfully.
Success: You see the “Return summary” screen showing the item, location, and quantity returned. The item is back in stock and available for the next user.
From here, tap Main menu to perform another operation, or Logout to end your session.
Troubleshooting
| Problem | Likely cause | Fix |
|---|---|---|
| The item I want to return is not in the list | The item was picked under a different user account, or has already been returned. | Check with your administrator. Use Show mine to see only your picks. |
| “Show mine” shows no items | You have no items currently picked on this device. | Verify that the item was picked from this device and under your user account. |
| The location shown is not accessible | The storage location may be temporarily blocked or full. | Contact your administrator or try returning to a different storage device. |
| Cannot change the return quantity | The item was picked as a single unit (durable item with quantity 1). | Durable items are returned as a whole unit. You cannot split the return. |
| The drawer or door does not open | The vending cabinet connection may be interrupted. | Check the cabinet is powered on and connected. Contact your administrator if the problem persists. |