Read time: ~4 minutes
Applies to: Shop Floor Interface
Note: Images and descriptions are based on an open storage device. A physical device will open the location instead of asking for checkmark confirmation.
What you can do
Picking is how you take a physical item with the Shop Floor Interface (SFI) — such as a tool, insert, or spare part — out of the storage device for use in production.
Before you start
- You need a user account with permission to pick items.
- You need access to the Shop Floor Interface on a device connected to your storage.
- Know which storage device holds the item you need.
Tip: If you are unsure which device has your item, you can tap Show items not assigned in this device during item selection to browse all items in the system.
Quick start
Experienced users — pick an item in 4 steps:
- Tap Pick on the main menu.
- Tap the item you want to pick.
- Set the quantity and tap Pick.
- Collect the item from the location shown and tap Picking finished.
Need more detail? Follow the full steps below.
Steps
Step 1 — Tap Pick on the main menu
After you log in, the SFI shows the main menu for your device. Tap Pick (1) to start picking an item.
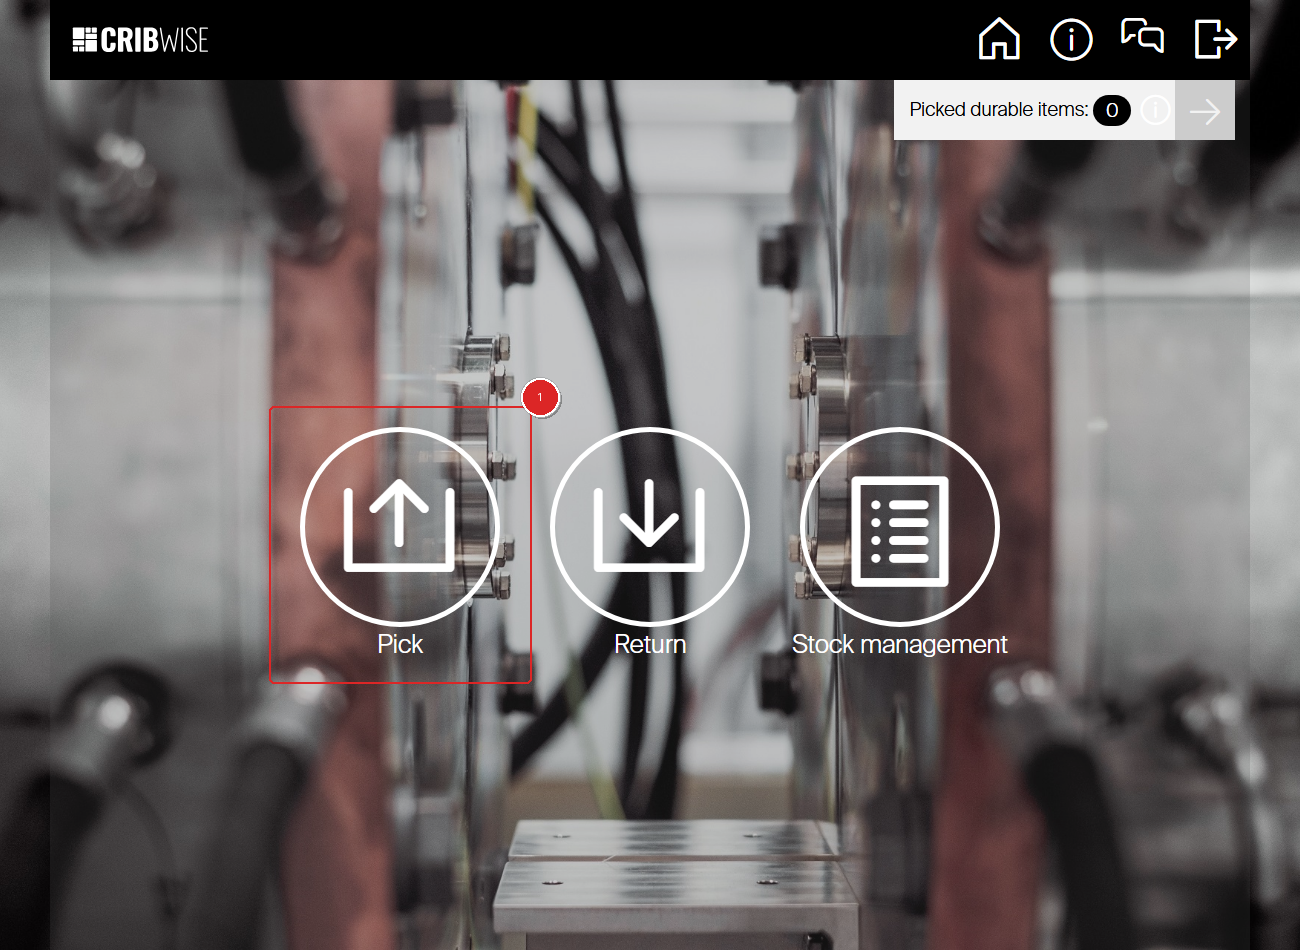
Note: If your system is configured with multiple devices, you may first see a device selection screen. Tap the device where your item is stored.
Step 2 — Select the item
The item list shows all items available in this device. Depending on the system settings, each row displays 1-3 lines of information and available quantity. In this example each row shows the item ID and description.
Tap the item you want to pick (1). Use the search field (blue) or barcode scanner icon to find items quickly. Note that using a barcode scanner or a keyboard will select the item directly if only one item matches the search.
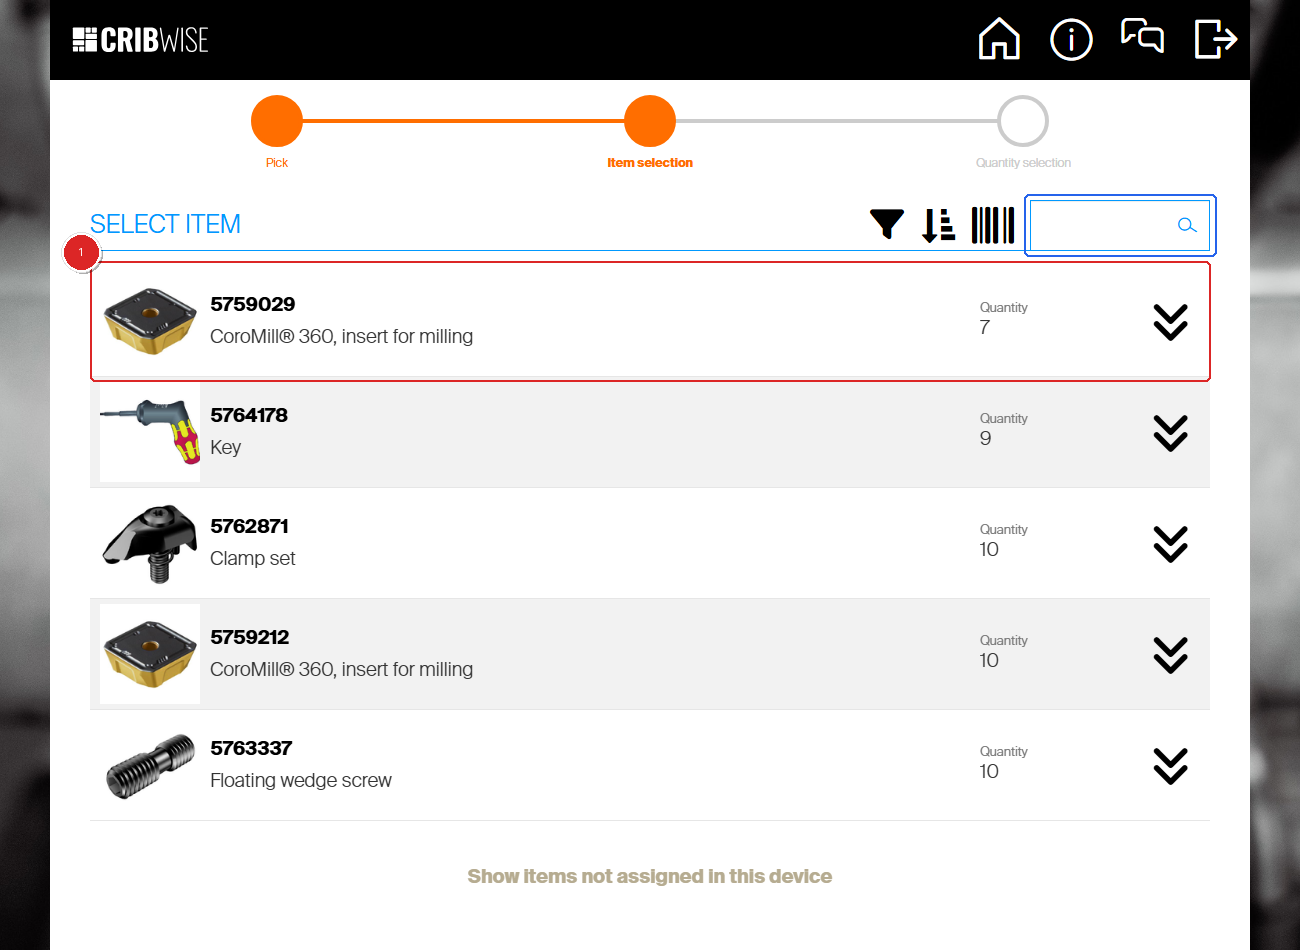
Tip: Tap Show items not assigned in this device at the bottom to see all items in the system, not only those assigned to this device.
Step 3 — Set the quantity and tap Pick
The quantity screen shows the selected item with its details (item ID, name, description, type, and vendor) and the available quantity.
- Use the − and + buttons (1) to set the quantity you need. The default is 1 unless changed in the settings for that particular device.
- Tap Pick (2) to pick this item now.
To pick multiple items in one go, tap Add to pick list instead.
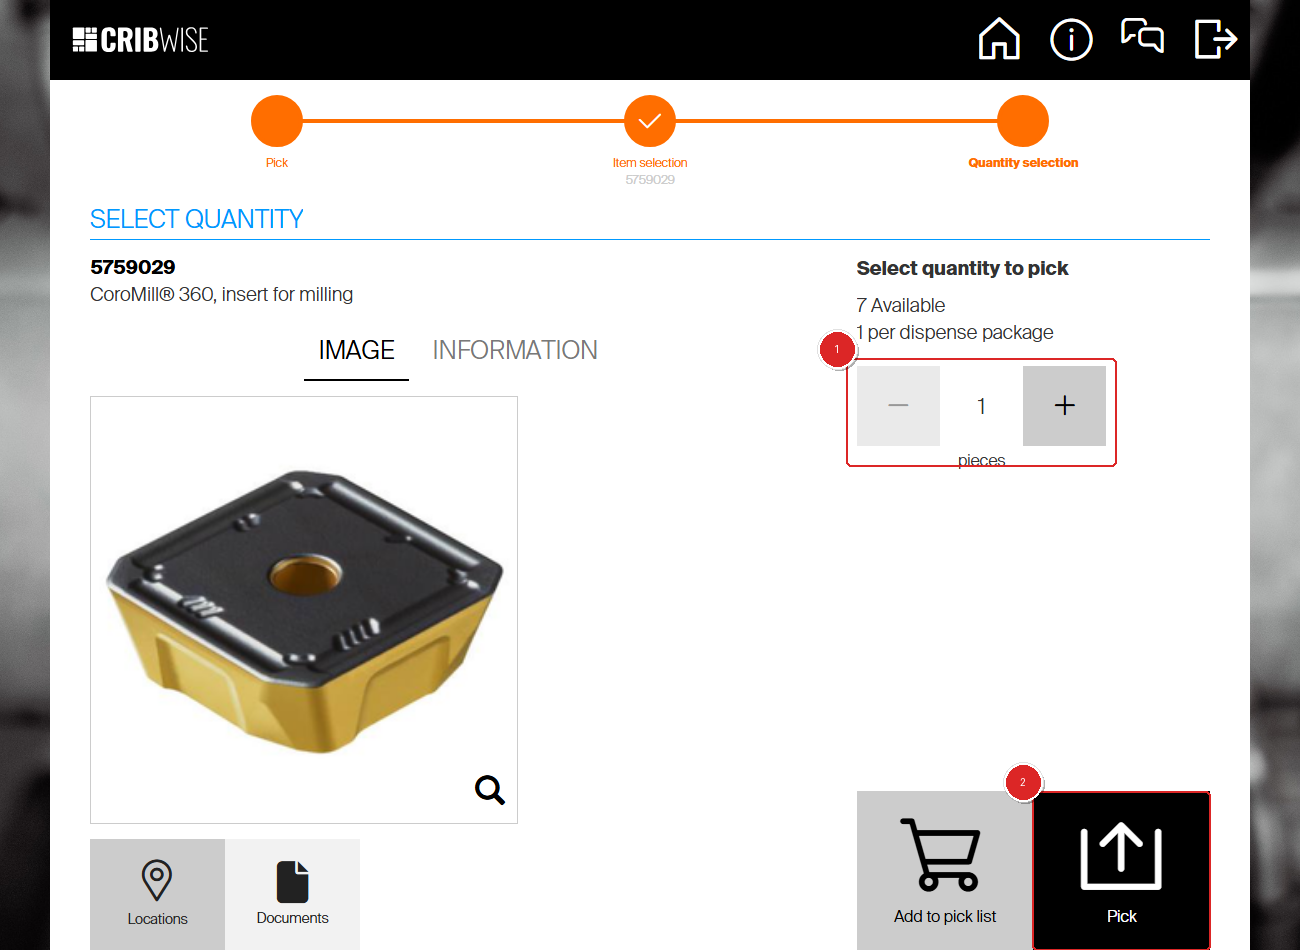
Tip: Tap Related items to see alternative items, or Locations to see where this item is stored.
Step 4 — Collect the item from the location shown
The “Items to pick” screen shows you exactly where to collect each item. It displays the item ID, storage location (for example, A-01-01-01), and quantity (1).
- Go to the location shown and take the item.
- Tap Picking finished (2) when you have collected the item.
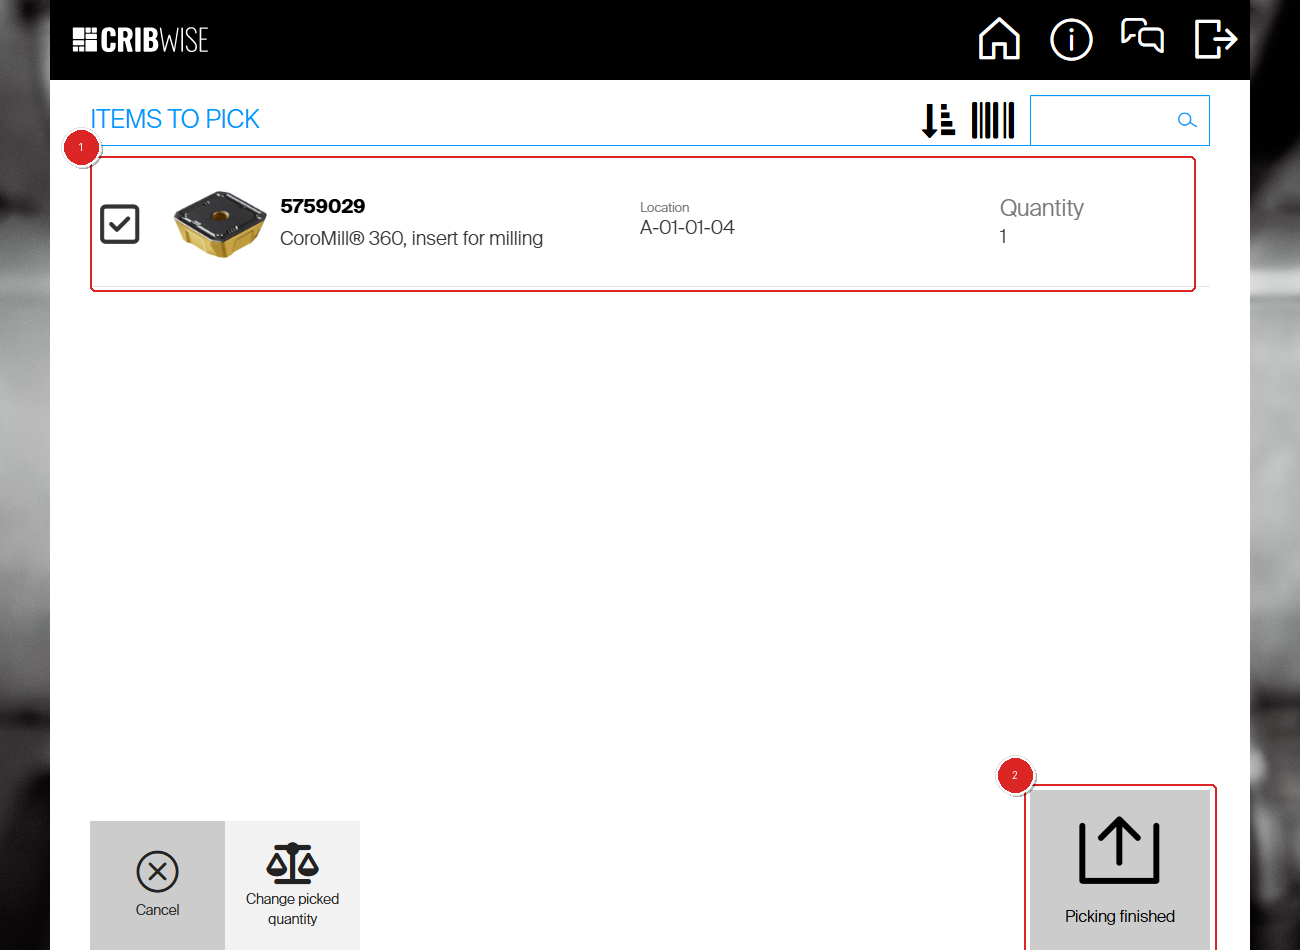
Note: If your storage device is a vending cabinet, the correct drawer or door opens automatically.
Step 5 — Review the summary
The pick summary confirms what you picked, from which location, and the quantity. A checkmark indicates the pick was processed successfully (green highlight).

Success: You see the “Pick summary” screen with a checkmark next to the item.
Tap Main menu (1) to perform another operation, or Logout to end your session.
Troubleshooting
| Problem | Likely cause | Fix |
|---|---|---|
| The item is not in the list | The item is stored in a different device, or has zero quantity in this device. | Go back and select another device (only for open storage), or tap Show items not assigned in this device. |
| “Picked durable items” notification appears | You have durable items checked out that are due for return. | Tap the notification to review and return overdue items. This does not block picking. |
| Cost allocation fields appear unexpectedly | Your administrator enabled cost allocation for this device. | Select or skip each cost allocation field as prompted. Contact your administrator to verify the setup. |
| Cannot change the quantity | The item is sold in fixed dispense packages (for example, boxes of 10). | The quantity increments in packages. Pick the smallest available quantity. |
| The drawer or door does not open | The vending cabinet connection may be interrupted. | Check the cabinet is powered on and connected. Contact your administrator if the problem persists. |