Read time: ~5min
Applies to: Admin portal
What you can do
Create a manual purchase order in to replenish stock from a vendor. Use this for one-off purchases, emergency restocking, or when automatic ordering does not cover a specific need. You can add standard items from the catalog and custom items with a specific order code.
Before you start
- You need Create permission for Orders in your user group. Ask your administrator if you are unsure.
- At least one vendor must exist in the system.
- The items you want to order must already exist and be assigned to a stock.
- Know the quantities you need and the vendor that supplies each item.
Important: Once a purchase order is sent to a vendor, it cannot be undone without manual intervention. Double-check quantities and vendor details before sending.
Quick start
Experienced users — create and send a purchase order in 6 steps:
- Open Order lists > Purchase orders in Admin Portal.
- Click New order in the toolbar.
- Fill in Order type, Vendor, Stock, and Device, then click Save order.
- Switch to the Ordered items tab, click + to add items, or Create custom item for items not in the catalog.
- Switch to the Send options tab, check Mail and Excel, select DefaultTemplate, then click Save order.
- Click Send order to transmit the order to the vendor.
Need more detail? Follow the full steps below.
Steps
Step 1 — Open the purchase orders list
- In Admin Portal, click Order lists in the sidebar.
- Click Purchase orders in the sub-menu.
- The purchase orders list appears with columns for ID, reference, type, vendor, and status.
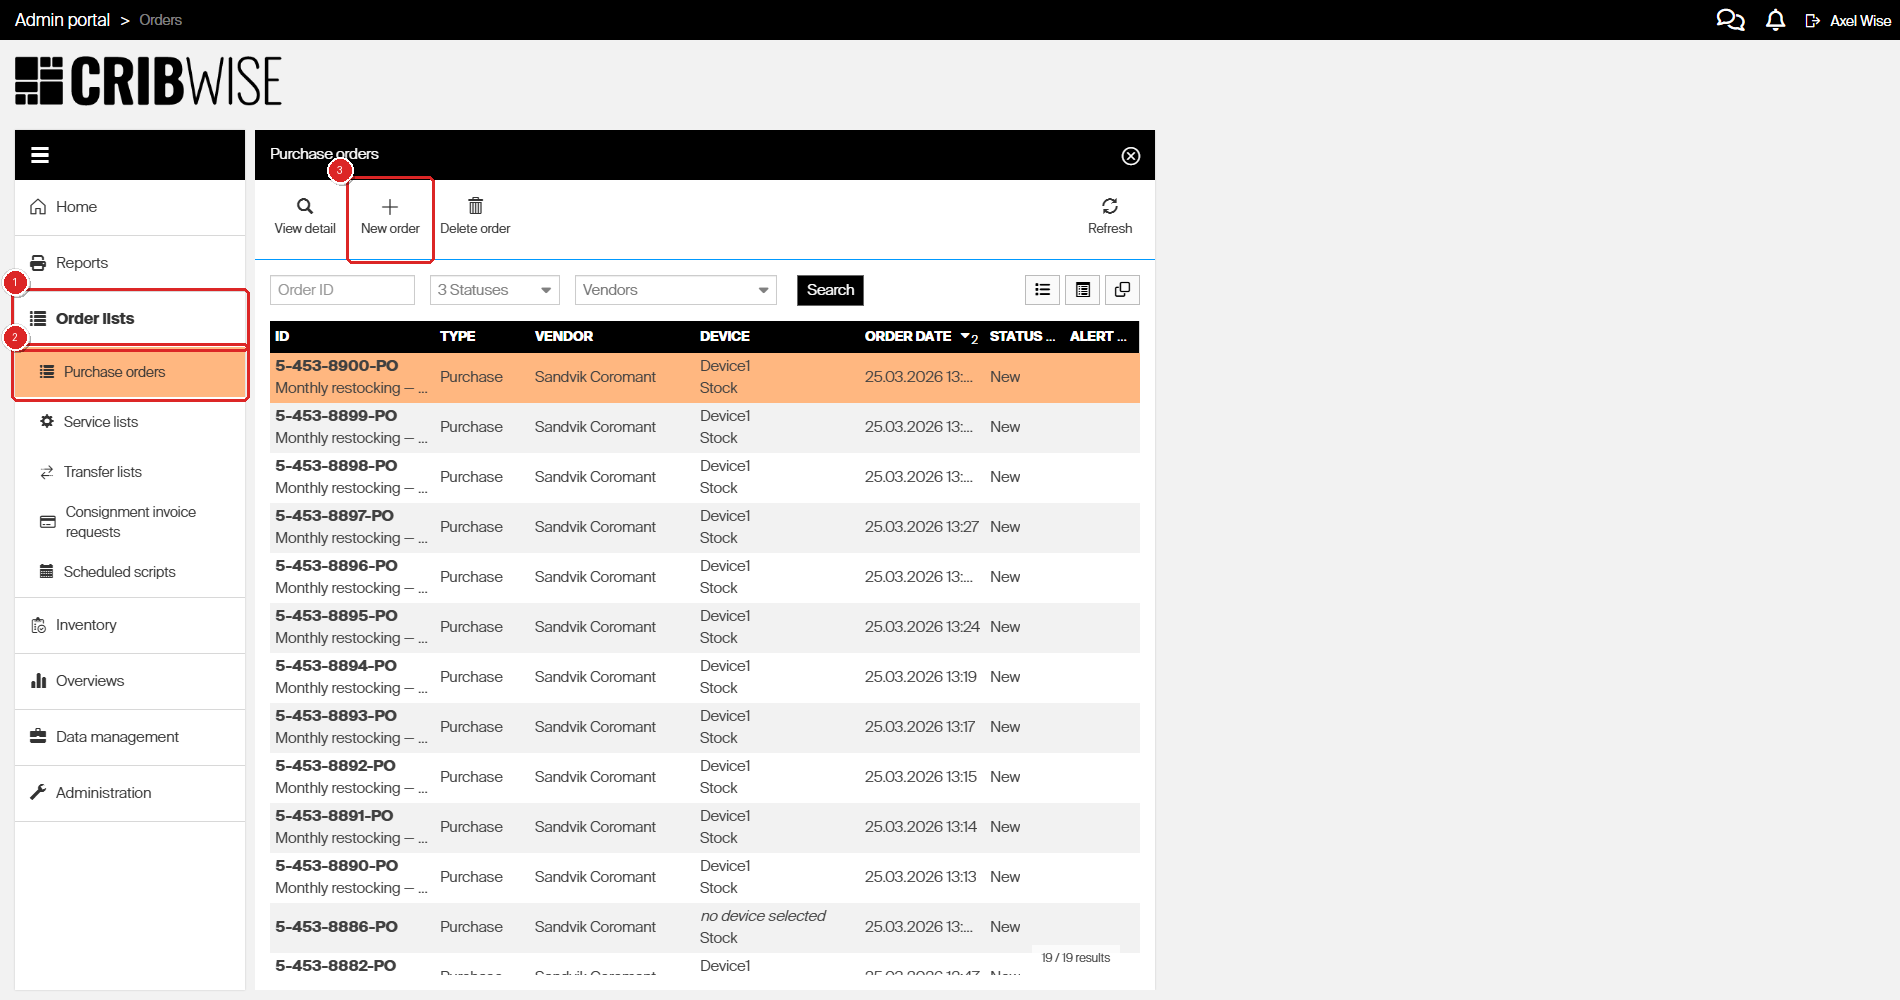
Click Order lists (1), then Purchase orders (2), then New order (3) to begin.
Step 2 – Create a new purchase order
- Click New order in the toolbar.
- A new purchase order form opens on the right side of the screen.
- The General information tab is active with the required fields.
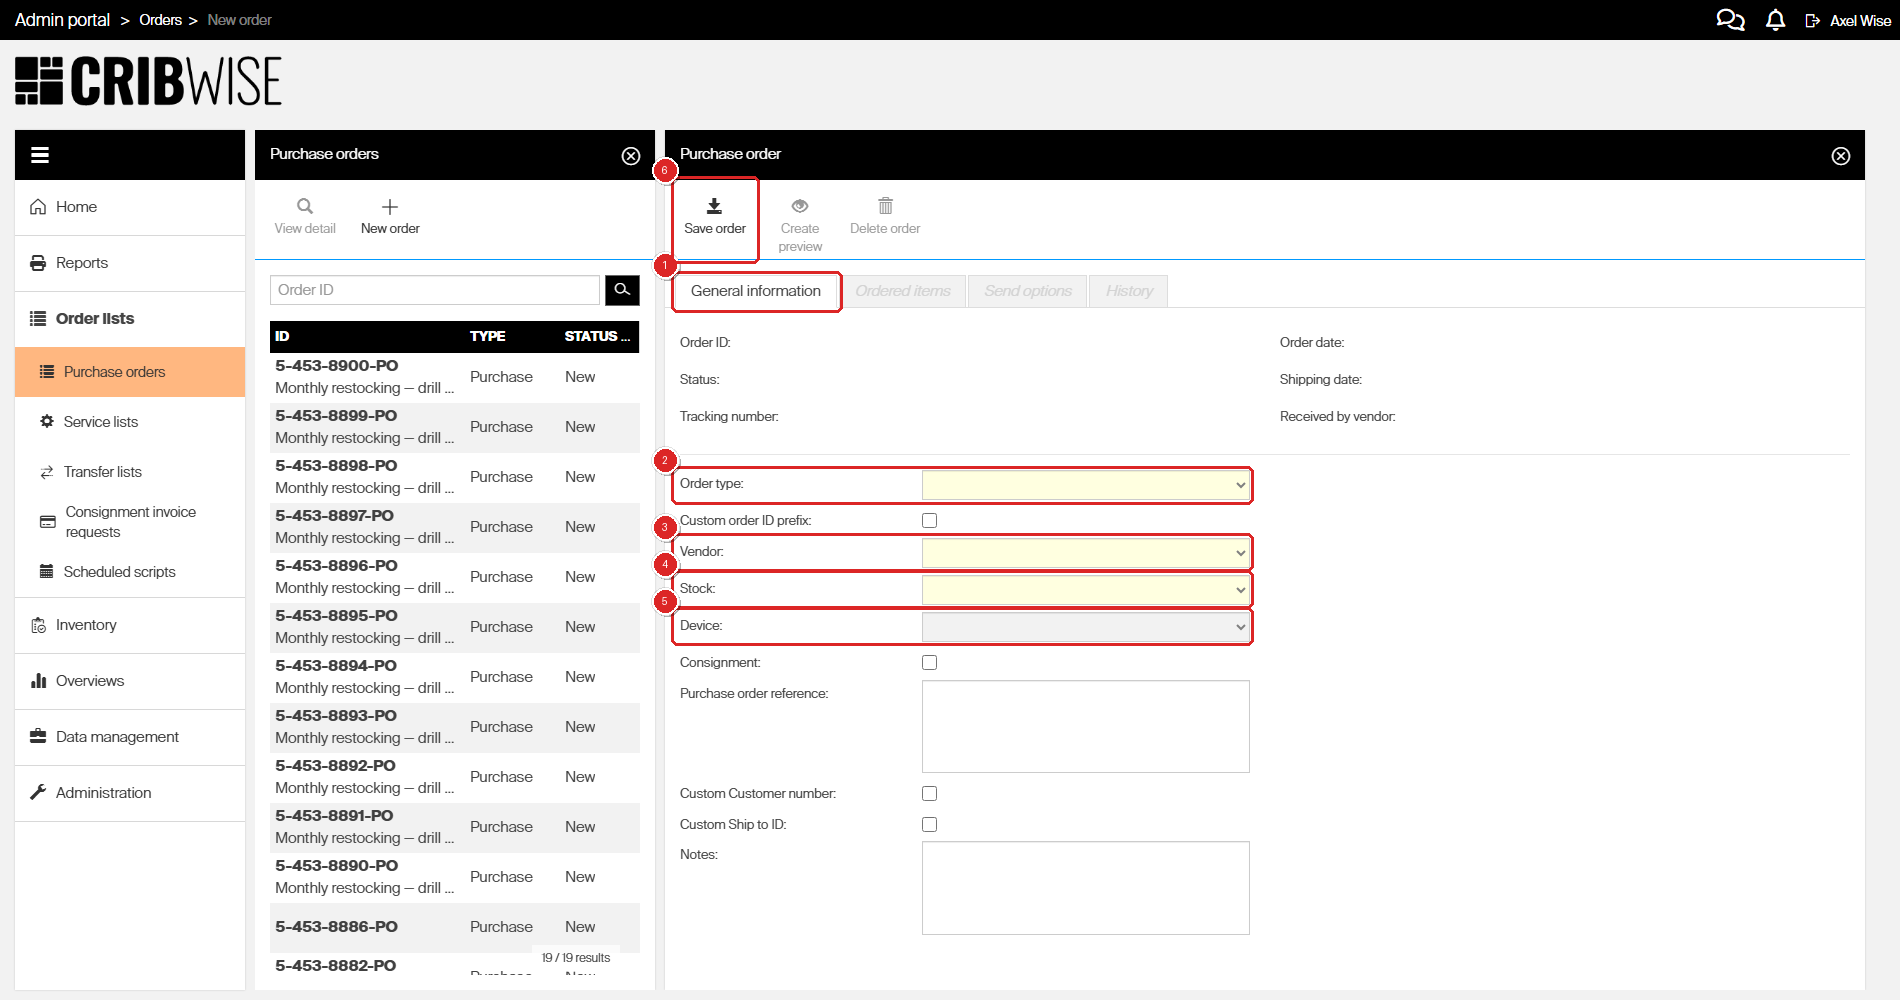
The General information tab (1) shows Order type (2), Vendor (3), Stock (4), Device (5). Click Save order (6) after filling in.
Step 3 – Fill in the order details
- Set Order type to Purchase from the dropdown.
- Select a Vendor from the dropdown (for example, “Sandvik Coromant”).
- Select the Stock where the items will be received.
- Select the Device (storage unit). This auto-selects when only one device exists.
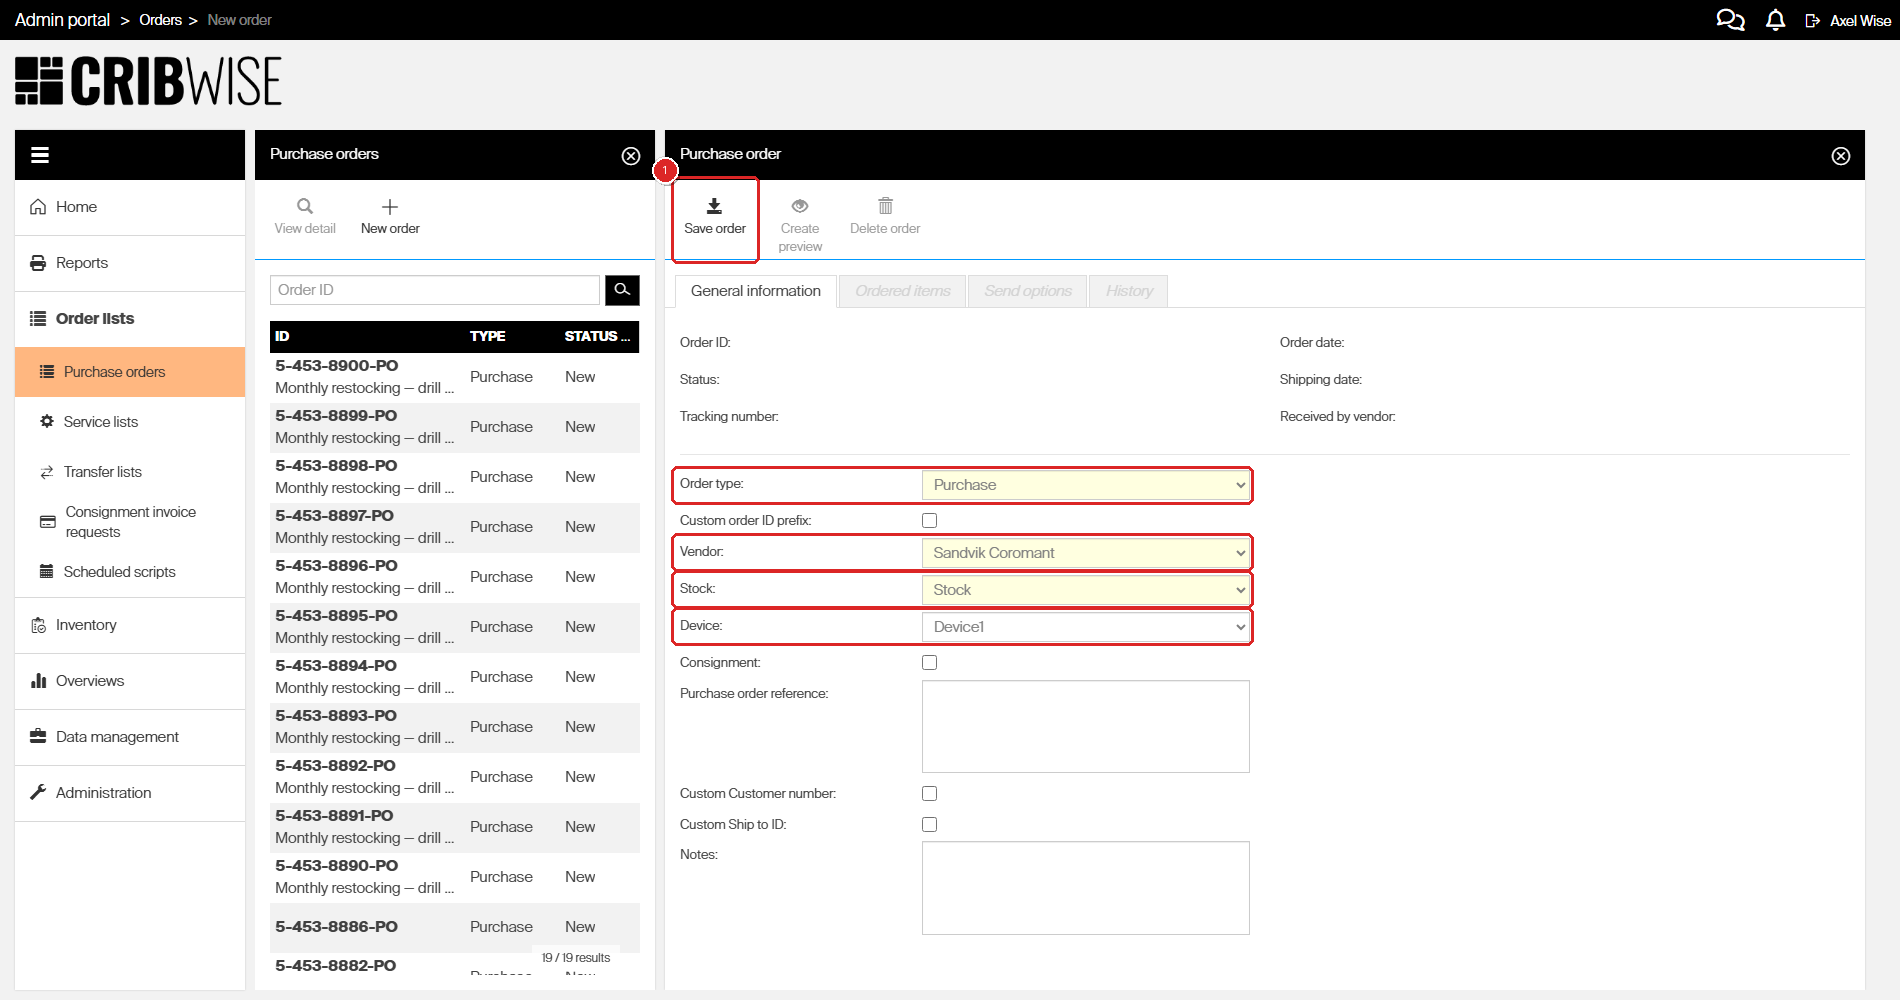
All required fields are filled and highlighted in red. Click Save order (1) to proceed.
- Scroll down and enter a Purchase order reference for internal tracking (for example, “Monthly restocking — drill bits and inserts”).
- Leave the optional checkboxes unchecked: Custom order ID prefix, Consignment, Custom Customer number, Custom Ship to ID.
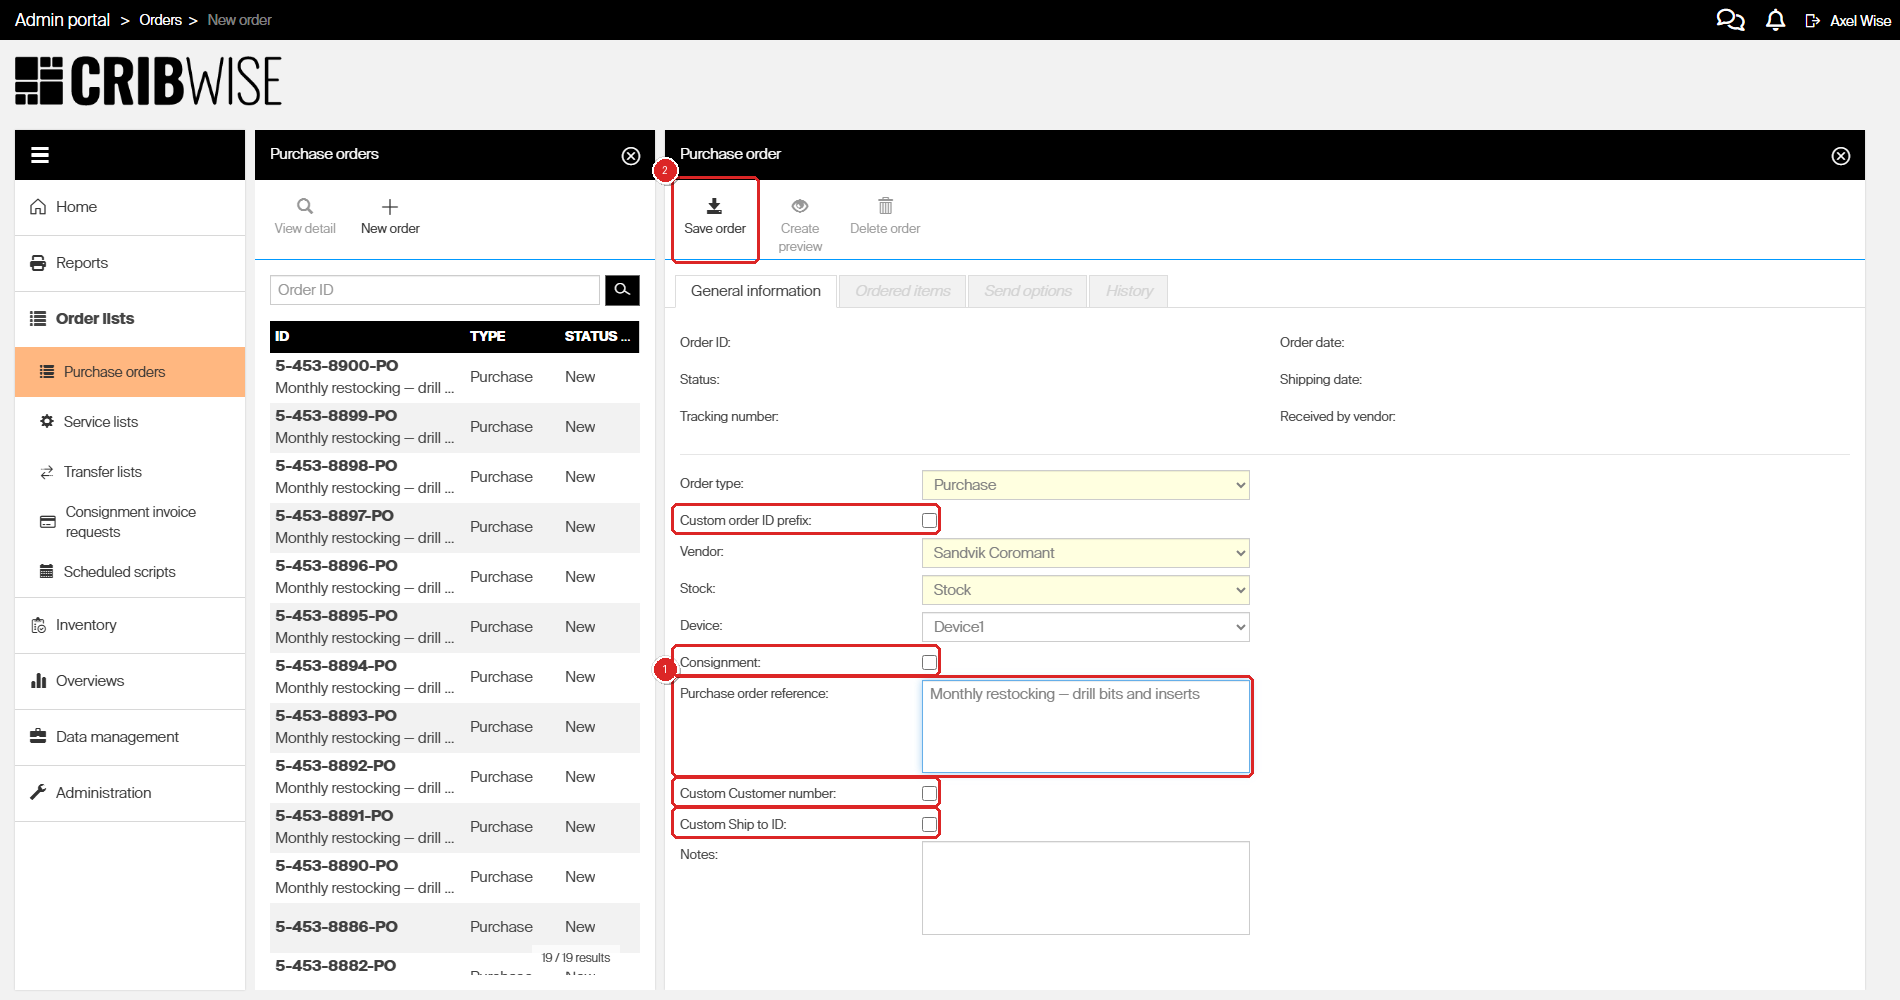
Enter a reference (1) for internal tracking. All checkbox options are unchecked. Click Save order (2).
| Field | Required | What to enter |
|---|---|---|
| Order type | Yes | Purchase (default for manual orders) |
| Vendor | Yes | The supplier for this order |
| Stock | Yes | The stock the device receiving the items belongs to |
| Device | No | The device the order belongs to. |
| Custom order ID prefix | No | Uncheck to use the system-generated ID |
| Consignment | No | Uncheck for standard purchase orders |
| Purchase order reference | No | Reference used by the vendor |
| Custom Customer number | No | Customer number other than the one set for this vendor |
| Custom Ship to ID | No | Used for shipment ID’s, not supported by all vendors. |
| Notes | No | Additional internal comments about the order |
Step 4 – Save the order
- Click Save order in the toolbar.
- The system assigns an Order ID and sets the Status to New.
- Three tabs appear: Ordered items, Send options, and History.
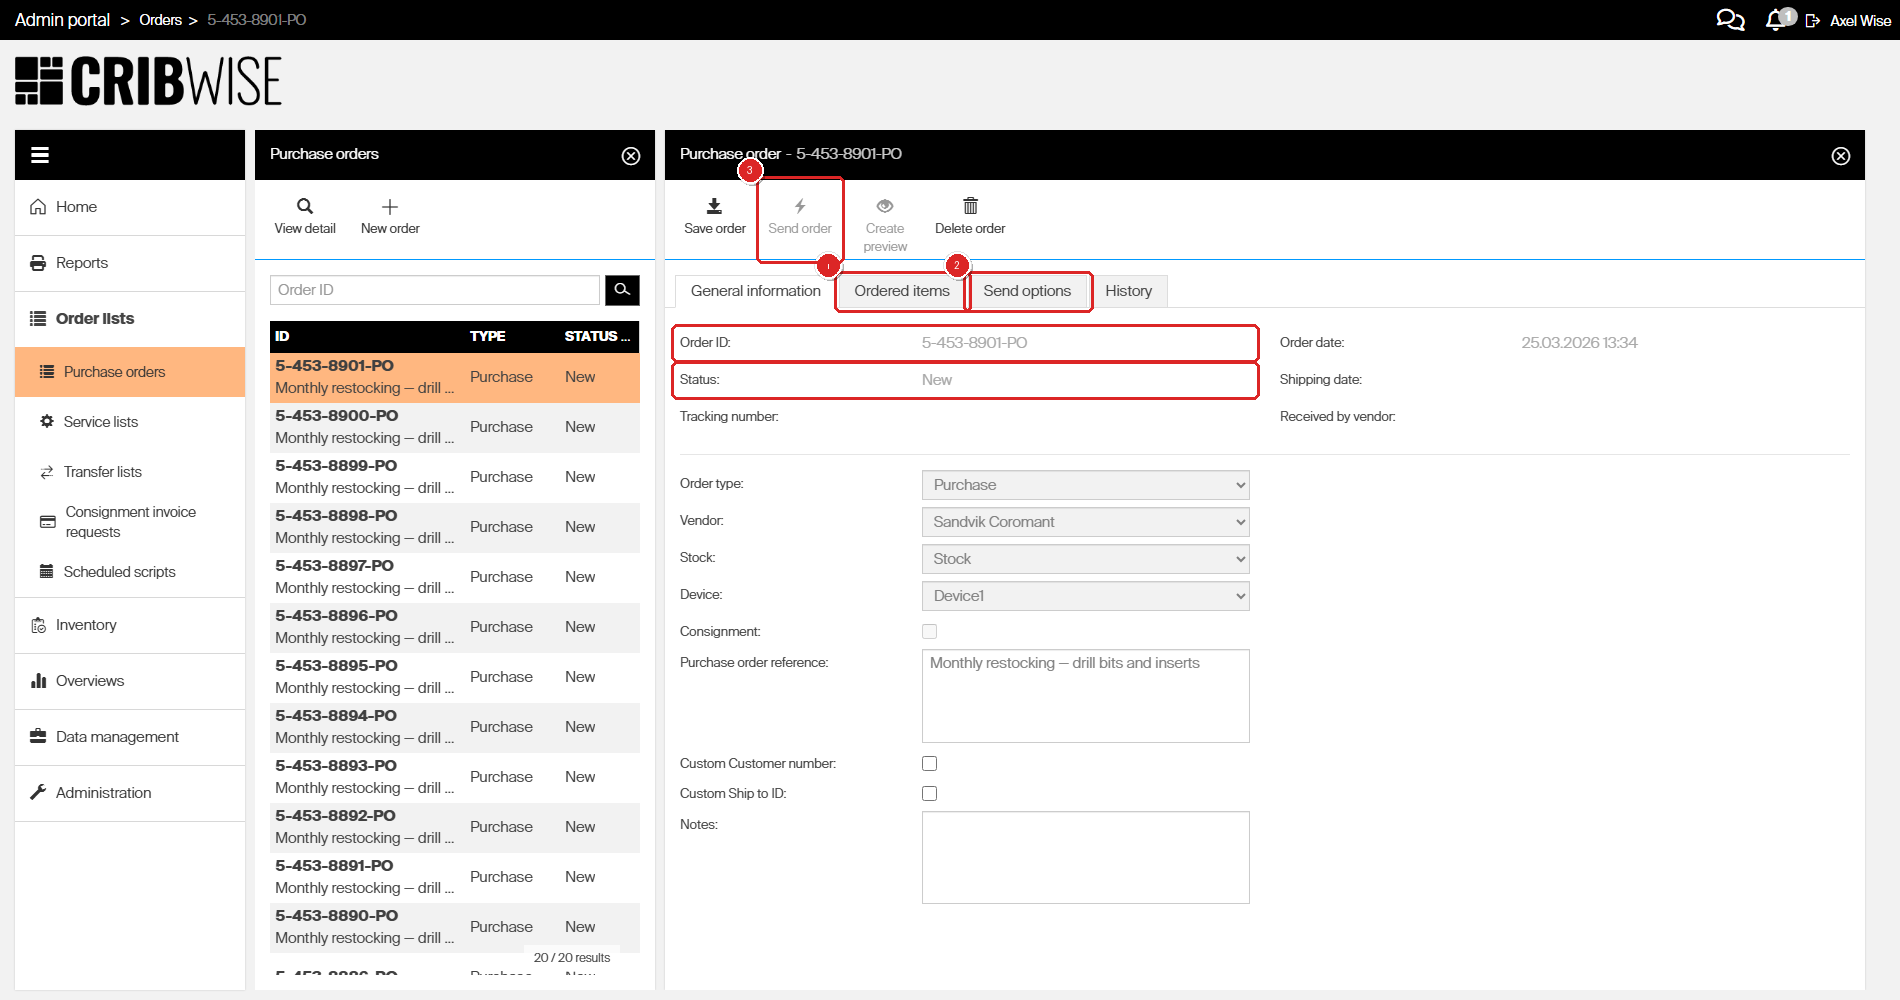
After saving, the order gets an ID and status New. Switch to Ordered items (1) to add items, finalize the order by setting format and delivery method in Send options (2). The Send order button (3) becomes available.
Success: You see an order ID in the header and the status shows New.
Step 5 – Add items to the order
As long as the status is New is it possible to add items.
- Click the Ordered items tab.
- Click the + (New ordered item) button to add a standard item.
- An Items panel opens on the right showing items available from the vendor.
- Click an item row to select it.
- Click OK to add the item to the order.
- Repeat steps 2-5 for each additional item you want to add.
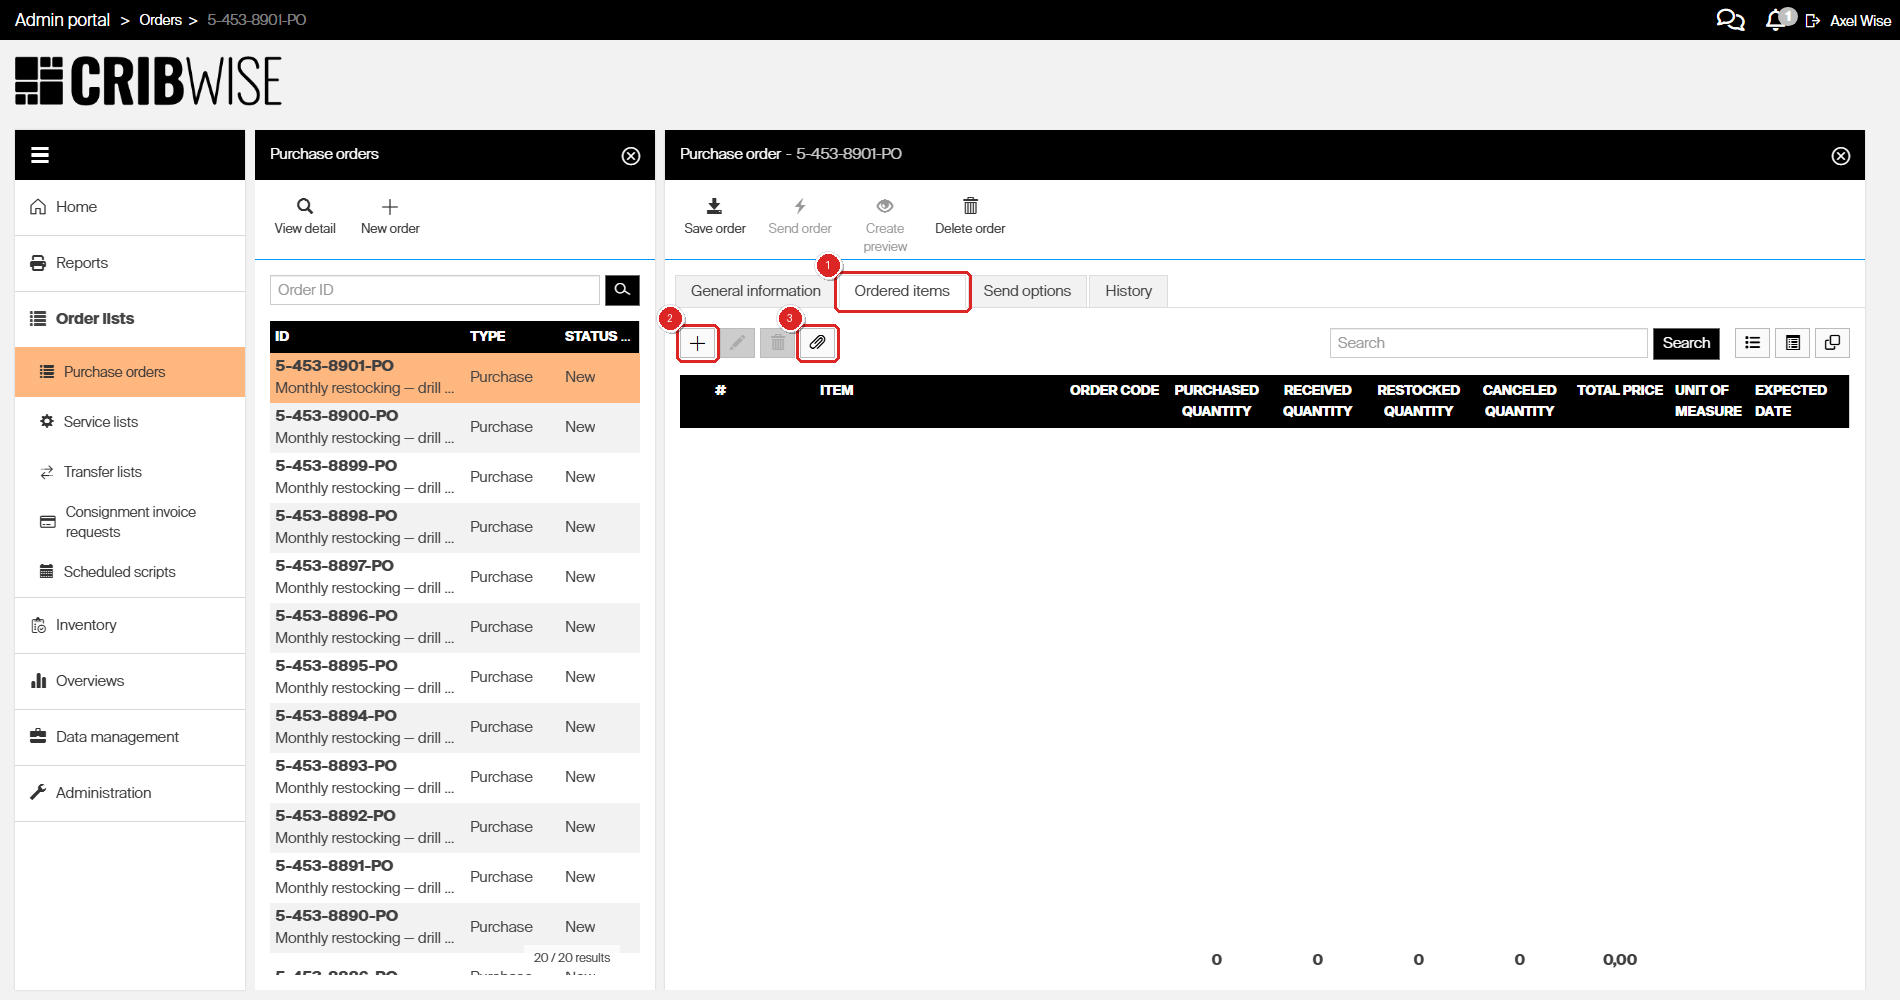
The Ordered items tab (1). Click + (2) to add a standard item, or Create custom item (3) for items not in the catalog.
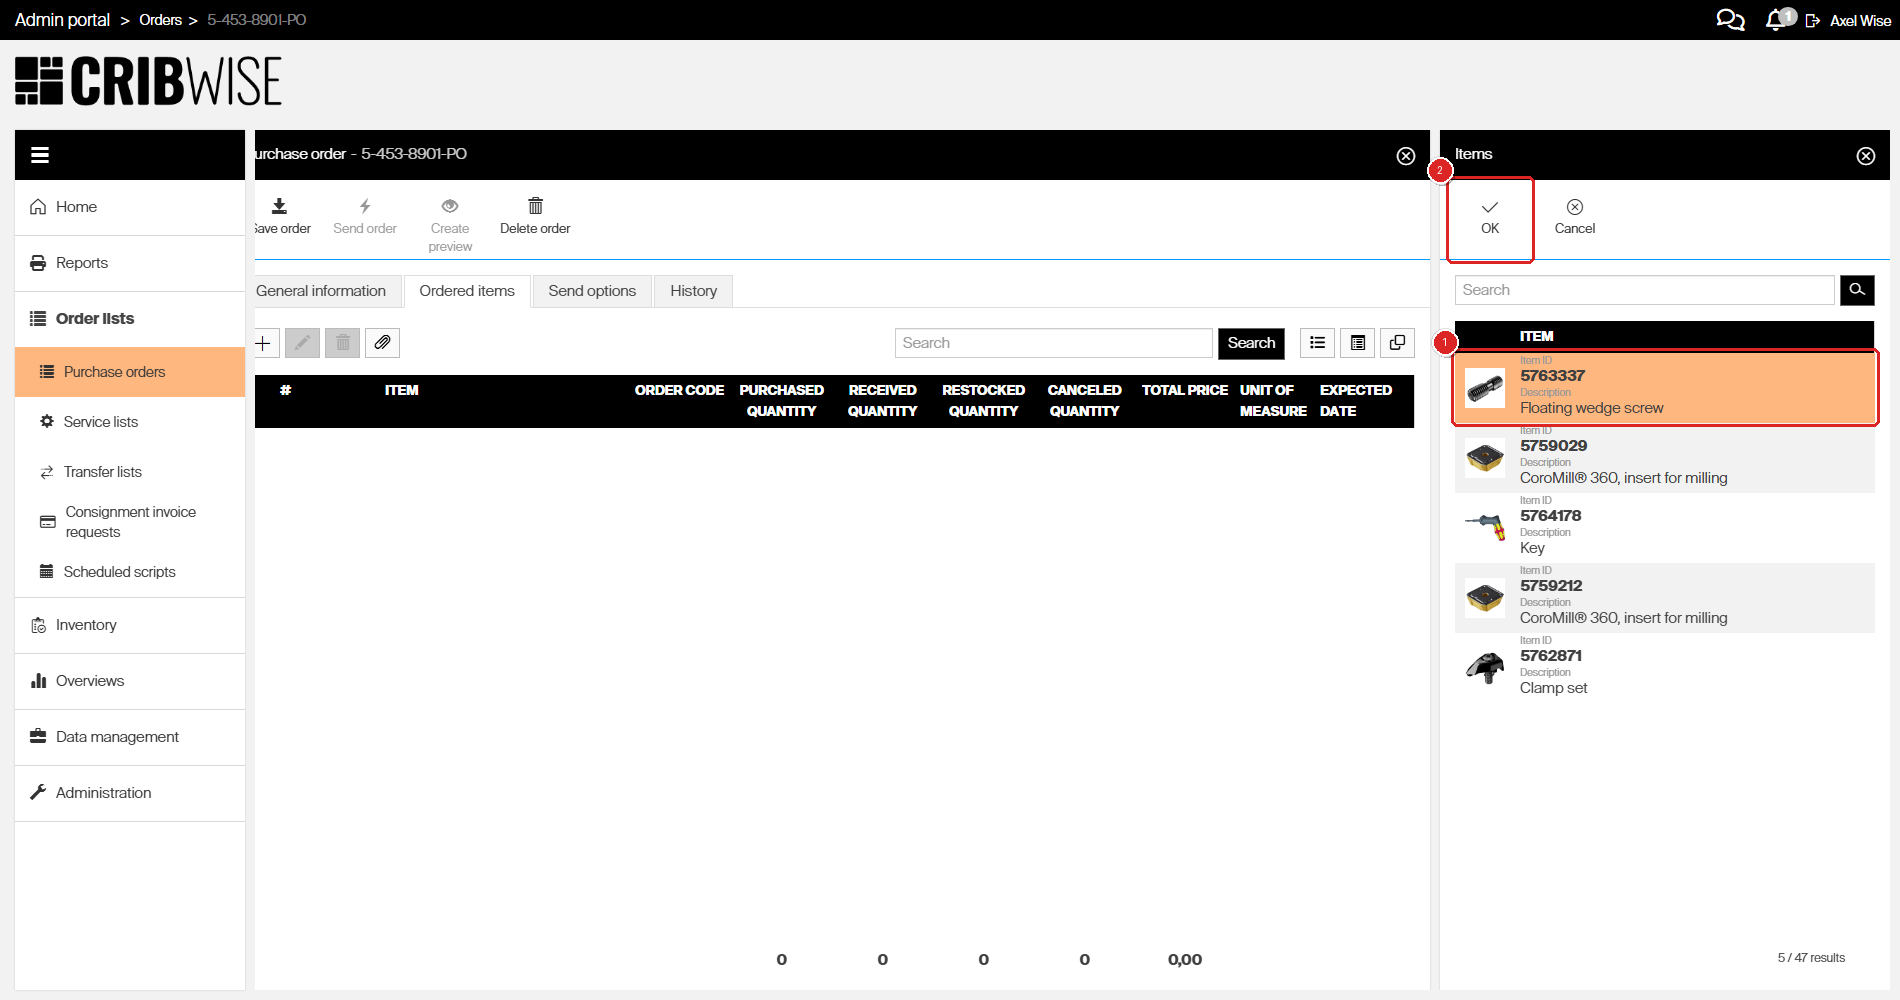
Select an item (1) and click OK (2) to add it to the order.
Important: Only items that are assigned to a cabinet will be available in the list
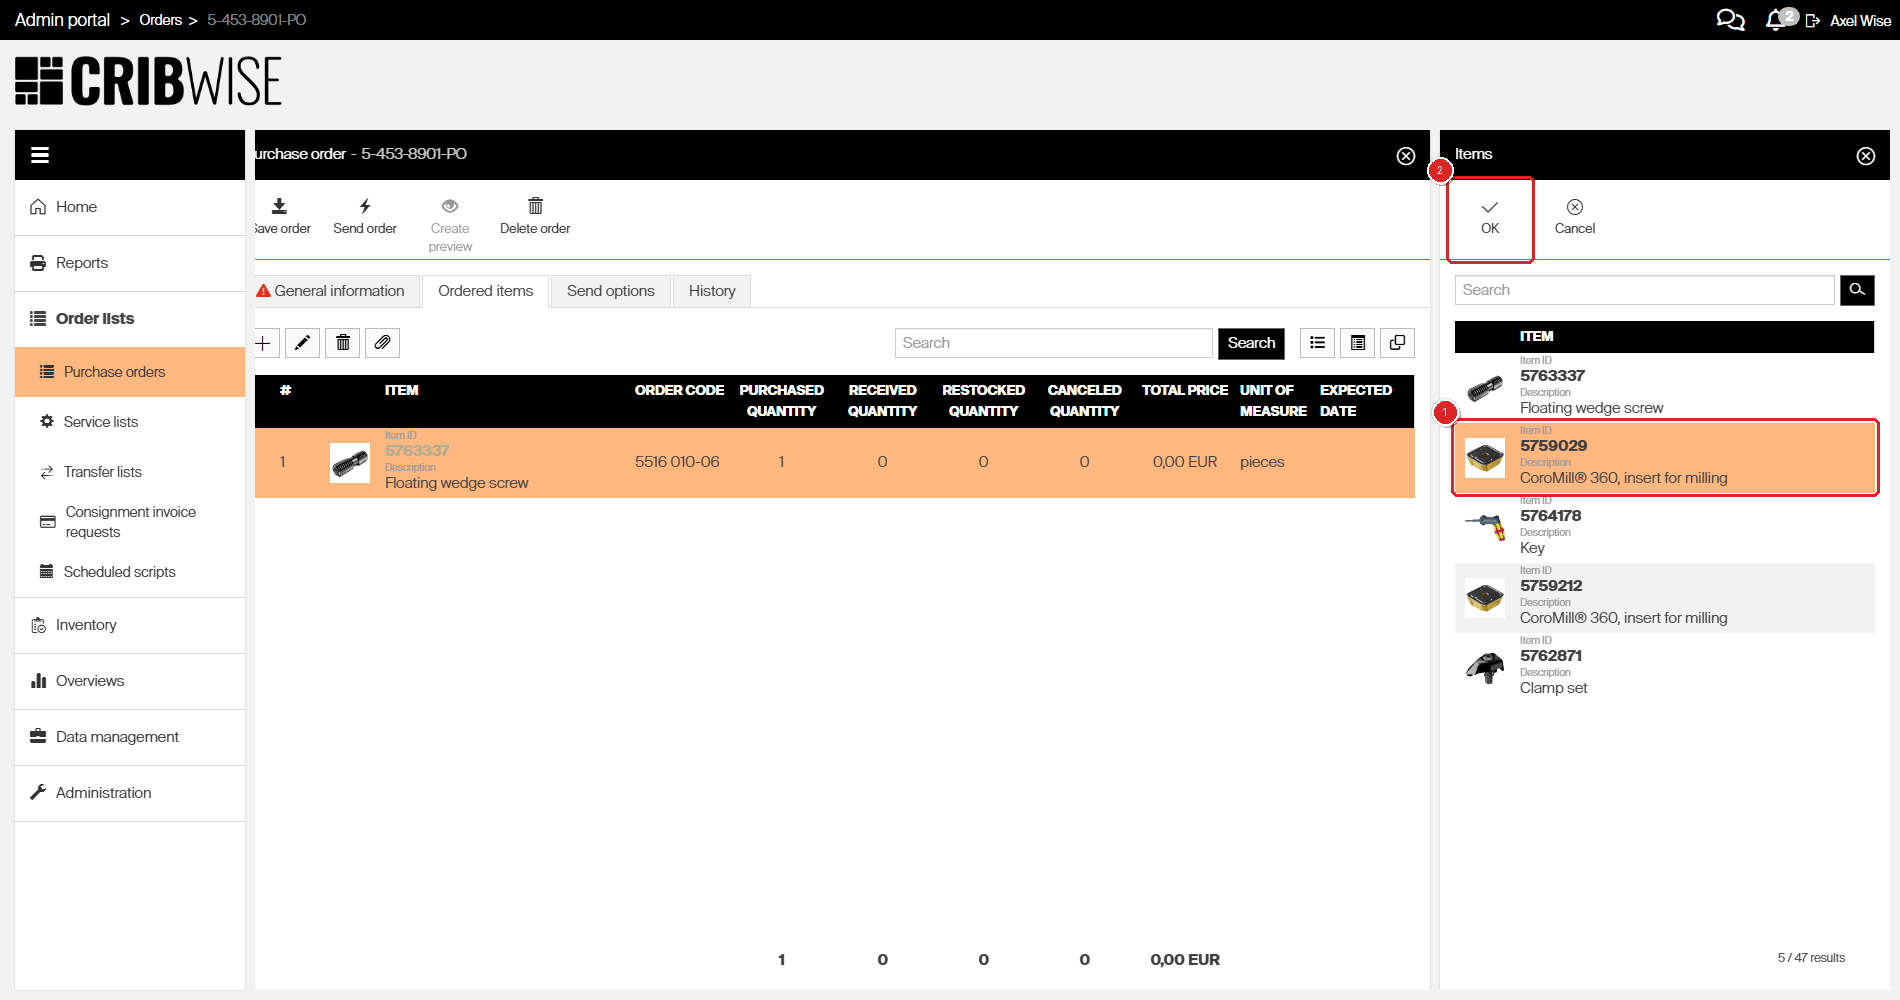
Select another item (1) and click OK (2) to add it.
Step 6 – Add a custom item (optional)
If you need to order an item not in the catalog:
- Click Create custom item on the Ordered items tab.
- Enter the Order code (for example, “12345678”).
- Enter the Quantity (for example, 15).
- Enter the Purchase price per piece (for example, 3).
- Click Save to add the custom item.
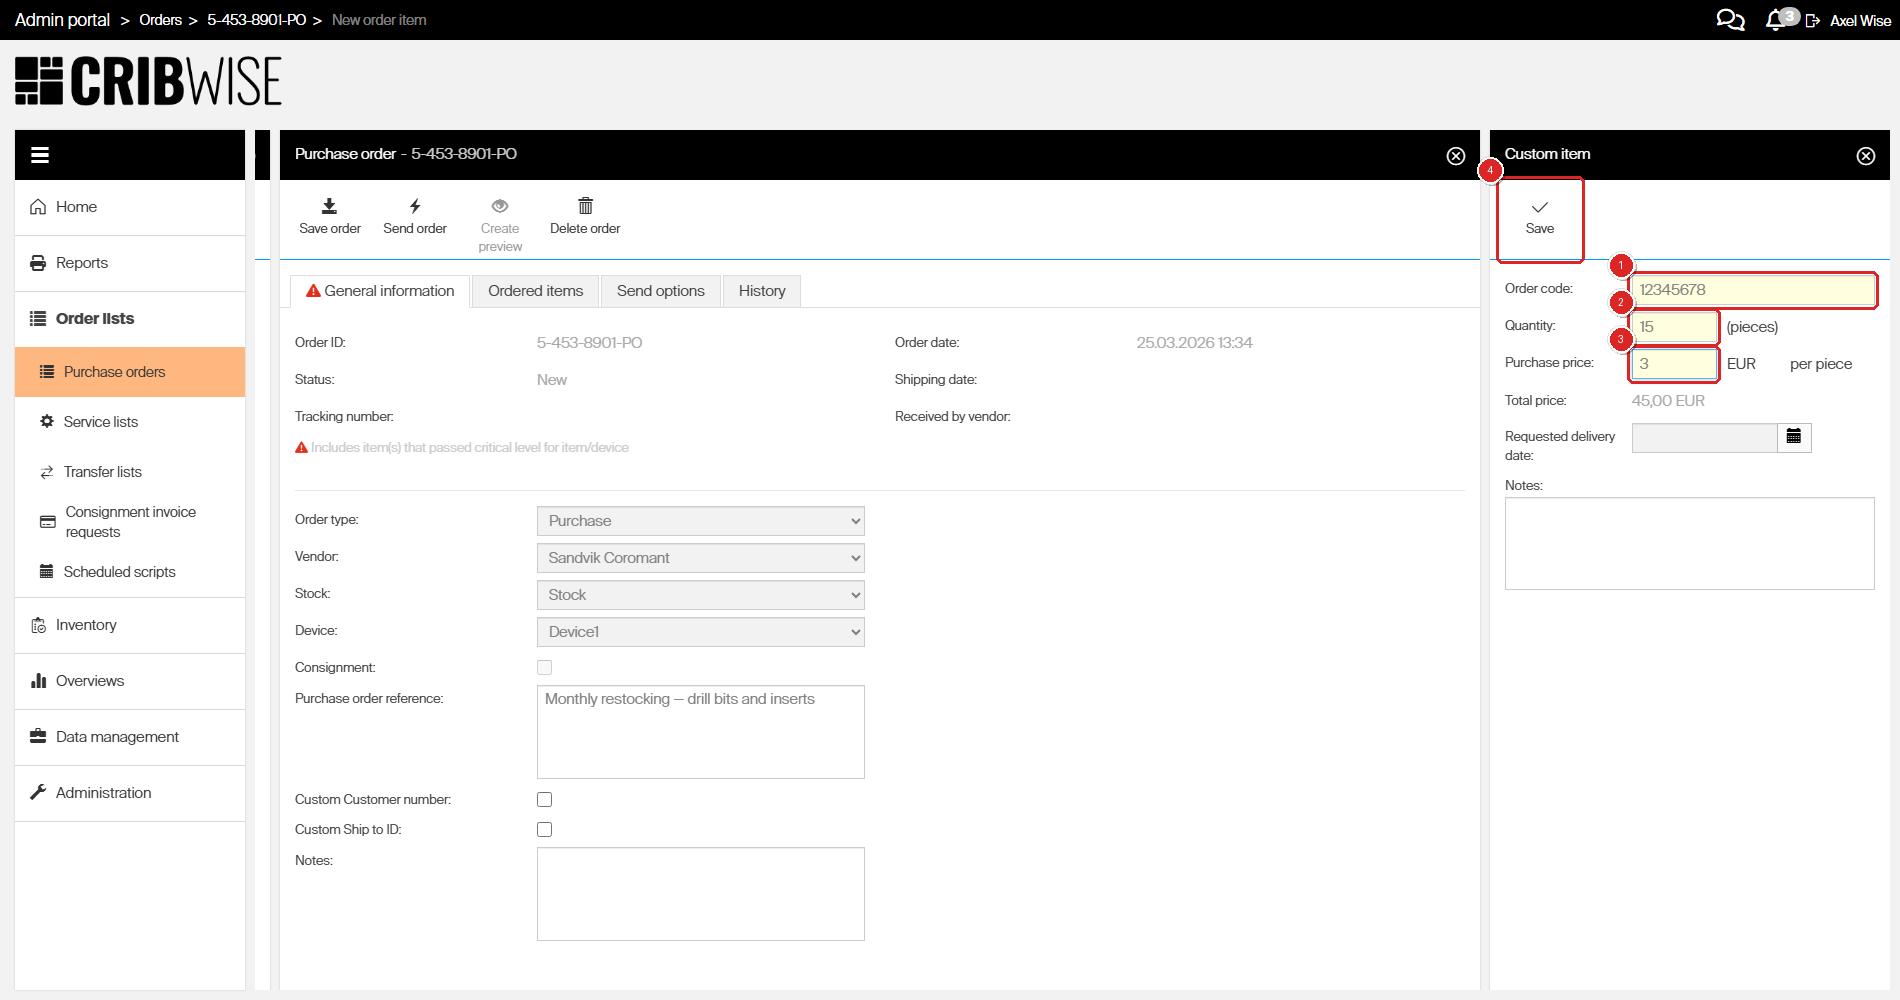
Fill in Order code (1), Quantity (2), Purchase price (3), then click Save (4).
After adding all items, the Ordered items tab shows the complete list.
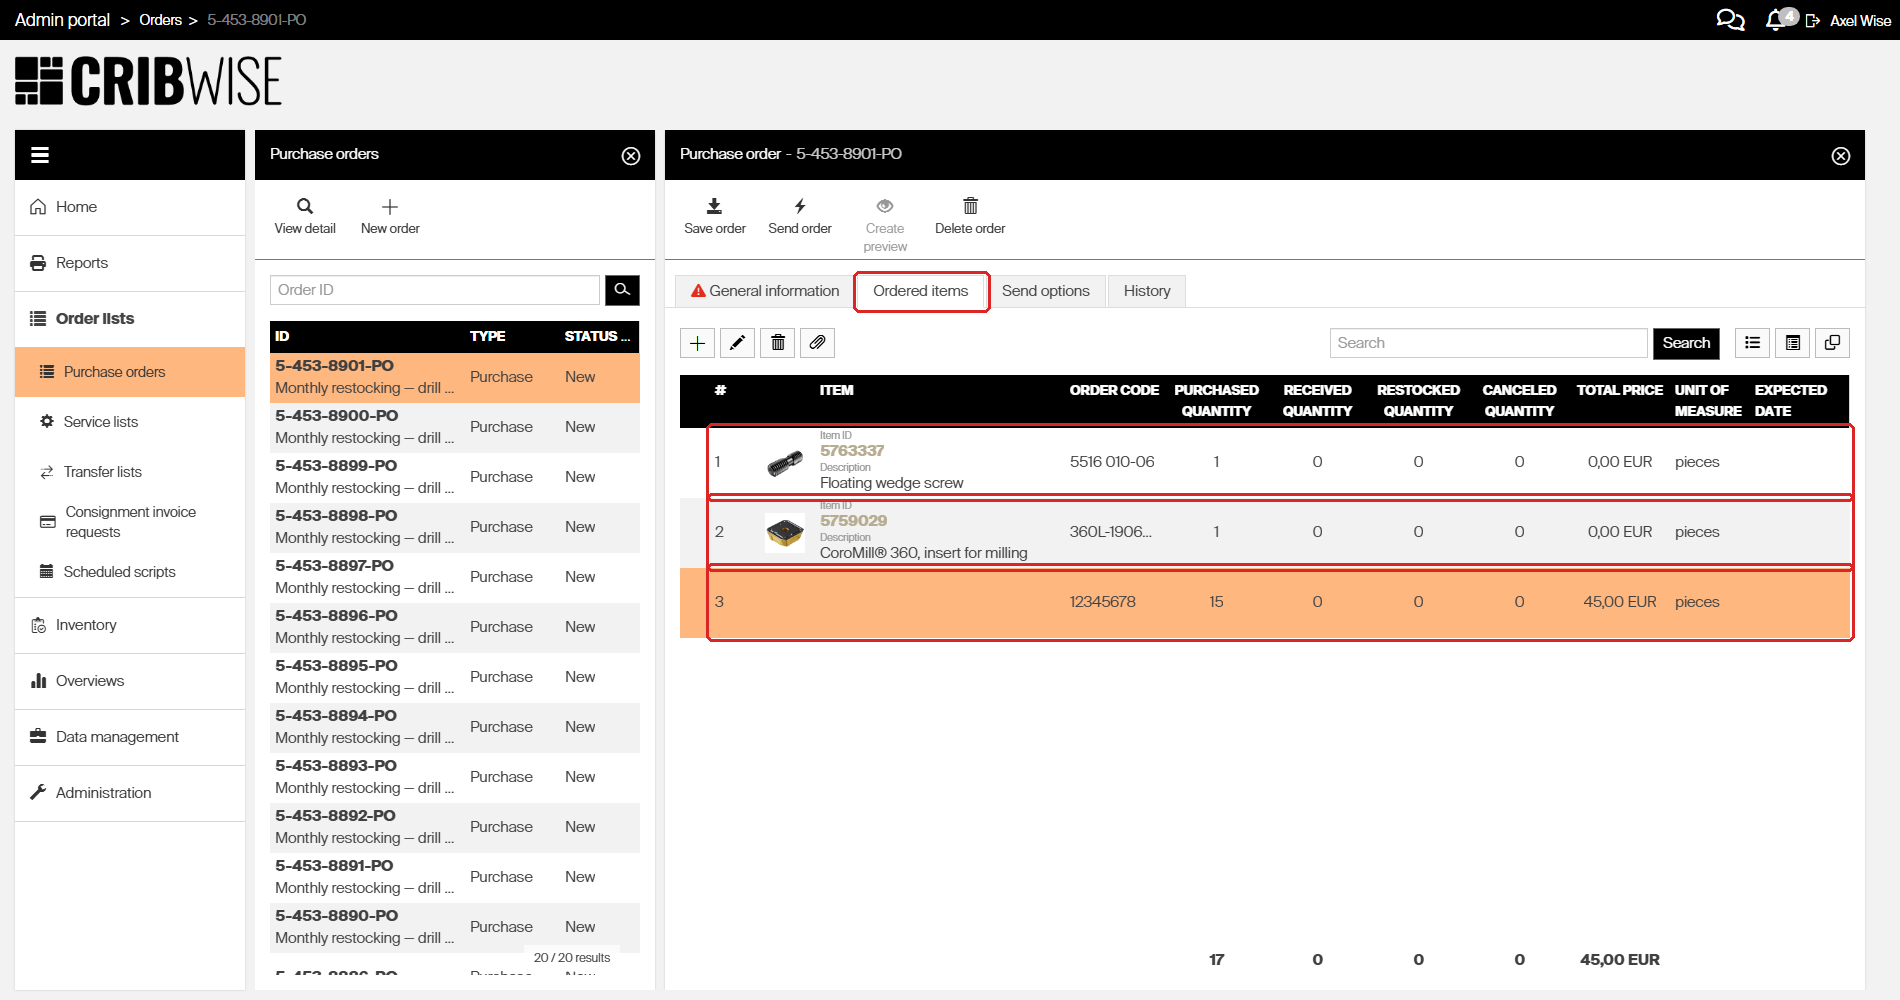
The ordered items list shows all standard and custom items added to the purchase order. A custom item does not have an image, name, ID or any other settings since its not an item in the system.
Step 7 – Configure send options
- Click the Send options tab.
- Check Mail to send the order via email.
- Check Excel under the Mail section to attach the order as an Excel file.
- Select DefaultTemplate from the Excel template dropdown.
- Click Save order to save the send configuration.
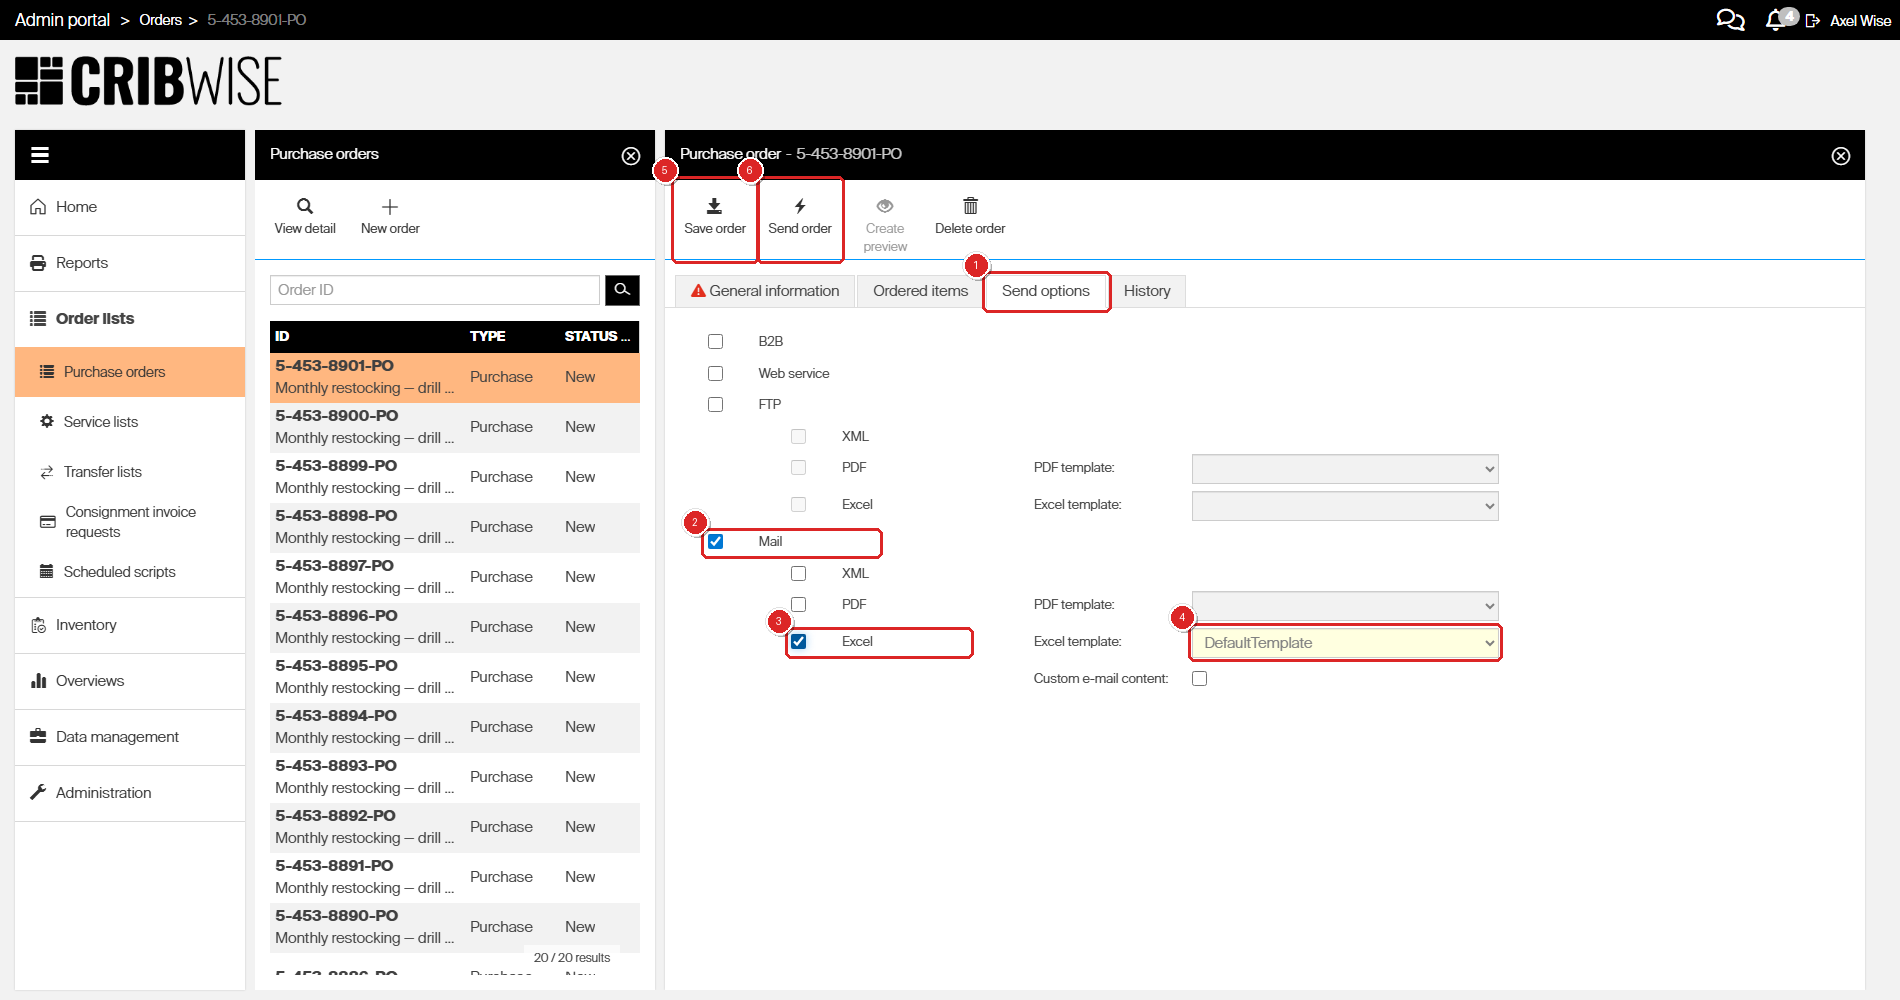
The Send options tab (1). Check Mail (2) and Excel (3), select the template (4), then click Save order (5) before sending with Send order (6).
Available delivery methods:
- B2B – Direct business-to-business electronic integration
- Web service – Web service integration
- FTP – Send as XML, PDF, or Excel file via FTP
- Mail – Send as XML, PDF, or Excel attachment via email
Step 8 – Send the order
- Click Save order to save any changes.
- Click Send order in the toolbar.
- Confirm the send if prompted.
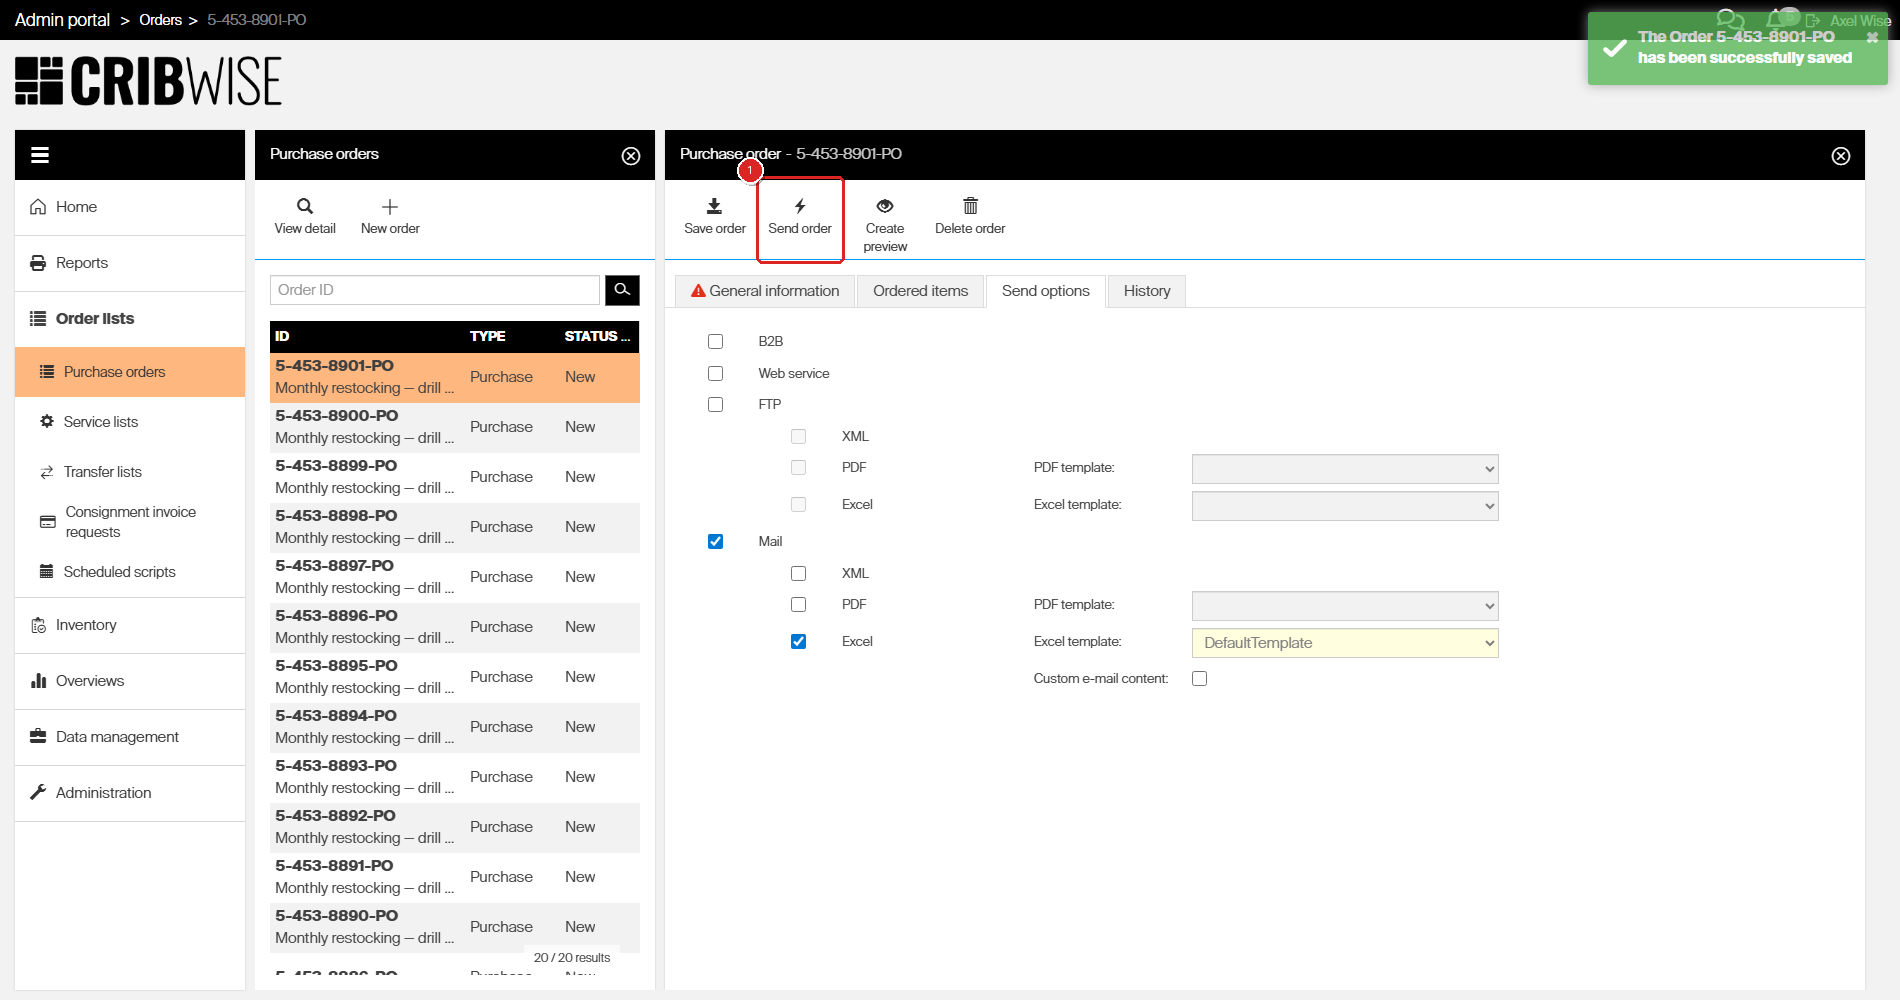
Click Send order (1) to transmit the purchase order to the vendor.
Important: The order email will be sent to the email address set under the integration tab for each vendor
Success: The order appears in the purchase orders list and the vendor receives the order via the configured delivery method.
The order will show under the purchase orders with Status Active.
Troubleshooting
| Problem | Likely cause | Fix |
|---|---|---|
| New order button is greyed out | Your user group does not have Create permission for Orders. | Ask your administrator to enable the Orders Create permission in your user group. |
| Item does not appear in the item picker | The item is not linked to the selected vendor. | Open the item detail, go to the vendor tab, and add the vendor. Then return to the purchase order and try again. |
| Cannot save the purchase order | A required field is missing — Order type, Vendor, or Stock. | Fill in all required fields and try again. |
| Send order button is disabled | The order has no items or has not been saved. | Add at least one item on the Ordered items tab and save the order first. |
| Purchase order was sent to the wrong vendor | The wrong vendor was selected before sending. | If the order is still in New status, change the vendor. If already sent, cancel the order and create a new one. |
| Excel template dropdown is disabled | The Excel checkbox under Mail is not checked. | Check both Mail and Excel before selecting a template. |