Import window can be accessed from items list by pressing Import items button.
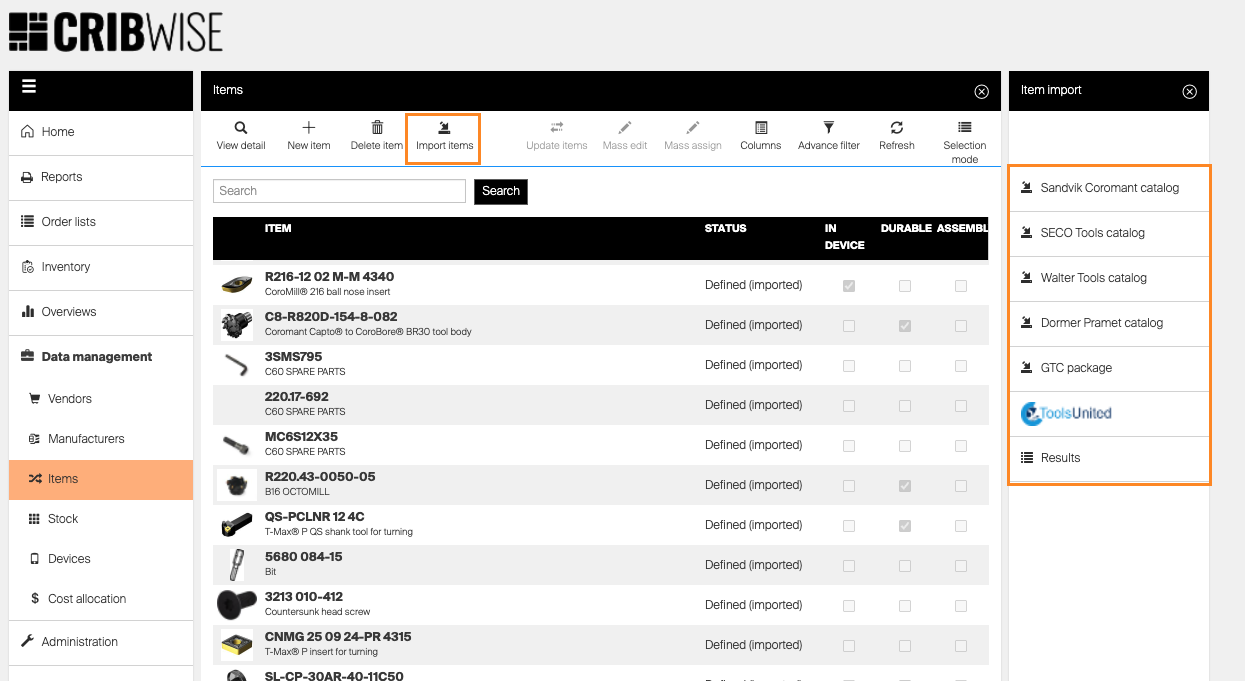
System offers to download items from external catalogs or import items data using GTC v2.0 format. Following catalogs are supported in current version:
- Sandvik Coromant catalog
- SECO Tools catalog
- Walter Tools catalog
- ToolsUnited
Import items from external catalogs
Follow these steps to download items from following sources:
- Sandvik Coromant catalog
- SECO Tools catalog
- Walter Tools catalog
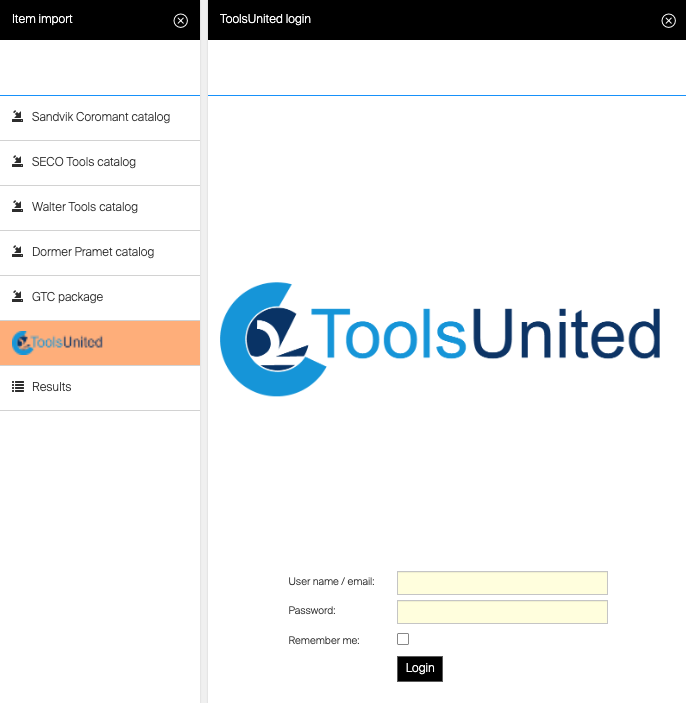
- ToolsUnited*
* To search and import items from ToolsUnited catalog, valid ToolsUnited account is needed. Downloading of items can be charged according ToolsUnited account type and license. Login information can be stored for current portal user.
Import allows to search for single item or search for multiple items by uploading a list of search parameters.
Search for single item
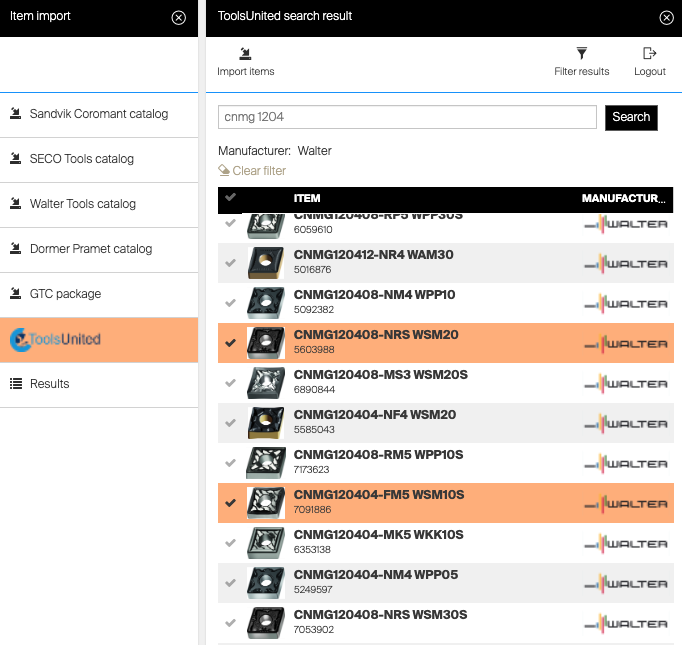
Open catalog and enter search criteria to get hits from the catalog. In case of multiple hits, only first 100 items are loaded. To load additional items, select Show next 100 items at the bottom of result list.
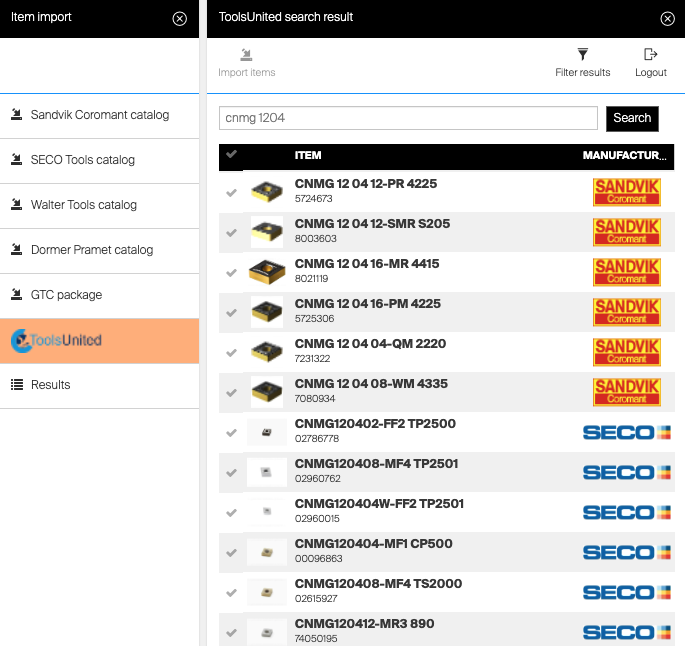
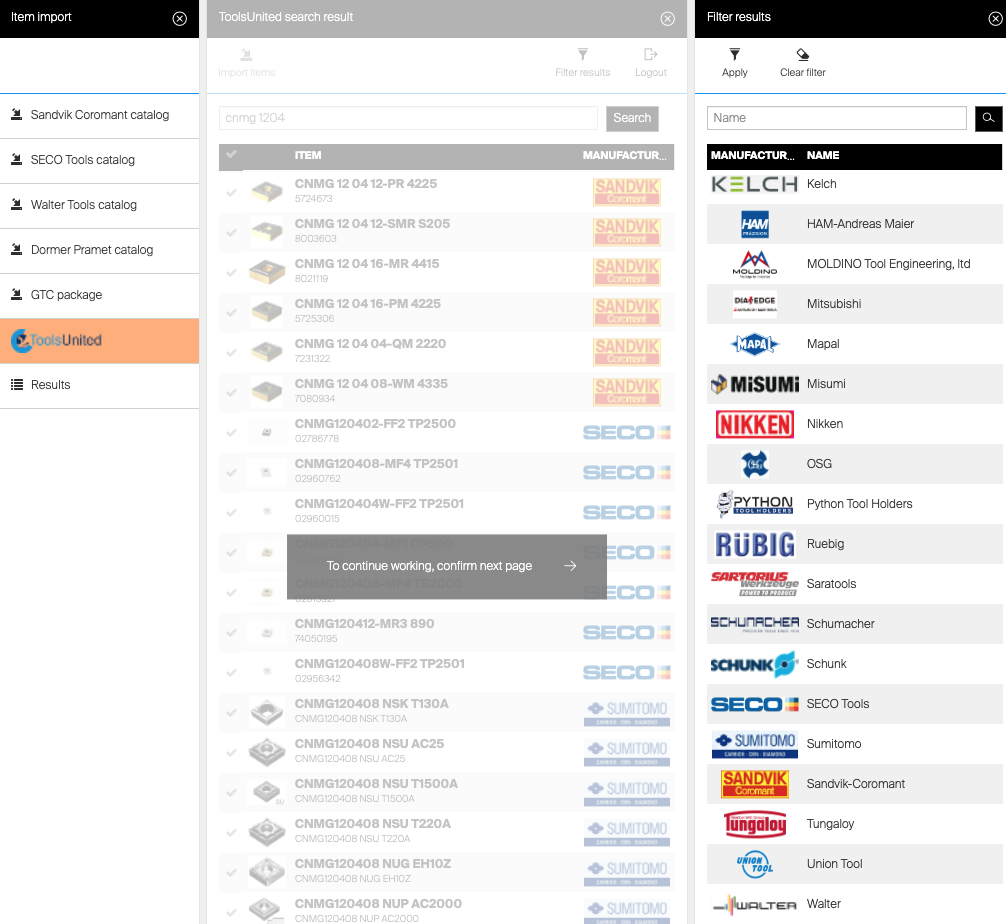
When searching in ToolsUnited catalog, hits can be filtered by manufacturer by selecting option Filter results.
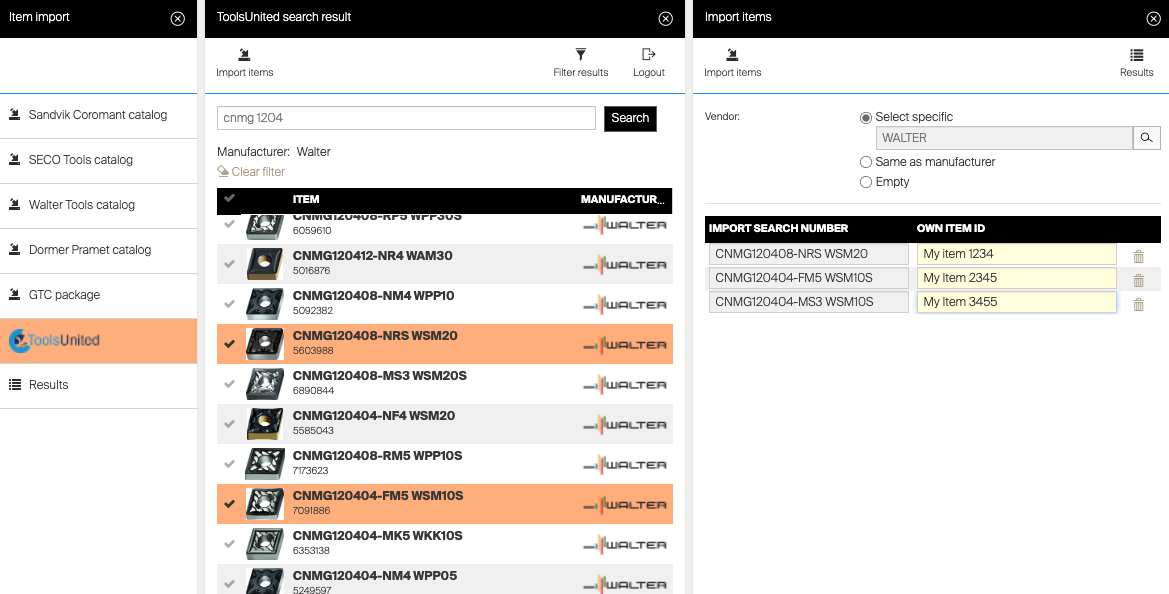
Select one or more items for import and proceed with import by Import items button. On import options blade, own item ID under which selected items will be imported is automatically prefilled according catalog settings.
Select how vendor will be specified and press Import items to start import process.
If vendor selected to be set according manufacturer, system can create new vendor with default settings if respective vendor is not available in the system (by vendor name).
Result screen is shown displaying progress and status of each imported item. After import is finished, items are accessible in the system together will all defined spare parts and documents.
Status of all imported items is set to “Defined (imported)” to allow changing of item type and to identify newly imported items.
Change status of imported items to Released to allow synchronization of items to SFI and assigning them to locations.
Search for list of items
To search and import more items at once, prepare Excel sheet containing search parameters in following format:
| A | B | |
| 1 | Search parameter | Own item ID (optional) |
| 2 | … | … |
Search parameter is mandatory information. Item will be searched in the catalog using this criteria. Own item ID is optional parameter and can be left empty.
If defined, this ID will be set for found item after import.
If not set, ID of item will set to the ID provided by external catalog settings.
Search parameters must be defined without any empty row between them.
List containing big amount of items will take several minutes to load
Once list is prepared, select to Load list of IDs once the catalog is opened and select the Excel sheet.
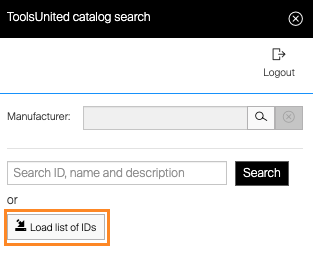
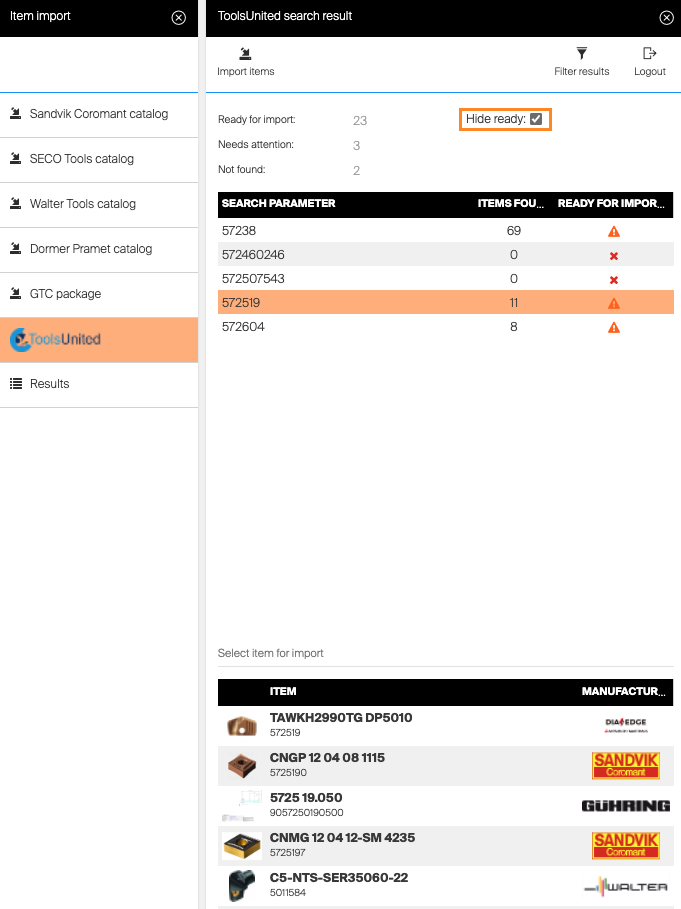
Manufacturer could be specified before list is loaded to perform search only using items from this manufacturer. Search is then performed for every search parameter in the list with following possible results:
- Ready for import – Single result has been found. Item is ready to be imported
- Needs attention – Multiple results have been found. Item for import needs to be selected from all results for this search parameters
- Not found – No result for the search parameter
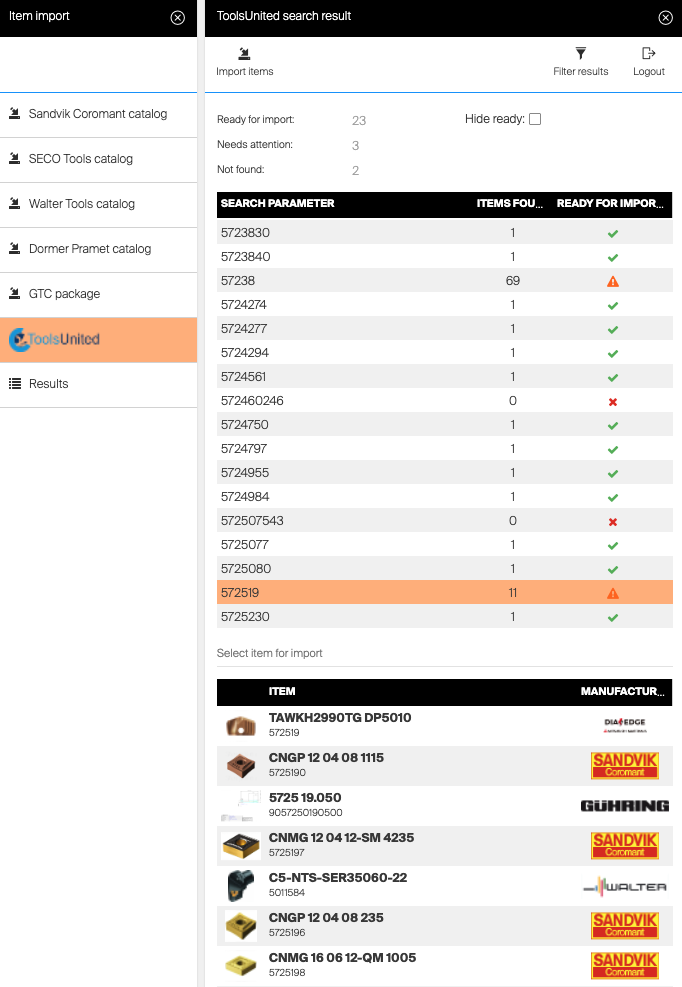
Each search parameter can be selected to see related item(s) found in the catalog. In case of multiple search results, desired item can be selected within results.
Once selected, search parameter is marked as ready for import.
All items ready for import could be hidden to show only items which needs attention or have not been found
Import can be started by pressing Import items. Following list will show all catalog item IDs which were ready for import with item ID, which will be set for item after import is finished. Select how vendor will be specified and press Import items to start import process.
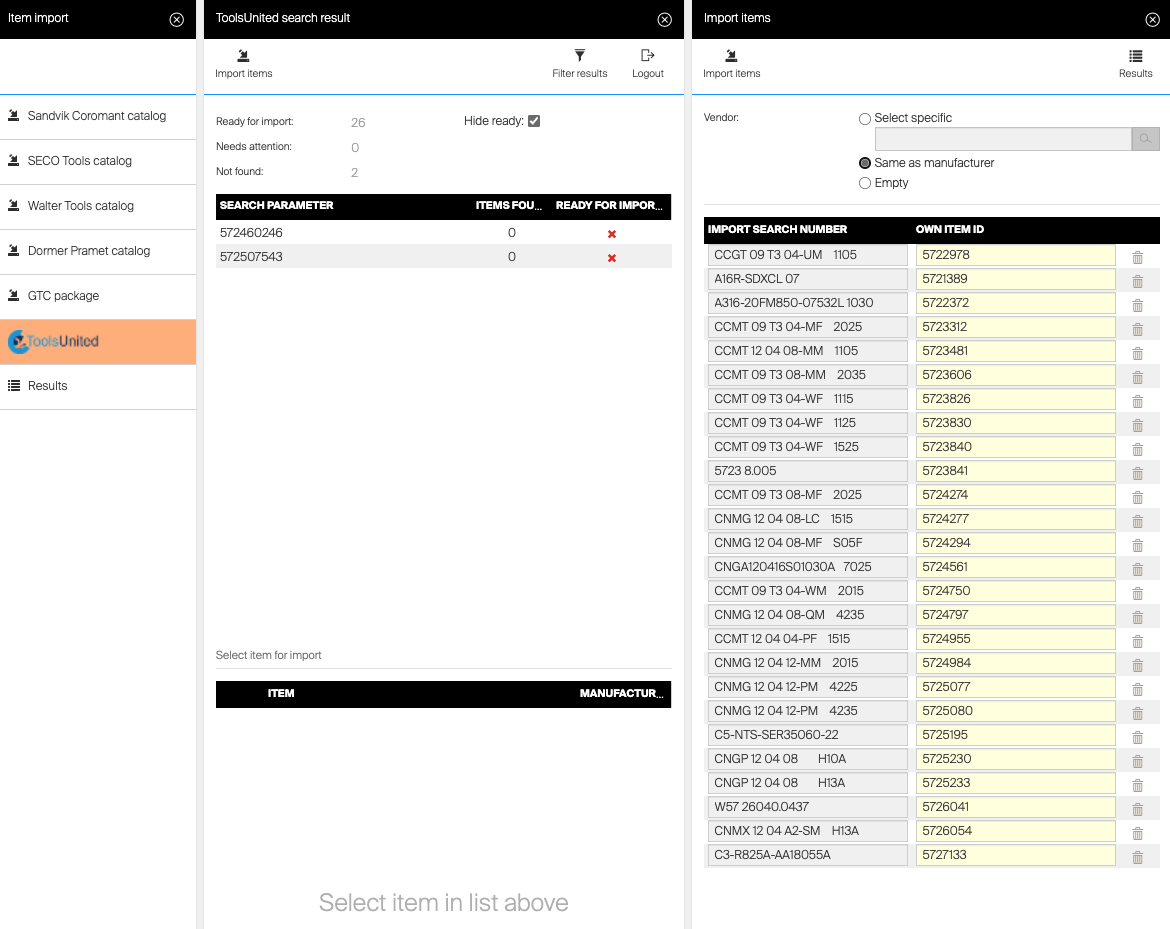
If vendor selected to be set according manufacturer, system can create new vendor with default settings if respective vendor is not available in the system (by vendor name)
Result screen is shown displaying progress and status of each imported item. After import is finished, items are accessible in the system together will all defined spare parts and documents.
Status of all imported items is set to “Defined (imported)” to allow changing of item type and to identify newly imported items.
Change status of imported items to Released to allow synchronization of items to SFI and assigning them to locations.