Read time: ~3 minutes
Applies to: Admin Portal
What you can do
View, filter, and inspect existing purchase orders in the Admin Portal. You can open any order to see its details, check ordered items, review send options, and read the order history.
Before you start
- You need access to the Admin Portal with a user account that has the Orders permission.
- At least one purchase order must exist. See How to create manual purchase orders to create one.
Quick start
Experienced users — view a purchase order in 3 steps:
- Open Order lists > Purchase orders.
- Select a purchase order row.
- Click View detail.
Need more detail? Follow the full steps below.
Steps
Step 1 — Open the purchase orders list
- In the sidebar, click Order lists to expand the menu.
- Click Purchase orders.
The purchase orders list loads in the main content area.
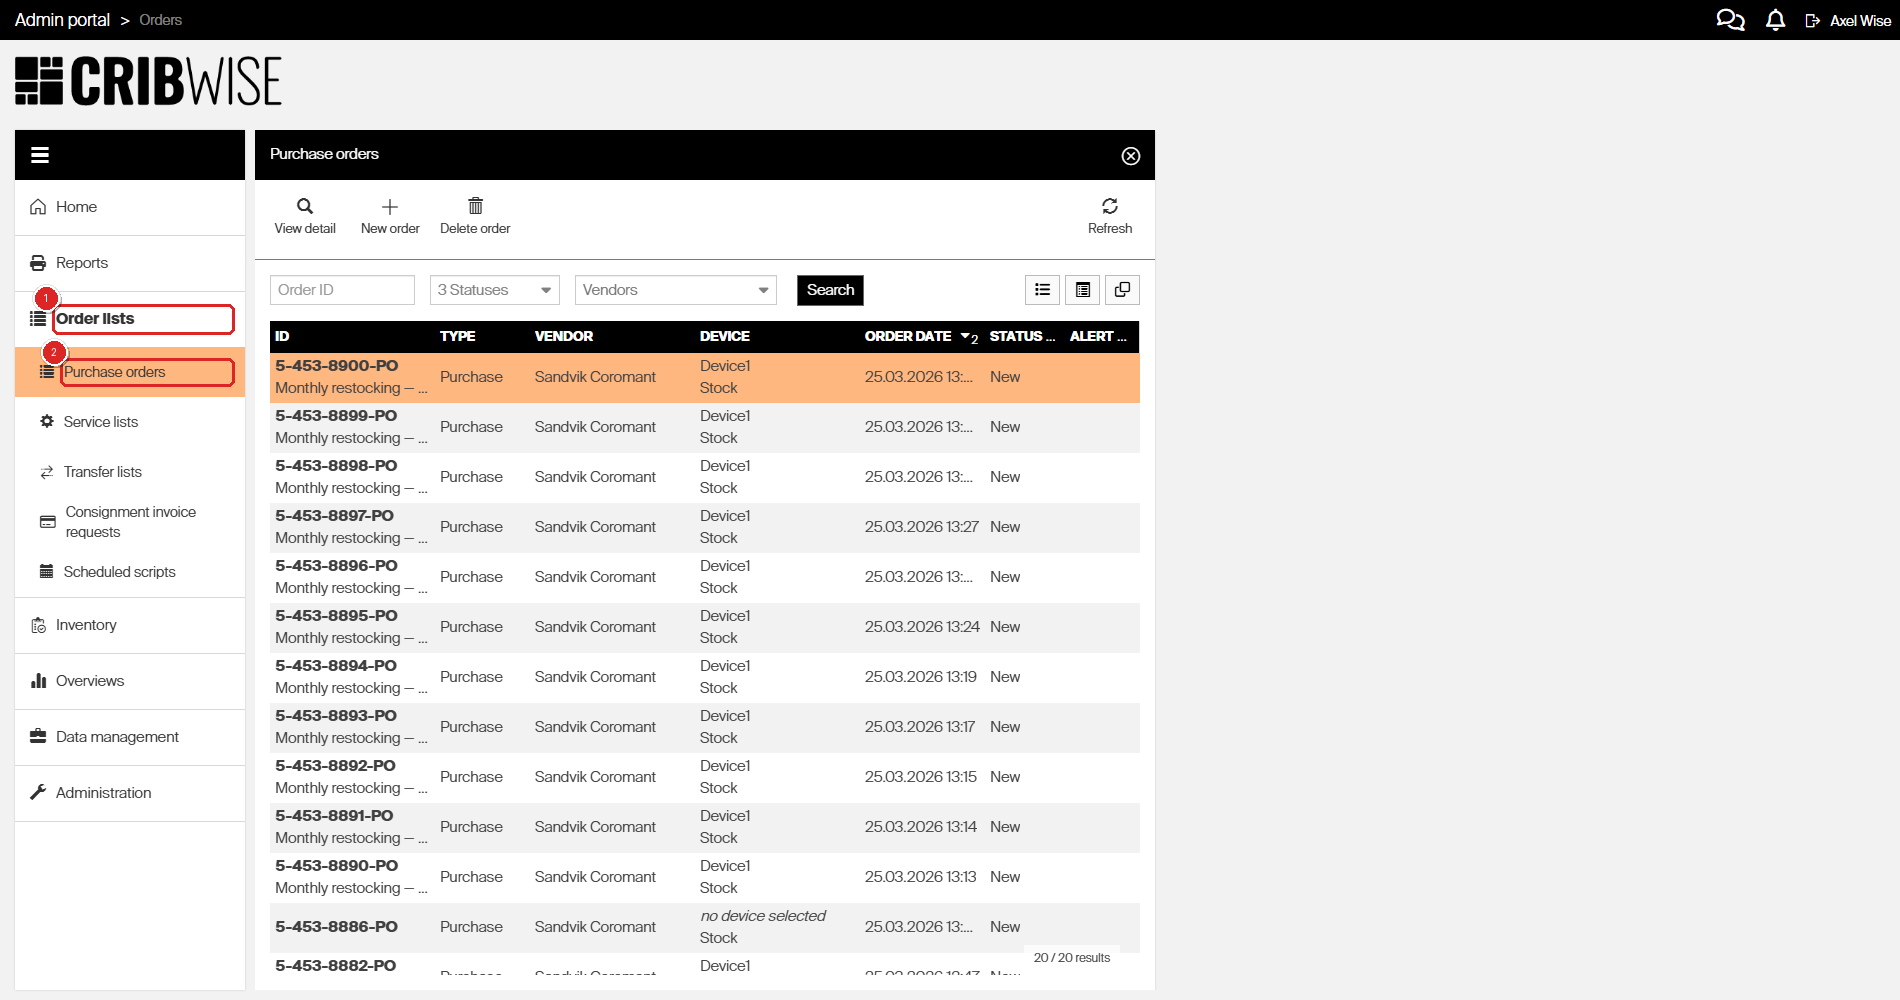
Sidebar navigation: (1) Order lists, (2) Purchase orders.
Step 2 — Explore the list toolbar
The toolbar above the list gives you quick access to common actions:
| # | Button | What it does |
|---|---|---|
| 1 | View detail | Opens the selected order in a detail panel |
| 2 | New order | Creates a new purchase order |
| 3 | Delete order | Deletes the selected order |
| 4 | Search | Opens a search bar to find orders by text |
| 5 | Refresh | Reloads the list with the latest data |
Use the Search button or the status and vendor filters above the list columns to narrow results.
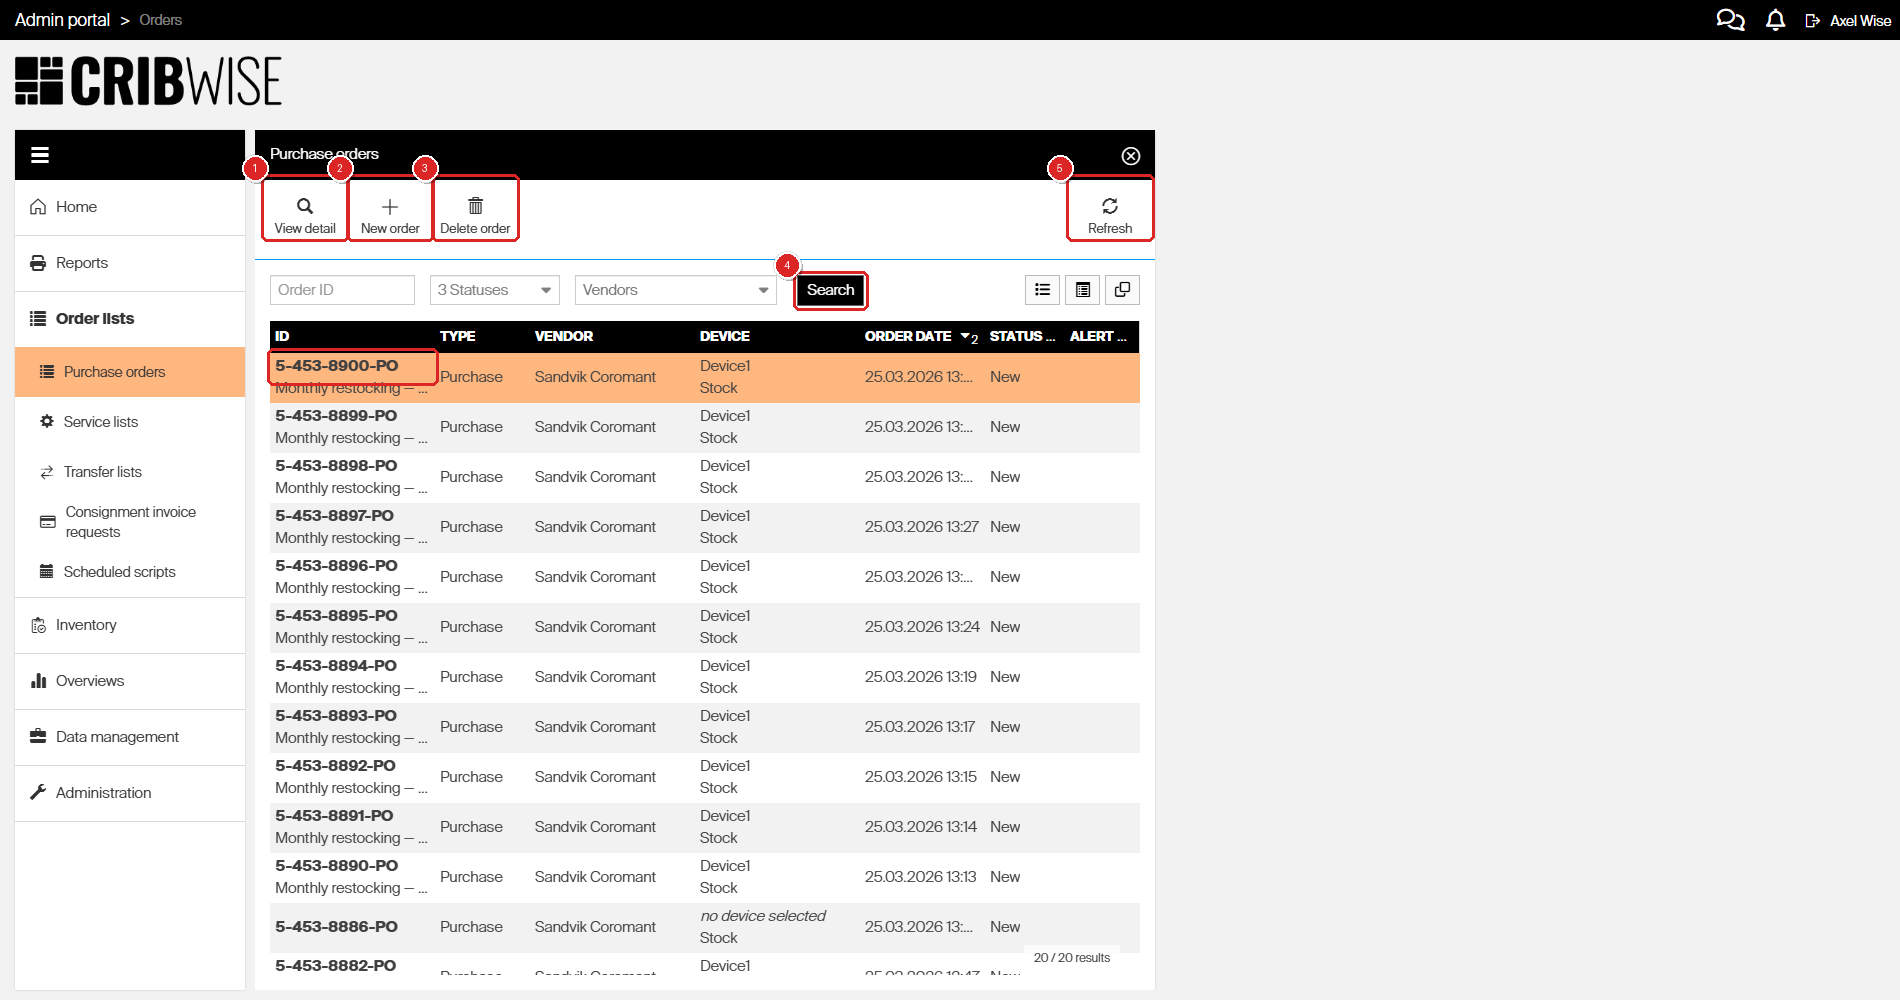
Purchase orders list: toolbar buttons (1–5) and order rows below.
Step 3 — Open a purchase order
- Click a row in the purchase orders list to select it.
- Click View detail in the toolbar.
A split view opens with the order list on the left and the order detail on the right.
The detail panel has four tabs and a toolbar:
| # | Element | Description |
|---|---|---|
| 1 | Save order | Saves changes to the order |
| 2 | Send order | Sends the order to the vendor |
| 3 | General information | Order type, vendor, stock, reference, and notes |
| 4 | Ordered items | Items included in the order |
| 5 | Send options | Email, Excel, and EDI settings |
| 6 | History | Timestamps and status changes |
After you send an order, the toolbar updates with additional options:
- Create preview — generates a preview of the purchase order document so you can review it before resending or sharing.
- Resend order — sends the order to the vendor again, for example after correcting items or updating send options.
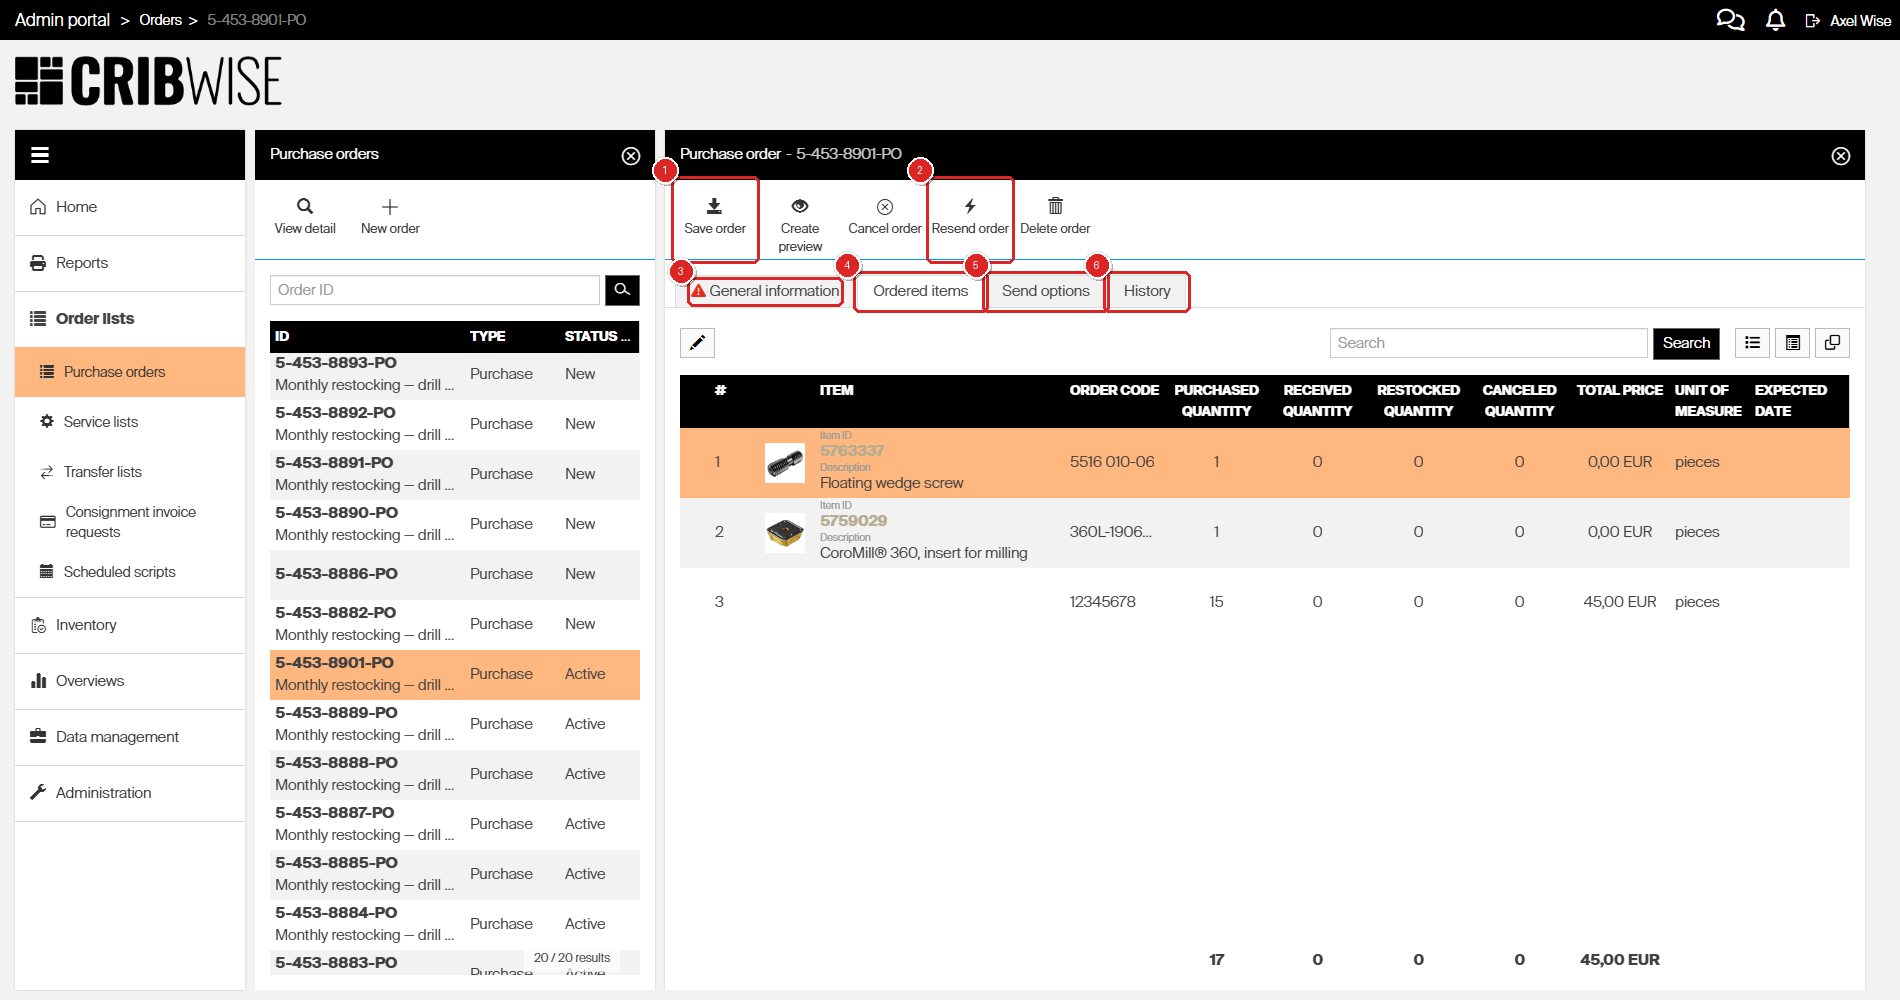
Purchase order detail: (1) Save, (2) Send, (3–6) tabs.
Step 4 — Review ordered items
- Click the Ordered items tab.
The item grid shows every item on the order, including quantities, prices, and expected delivery dates.
From the item toolbar you can add new items, edit existing ones, or create custom line items.
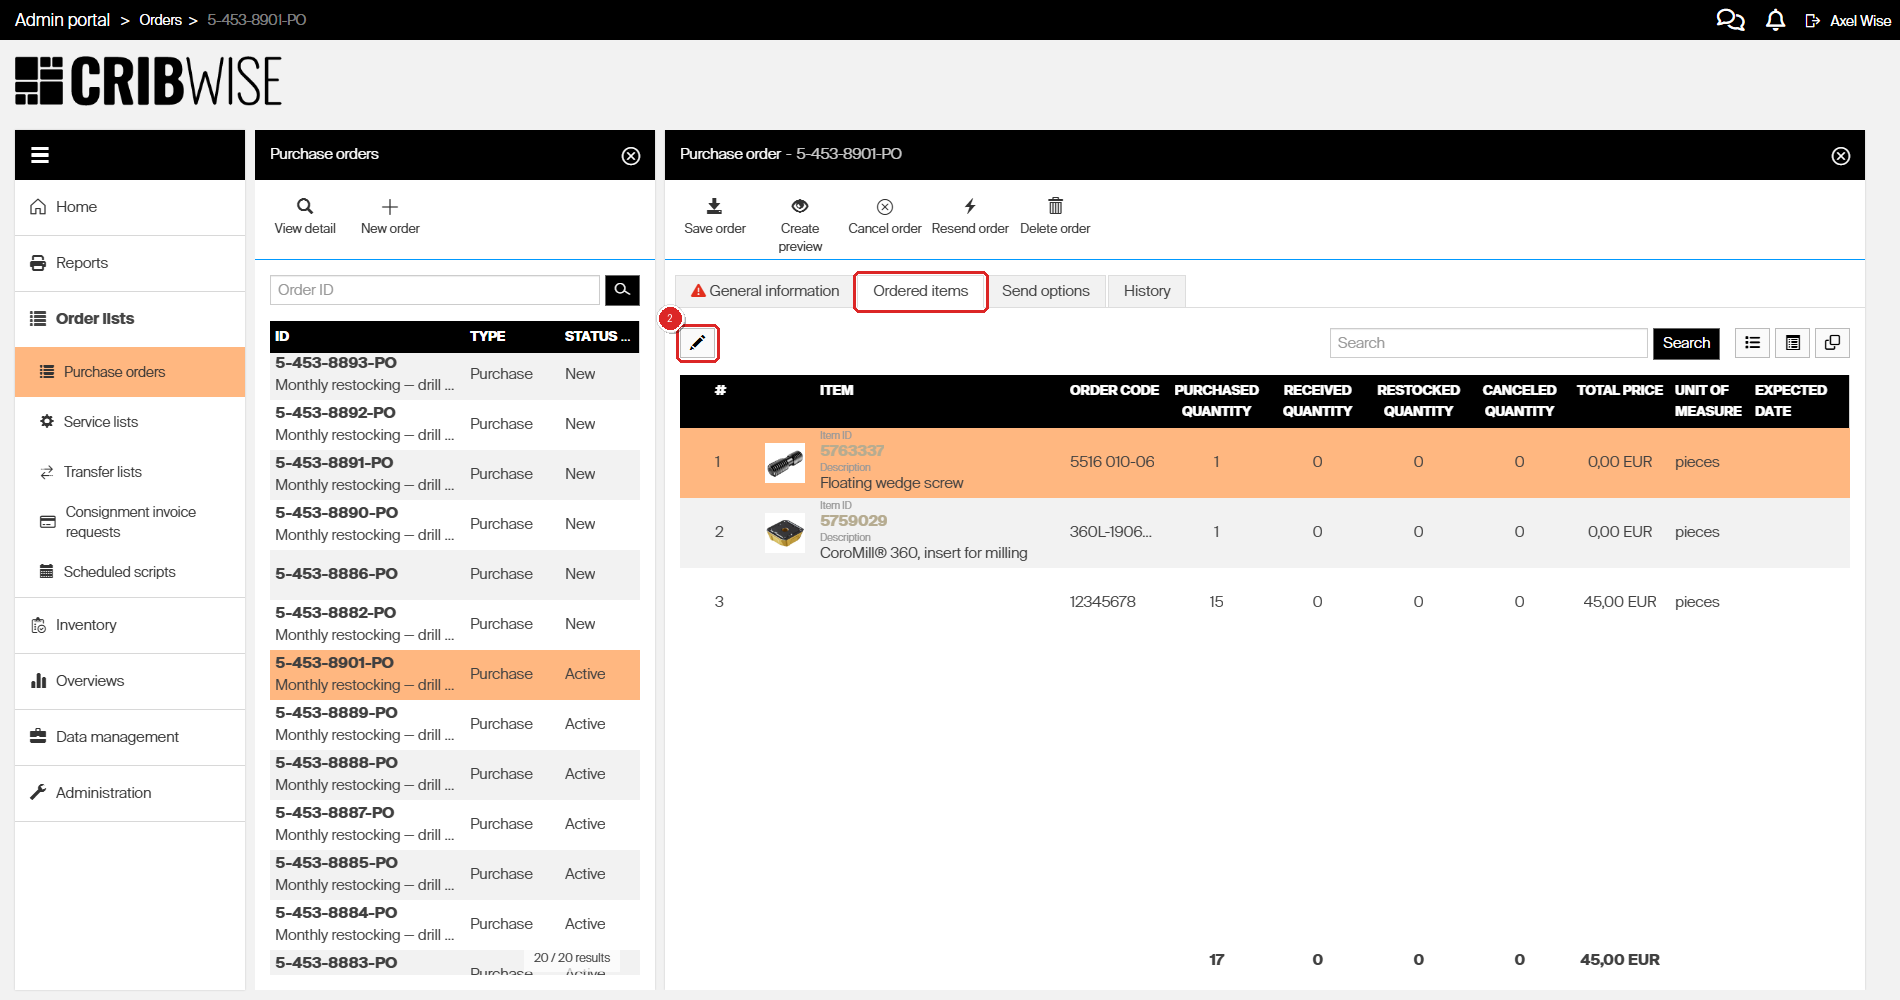
Ordered items tab with the item grid and action buttons.
Step 5 — Check order history
- Click the History tab.
The history log shows every status change and action taken on the order, with timestamps and performed action.
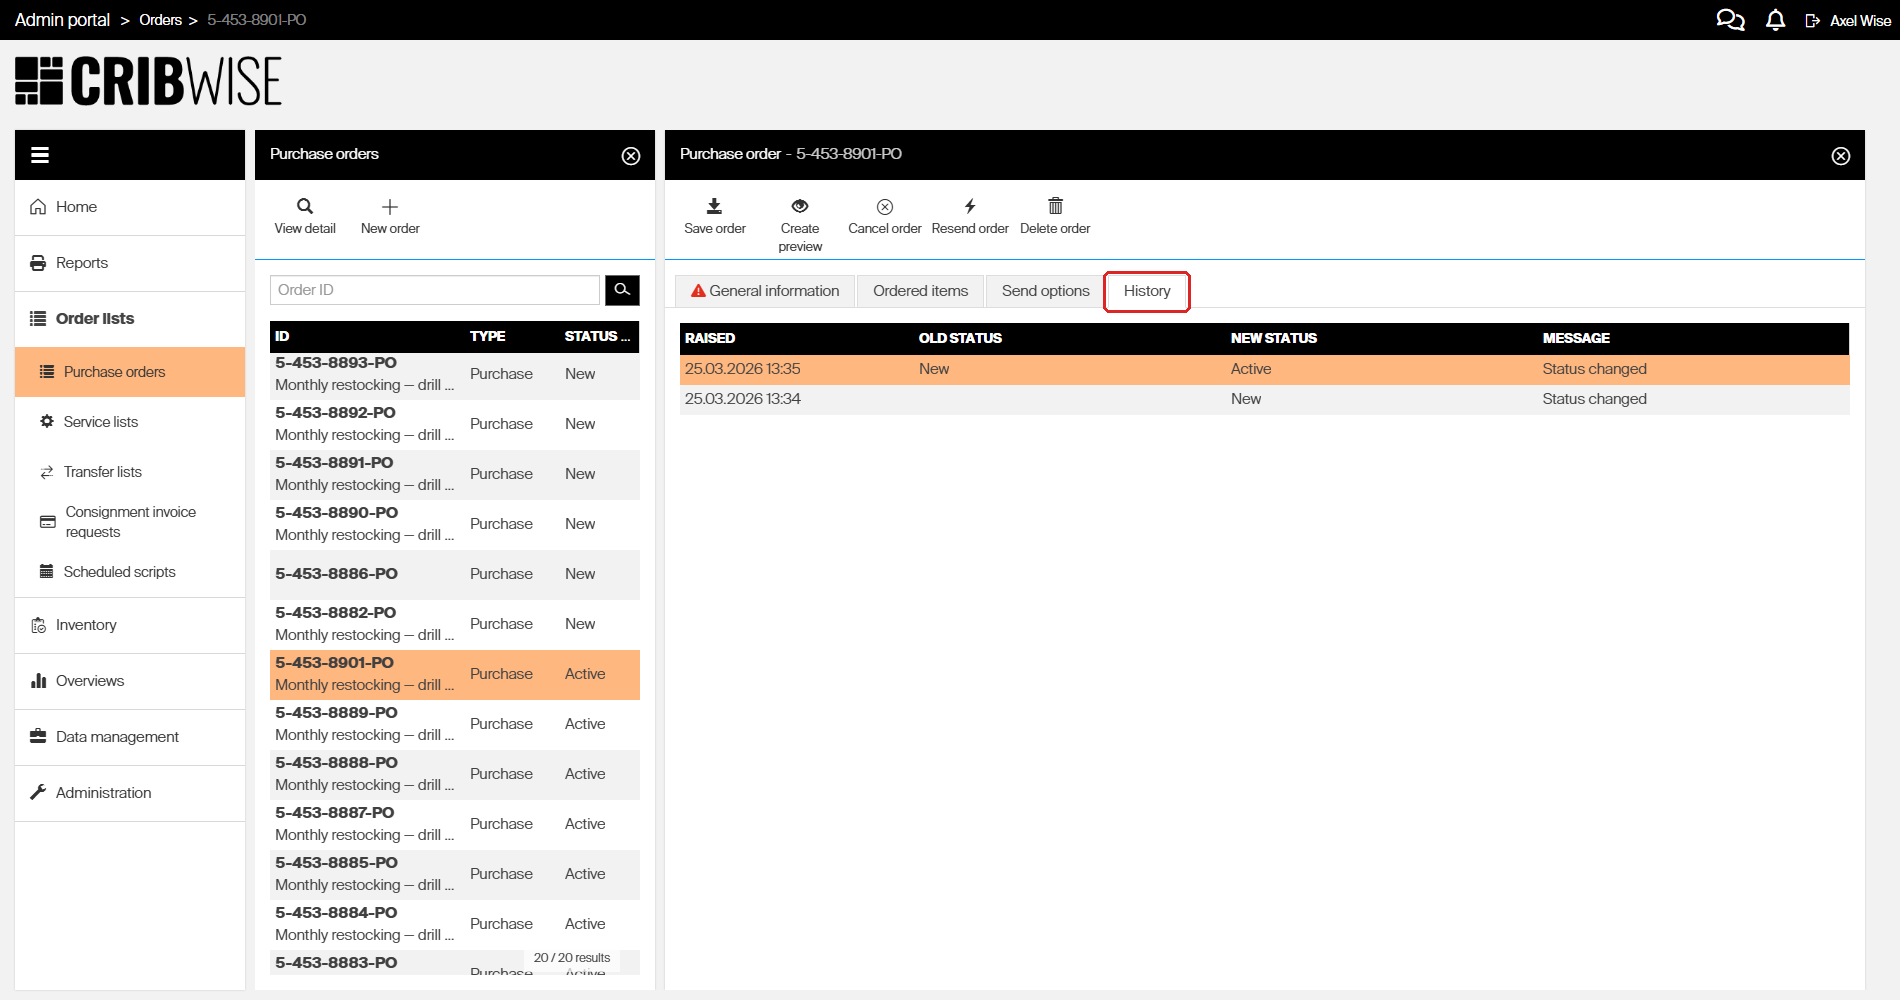
History tab with the order event log.
Success: You can now see all order details, item quantities, and history. Use the tabs to switch between sections at any time.
Troubleshooting
| Symptom | Cause | Fix |
|---|---|---|
| Purchase orders menu is missing | Your user does not have the Orders permission | Ask an administrator to add the Orders permission to your user group |
| View detail button does nothing | No row is selected in the list | Click a row to select it, then click View detail |
| Order list is empty | Filters are too narrow or no orders exist | Clear all filters and click Refresh. If still empty, create an order first |
| Ordered items tab shows no items | The order was saved without adding items | Open the order and add items from the Ordered items tab |